
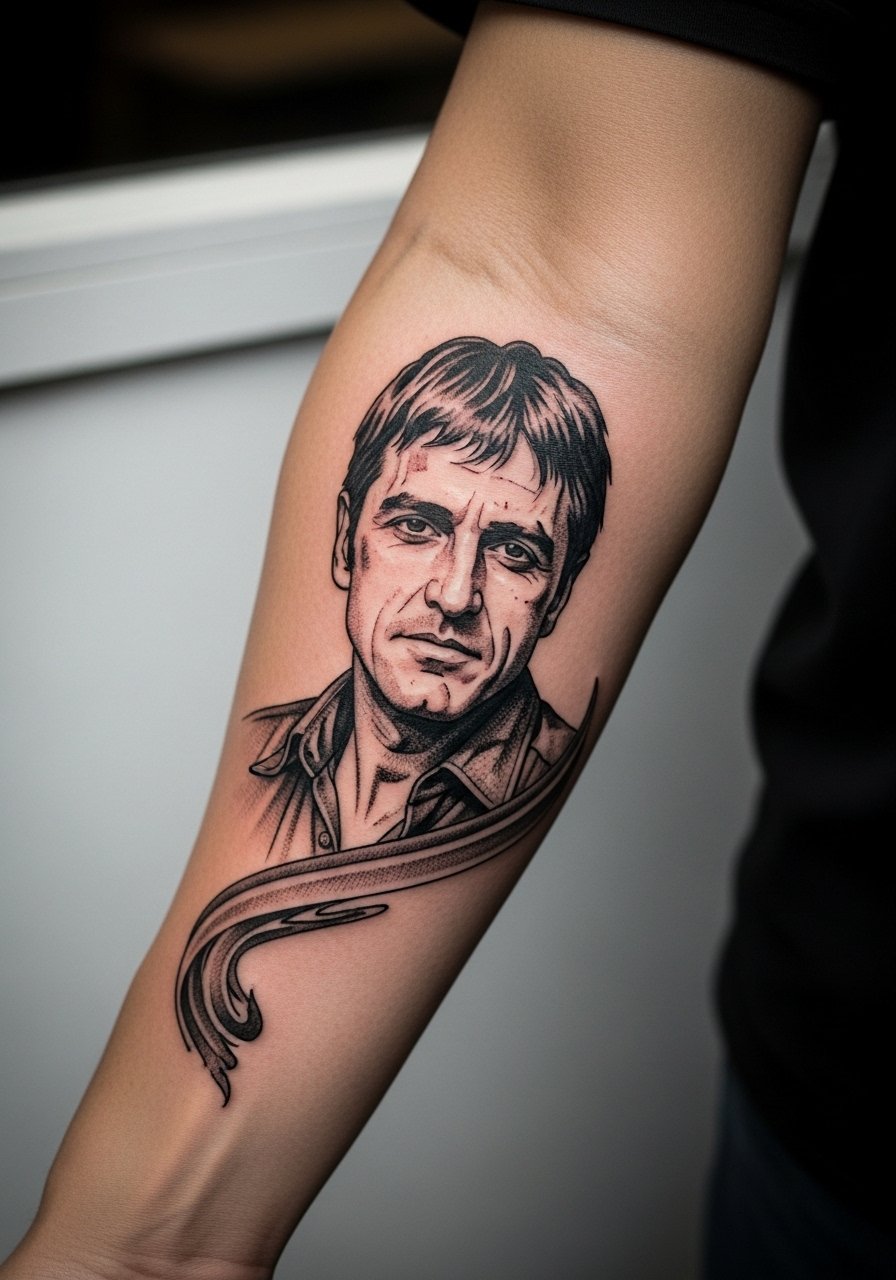
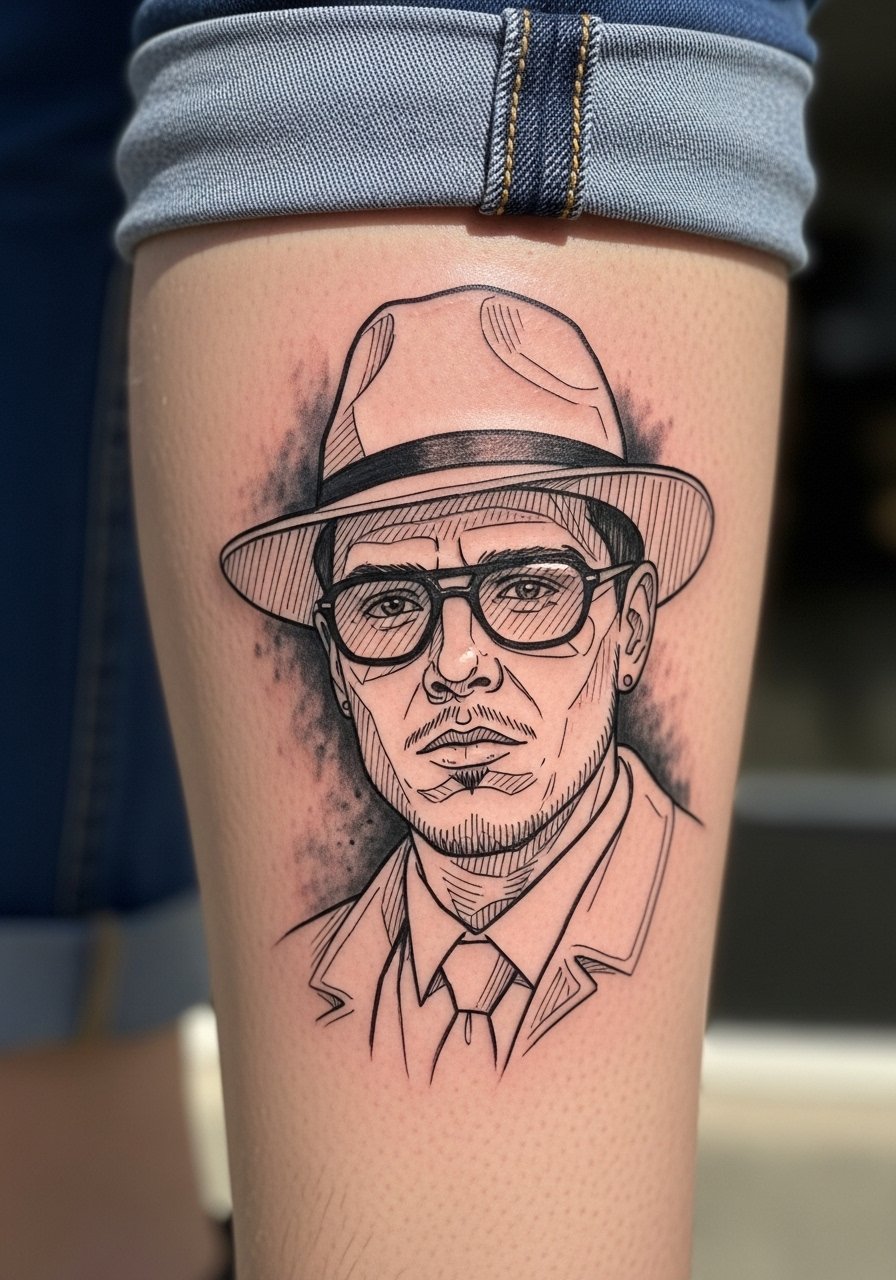
Fine line portrait trends look bold on Instagram, but the reality is different under salon lights and real skin. Sketch style Tony Montana pieces read raw and cinematic at first, yet their fragile strokes need room and the right placement to hold up. If you want a sketchy Scarface homage, pick the placement that protects negative space and plan a touch-up at the few-year mark. The first idea below shows a small, resilient way to wear it.
1. Small Sketch Portrait on Inner Forearm
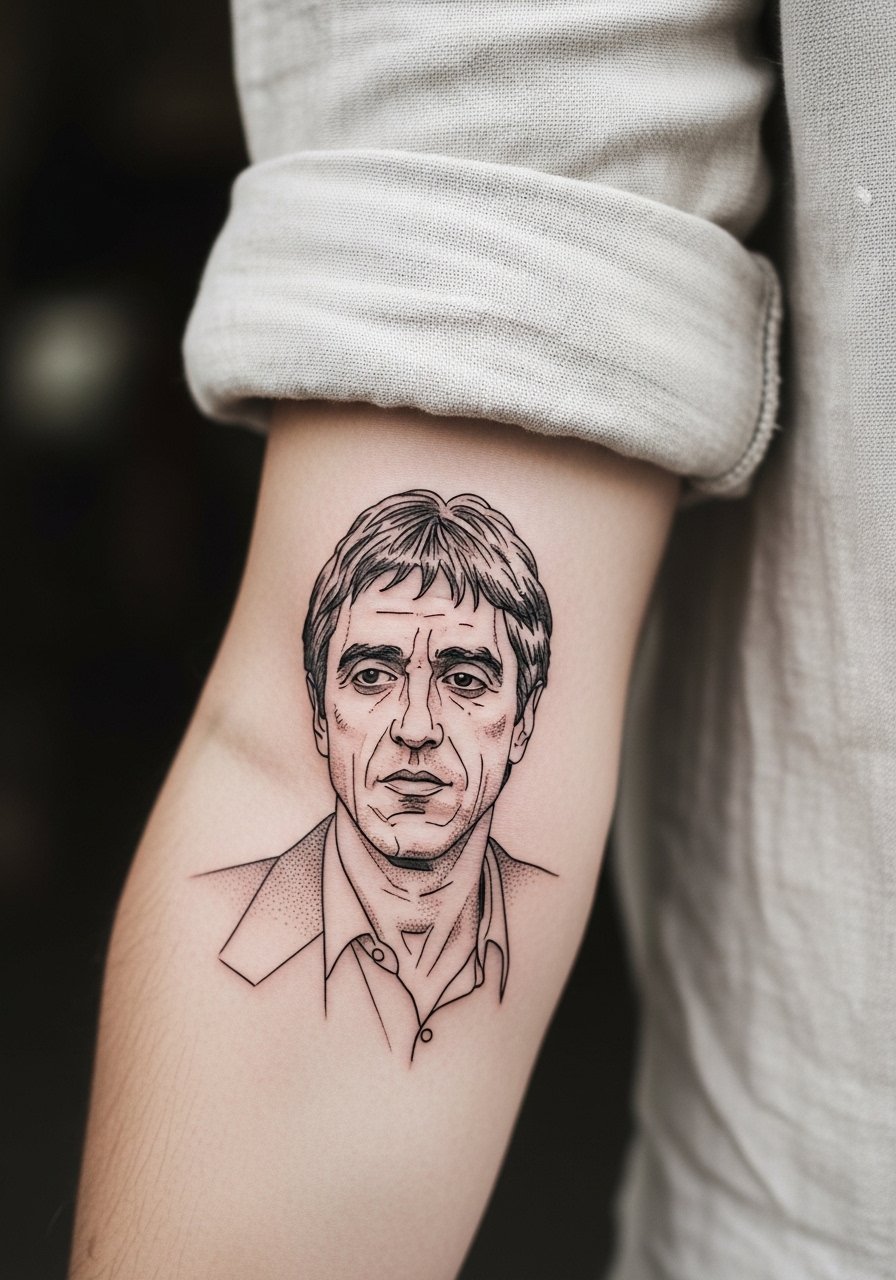
I've seen this placement a lot because it balances visibility and protection. The inner forearm takes less sun than the outer arm, so fine sketch lines last longer. Tell your artist you want slightly heavier linework around the main features and lighter sketch strokes elsewhere so the portrait keeps its form as the thin lines soften. Common mistakes are going too small or too wispy. Expect a 2- to 4-hour session and plan a touch-up around year three. For showing this off, roll sleeves and try a rolled-up linen shirt that frames the forearm without stealing attention.
2. Upper Chest Sketch with Collarbone Frame
This placement reads cinematic against the collarbone and works well if you want a statement that can be hidden. Pain is moderate. One controversy to name here is what this imagery represents. One camp argues such portraits can glamorize violence. The other camp treats them as pop-culture homage and personal iconography. Say where you stand in the consultation so the artist can lean into respectful cues or stylized abstraction. Bring reference photos that show the exact line weight you want and expect a 2.5- to 4-hour session. For session comfort, wear a wide-neck shirt you can pull aside easily.
3. Upper Arm Micro-Real Sketch Portrait
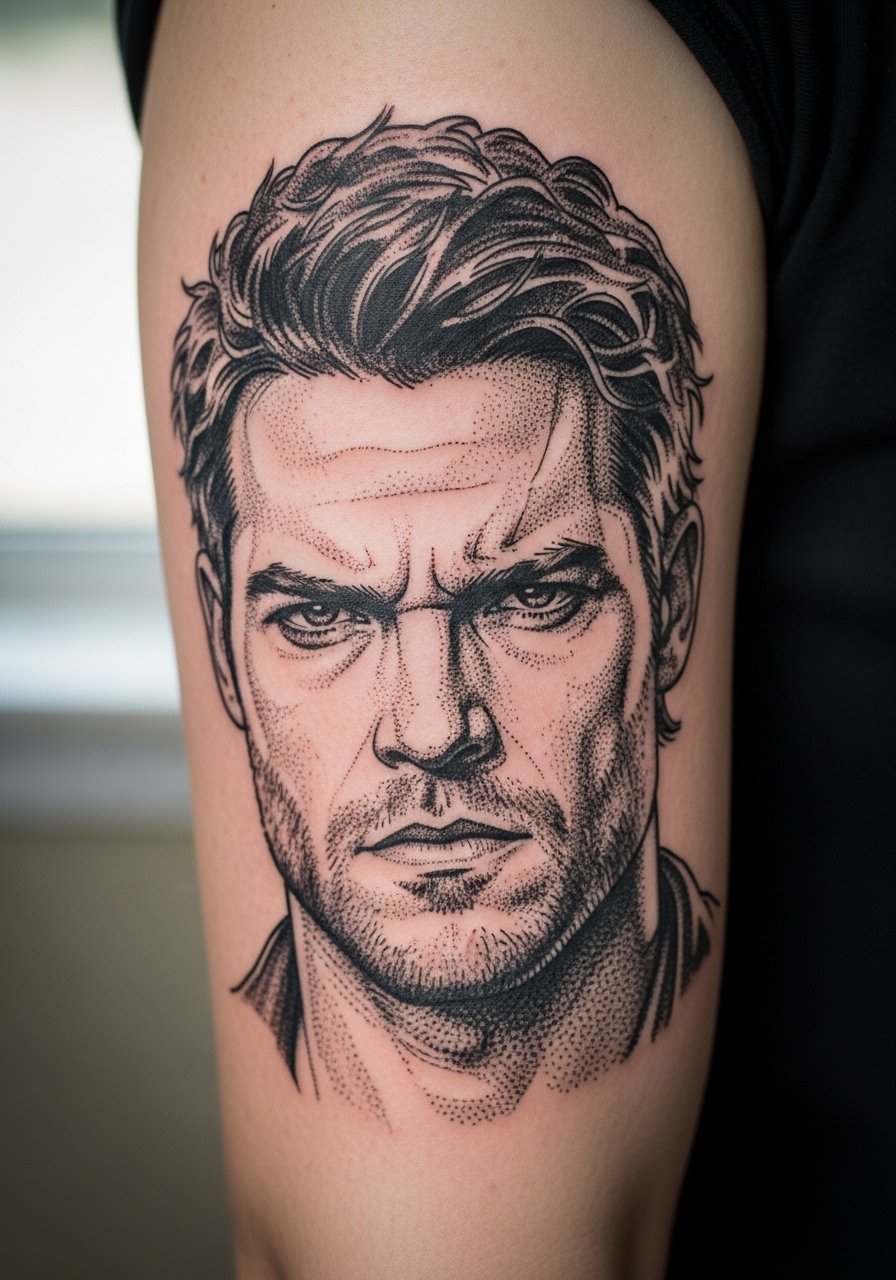
This spot is forgiving for fine detail because the arm skin stretches less than the ribcage. Fair warning: the bicep can be punchy during longer sessions if you hold tension. I recommend a slightly denser primary contour so the portrait still reads at a distance after two years. Tell your artist you want stipple shading behind the face to keep the sketch feel without heavy saturation. Typical session time is two to three hours. For casual show-off, pair it with a loose button-down shirt you can pull open at the sleeve.
4. Ribcage Full Sketch Scene

Fair warning about ribs. This area ranks high on pain and on aging risk for fine detail. Artists split into two camps on whether intricate fine line holds here. One camp says the skin movement blurs lines within a couple of years. The other camp argues spacing and depth win the day. If you want this spot choose larger, bolder sketch strokes rather than ultra-fine hatch marks. Sessions can run long so plan breaks and wear a cropped athletic top you can lift without fuss. Expect a touch-up at year two to three.
5. Tiny Wrist Silhouette Sketch
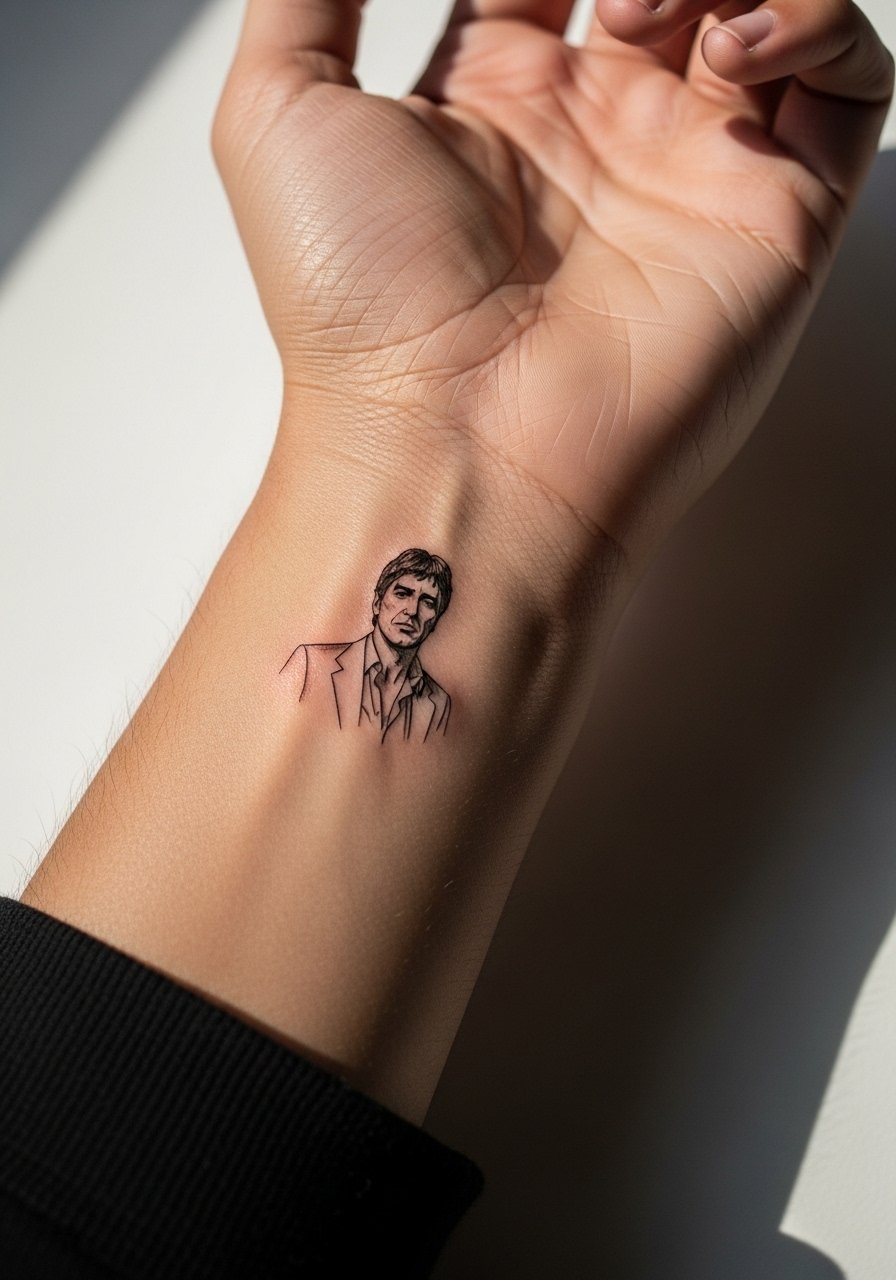
Wrist tattoos age under constant friction and frequent washing. The risk here is that micro strokes bleed into a soft blur over time. I usually recommend keeping the silhouette bold and minimal rather than trying to cram facial detail into that space. The session is short and the pain is mild. For the appointment wear a minimalist watch you can remove easily and avoid rubbing the band during healing. Plan on a touch-up at year two if the sketch relies on thin cross-hatching.
6. Back Shoulder Blade Sketch Portrait
This placement is low-friction and tends to protect delicate sketch strokes, so it holds detail well. The biggest mistake is asking for too much tiny texture in a single session. Break big designs into two sessions to keep linework consistent. Tell your artist to map the composition across the shoulder blade arc so the portrait looks correct whether you are standing or moving. Sessions run from two to five hours depending on size. For the studio wear I suggest a tank top that gives clear access and stays out of the sterile field.
Pre-Session Essentials
The chest, forearm, and ribcage pieces above demand different prep. These items make the session and the first week more manageable.
- Stencil transfer paper kit. Lets you preview placement on skin before the needle starts, which is especially helpful for collarbone and forearm portraits.
- Topical numbing cream. Applied per directions about 45 minutes before the session reduces rib and sternum sensitivity without affecting line clarity.
- Thin protective film roll. Useful for wrist and hand placements that face daily friction and frequent washing.
- Fragrance-free body wash. Cleans the tattooed area gently during showers so fine linework does not dry out or crust aggressively.
- Aquaphor healing ointment. Thin layers in the first days lock in moisture for lines without clogging the needle channels.
7. Half-Sleeve Sketch with Negative Space
This option plays with negative space so the sketch feels airy rather than packed. The visual impact lead works well here. Ask your artist to plan empty zones that will breathe as lines fade. That approach keeps the portrait readable at year five. A common mistake is overfilling with tiny strokes that merge over time. Sessions often break into two or three visits. Show-off style pairs with rolled sleeves or a short-sleeve linen shirt that lets the half-sleeve peek out naturally.
8. Shoulder Cap Single-Line Sketch
The shoulder cap is forgiving for single-line approaches because of soft sun exposure. The visual texture reads well in casual wear. A mistake is asking for continuous micro-hatching there, which can look muddy after a few years. Tell the artist you want decisive single strokes and a faint shadow wash. Session time is usually under three hours. For showing off, an open-shoulder blouse or a loose button-down pulled slightly off one shoulder keeps the focus on the sketch.
9. Thigh Sketch Portrait with Motion Lines
Upper-thigh work lets you go larger and experiment with motion lines that read like a storyboard. The session feels long but tolerable for most people. The downside is occasional rubbing from clothing during healing. Ask for a slightly heavier outer contour so the sketch survives gentle abrasion. For the appointment wear loose drawstring linen pants you can roll the leg up without pressure on the fresh ink. Plan a touch-up after the first year if the lines soften.
10. Calf Sketch Portrait with Background Wash
Calf placements age predictably because they avoid constant sun and frequent washing. That makes them great for mid-sized sketch portraits that include a background wash. The main mistake is over-saturating the wash which can hide the sketch quality. Tell your artist to keep the wash thin and textured. Sessions run two to three hours depending on background size. For casual reveal, roll jeans or wear sandals and cropped trousers that show the calf.
11. Hand or Knuckle Sketch Accent
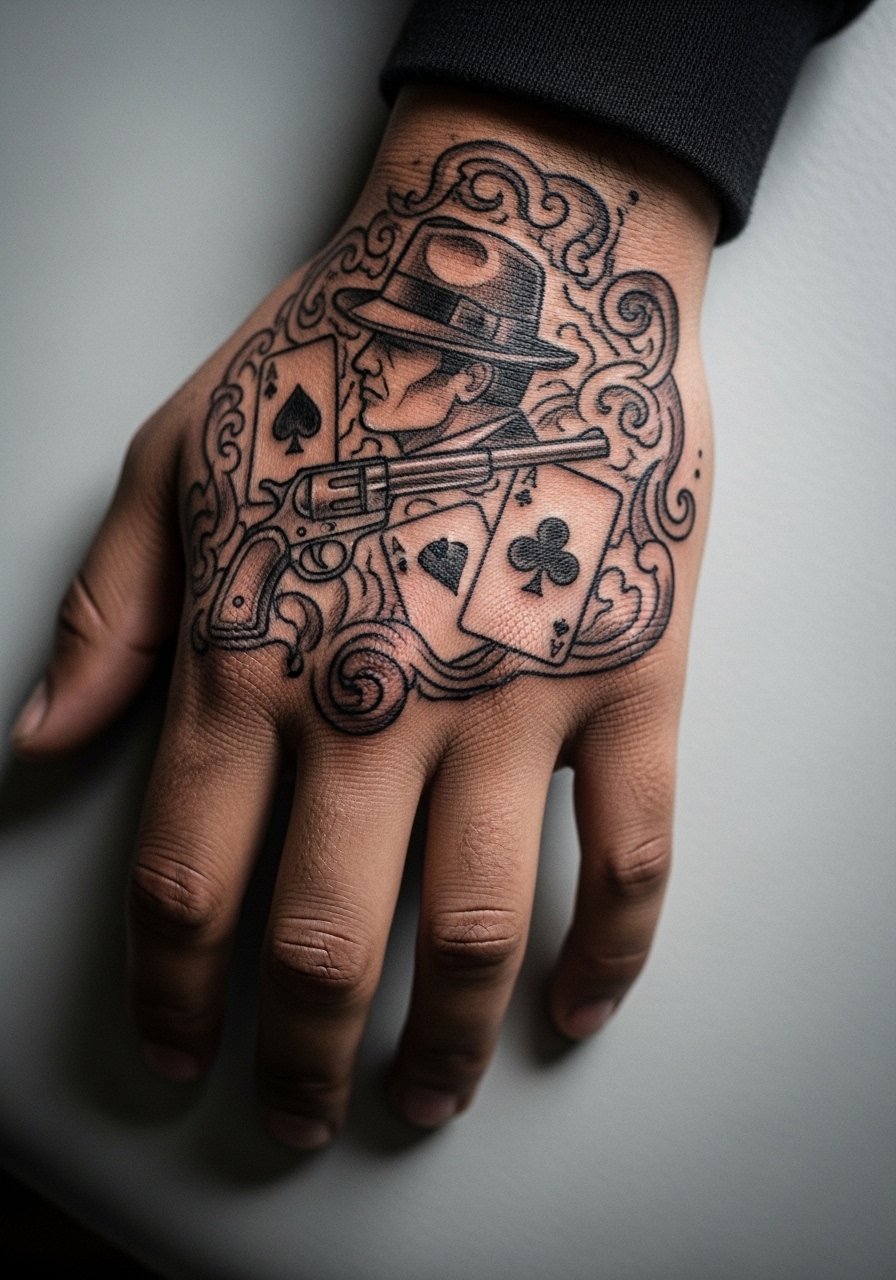
Hand tattoos carry real debate. One camp says hands are honest canvases that show off commitment. The other camp warns about work and social consequences plus fast fading. If you pick the hand, expect frequent touch-ups and possible career considerations. Use bolder sketch marks rather than fine hatchwork and accept the maintenance reality. Sessions are short but painful. For minimal disruption to healing avoid rings and wear gloves when doing messy tasks for the first week. I have said to clients that hands require a maintenance mindset more than most spots.
12. Finger Tip Mini Sketch
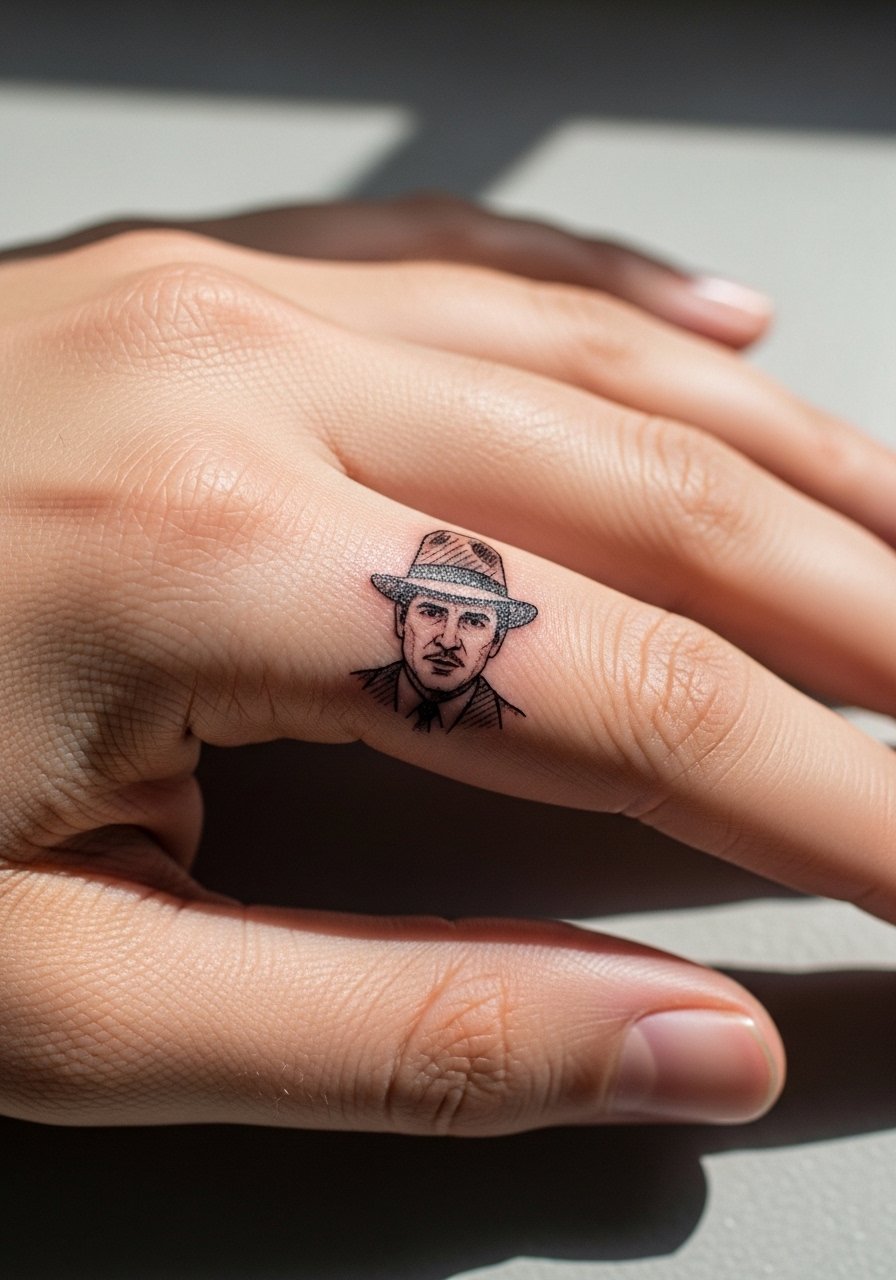
Finger tattoos are a long-term commitment because they sit in a high-friction zone. My advice is to keep the design ultra-simple and embrace that touch-ups will be regular. The common mistake is asking for facial detail on a fingertip. Session time is short but the risk of early fading is high. For showing off, layer with stacked dainty bracelets on the opposite wrist so attention shifts and the finger detail feels intentional.
13. Sternum Sketch with Vertical Composition
Sternum placements are intimate and demand careful planning. The session is intense and healing can be tender. A design that uses vertical composition tends to work better because it follows body contours. The mistake is over-detailing the center area. Ask for slightly wider strokes in the torso zone and expect a touch-up at year two. For the session wear a fitted sports bra so the artist has access while you stay comfortable.
14. Ankle Sketch with Negative Space Heel Accent
Ankle tattoos take friction from shoes and socks so negative space accents help the sketch read despite scuffs. The pain is low to moderate. The main mistake is lining too many tiny details that blur with shoe friction. Ask your artist to keep contours slightly bolder and plan for a touch-up in year two. For showing it off pick sandals or cropped pants and consider a simple pair of sandals that draw the eye downward.
15. Back Centerpiece Full Portrait
A full back portrait lets you go grand and keep the sketch aesthetic intact because the canvas is large. The hazard is trying to rush it into one marathon session. Break it into staged visits to maintain consistent linework. Mention in consultation you want staged progress and ask for mapped photos between sessions. Healing is straightforward and long-term visibility is high. For comfortable studio wear bring a button-up shirt you can slip on without disturbing the area.
16. Collarbone Accent Sketch with Script
When combining portrait sketching with text be precise about the exact wording and font. Text in image prompts must be exact so bring the script sample. The collarbone is a show-off spot but it moves with breath so ask for slightly stronger contour lines near the letters. A mistake is pairing tiny script with intricate portrait detail. Session time is one to two hours. For jewelry pairing try a thin chain pendant necklace that sits above the script without competing.
17. Behind-the-Ear Mini Sketch Accent
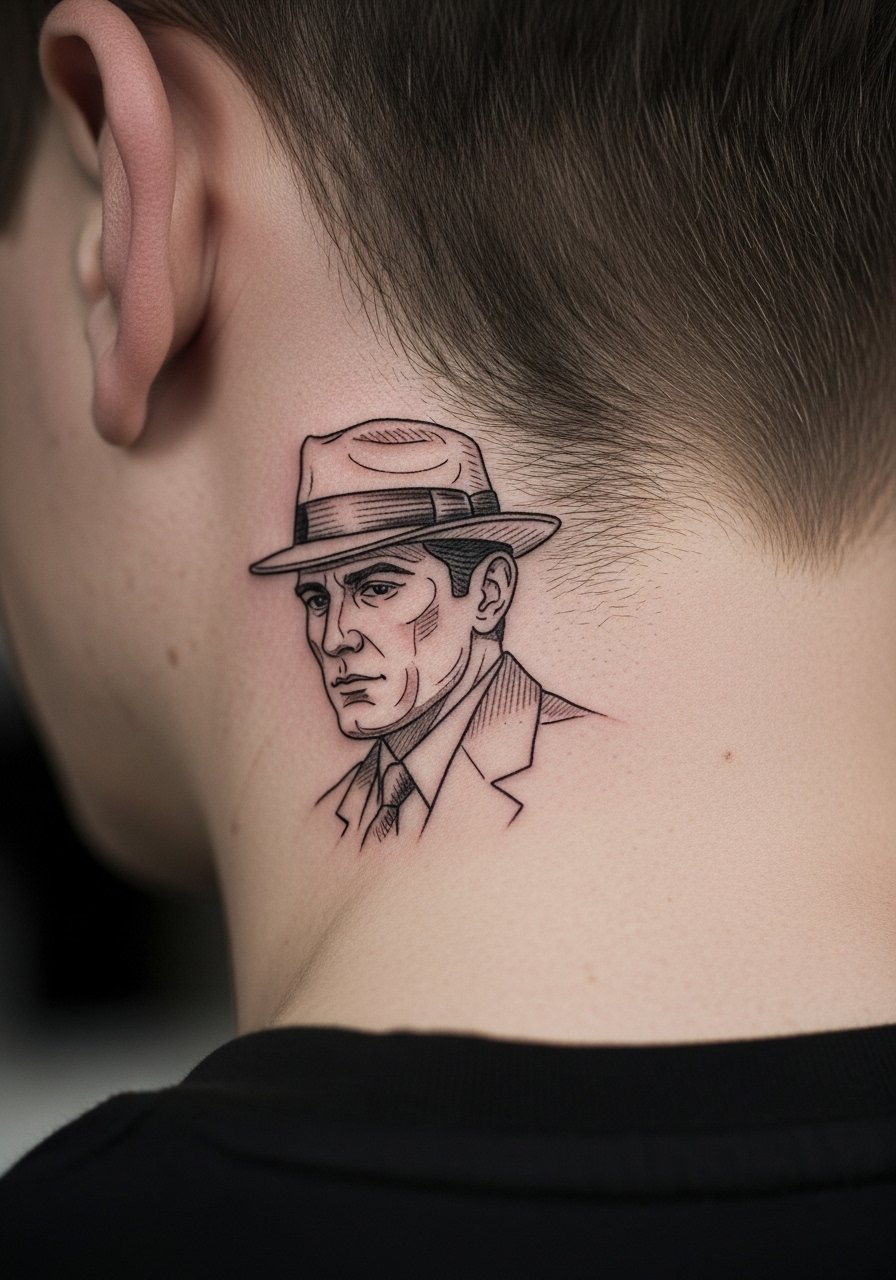
Behind-the-ear pieces are subtle and personal. They demand a very small, confident touch and often require specialized needle control. The major mistake is trying to squeeze portrait detail into that tiny patch. Expect short sessions but be ready for touch-ups if you wear glasses or have hair brushing the area. This placement also favors discreet discovery pathways like event booths and local directories when searching for artists who handle sensitive small spots.
Frequently Asked Questions
Q: Will a sketch-style Tony Montana portrait on the ribcage blur faster than one on the forearm?
A: It depends on spacing and depth. Rib skin moves more and details can soften faster. If you want a rib piece ask for larger, more decisive strokes and accept a likely touch-up at year two to three.
Q: How do I prepare clothing for a sternum or chest session?
A: Wear a fitted sports bra or a wide-neck shirt you can pull aside without exposing other areas. A fitted sports bra keeps fabric from rubbing the fresh ink during travel and the first few days of healing.
Q: Are portrait sketch tattoos of controversial characters recommended for workplaces?
A: Some workplaces react to any visible pop-culture portrait, and some focus on content. One camp sees these likenesses as glamorizing certain figures. The other treats them as cultural nods. If career fit matters pick a placement you can conceal or a stylized abstraction rather than a literal face.
Q: How often should I expect touch-ups for fine sketch portraits on hands and fingers?
A: Hands and fingers need the most maintenance. Plan for touch-ups every one to three years depending on friction, sun exposure, and how bold you want the lines to stay.
Q: Where's the best place to find artists who do sketch-style celebrity portraits without naming people?
A: Use local convention listings, directory searches, community subreddits, and targeted hashtag browsing. Look for portfolios that show healed photos of similar small-scale sketch work and ask for healing photos during consultation.
