
Fine line tattoos are everywhere on saved boards right now, and the gap between what looks gorgeous on a screen and what lasts on skin keeps coming up in shop conversations. Darker skin tones, tiny wrist pieces, and ribcage placements all raise different red flags about fading, touch-ups, and session logistics. Read on for 27 soft Tim Burton tattoo ideas that give you placement, aging notes, and what to tell your artist before you book.
1. Fine Line Jack Skellington Outline on Inner Forearm
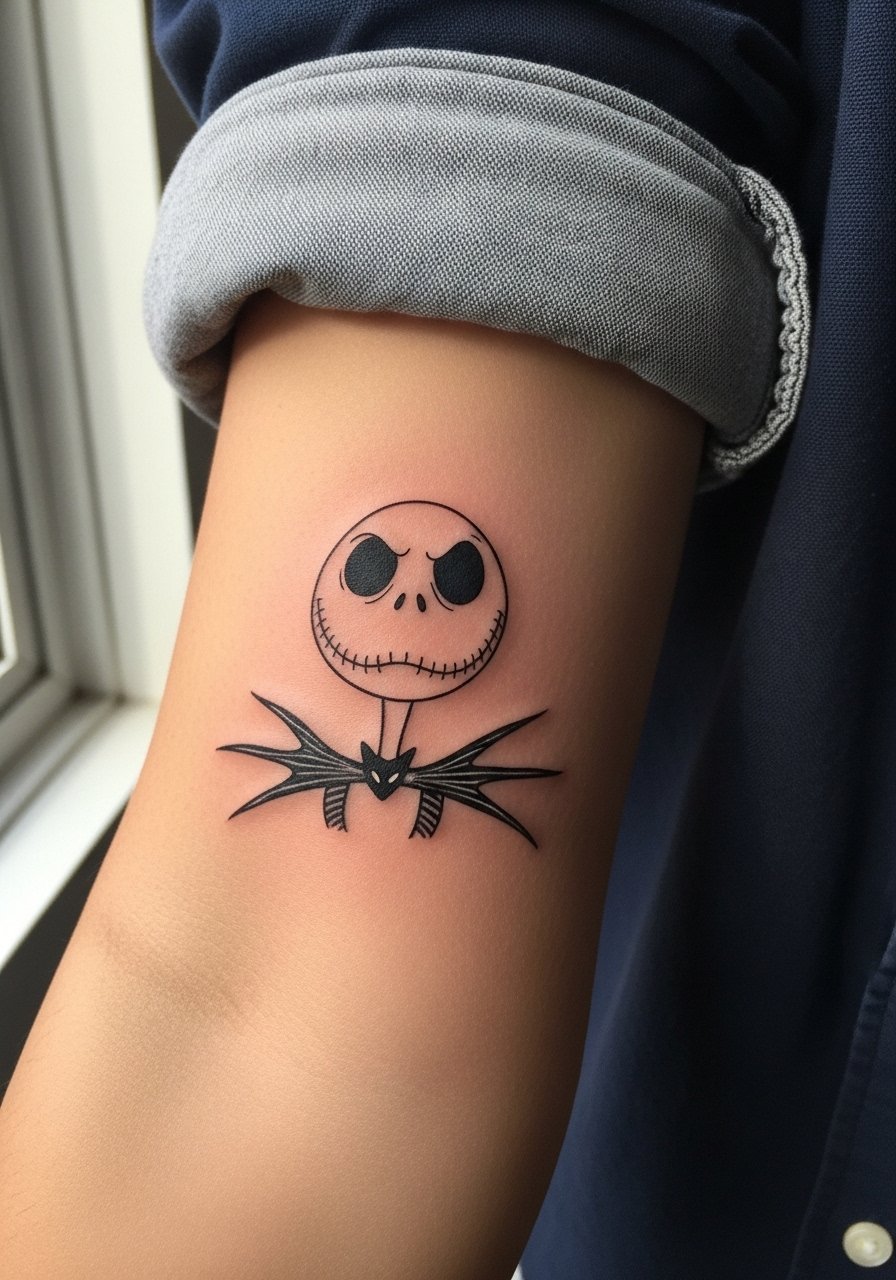
I tell people the inner forearm is the safe play for a 3-5 inch fine line Jack. If you want the crisp jaw and thin eye sockets to last, ask for slightly increased line weight and a little negative space to keep contrast on medium and dark skin. Expect a low to moderate pain level and a single session that runs 45 to 90 minutes. Common mistakes are asking for hairline lines that sit too shallow or too small a size. For the session wear, roll up a linen button down shirt so the artist has clean access without tugging at fabric.
2. Watercolor Sally Face on Collarbone
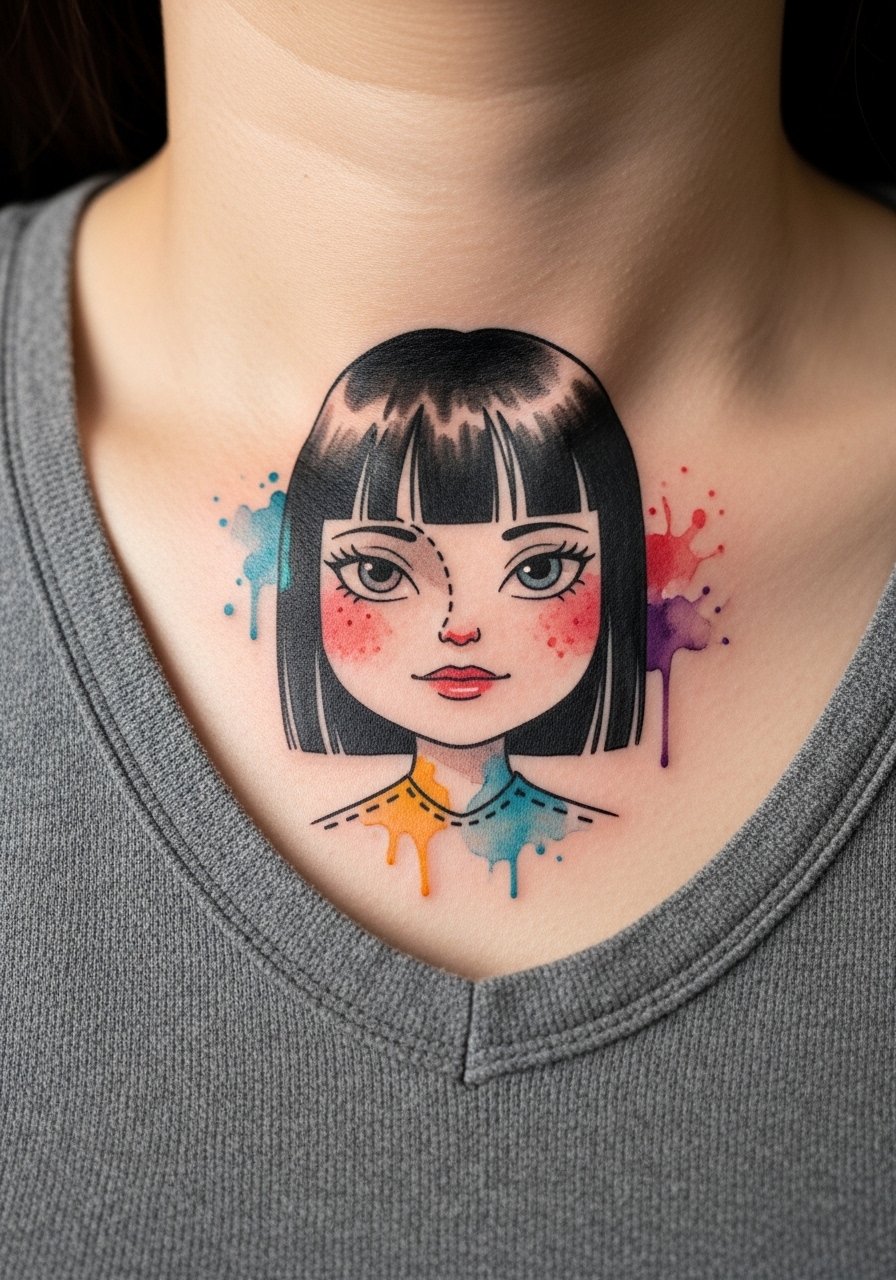
Most watercolor pieces show immediately but need careful placement to avoid color bleed during healing. The collarbone gives a graceful angle for Sally's stitched features, and a shallow 1-2 session approach keeps saturation soft. The trade-off is that watercolor can feather on oily or sun-exposed skin, so tell your artist you want controlled washes with crisp black anchors around key stitches. Pain sits at a medium level thanks to bone proximity. For showing it off, an off shoulder sweater in muted purple frames the piece without overwhelming the palette.
3. Minimalist Sandworm Swirl on Wrist
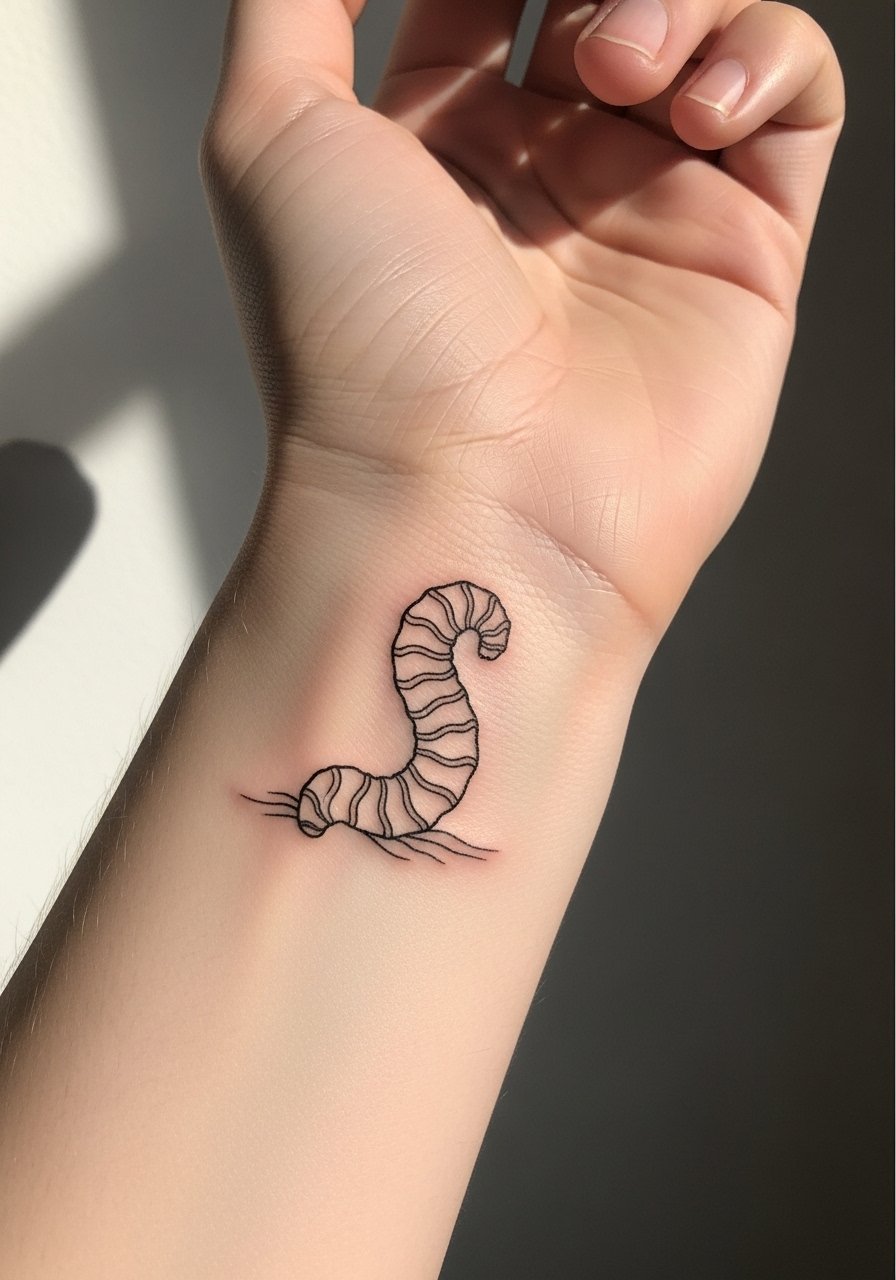
Wrist pieces are tiny and visible, which is exactly why they need slightly thicker linework than a phone reference suggests. For a 2-inch sandworm swirl, expect a quick 20-40 minute session. The biggest mistake is going hairline thin on the wrist where constant washing and friction fade lines fast. Plan for a touch-up at year one for fine line versions. During the session wear a sleeveless top and leave jewelry off. Pair the finished tat with a thin leather cord bracelet to balance the negative space on the wrist.
4. Neo-Traditional Scissorhands Hands on Outer Thigh
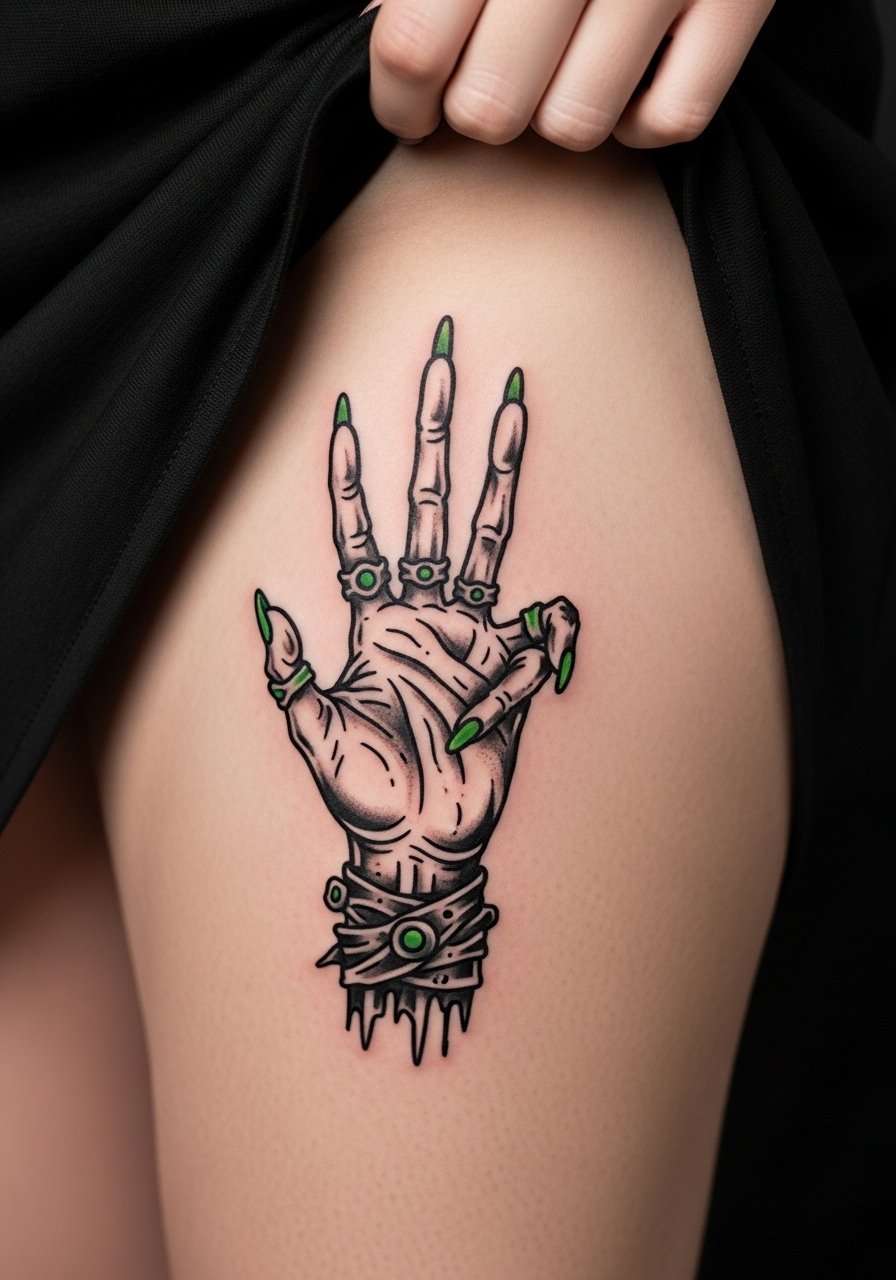
The outer thigh is forgiving for neo-traditional work because it holds saturation well and tolerates bigger line weights. A 6-inch Edward Scissorhands hands motif benefits from bold outlines and selective shading to preserve edge definition as skin stretches. Expect a moderate session time across two sittings for full shading. Common errors are compressing detail into too small an area. For show, a high waist a line skirt pairs with the placement and keeps the piece visible when you want to show it off.
5. Fine Line Corpse Bride Silhouette on Ribcage

Fair warning, ribs rank higher on most pain charts, and fine line silhouettes there split artists into camps. One group says ribs stretch and blur thin lines quickly. The other group argues that careful spacing and consistent needle depth make it hold. If you choose ribs, request slightly larger spacing and schedule a follow-up touch-up at six weeks. The common mistake is going too small for a placement that moves with breathing. Wear a sports bra or loose crop to the session for access and comfort.
6. Blackwork Haunted Tree on Shoulder Blade

Shoulder blade blackwork ages well because the area sees less stretch and friction. A 7-inch haunted tree rendered in solid black fills with a dramatic silhouette that keeps contrast long term. Expect two to three sessions for full saturation and stipple shading details. A frequent error is packing too many tiny branches with thin lines that blur later. For sessions wear a loose tank or button-front top you can pull aside without lifting across the chest.
Studio Day Picks
The inner forearm pieces and wrist work above heal differently from ribcage and shoulder blade sessions, so a few targeted items smooth studio time and the first week.
- Koo Tattoo Balm. A lighter balm that absorbs quickly and avoids the sticky residue some people complain about, helpful for thin line forearm and wrist pieces.
- Recovery Ink Pen. Handy for pre-session sketches or marking small adjustments on tricky areas like the ribcage before the needle hits.
- Zen Ink Aftercare Spray. An alcohol-free mist that soothes watercolor sections during early healing without disrupting scab adherence.
- Indie Butter Tattoo Balm. Thin consistency that reduces pilling against clothing, useful for thigh and calf placements that rub.
- CeraVe Healing Ointment. A fragrance-free, lighter alternative for the first few days that helps fine line work on oily skin avoid clogged pores.
7. Micro-Realism Oogie Boogie Underbust

Underbust or underboob micro-realism reads intimate and detailed, and the area is sensitive to movement during healing. A small, three-inch Oogie Boogie in black and gray can hold fine texture if the artist uses tight stipple shading and controlled saturation. Pain is moderate to high in the region, and a single session is typical. The usual mistake is requesting ultra-fine texture without planning for a touch-up once swelling subsides. Pick clothing that avoids underwire for the first two weeks and consider a strapless or soft bralette to prevent friction.
8. Ornamental Stitched Heart on Ankle
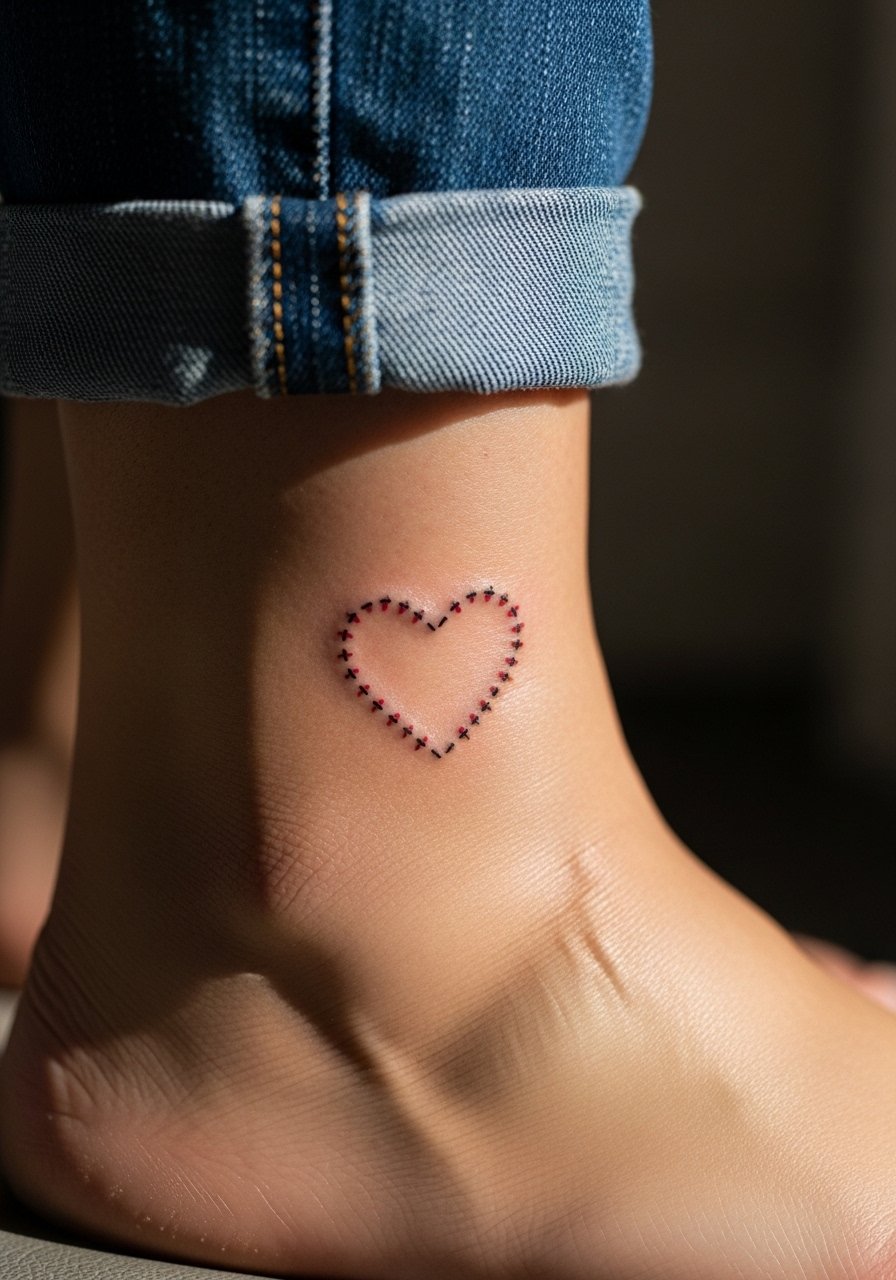
Ankles take a beating from shoes and summer sand, which makes placement choice important. A 2.5-inch stitched heart works best with clean outlines and a touch of negative space so the small red accents do not muddy. The big mistake is placing too low where constant rubbing from shoes accelerates fade. Session time is short and pain is low to medium. Show it off with cuffed straight-leg jeans or espadrilles and a thin anklet on the opposite foot by adding a cuffed ankle jeans to your wardrobe.
9. Ignorant Style Mars Kid on Calf
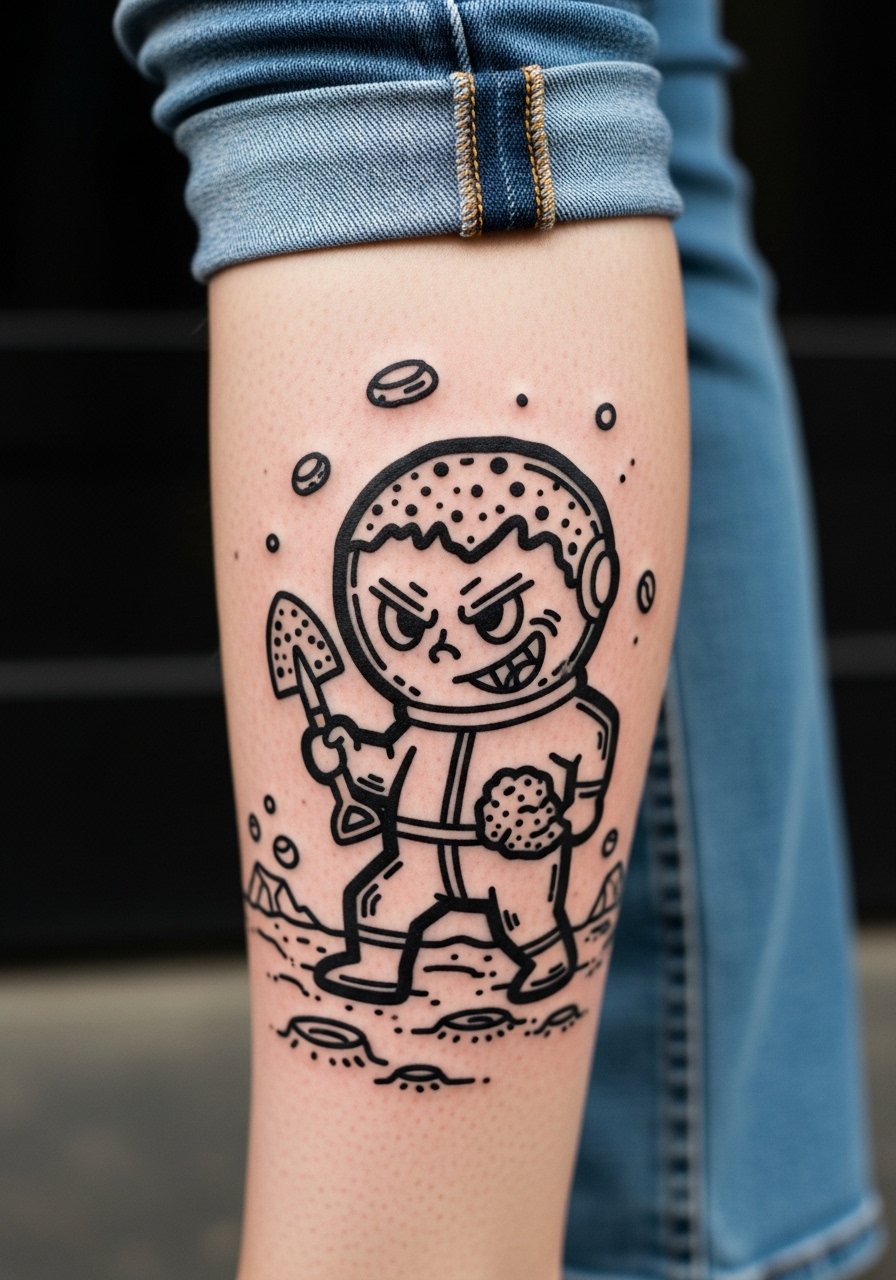
Ignorant style favors naive, bold outlines and a playful look that often survives stretching better than fussy fine line. Calf placement is forgiving and handles larger, bolder linework. Expect a single session and a design that keeps personality without needing saturation heavy shading. A common error is requesting delicate fill inside a naive outline which then blurs. Wear loose pants or capris to the session for easy access and pairing with midi skirts or boots afterward gives a retro vibe.
10. Dotwork Moon with Bats on Upper Back
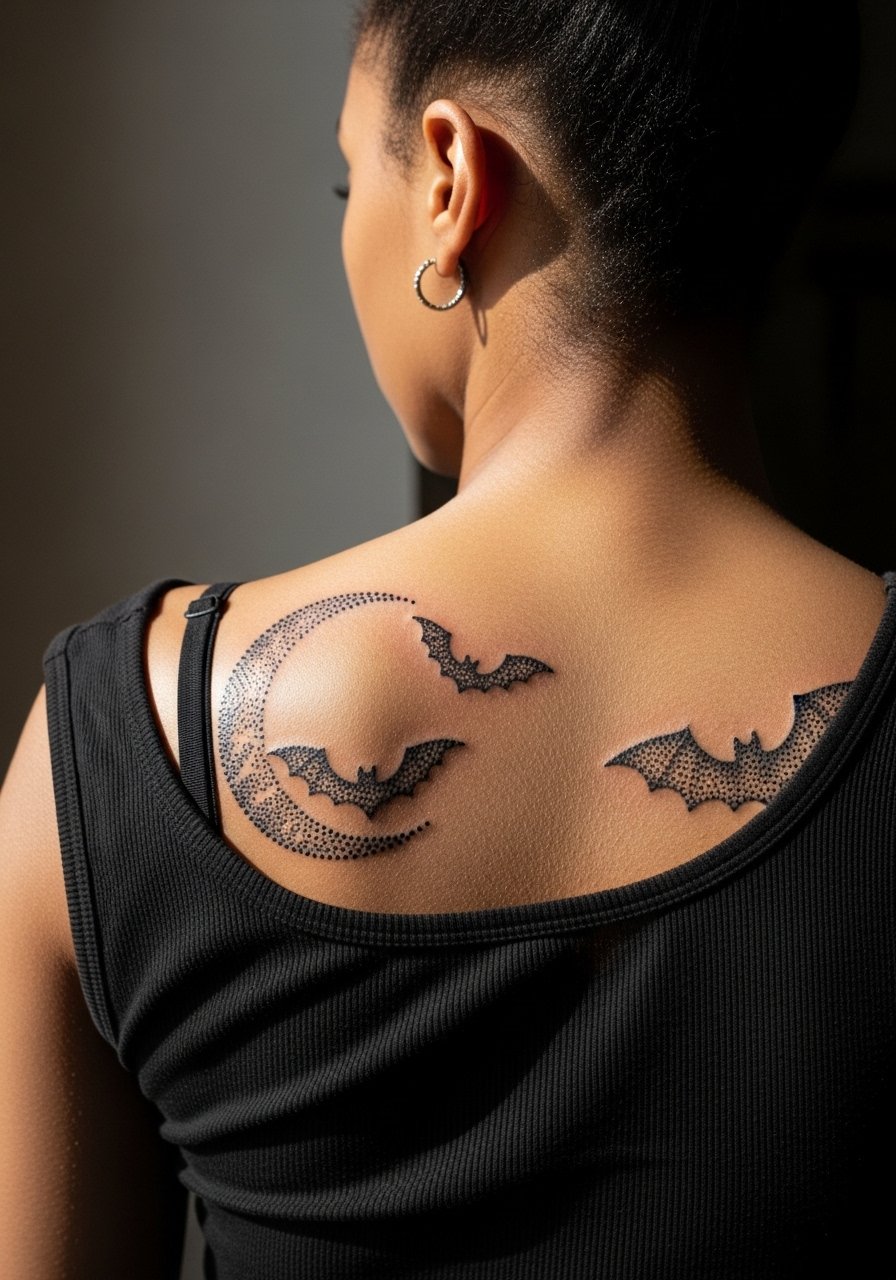
Upper back pieces let dotwork breathe, and stipple shading creates depth without dense saturation that can age poorly. An 8-inch moon and bat composition benefits from layered dot densities to keep highlights. Expect multiple short sessions for build-up and a low blowout risk if the artist spaces dots correctly. The usual mistake is compressing too much detail into a narrow area. Wear a button-front crop or tank so you can expose the area without contorting.
11. Neo-Traditional Poem Script on Inner Bicep
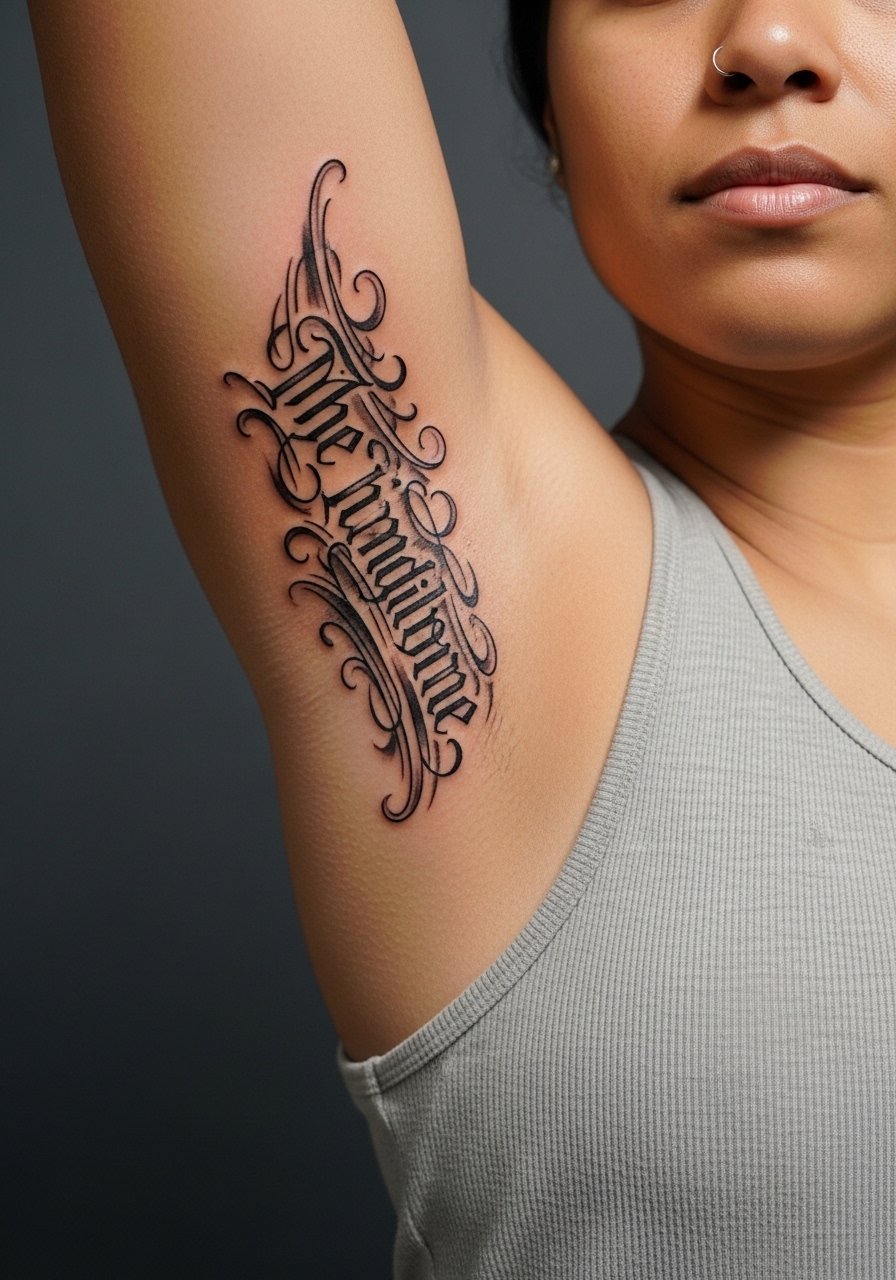
Inner bicep script can sit hidden yet personal. A five-inch neo-traditional script line benefits from thicker primary strokes and clean serifing so letters stay legible as skin moves. Pain is medium due to sensitivity, and a single session usually suffices. A common mistake is asking for ultra-thin script without testing how it reads after healing. For the session wear a tank so the artist can have full access and consider a thin chain pendant necklace to complement the vertical flow when shown off.
12. Watercolor Big Fish Circus Elements as Forearm Sleeve Starter
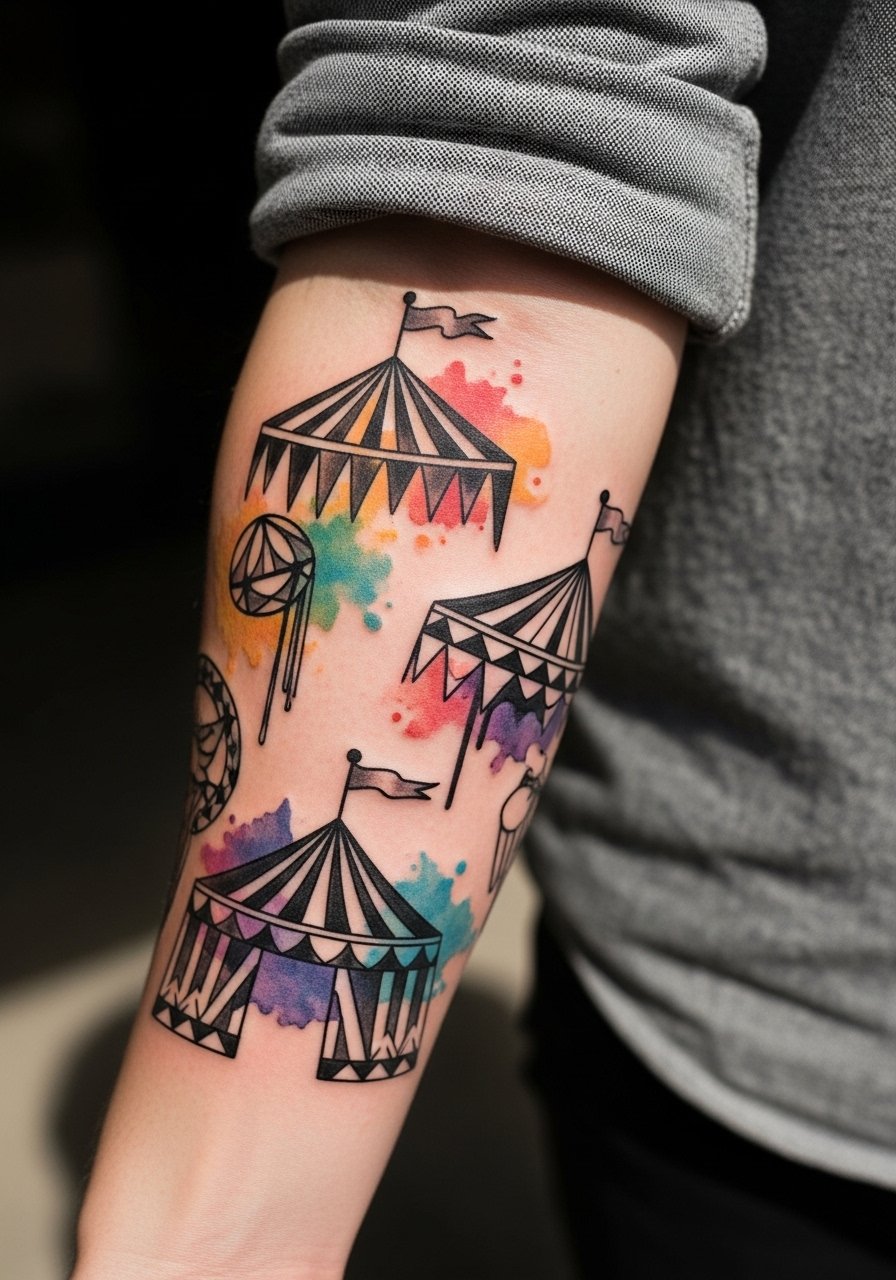
Sleeve starters work best when planned as patchwork from the outset. For Big Fish circus motifs on a forearm starter, use bold black anchors around watercolor fills to contain potential feathering. That approach helps the art age better than loose washes alone. Expect multiple sessions and a plan for expansion. The mistake is treating each flash as a standalone without a connecting palette. Wear a loose long-sleeve you can roll up easily and schedule guest spots thoughtfully.
13. Fine Line Cheshire Grin on Side Neck
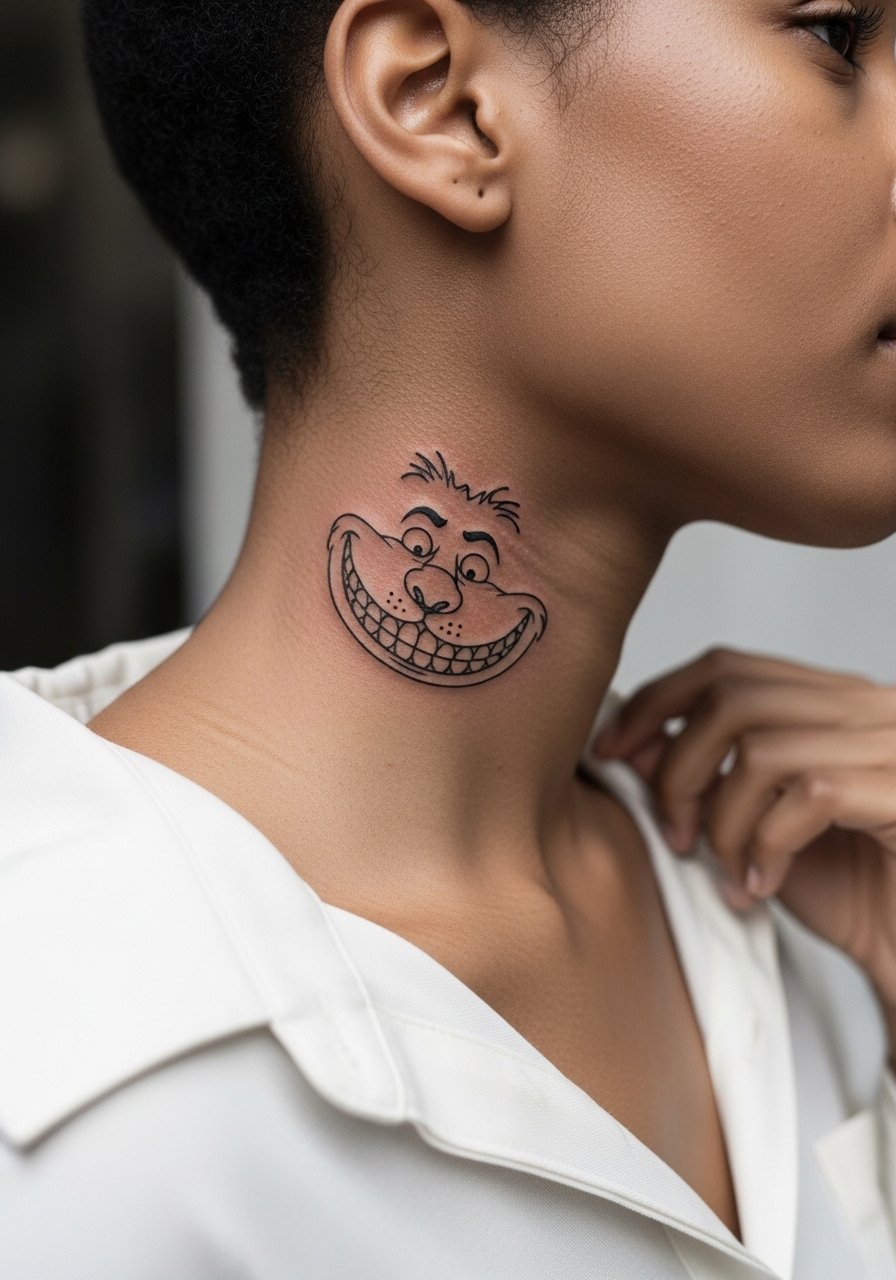
Side neck tattoos are peekaboo pieces and the skin there presents movement and occasional friction from collars. A 3-inch Cheshire grin needs slightly bolder linework than a phone reference to maintain readability. Artists disagree on neck longevity because of motion and exposure. One camp recommends thicker contour lines to keep contrast, while the other warns thicker lines can scar. Ask your artist their preference and plan a six-week check. Wear your hair up for the session so the artist has clear access.
14. Patchwork Starter: Small Jack with Future Sally Path on Forearm

If you want a sleeve over years, start with a small Jack as an anchor and map out where Sally might land later. I suggest planning spacing and leaving breathing room so future elements do not compete. The common misstep is adding a dense motif right next to the first piece and forcing awkward joins. For consults, bring a rough sleeve map and ask your artist to pencil placement on skin during the first session. For showing it off, roll sleeves up to let the patchwork breath.
15. Hidden Neck Cheshire for Hair Coverage
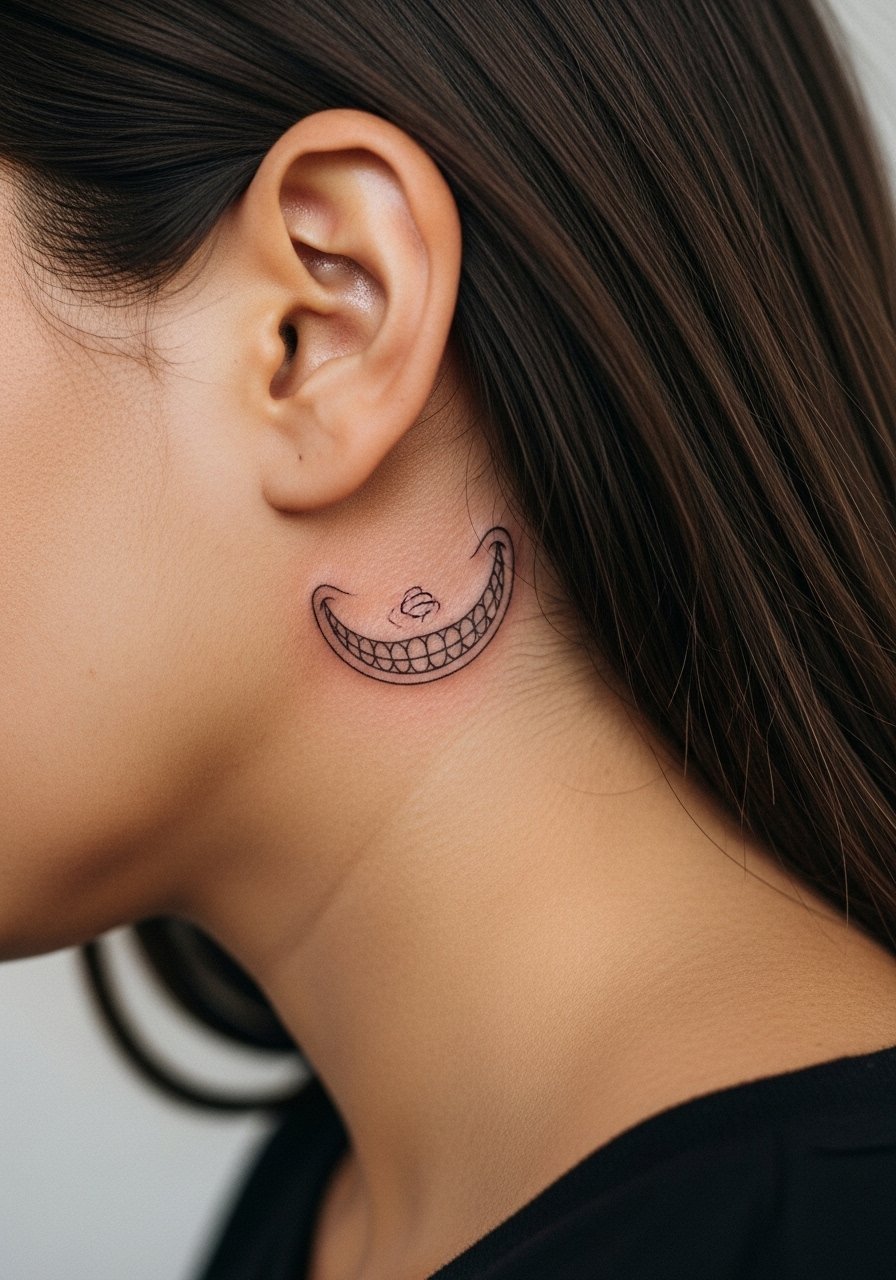
A neck or behind-the-ear placement that hides under hair is smart for people worried about visibility at work. Framing matters here. Keep the grin small and request placement just below the hairline so it peeks when you tuck hair up. The risk is getting too elaborate where the coverage hides the detail, which wastes needle time. This placement pairs with side-swept hair or updos and needs an artist comfortable with tiny, shallow areas.
16. Negative Space Burton Silhouette for Dark Skin

For darker skin tones, negative space can create contrast without relying on hairline black lines that ghost fast. A silhouette approach uses solid surrounding shading to let skin show the figure. The tactic preserves long-term readability but requires an artist practiced in working with contrast rather than relying on thin outlines. Mistakes happen when artists try to replicate light-skin references without testing on a similar skin tone. Ask for healed examples on similar skin in the consult and expect a touch-up at year one to refine edges.
17. Thigh Inner Oogie Boogie with Burlap Texture

Inner thigh placements are private and tolerate texture work like burlap effects that mimic Oogie Boogie's sack. The design holds up because shading uses dot work rather than thin lines that fade under friction. Pain is moderate and sessions may be longer due to sensitivity. A common error is over-detailing in a narrow space. For the session, wear shorts you can shift slightly to expose just the area and avoid seams rubbing the spot while it heals.
18. Memorial Burton Tree with Hidden Dates in Branches on Upper Back

A memorial tree with small dates tucked into branch negative space is a quiet customization that reads as ornament and meaning. Upper back placement keeps the design large enough to hide text without clutter. The trick is to render the numerals small but crisp so they remain legible after healing. The mistake is embedding full dates in hairline text that disappears. Ask the artist to show a stencil with the numerals clearly visible before the session.
19. Whip-Shaded Beetlejuice Stripe Wrap on Ankle

Whip shading adds texture and motion to stripes while keeping saturation controlled. Around the ankle, the stripes should avoid points of tight friction from shoe straps. Expect a quick single session and a higher fade risk near the foot if exposed to sand and salt. The common error is putting the darkest fills where shoe straps sit. Wear loose joggers or shorts to the session and plan summer footwear accordingly.
20. Stipple-Shaded Crooked House on Calf
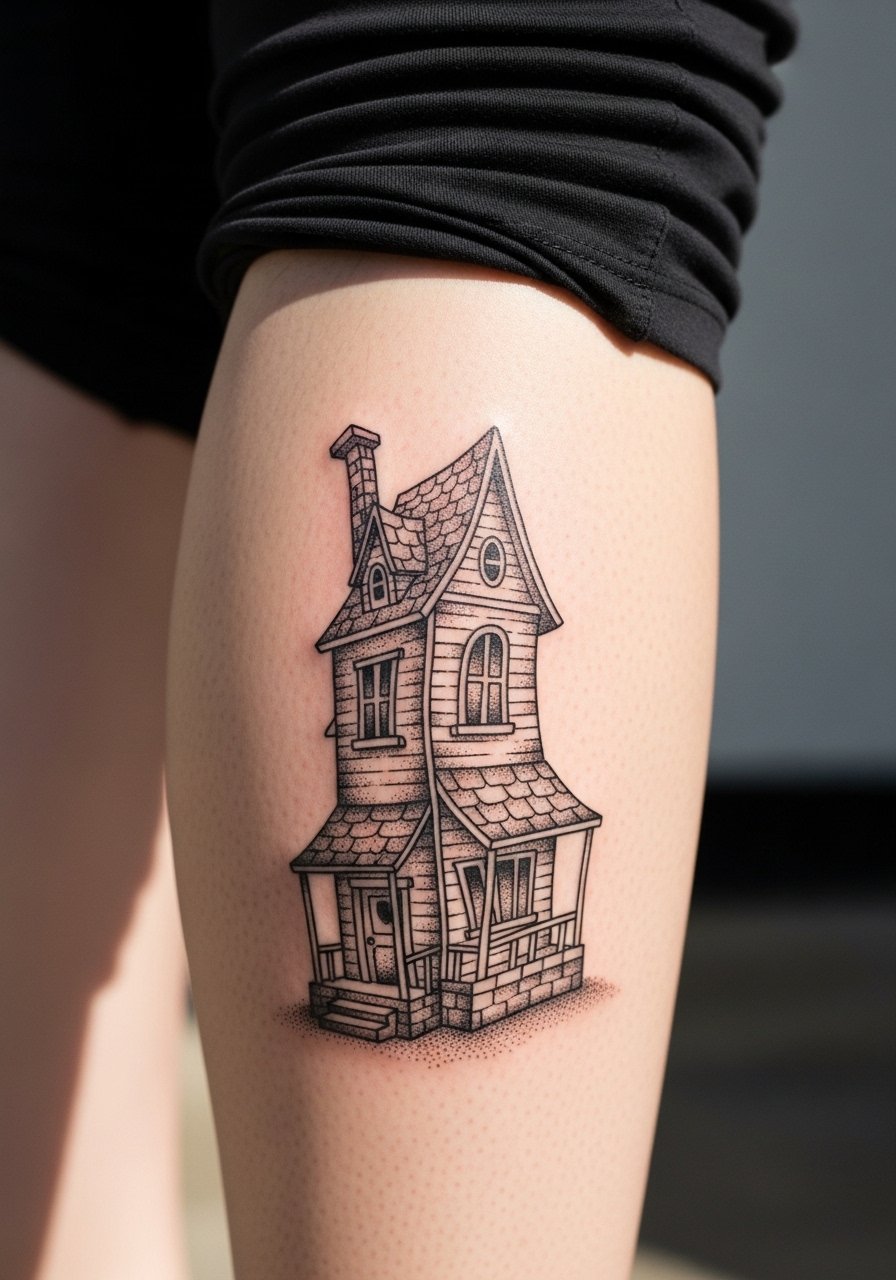
Calf work handles stipple shading well and gives room for atmospheric details. A crooked house with layered dotwork reads textured without heavy saturation. Expect one session and a lower blowout risk, though tiny stipple dots need spacing to age clean. The mistake is overpacking dots too densely which merges in time. Pair with rolled bootcut jeans or midi skirts to show off the vertical composition.
21. Tiny Sandworm Behind the Ear, Below Hairline

Behind-the-ear placements require precise framing as the skin is delicate and tiny pieces can blur if placed on cartilage. For a sandworm, keep it under 1.5 inches and request the artist place it slightly below the hairline so it hides with hair. The usual mistake is crowding the area with too much detail. Pain is low to moderate and session time is short. Plan an updo for the session so the artist can see the exact skin patch.
22. Forearm Sleeve Connector: Big Fish Tentacle and Circus Banner

When you plan a sleeve, connector pieces should bridge different styles with shared anchors like a banner or tentacle. This connector approach helps future patches sit naturally. The frequent error is using unmatched palettes that fight instead of link. Expect several short sessions and lay out the connector before committing to the next flash. For the session wear a loose long-sleeve you can roll up easily.
23. Sternum Locket with Stitched Heart Accent

Sternum pieces need special care because the area moves with breathing and sees nearby fabric contact. A small locket with a stitched heart accent benefits from heavier contour lines around the locket and lighter internal detail. Pain is moderate to high. Artists disagree about numbing there because some think it interferes with saturation while others use it for client comfort. Decide in consult and consider a topical numbing option if long sessions are planned. Wear a supportive sports bra to the session.
24. Tiny Dotwork Bat Cluster Behind Collarbone

A subtle bat cluster near the collarbone reads sophisticated when spaced and composed with light dotwork. The area is exposed to sun and clothing, so place bats slightly higher to avoid strap rubbing. The common mistake is clustering too tightly which leads to merged forms after a year. Session time is short and pain is low to medium. Pair with a pearl drop earrings and wide-neck tops to frame the piece.
25. Minimalist Keyhole and Skeleton Key on Finger

Fingers are high maintenance because constant washing and friction dull linework fast. Tiny key motifs look great fresh but expect annual touch-ups. The biggest mistake is choosing ultra-fine detail that cannot hold on skin that moves and stretches. Ask for stronger primary contours and plan to touch up at year one. Leave bands off during the session and avoid heavy hand activity during the first week.
26. Blackwork Horse Skull on Shoulder Cap

Shoulder cap placements handle heavy blackwork and keep contrast over time. A horse skull in solid black with negative areas retains its gothic edge without frequent touch-ups. Expect one to two sessions and minimal blowout risk if the artist spaces lines and transitions. Common errors include tiny internal detail that gets lost inside dense black. For the session wear a loose tank that slides easily for access.
27. Watercolor Corpse Bride Silhouette on Outer Thigh

Outer thigh watercolor silhouettes get room to breathe and avoid the constant friction small pieces face. A larger silhouette lets the washes remain soft without bleeding into the outline. The main mistake is tiny watercolor washes on inner thighs where friction from clothing ruins the effect. Expect one to two sessions and wear loose shorts or a skirt on the day of the appointment.
Frequently Asked Questions
Q: Will fine line Burton designs blur faster on darker skin than on lighter skin?
A: It depends on contrast and technique. On darker skin, negative space and slightly heavier contour lines preserve readability longer than hairline black lines. Ask to see healed examples on skin tones similar to yours and plan for a touch-up around the first year if you want crisp detail maintained.
Q: How should I decide between watercolor Sally on the collarbone and a blackwork version for longevity?
A: Watercolor looks softer fresh but can fade faster, especially on oily or sun-exposed skin. Blackwork keeps contrast and usually ages better. If you want the watercolor palette, request bold black anchors around key features and plan a six- to twelve-month check to see if a minor saturation pass is needed.
Q: I want a ribcage Corpse Bride silhouette but heard artists disagree about fine line there. What should I ask in consultation?
A: Name both sides of the debate and ask where your artist stands. Ask to see healed ribcage pieces in the artist's portfolio and request a stencil on skin to check scale and spacing. If they favor fine line, confirm their touch-up policy and schedule a six-week follow-up.
Q: Do ankle Burton tats survive summer activities like sandals and beach trips?
A: Ankle tattoos face extra friction and salt exposure which accelerates fading. For ankle placements pick slightly thicker outlines and avoid placing the design where straps press. After sessions, protect the area from sand abrasion and consider light re-saturation after the first summer if necessary.
Q: Are there practical ways to plan a patchwork sleeve starting with a small Jack outline?
A: Yes. Bring sleeve maps or ask the artist to draw tentative filler zones on your arm during the first session. Leave breathing room around the initial piece so future elements can be added without forced joins. Book guest spots with the map in hand to keep the aesthetic cohesive as it grows.
Q: Should I use Saniderm or dry healing for a watercolor Sally collarbone piece?
A: Artists and collectors split on this. One camp favors protective film for cleaner, less messy healing. The other prefers dry healing to avoid trapped moisture. Consider your activity level and hygiene context. If you sweat a lot or will be sun-exposed, a short film period followed by careful dry care can balance both approaches.
Q: Can I get hairstyle or clothing advice to hide a side neck Cheshire grin at work?
A: Yes. A side-swept hairstyle, high-neck shirts with side slits, or updos keep the piece concealed. For show-off moments, a wide-neck top pulled to one side exposes the tattoo. Pack a loose high-neck top or a high neck side slit top for sessions and post-session cover if needed.
