
Fine line is everywhere on saving boards right now, but what holds up on real skin is a different story. Expect fine work to need touch-ups sooner, price surprises when you book, and web designs that distort across moving joints. If you want subtle spider references that still read clean at year two, start with placement and line weight before you pick the species. The first idea shows a wrist-safe path.
1. Black Widow Outline on the Inner Wrist
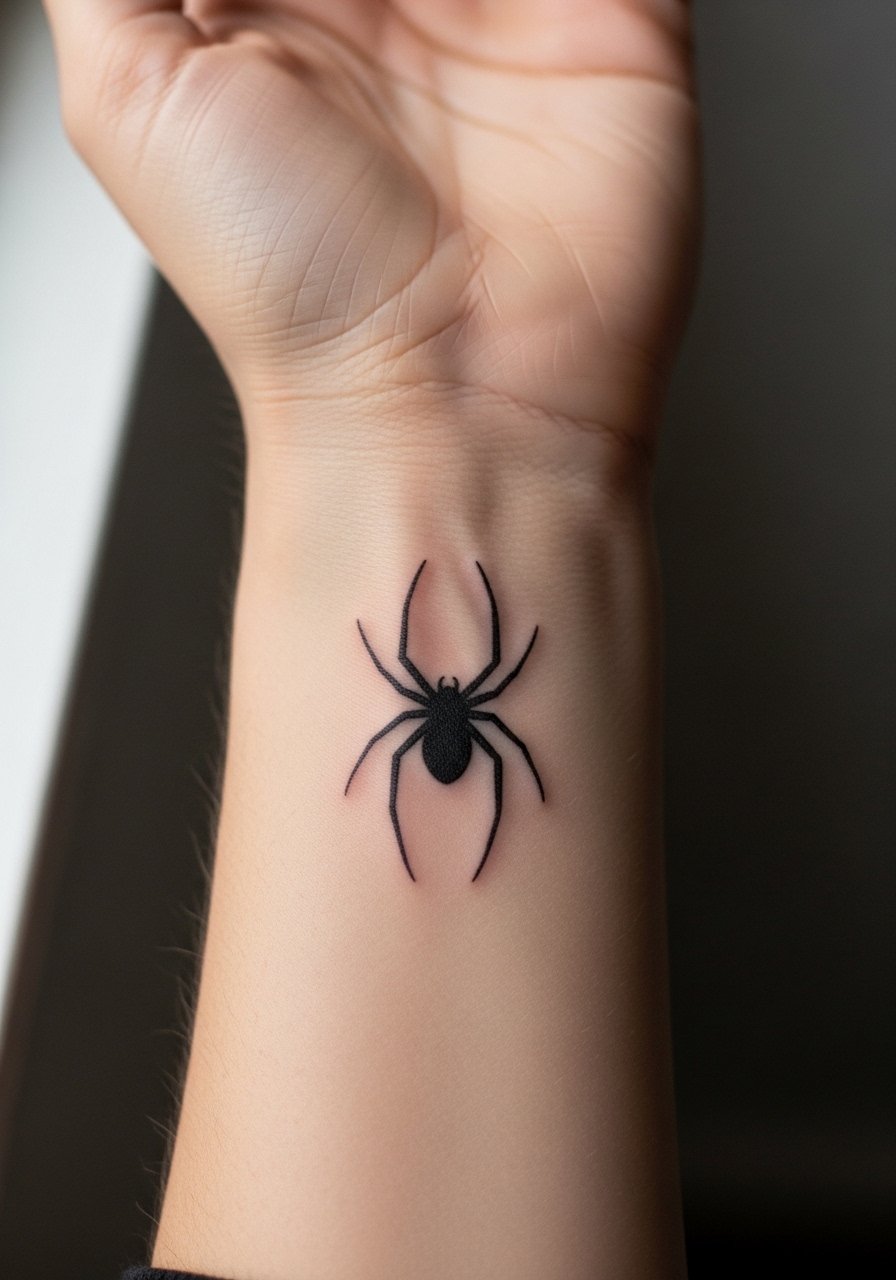
I've seen small black widow outlines hold up best when artists use confident, slightly heavier linework rather than hair-fine single strokes. Tell your artist you want a clean outline with a single pass and some negative-space legs so the shape remains readable over time. The wrist is low to moderate on pain and usually a single 30-60 minute session. Common mistakes are insisting on ultra-thin lines or packing too many legs into a tiny area. Expect a touch-up window around year two to three if you want the silhouette razor-sharp. For showing it off, wear a thin leather cuff bracelet on the opposite wrist so the delicate black silhouette reads like jewelry.
2. Orb Weaver with a Single Strand on Inner Forearm
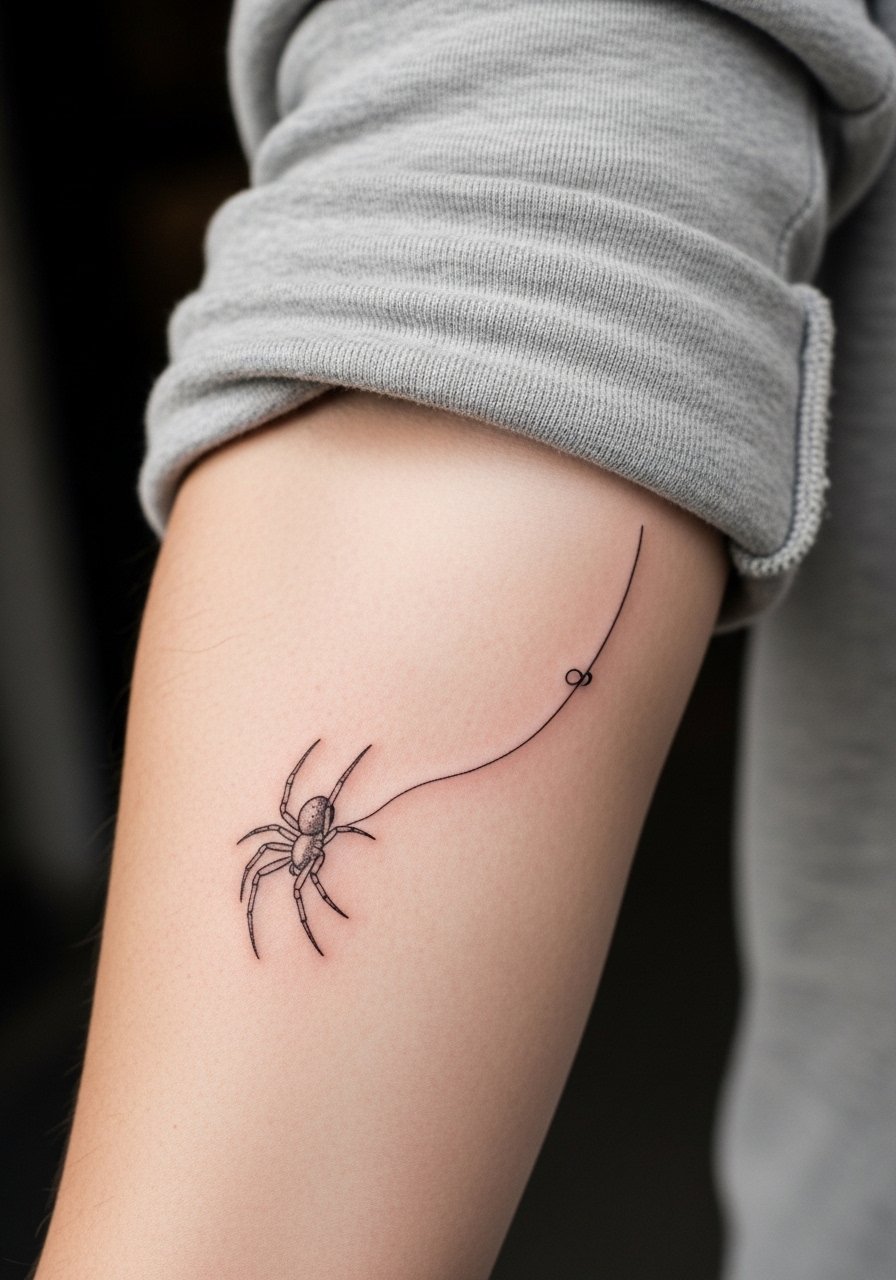
This is the one I recommend when you want spider symbolism without appearing overt. Go slightly larger than you think, about 3 to 4 inches, so the web and body have breathing room. In consultation, ask for stipple shading on the abdomen and a tapered silk strand that leads toward the wrist for motion. The inner forearm is forgiving for fine line, with mild pain and one to two sessions depending on shading. A common aging issue is crammed webbing that becomes a gray blur. If you plan to show it, roll up a chambray shirt and layer slim bangles on the opposite arm to balance attention.
3. Minimalist Spider Silhouette at the Ankle
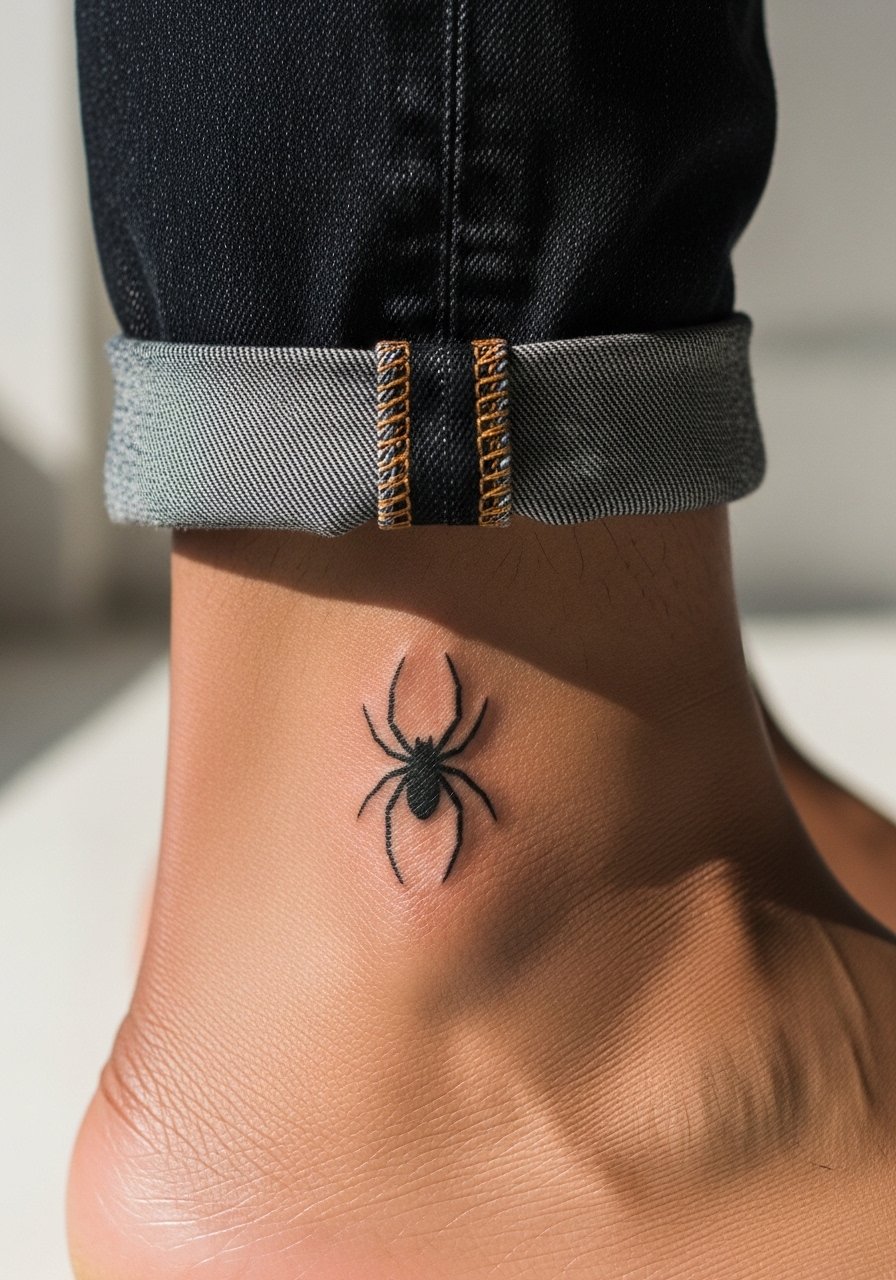
Ankle placements keep subtle pieces discreet and seasonal, which is why micro silhouettes are popular. Pain is low to moderate and most artists do this in a single short session. The usual mistake is requesting a spider smaller than one inch with overly delicate legs. Ask for a single bold outline and slight negative-space gaps to prevent early blurring. Healed at six months the silhouette will read crisp if the artist avoids tiny internal detail. For summer show-off looks pair it with strappy heeled sandals or cropped pants so the spider peeks out like a charm.
4. Fine Line Spider on the Ribcage
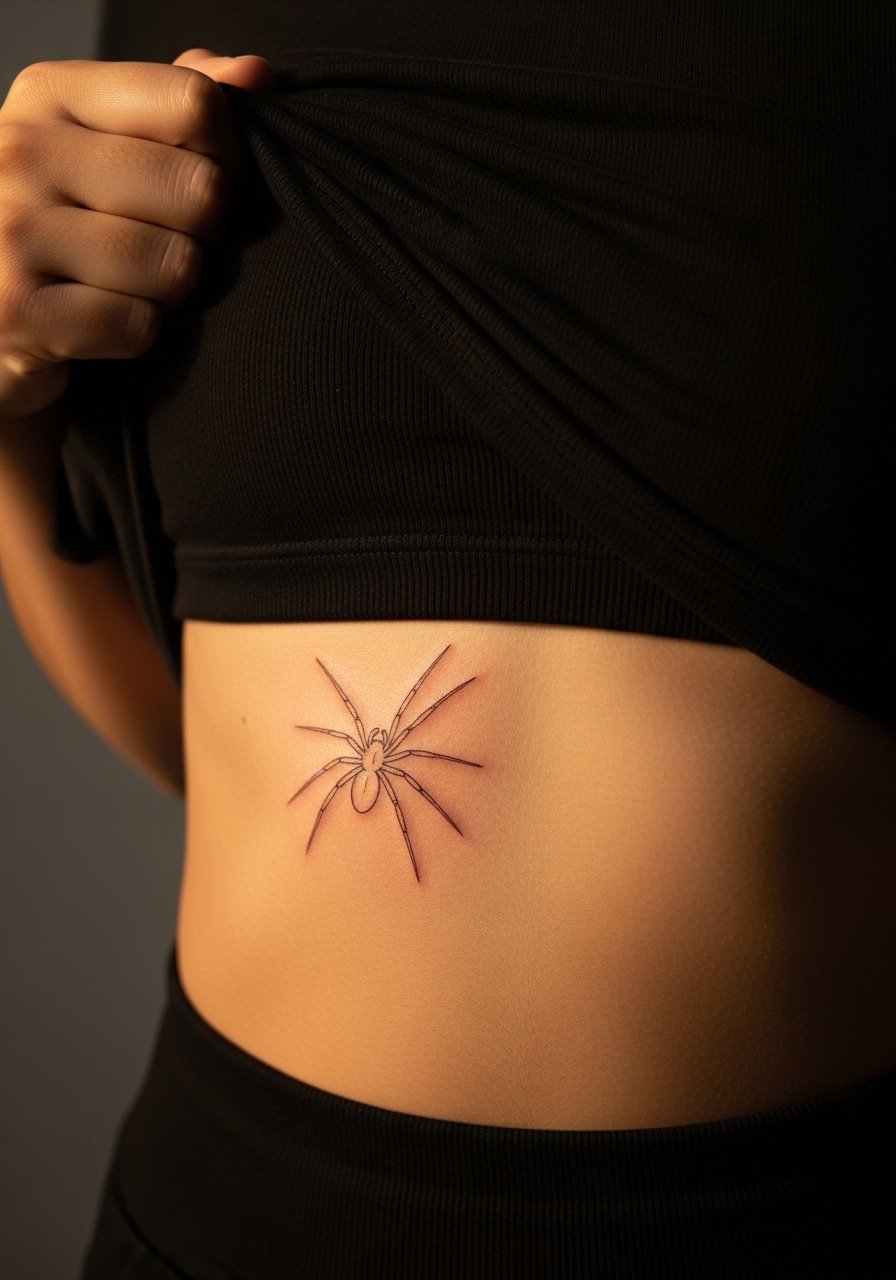
Fair warning, the ribcage is a higher pain zone and artists are split on fine line there. One camp says the skin stretch and movement blur thin lines within two years. The other camp argues that with correct needle depth and spacing fine line settles just fine. When you book, ask the artist which side of that debate they fall on and for healed examples on similar skin. I suggest slightly increasing scale and spacing so the body reads the piece at six months and at two years. Session time is longer because of pacing and breathing. Wear a loose cropped top on the day so the artist can lift or shift fabric without disturbance.
5. Traditional Spider Web on the Elbow
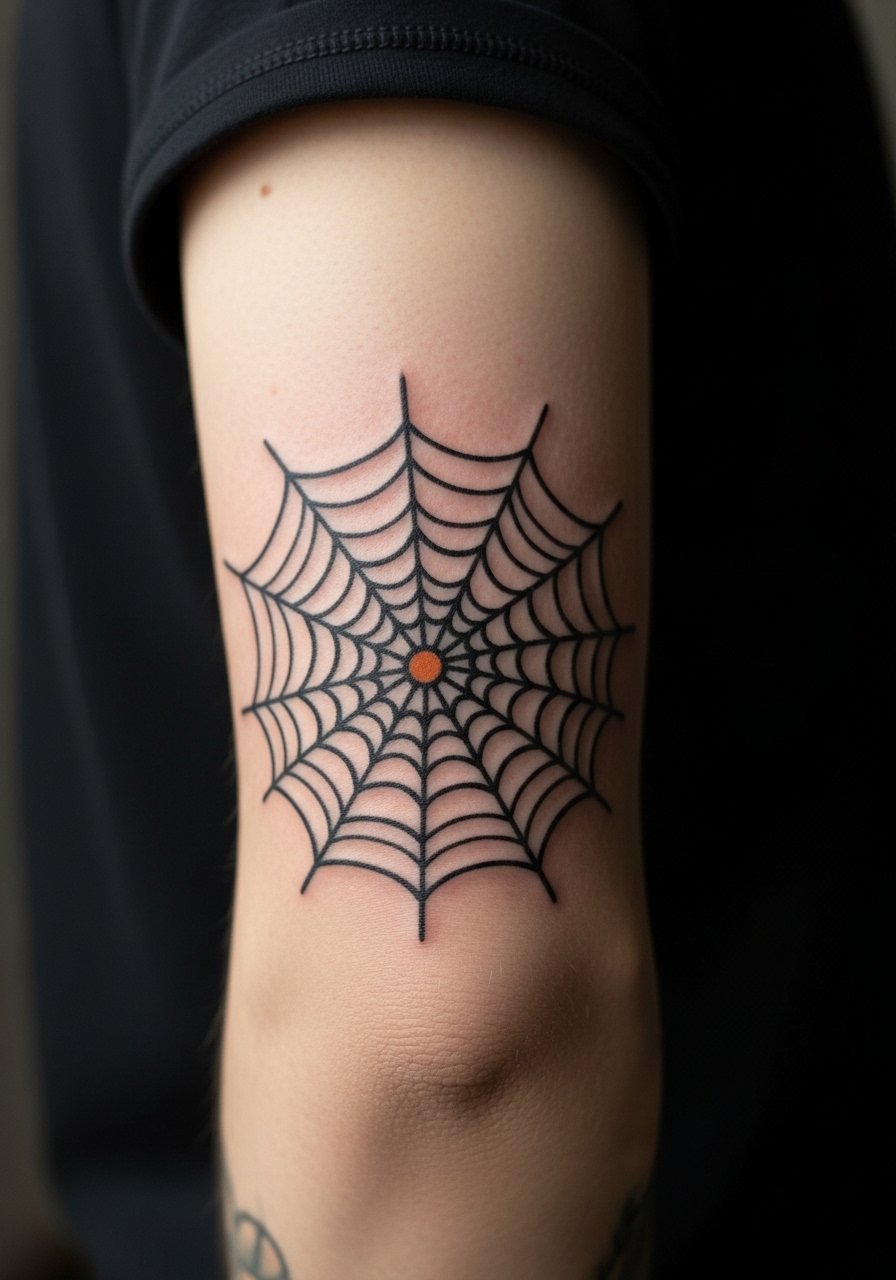
Elbow webs are classic and bold, but movement exaggerates distortion. Traditionalists like bold saturation because it ages into solid form, while some realists warn that tight web geometry will warp across the joint. If you want a durable elbow web, ask for thicker bridge lines and fewer concentric rings. The session typically takes one to two visits depending on saturation. One mistake is asking for ultra-dense concentric rings on a small elbow canvas. For wardrobe, a fitted tee with an elbow cutout or rolled leather jacket sleeves shows the web without constantly rubbing it.
6. Realistic Tarantula Portrait on the Upper Thigh
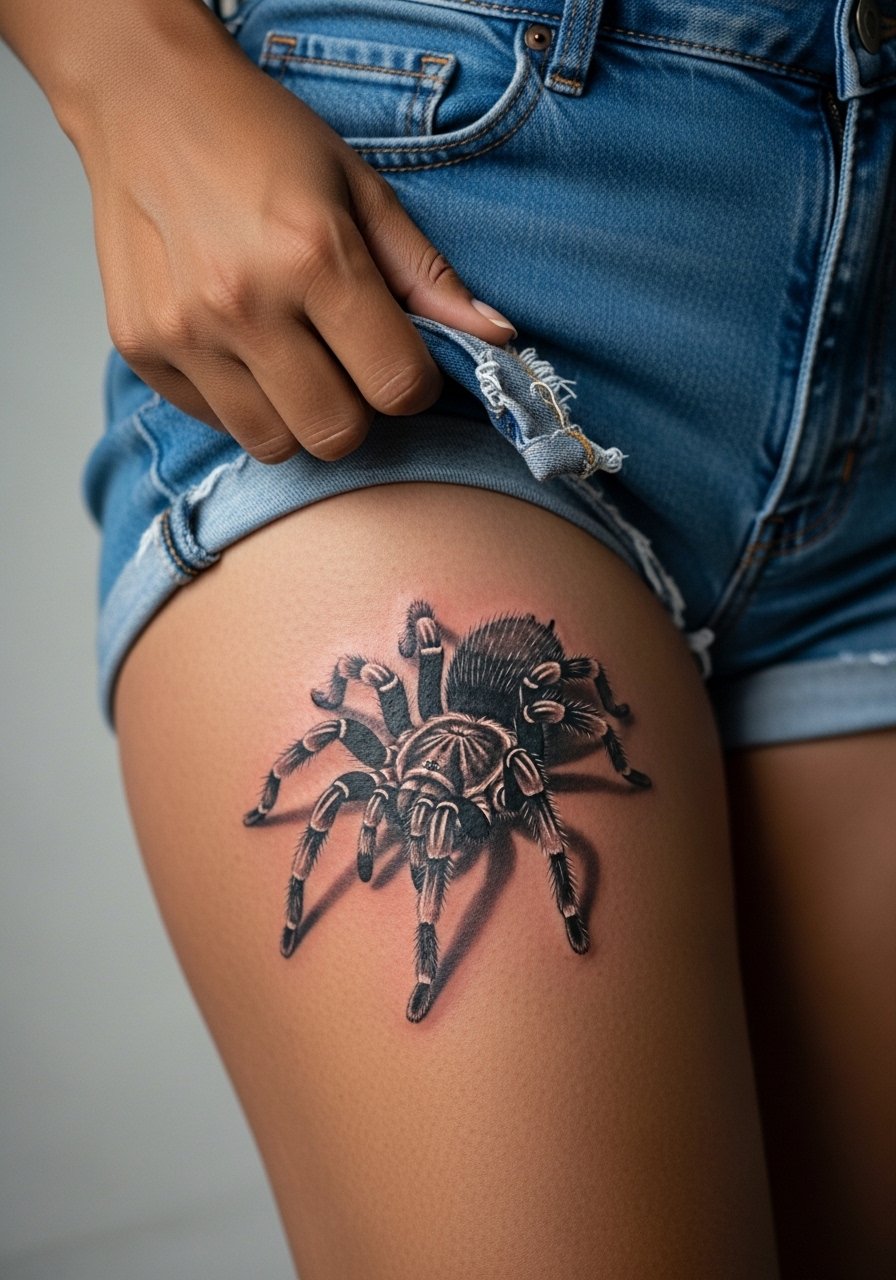
Big, textured tarantulas demand room. I recommend the thigh because the canvas allows 6 to 8 inches of detail and shading without distortion. Tell your artist you want micro-realism with subtle gray gradients and stipple on the legs for texture. Expect two to three sessions and a heavier session-time commitment. Common mistakes are compressing intricate legs into too small a piece and skipping a sit-down to review healed progress. This style holds well at year five when done large, but plan for a touch-up after intense sun exposure. For show-off looks pick high-slit skirts or denim cutoffs and try a high slit skirt that frames the thigh art.
Studio Day Picks
The small wrist, elbow, and thigh pieces above each ask for slightly different prep, so a short kit smooths the session and the first week.
- Stencil transfer paper kit. Lets you preview the line placement on skin, especially useful for wrist and forearm references to avoid surprises during the stencil stage.
- Topical numbing cream. Applied thirty to forty five minutes before a sensitive thigh or rib session can reduce initial sting without altering linework.
- Thin protective film roll. Covers ankles and wrists during the first 24 hours and cuts down on rubbing from clothes and shoes.
- Fragrance-free gentle body wash. Cleans healing areas without stripping pigment from fine line work on forearms and ribs.
- Aquaphor healing ointment. A thin layer helps lock moisture in during the initial healing window, useful for delicate silhouettes and dense tarantula shading.
7. Cute Cartoon Spider on the Shoulder
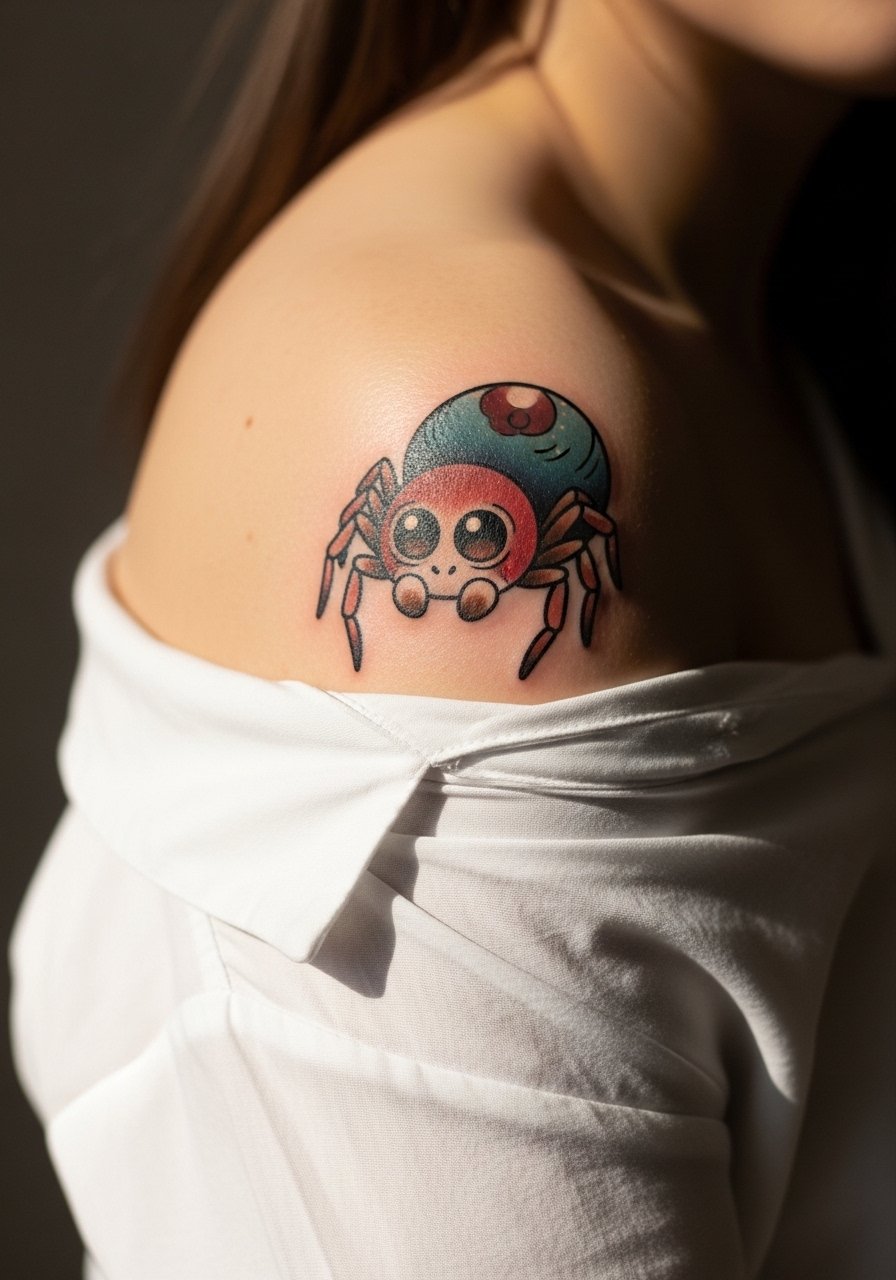
Cartoon spiders soften the species into playful lines and color accents. Shoulder placement is low pain and shows well with off-shoulder tops. Ask your artist for a bold outline and small color pops in the eyes or abdomen so the piece reads as graphic from a distance. A common error is asking for tiny dots of color that fade into gray; ask for saturated color blocks instead. Healed at two years the outline should remain solid if the pigment was saturated properly. Bring an off-shoulder blouse to session day so the artist can reach the area easily and you can visualize the finished look.
8. Geometric Tarantula Abstraction on the Side Thigh
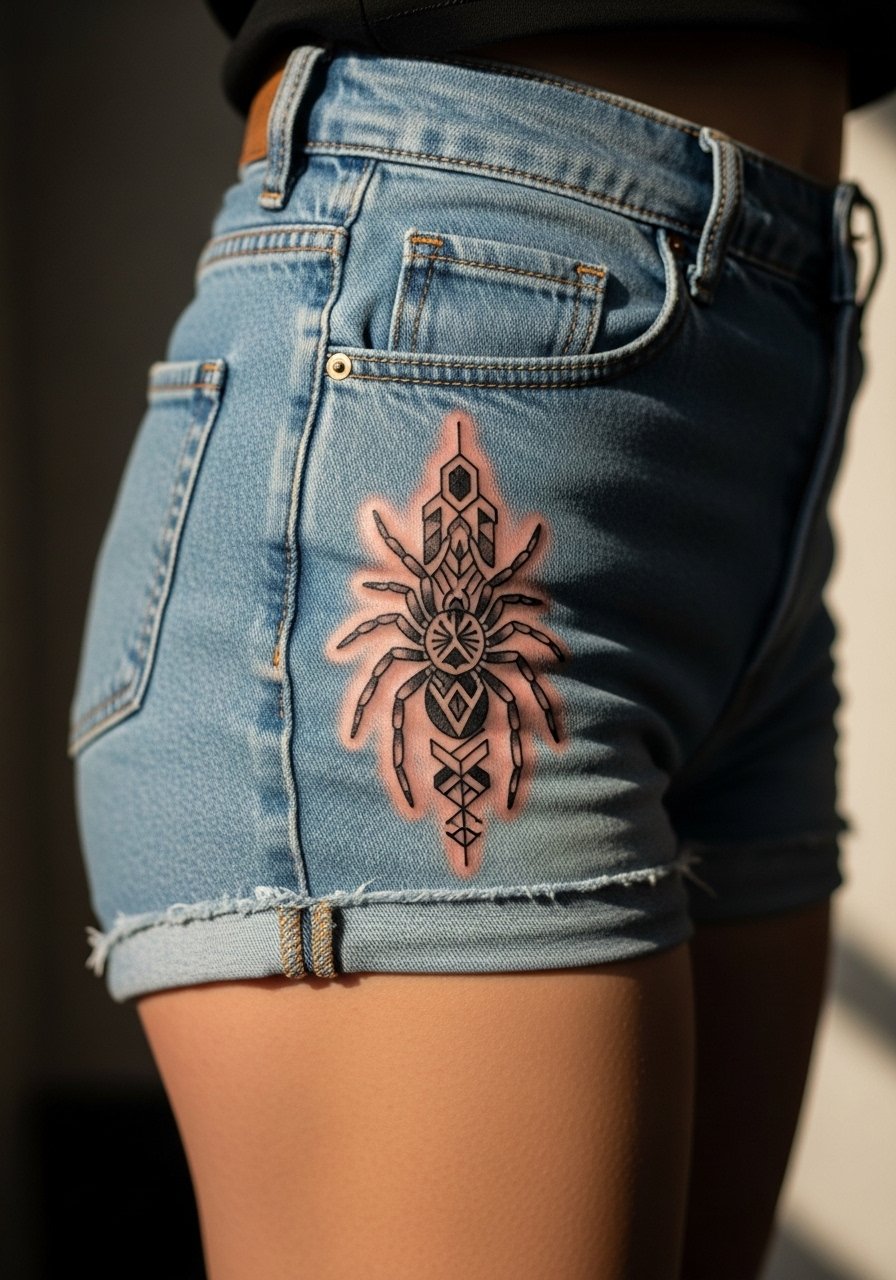
Geometric blackwork converts tarantula silhouette into angular forms that age well because bold fills resist blur. This side-thigh piece needs room, so plan for a 6+ inch layout across one to two sessions. Tell the artist you want negative-space legs and large solid shapes rather than tiny polygons. A frequent mistake is cramming intricate geometry into a small patch, which loses contrast quickly. Expect lower risk of blowout on the thigh compared with hands. For nights out, a pair of denim cutoff shorts or thigh-high boots frames the work without covering the artwork.
9. Symmetrical Web with Small Spider on the Back of the Hand
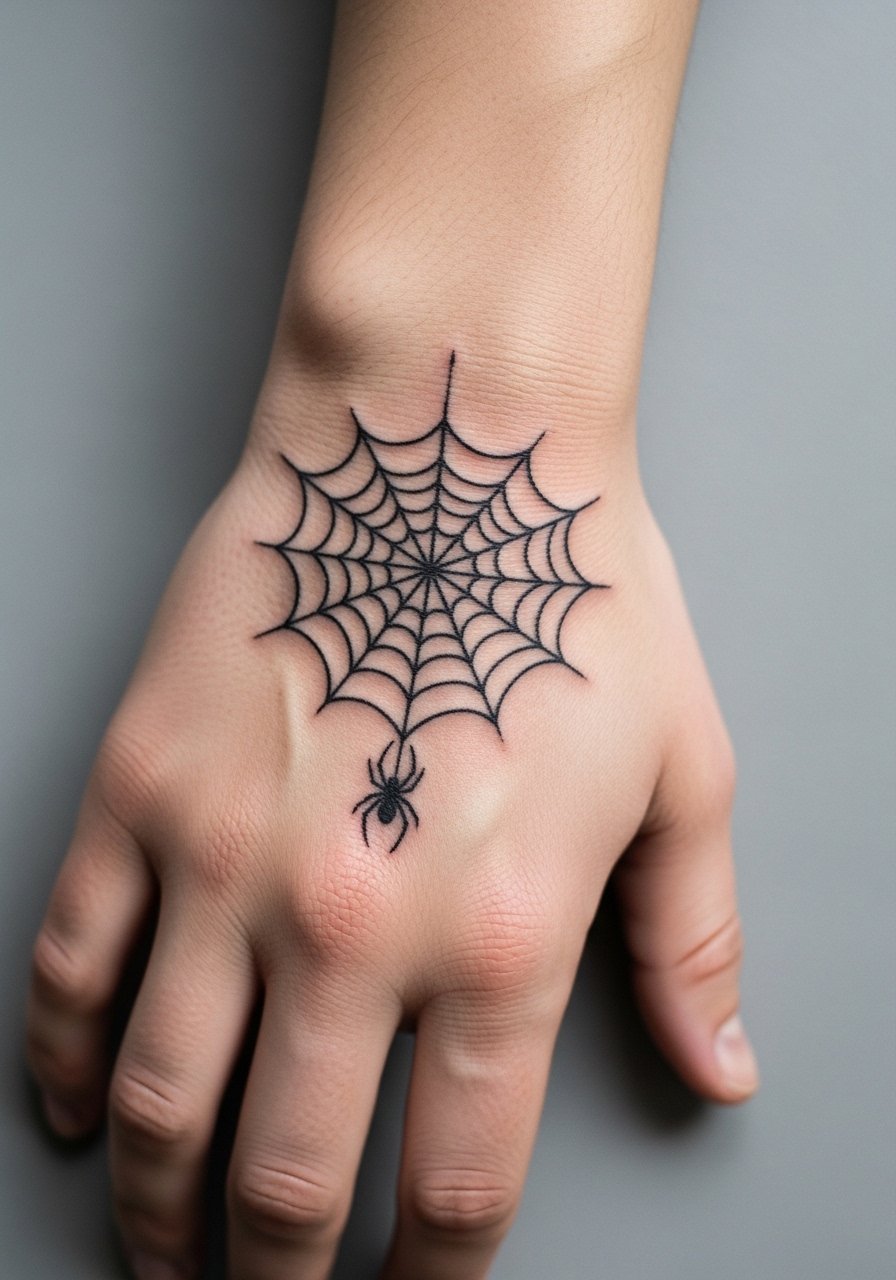
Hand tattoos are high-visibility and high-friction, so fine detail can soften fast. If you still want a hand web, ask for simplified geometry and slightly thicker bridge lines so the pattern remains legible after frequent washing. The back of the hand needs honest talk about career considerations in some fields. Session time is brief but expect a touch-up in 12 to 18 months if you use your hands a lot. A common mistake is asking for micro-dot shading across the knuckles. Instead, request negative-space highlights and bold bridges to keep the web readable. Keep the overall diameter moderate so the spider remains a subtle accent.
10. Fine Line Spider Cluster Along the Collarbone
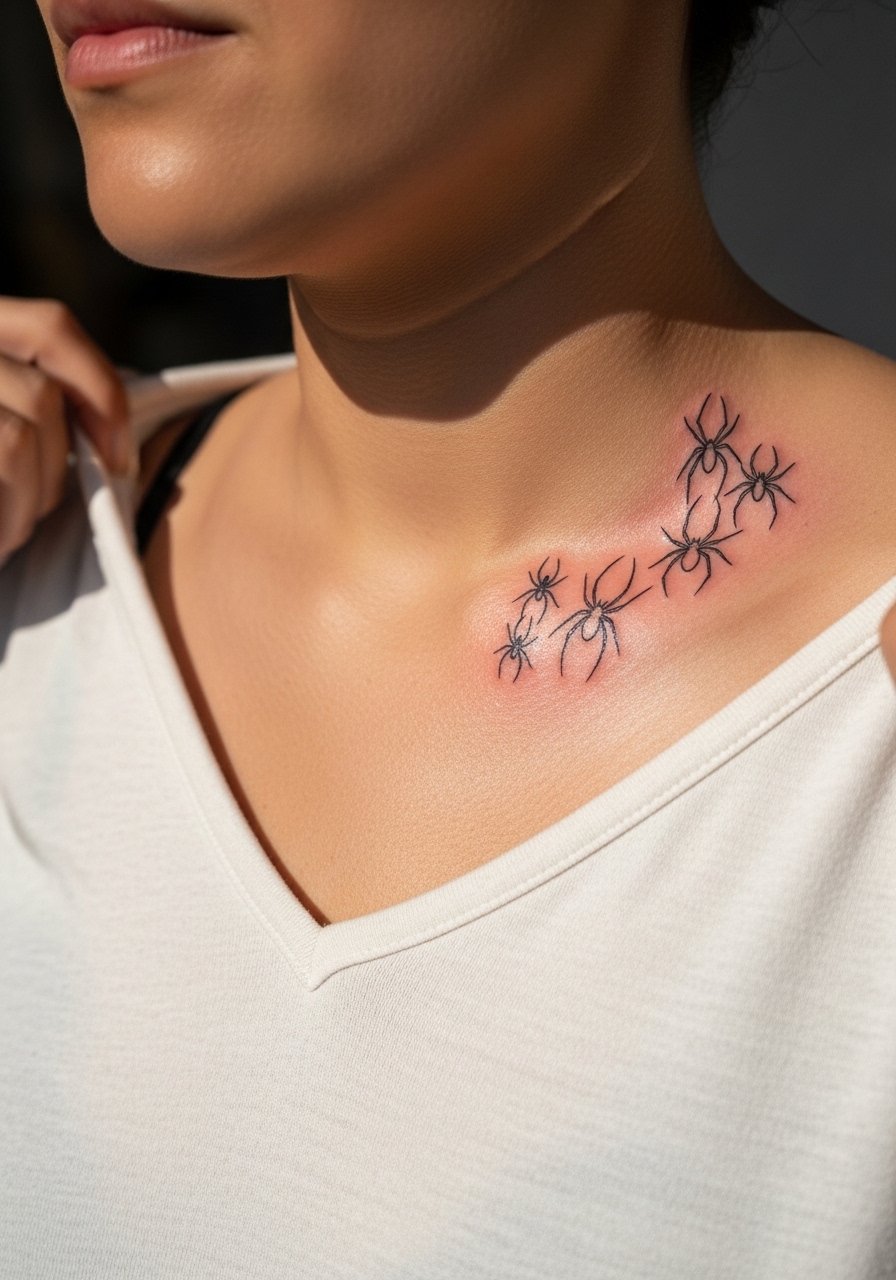
The collarbone reads elegantly with small clusters of spiders and silken strands. Pain is mild to moderate and usually a single session if the cluster remains micro. Tell the artist to stagger sizes and avoid identical legs that create visual congestion. The main mistake is placing too many tiny spiders side by side. At six months the cluster should retain definition, but expect lightening if you sunbathe that area often. For showing it off choose a v-neck silk blouse or a choker to frame the space without competing with the linework.
11. Stipple-Shaded Orb Weaver on the Inner Bicep
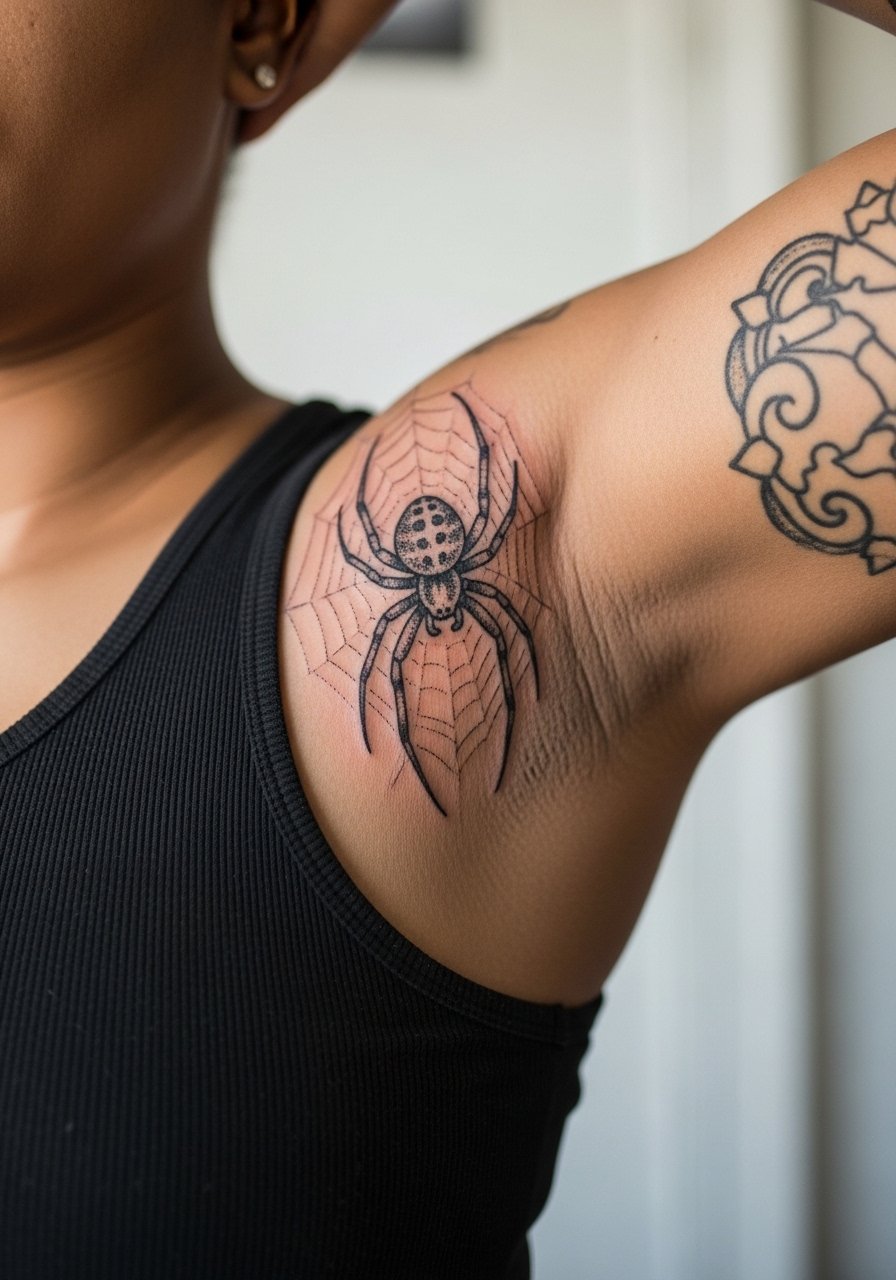
Inner bicep placements give privacy and longevity for dot-work shading. If you want texture, request stipple shading and whisper-thin legs that step back from the edges. The bicep is a moderate pain area and takes well to dot work when the artist spaces the stippling carefully. A typical mistake is requesting dense stipple right to the edge, which can look muddy once healed. Expect a durable result at two years if the stipple spacing is wide enough. Wear a loose tank top for the session so the artist can access the area cleanly.
12. Tiny Realistic Black Widow Behind the Ear (Neck Framing)
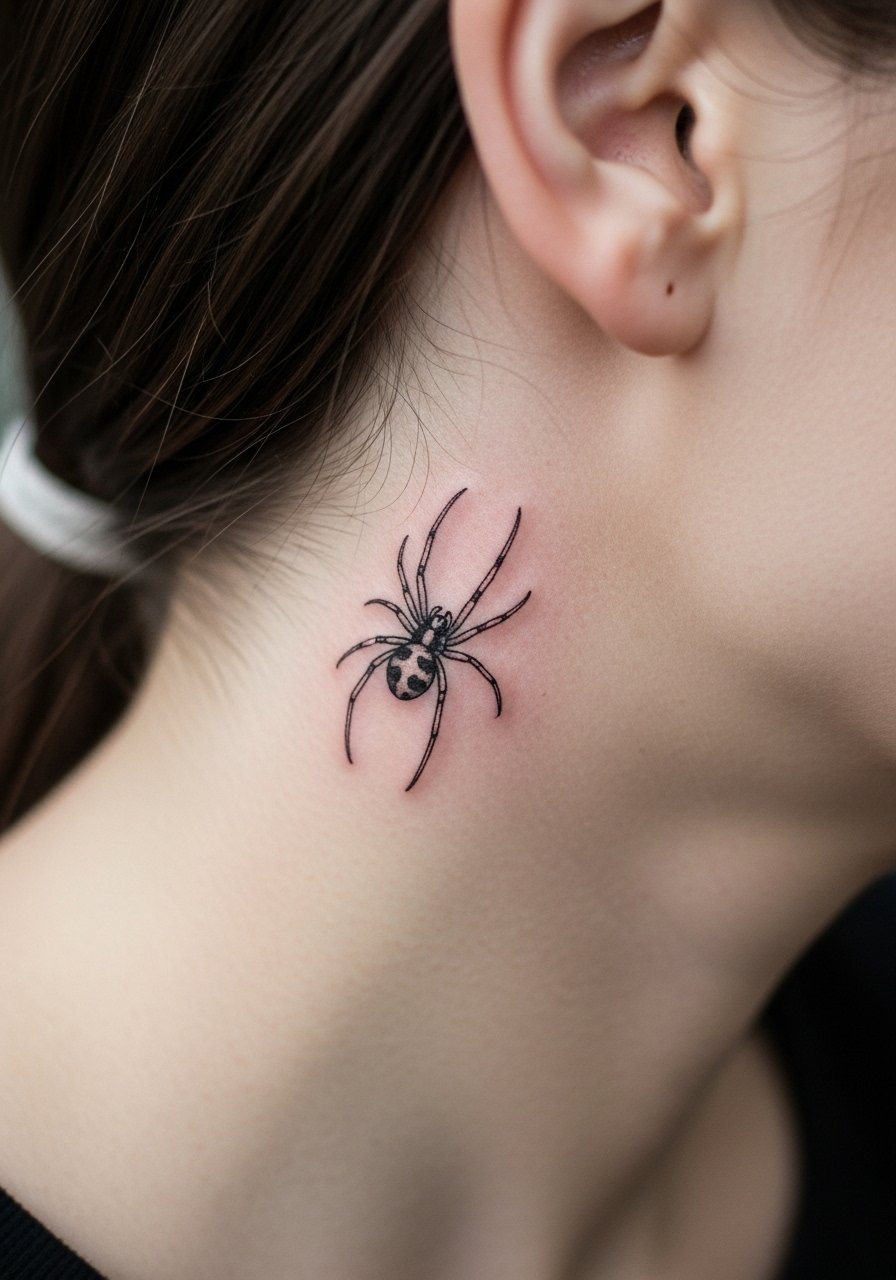
Behind-the-ear pieces require careful placement and clothing control during the session. This tiny realistic black widow works when the body of the spider is simplified and shading is minimal so the form remains clear. Mention that you want the hairline to partially frame the piece and ask for healed examples on similar placements. Pain is low but the area is sensitive to rubbing from collars and hair. A common mistake is wanting high realism in a space too small for shading nuances. Keep the scale micro and plan for a touch-up if details soften after a year.
13. Scripted Spider with Date on the Side of the Rib
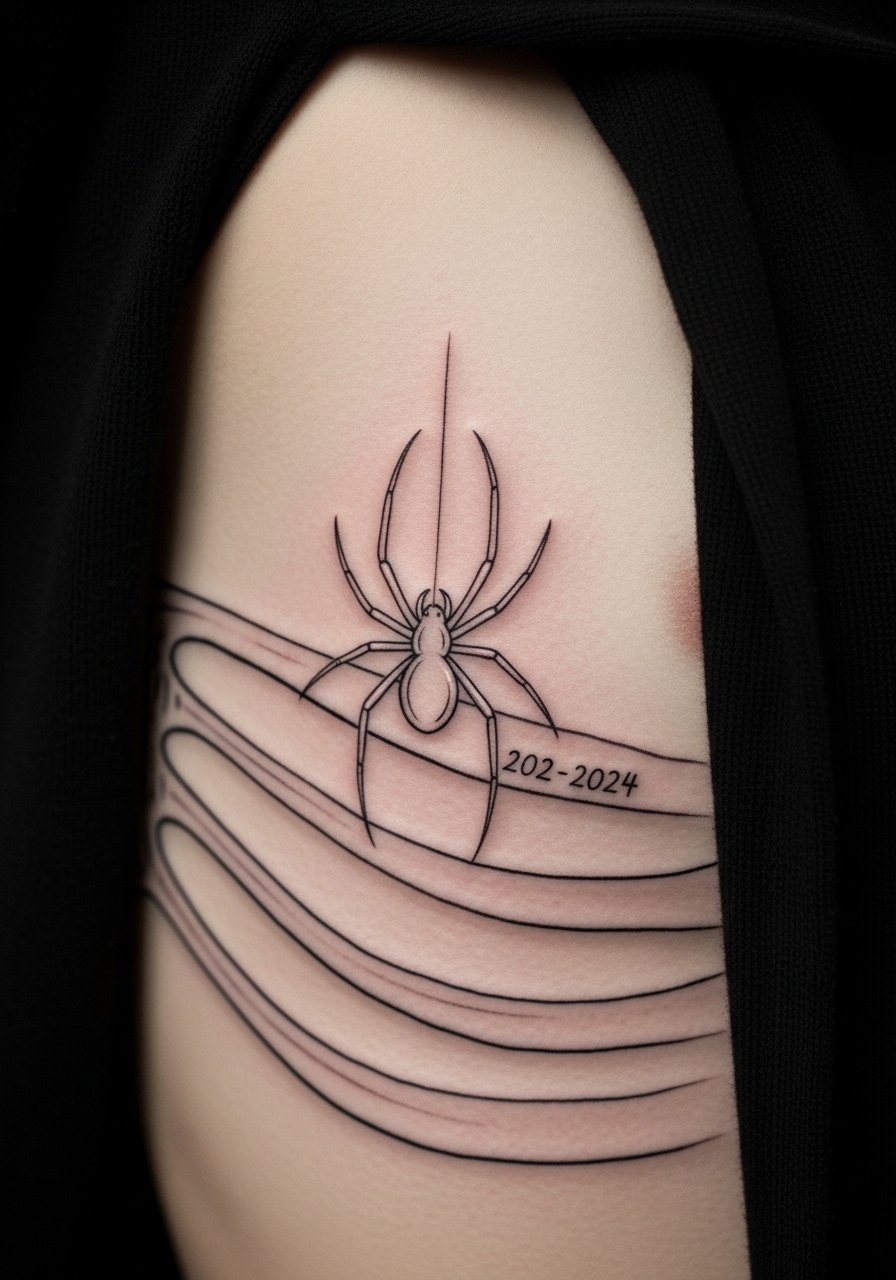
Combining small script with a spider on the ribs asks for careful spacing to avoid letter blurring. Ribs are higher on the pain scale and lines can feather if the artist goes too shallow. Tell the artist to place the text at least one centimeter from the spider so each element heals independently. The usual mistake is requesting tiny cursive that sits too close to stippling. Expect the script to need a touch-up sooner than the silhouette if you keep it very fine. Wear a loose cropped top to the appointment so the artist can shift fabric without stretching the area.
14. Geometric Web Across the Knee
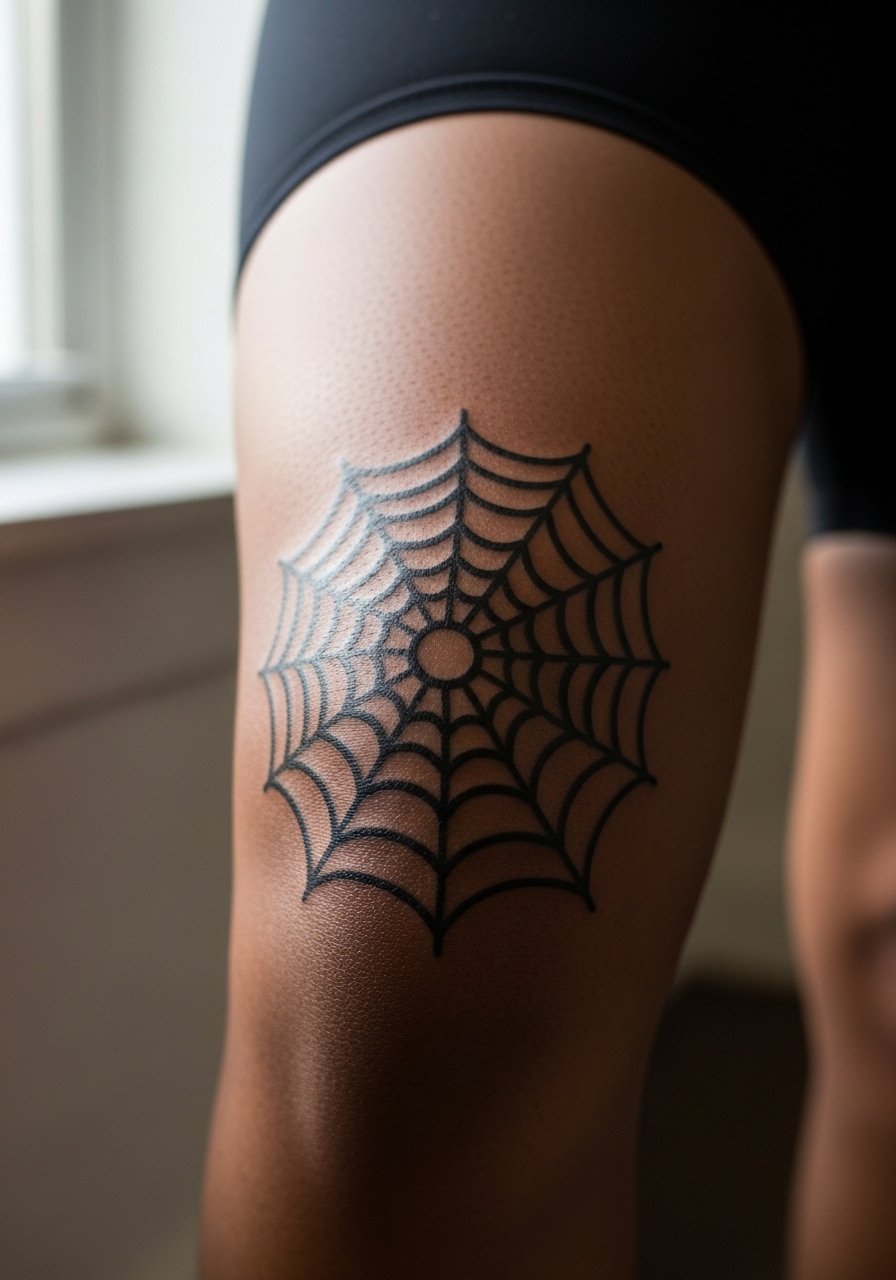
Knee webs make a bold visible statement and require bold lines to stay crisp as the joint moves. The debate is clear: some artists prefer wide spacing and thick bridges for joints, while others try dense geometry that can warp. Ask for structural spacing and fewer radial threads. The session may need two passes for saturation across the kneecap. A mistake is expecting dense ornamental detail to remain sharp over the knee. For wearability, pair the piece with fitted tees or cutout sleeve tops on cool days to keep the area breathable.
15. Negative Space Spider for Darker Skin Tones on the Upper Arm
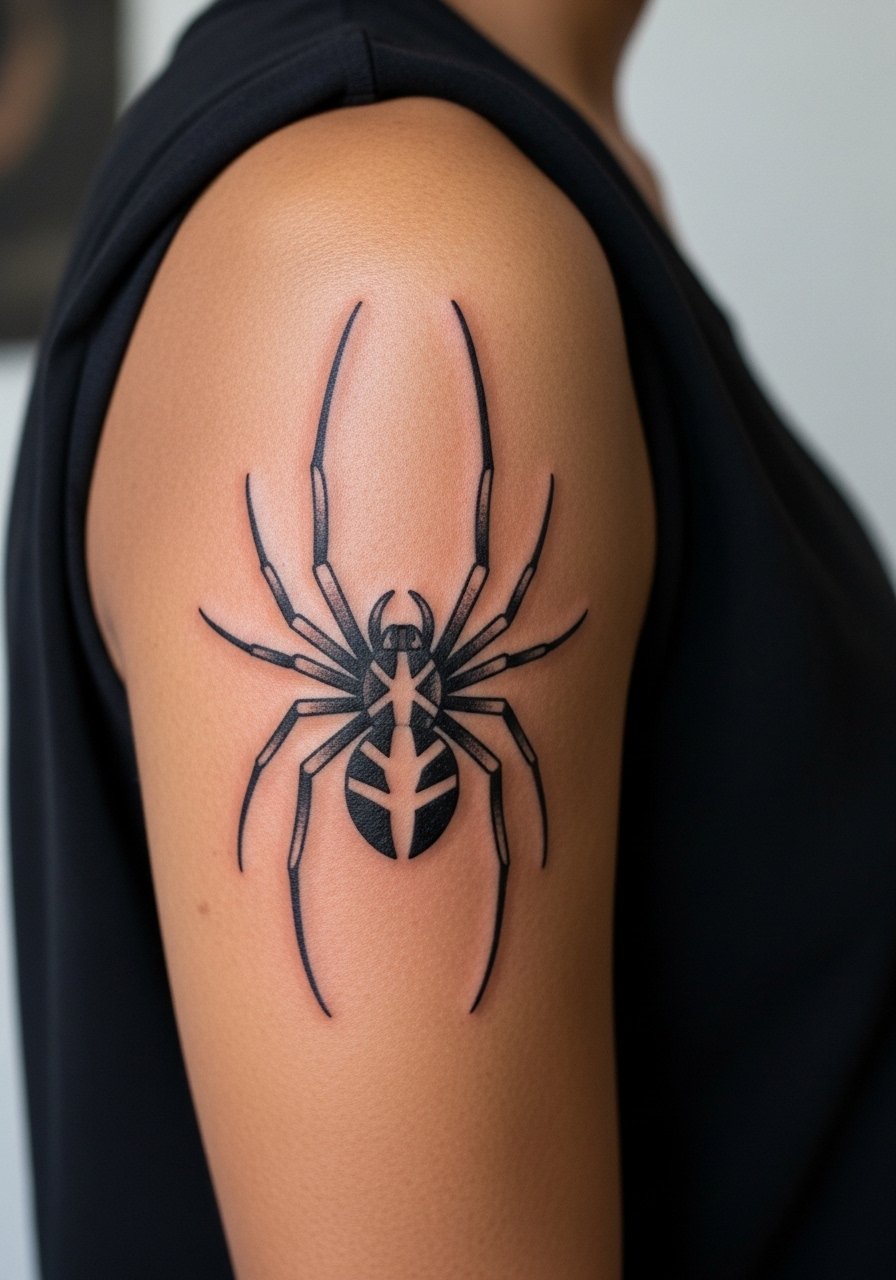
On deeper skin tones, negative space and strong silhouettes maintain contrast better than tiny linework. Tell your artist you prefer bold black fills with skin-tone highlights rather than thin internal lines that can vanish. The upper arm is moderate pain and usually a single to two-session job depending on saturation. A frequent mistake is copying tiny fine-line examples meant for lighter skin. Expect a dense blackwork approach to look solid at two to five years without losing its form. For showing it off consider sleeveless tops or a sleeveless tank that keeps focus on the upper arm.
16. Micro-Realism Spider Eye Closeup on the Inner Wrist
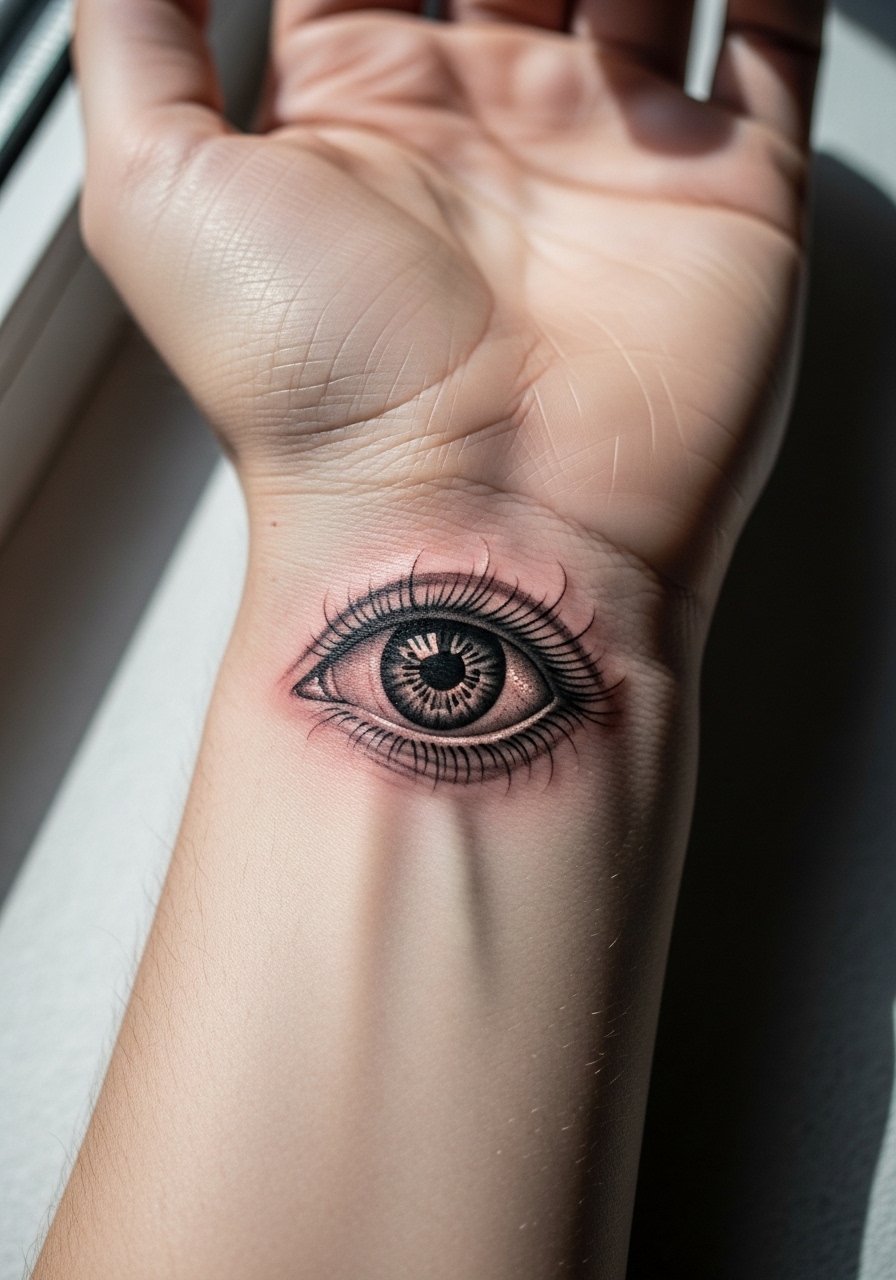
Micro-realism demands tight control and careful aftercare. A tiny spider eye can look hauntingly detailed when the artist balances dot shading and a single catchlight. For this spot, ask for a reference showing healed micro work and expect a 45 to 90 minute session. The main risk is overworking the area which causes swelling and ink migration. If you handle frequent hand washing, plan for a touch-up within a year. Pair the piece with a minimalist accessory like a thin chain pendant that keeps attention close to the wrist without crowding the detail.
17. Ornamental Spider with Filigree on the Sternum
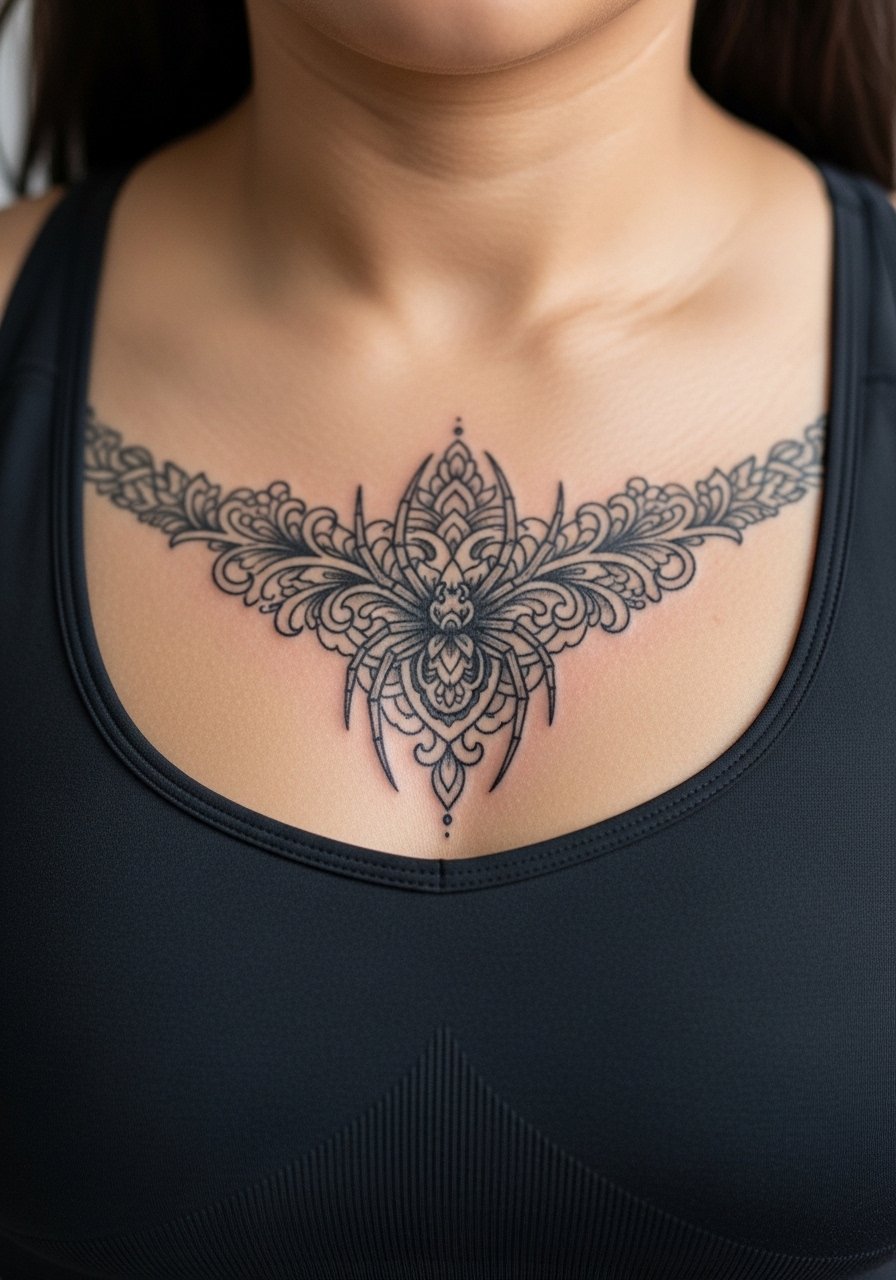
Sternum pieces require a careful scale so the filigree breathes and does not compact into a shaded gray. This is a moderate to high pain area and benefits from staged sessions. Tell the artist you want open negative spaces in the filigree and to avoid tight dot fills near the bones. A common mistake is requesting dense ornament that loses separation once healed. For session wear bring a fitted sports bra or bandeau so the artist can access the sternum without full exposure. Expect to revisit small touch-ups after seasonal sun exposure.
18. Linework Spider Ankle Band Around the Lower Leg
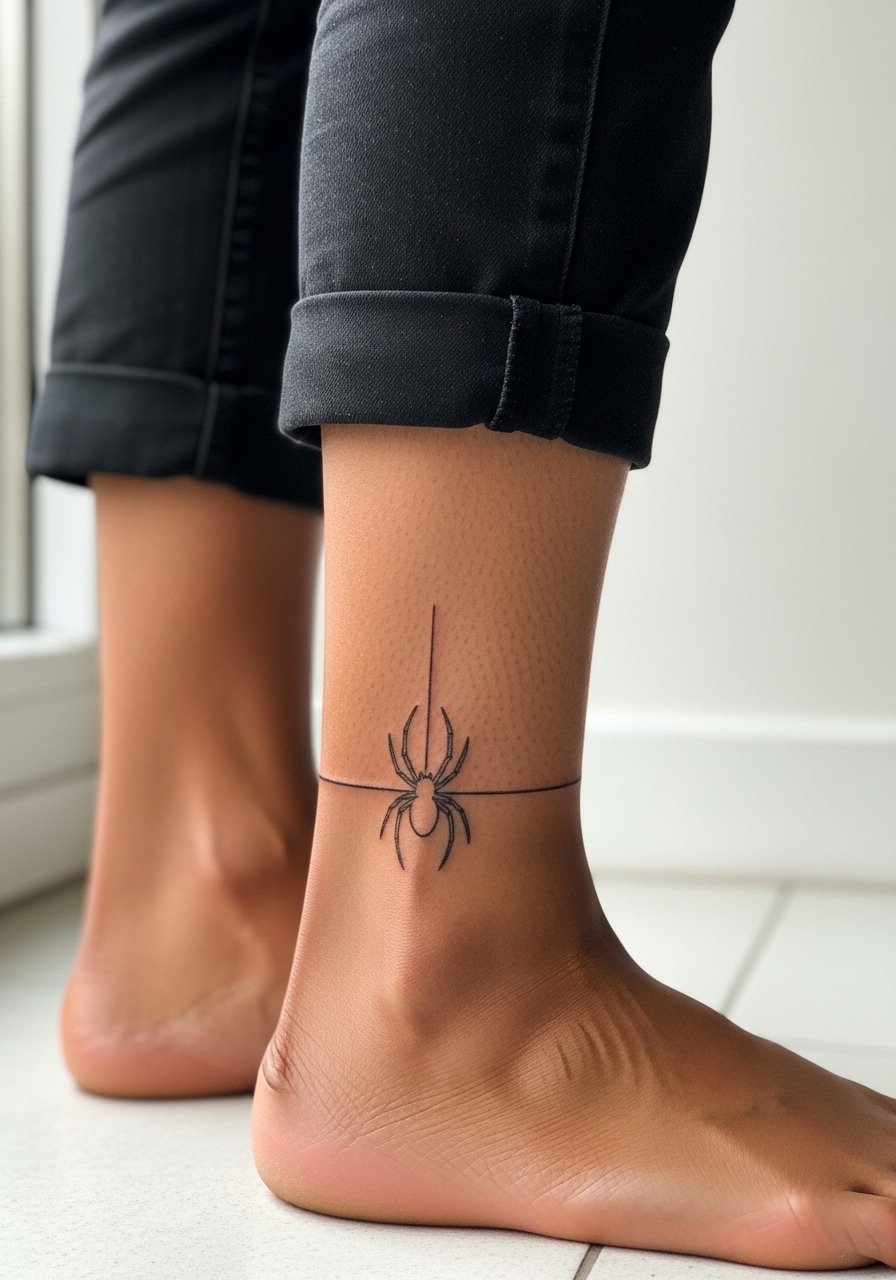
Ankle bands that incorporate tiny spiders act like permanent anklets but need bold enough lines to survive shoe friction. The ankle can be fussy with scabbing due to shoe contact. Ask for slightly bolder line weight and strategic placement away from high-friction shoe seams. The mistake artists often see is attempting ultra-thin chains too close to the shoe line. Expect a touch-up within a year if you wear close-fitting footwear daily. For summer wears pair with cropped ankle pants or sandals so the band shows cleanly.
19. Small Blackwork Spider on the Calf
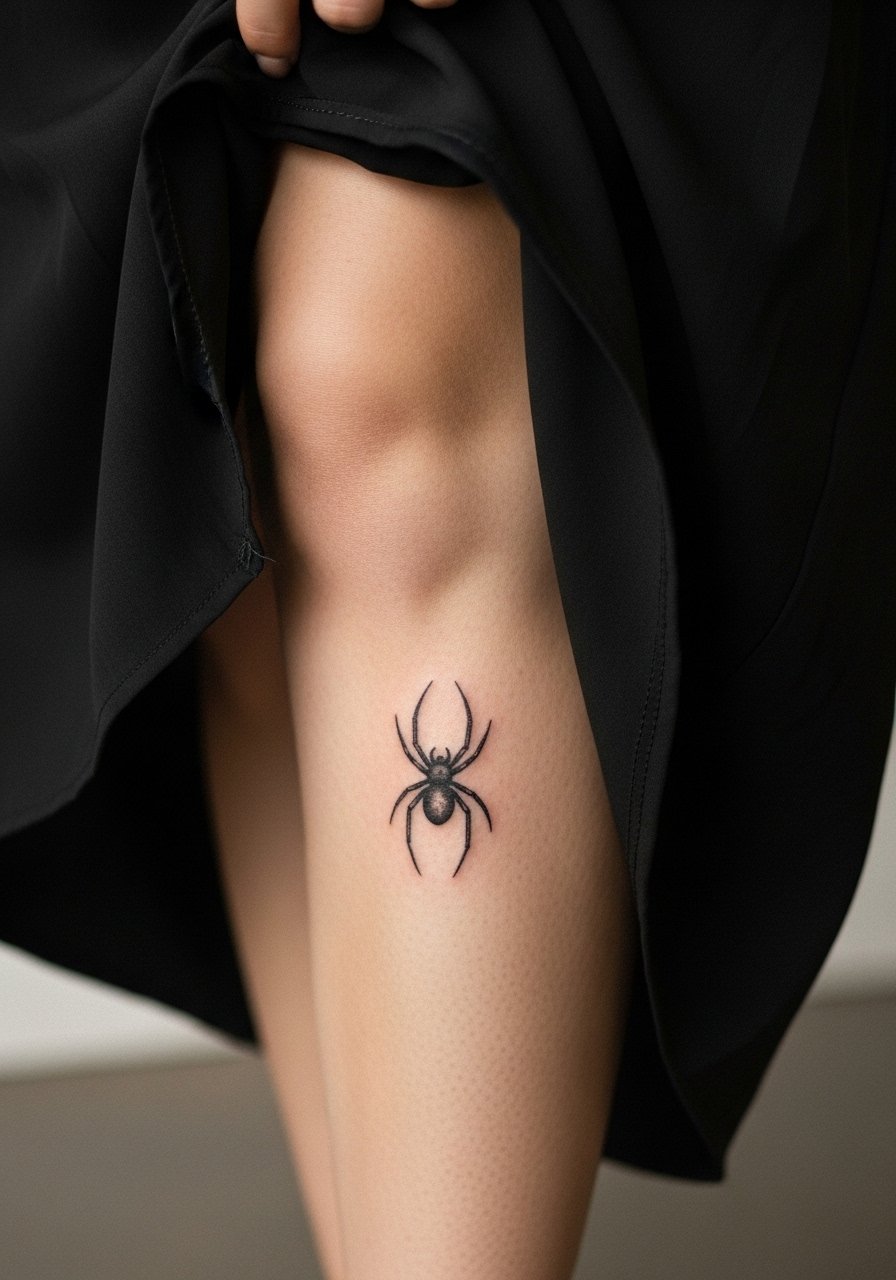
Calf placements are forgiving and ideal for compact blackwork. Opt for a solid silhouette or a bit of stipple on the abdomen rather than delicate legs that blur. Tell the artist you want dense black saturation and clean edges for contrast. The calf is low to moderate pain and often completed in one session. A mistake is placing the spider too close to the back of the knee where movement changes the visual flow. For showing it off choose short skirts or lifted hems that reveal the calf in motion.
20. Tiny Web Behind the Knee Edge
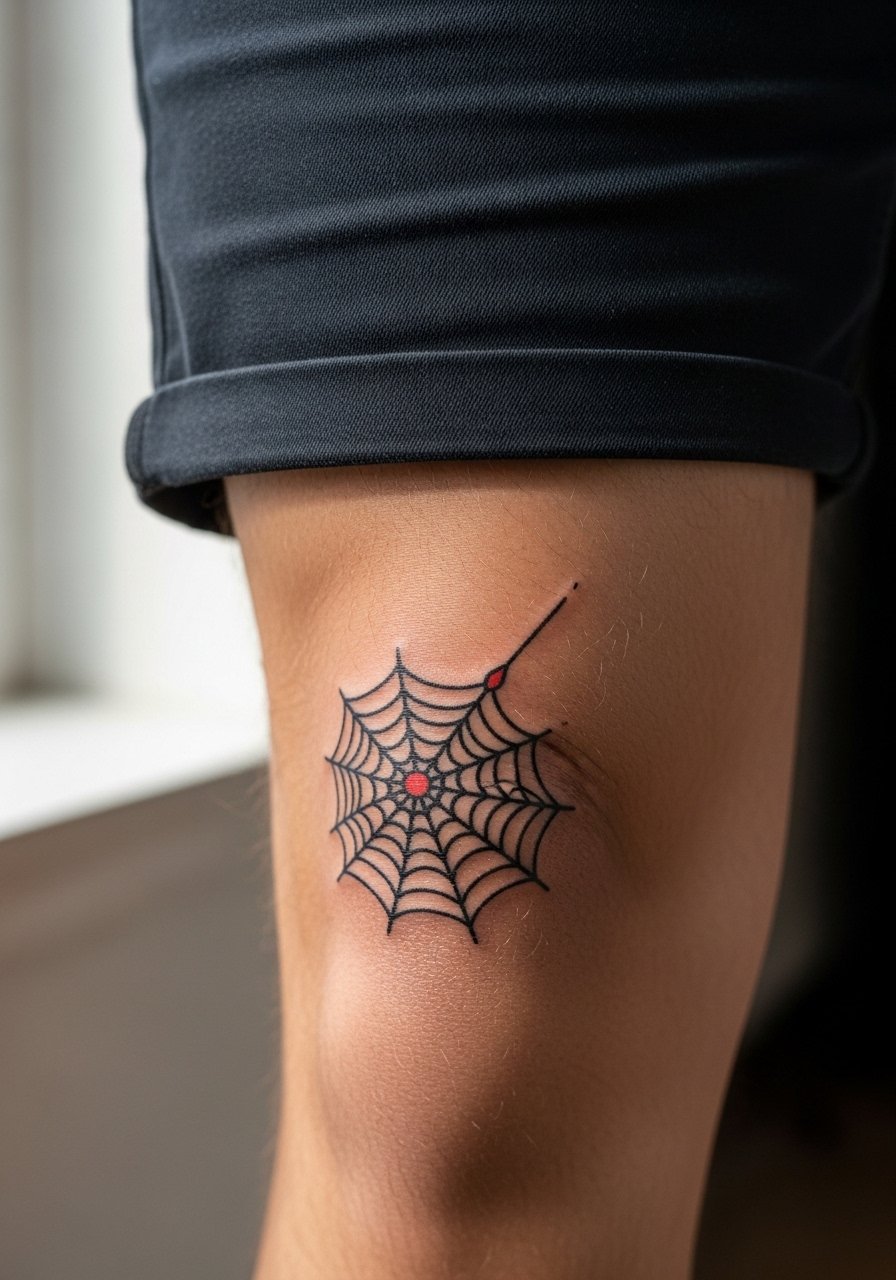
Behind the knee is a tricky moving surface because flexing changes line relationships. If you want a web there, ask for fewer radial threads and thicker anchors. Artists often advise against very dense patterns in this spot. Pain can spike when the needle nears the joint. The usual mistake is trying to pack too much detail on the crease. Plan for a touch-up if you use that area heavily for workouts or sitting. For wear choose looser fabrics post-session to reduce friction and swelling.
21. Tiny Spider on the Side of the Finger
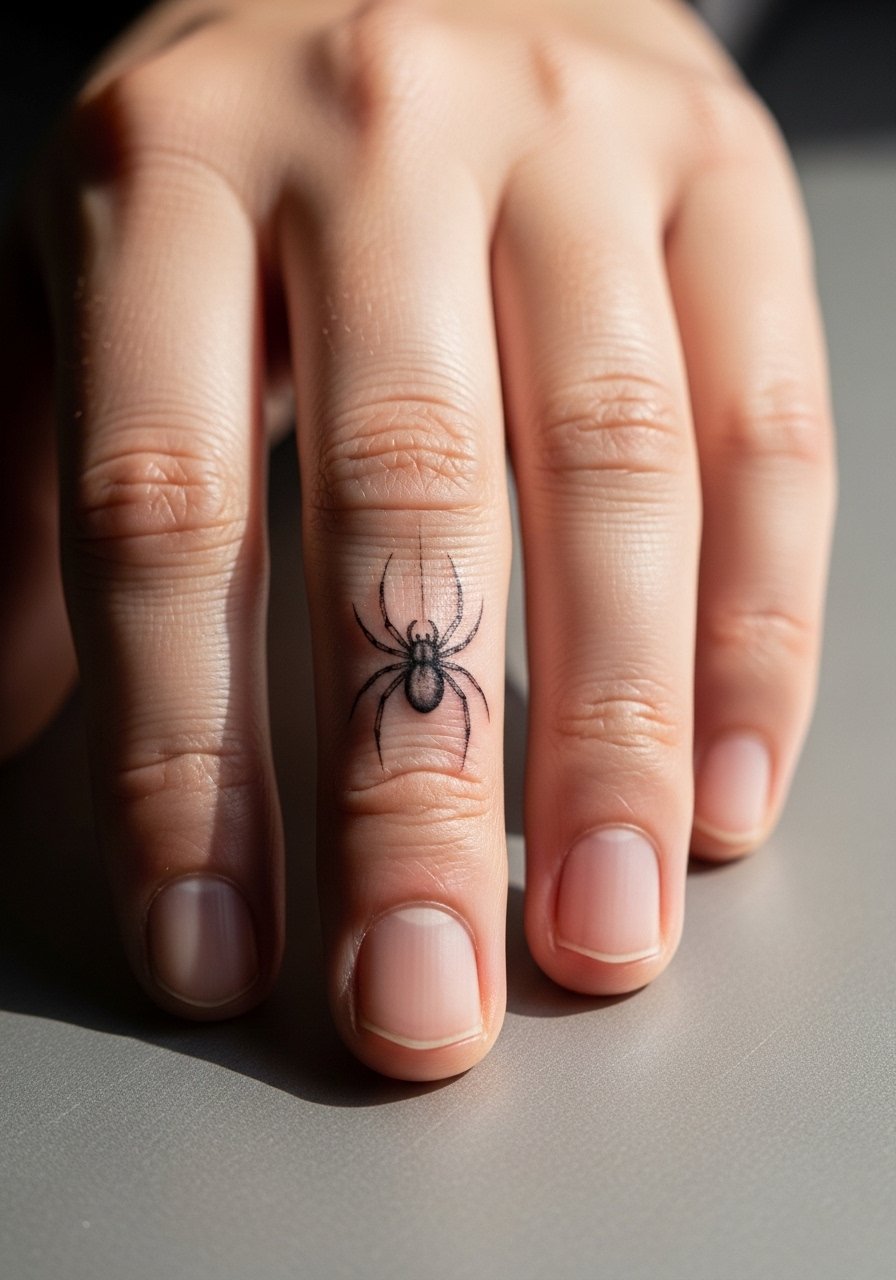
Finger tattoos are subject to heavy abrasion and can fade fast, so if you want a side-of-finger spider go for bold single-line silhouettes and accept that touch-ups are part of ownership. Tell your artist you prefer a simplified shape with no internal detail. The pain is high for such a small area, and sessions are short. A common mistake is expecting tiny legs to hold; they usually blur into indistinct marks. Think of this as semi-permanent in practice and book for a touch-up at the one-year mark if needed.
22. Clustered Mini Spiders Along the Spine
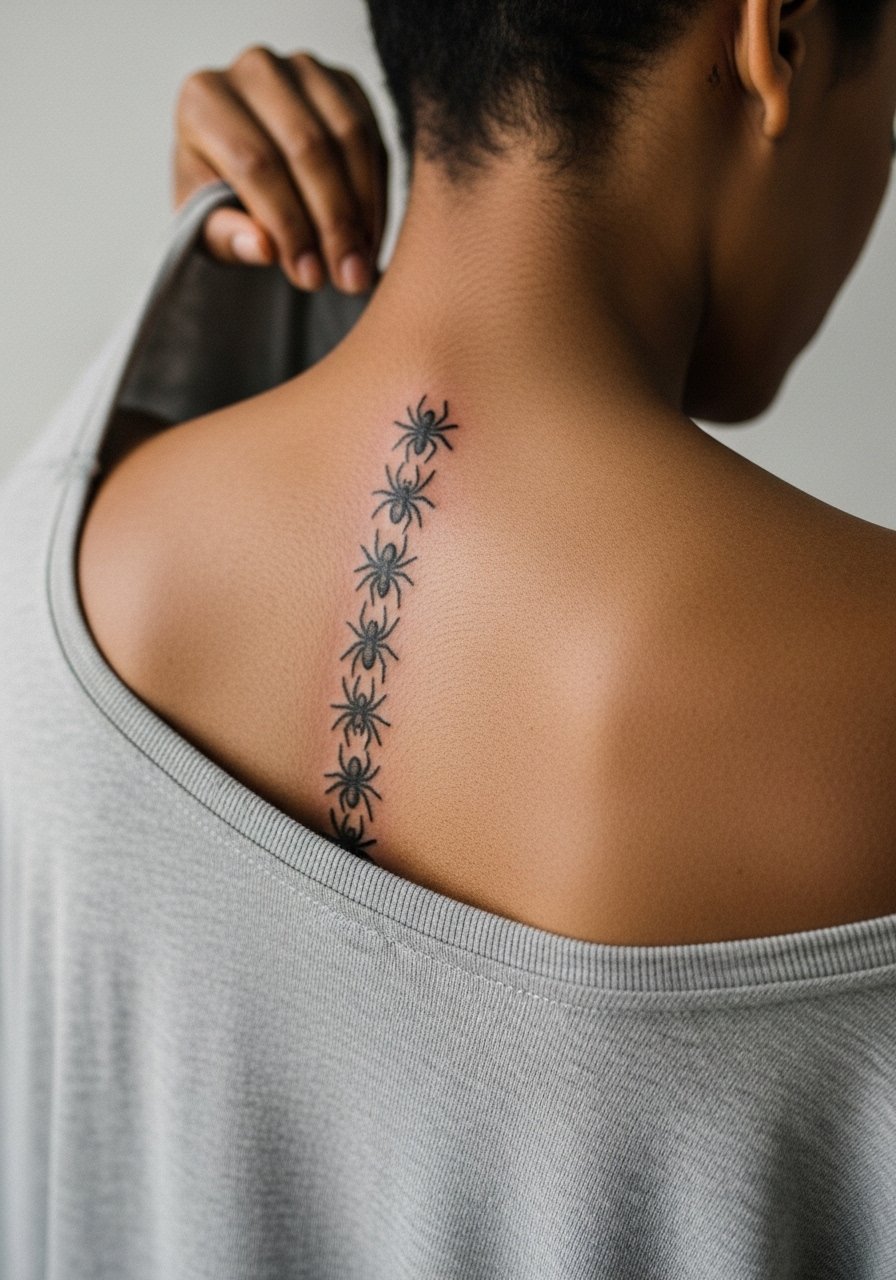
Spine placements read vertically and look great as small repeating motifs. For longevity, space the spiders so each has breathing room and avoid tiny interlocking legs. The spine can be a sensitive spot and may require pacing breaks during a session. A mistake is lining them up too densely, which turns into blur across the column. Expect the work to age evenly if spacing is deliberate. For showing off, an open-back dress or a wide-neck top frames the vertical flow without competing.
23. Water-Resistant Black Widow Outline at the Ankle Bone
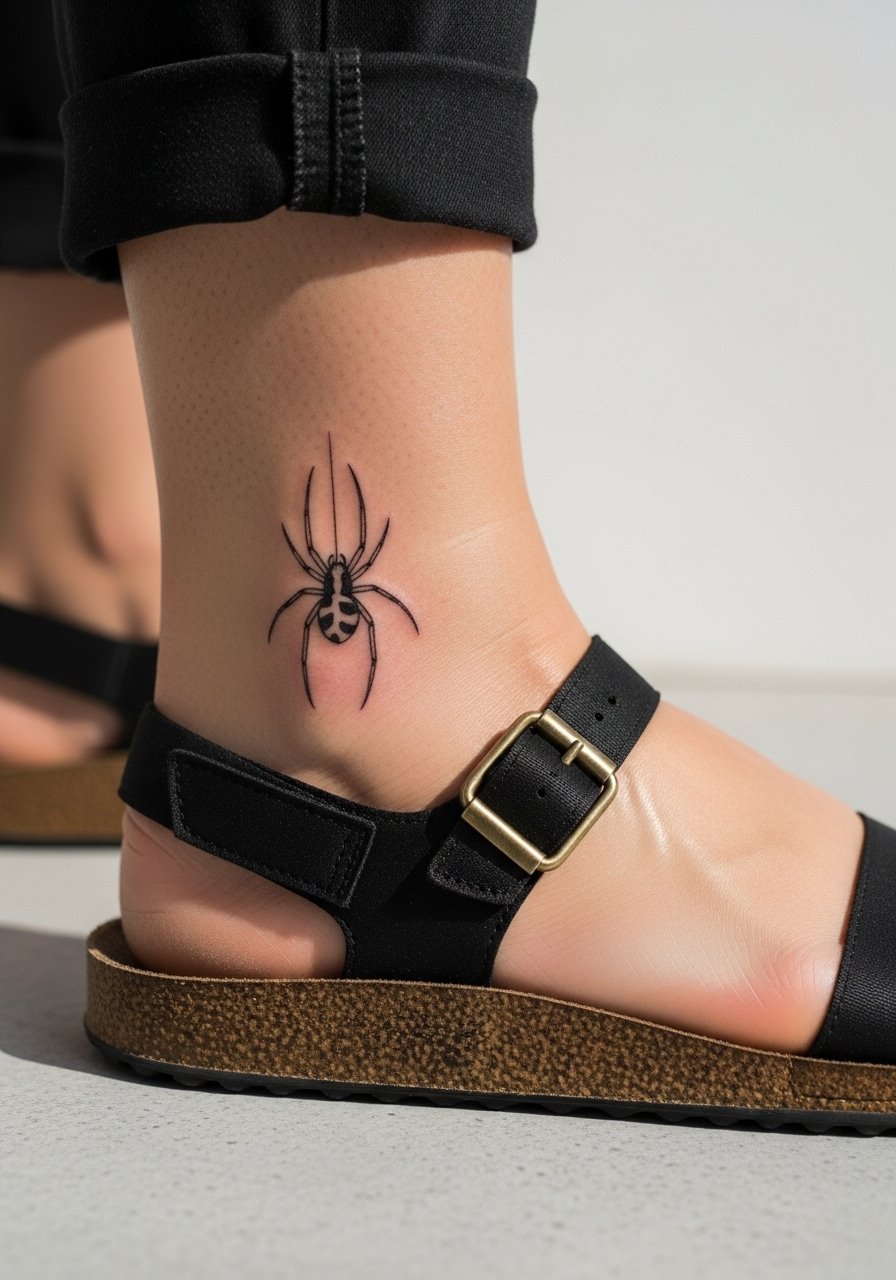
If you want a black widow near the ankle bone, protect it from shoe straps during healing and pick slightly bolder lines so beach sand and socks do not erode the edges. Tell the artist you want a single-pass bold outline that avoids tiny leg splits. The ankle bone is moderately sensitive and benefits from a short single session. Common errors include placing it directly under a strap. After six months the outline should still read clean if the piece had proper aftercare, and avoid tight shoes during early healing.
24. Tiny Geometric Spider on the Collar of a Jacket (Hidden Collar Placement)
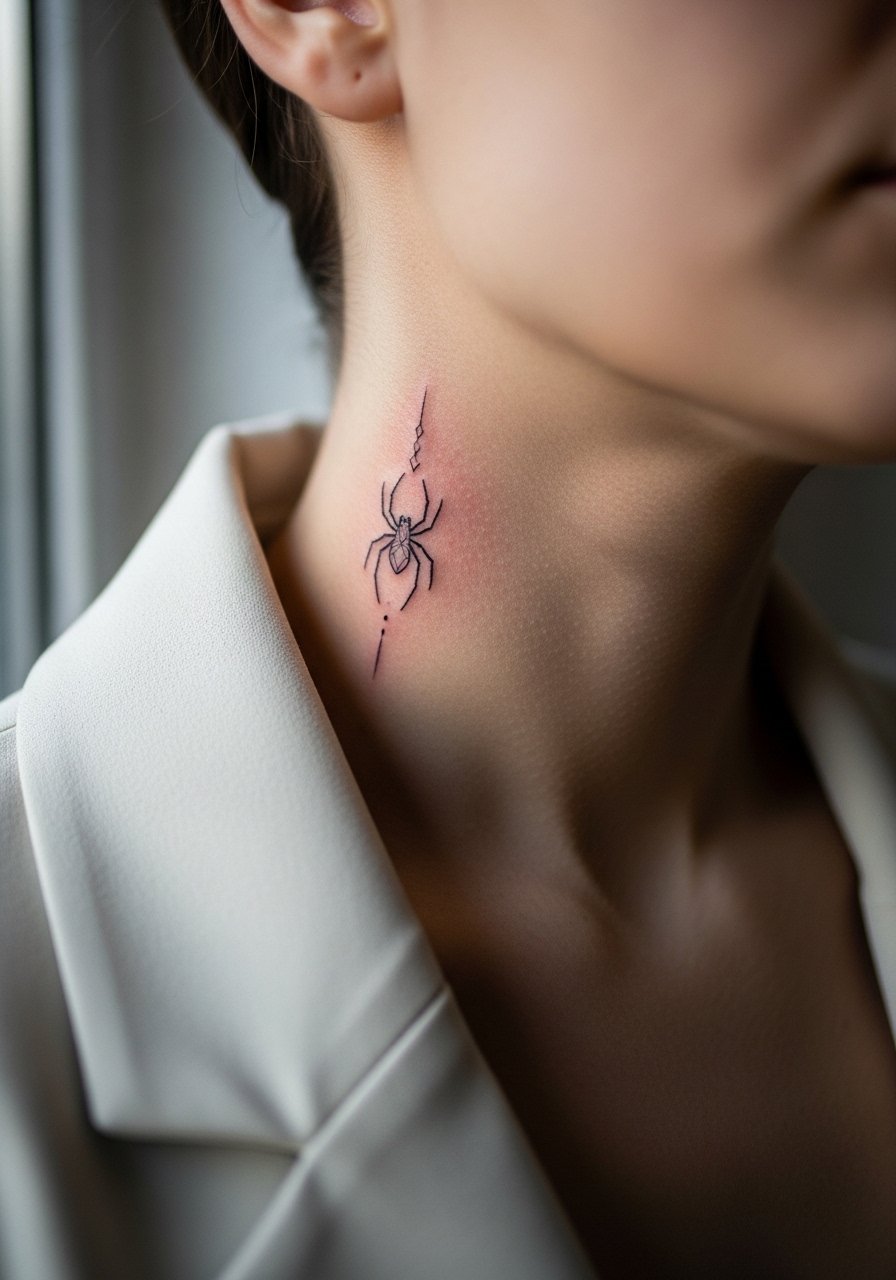
A collar or side-neck piece can be subtle and easily covered by collars if needed. For a geometric spider keep lines bold and avoid tiny connecting angles that can blur. Neck placements are visible and may carry social considerations. Tell the artist you want a design that reads clearly at arm's length. Pain is moderate. A frequent mistake is asking for micro-angles that lose fidelity when skin shifts. For on-session clothing bring a wide-neck jacket that you can shift without creating tension on the area.
25. Small Tarantula Silhouette on the Upper Back Near the Shoulder Blade
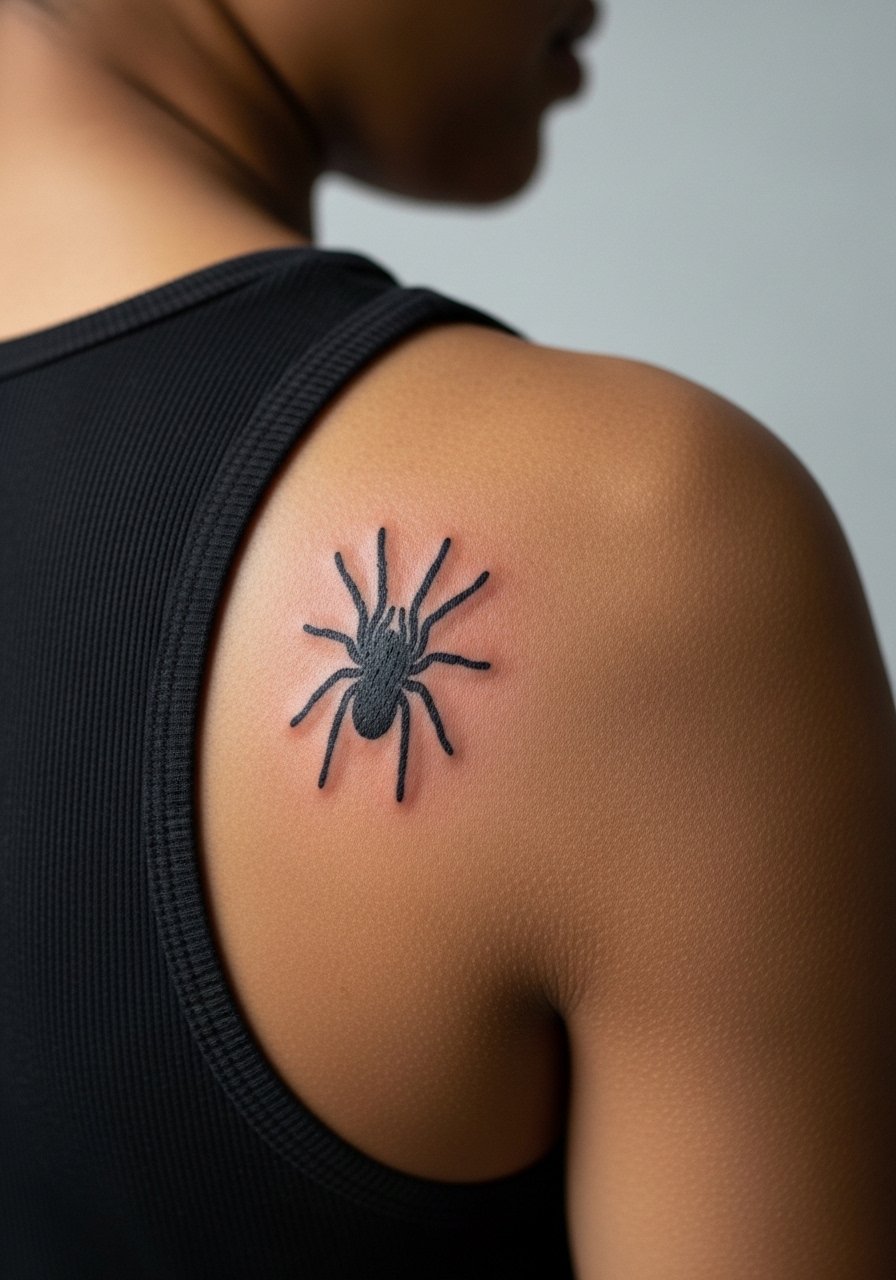
Shoulder blade placements are forgiving for small silhouettes and accept detail better than wrists or hands. Ask for a slightly scaled-up silhouette and whisper stipple on the abdomen for texture. This spot is moderate pain and typically finished in a single session. Many people make the mistake of requesting ultra-tiny realism there when a modest increase in size would yield far better longevity. For showing it off choose off-shoulder tops or shift a strap on session day to give the artist clear access.
26. Single-Line Spider on the Collarbone Curve
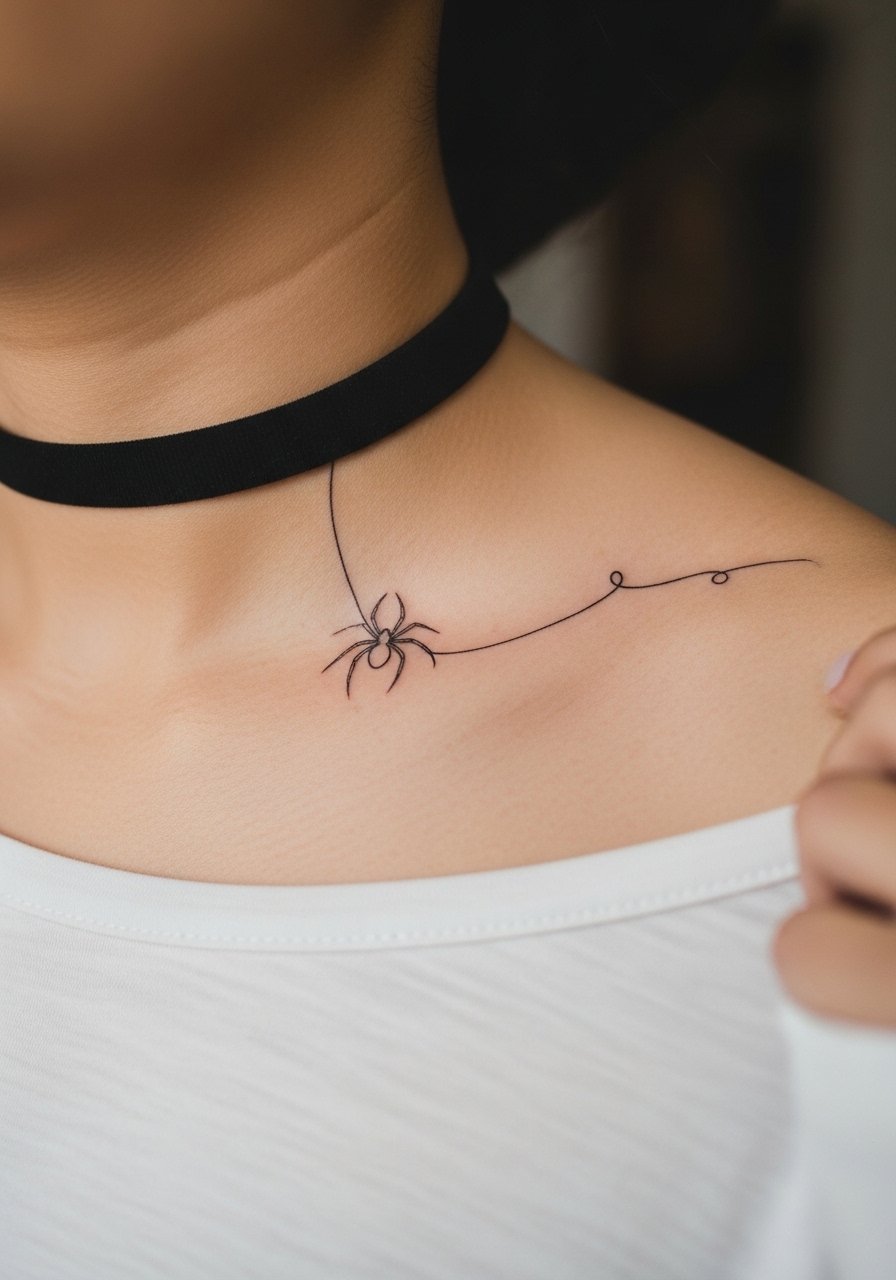
Single-line or continuous ink pieces rely on confident hand movement and need spacing to avoid looking like a squiggle as they age. For collarbone curves, ask for slightly thicker single-line weight and a small negative-space gap where the line crosses bone. Pain is mild. The typical mistake is asking for the absolute thinnest line possible, which often fades into a faint mark. A choker necklace sits well above this style and frames the collar without competing for attention.
27. Micro-Realism Tarantula Footprint on the Outer Thigh
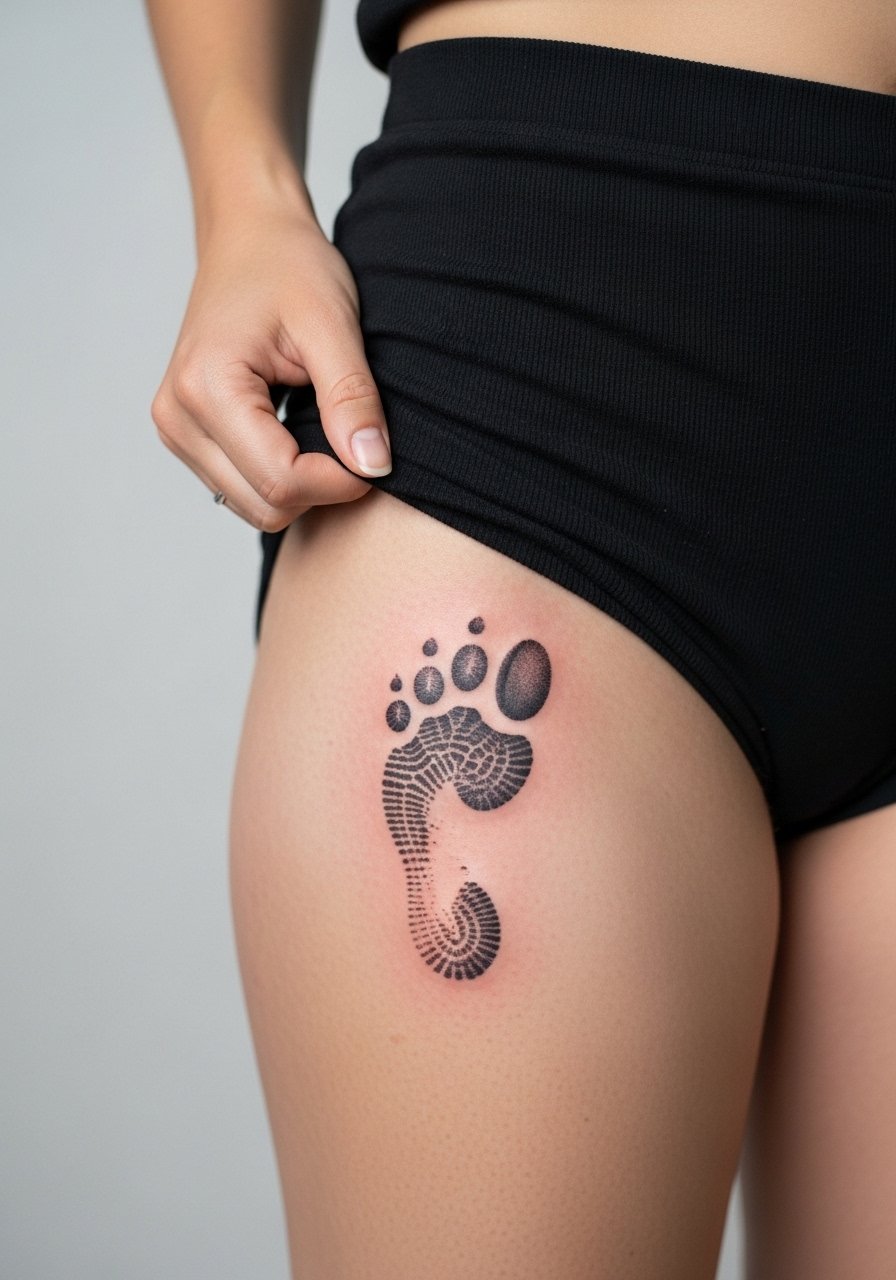
For a micro-realism footprint, the outer thigh is ideal because it gives room for tiny claws and texture while staying discreet. Ask the artist for soft gray gradients and stipple to suggest hair and pad texture rather than hard lines. Expect one to two sessions depending on how much detail you want. A common error is compressing realism into a too-small patch. This placement heals well and tolerates sun exposure better than shins, but plan for sunscreen on exposed sessions when you do show it off.
Frequently Asked Questions
Q: Will fine line spider tattoos blur faster on joints like the elbow or knee?
A: Joints are higher risk because the skin moves and stretches so patterns with dense linework can soften. One group of artists prefers bold bridge lines and wider spacing on joints. Another group will still do fine line if they increase spacing and depth accordingly. Ask your artist their approach and request spaced geometry or thicker bridges if you want the piece to age predictably.
Q: How often should I expect touch-ups for minimalist wrist or finger spiders?
A: Minimalist pieces on wrists and fingers often need touch-ups sooner than larger work. From what I have seen, plan for a check-in around year one to two for fingers and year two to three for wrists, depending on sun exposure and washing habits. Be realistic with your artist about your daily activities so they can advise on line weight.
Q: Are realistic tarantulas worth the extra sessions on the thigh versus doing a smaller version on the arm?
A: Yes if you want long-term detail. Thigh skin holds shading and texture better and takes repeated sessions without as much distortion. A small arm version will look great fresh but loses micro detail faster. If detail is the priority choose thigh or upper arm and expect two to three sessions.
Q: What should I wear to the studio for a rib or sternum spider session?
A: Wear a fitted sports bra or a cropped top you can lift slightly so the artist has clear but modest access. For thighs and hips, choose loose shorts or high-waisted bottoms that shift easily. Bringing the right clothes cuts session time and keeps the area relaxed.
Q: How do I find artists who handle dark skin tones and negative-space work well?
A: Look through local directories and social feeds using hashtags such as #FineLineSpider and #BlackworkTattoo and filter for healed photos on darker skin. Book a consultation asking to see healed examples on similar tones and request negative-space options in your reference images.
Q: Can I get a small spider on my finger if my job has strict appearance rules?
A: Finger tattoos are highly visible and fade faster, so consider side-of-finger placements or a tiny ankle instead if your workplace is strict. If you still choose the finger, accept that touch-ups and concealment strategies may be part of the plan.
