
Fine line Anubis art is trending online, but what you see in a feed and what lasts on skin are not the same thing. I've seen tiny jackal heads blur on forearms, small wrist pieces jump in price at shop minimums, and thigh work stretch after body changes. The list below gives 17 Anubis ideas that aim for clean linework, smart placement, and realistic wear over time so you know what to ask at your consult.
1. Minimalist Anubis Head Outline on the Wrist
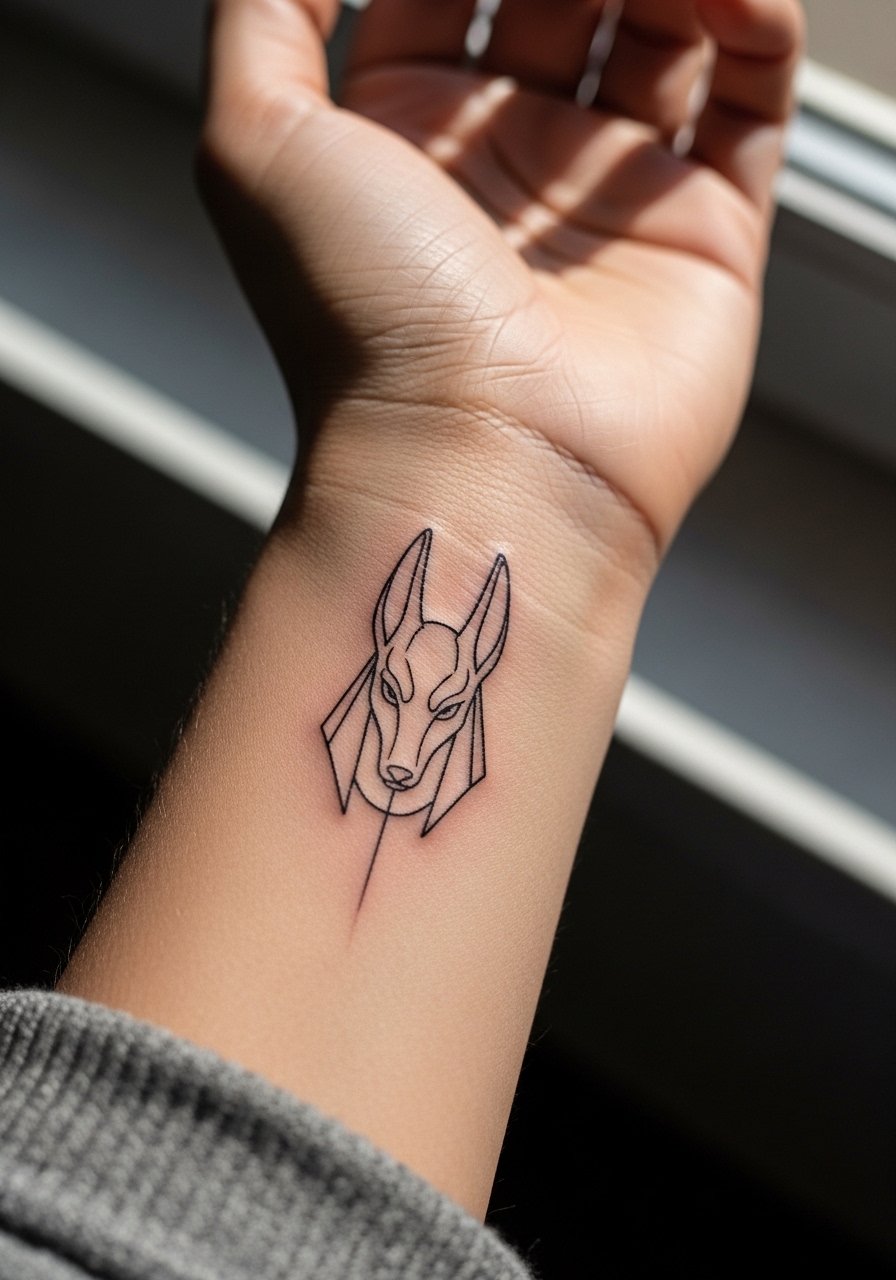
I recommend this one for a first Anubis because the linework reads clean and it is easy to scale. Tell your artist you want a 1.5 inch single-line stencil with slightly increased spacing between key contours so the lines do not merge as the skin ages. Common mistake is asking for ultra-tiny detail in the same spot, which invites blowout and loss of silhouette within a couple of years. Expect a quick session, mild wrist sensitivity, and a likely touch-up window at 12 to 24 months depending on sun exposure. For showing it off, pair the piece with a thin leather cuff bracelet on the opposite wrist so the tattoo sits as a quiet focal point.
2. Inner Forearm Fine Line Anubis with Ankh

Fair warning: fine line on the forearm can fade faster than bolder work. One camp argues fine line is worth the trade for low visual weight, the other says heavier linework lasts longer. When you consult, ask the artist for slightly deeper initial depth and moderate spacing between parallel lines. This area is low on blowout risk but high on sun exposure, so plan touch-ups around year two to three. Session time is typically one to two hours and the inner forearm is a relatively low-pain spot. For appointments wear a short sleeve button up so the sleeve can be rolled for access without tugging.
3. Blackwork Anubis Jackal Profile on the Hand

Hand tattoos age differently because skin here moves and rubs constantly. The piece reads strong fresh and keeps its silhouette if you opt for crisp blackwork rather than tiny internal detail. Mistake to avoid is asking for micro shading inside the hand fill, which will soften into patchiness quickly. Expect a 45 to 90 minute session and a higher pain sensation than forearm work. Note that hand tattoos can still affect some employers, so factor career context into your decision. Show it off with thin stackable rings or a fingerless glove for colder months, both keep attention on the profile without overcrowding the hand.
4. Collarbone Micro-Realism Anubis Holding Scales
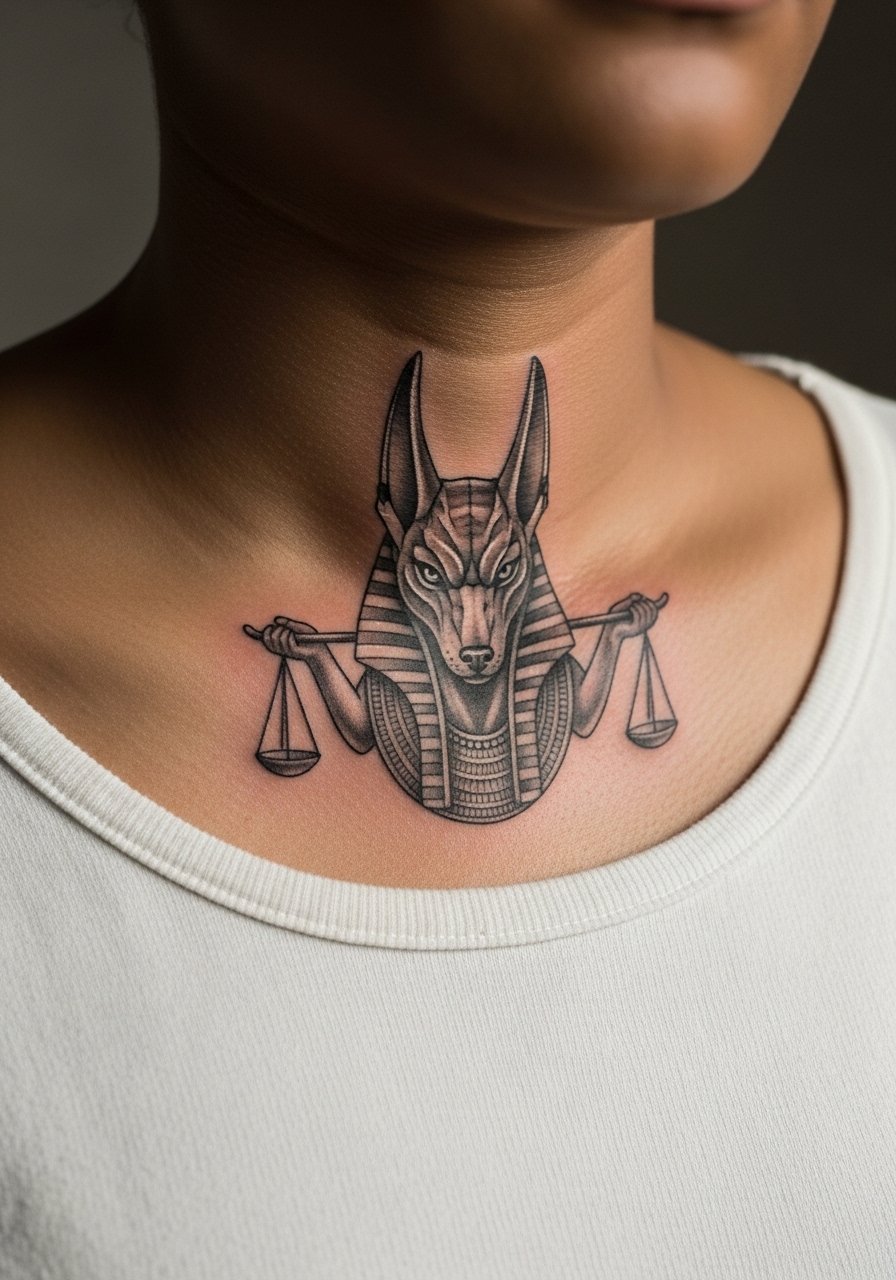
Most micro-realism on flat collarbone planes ages gracefully when scaled to 2–3 inches. Tell your artist you want tonal transitions in black and gray rather than tiny stipple detail, and ask to see healed photos of similar skin tones. A common version that ages poorly tries to cram photoreal detail into one inch. Session time is usually two sessions for fine tonal work and pain is moderate because the collarbone sits close to bone. For showing the piece wear an off shoulder blouse or a V-neck tee that frames the area without competing with the shading.
5. Ornamental Anubis with Crook and Flail on the Thigh

Thigh placements handle density and intricate geometry well because the area stretches less with normal movement. The mistake I see is making ornamental lines too tight for the thigh scale. Ask for a 5 inch composition with clear negative space between motifs so the geometry holds at five years. Sessions run longer for this size and pain is moderate to low. Weight change can distort thigh work, so plan placement with future body changes in mind. For showing it off, high-waisted shorts or skirts are ideal. Try pairing with high waist denim shorts for summer looks.
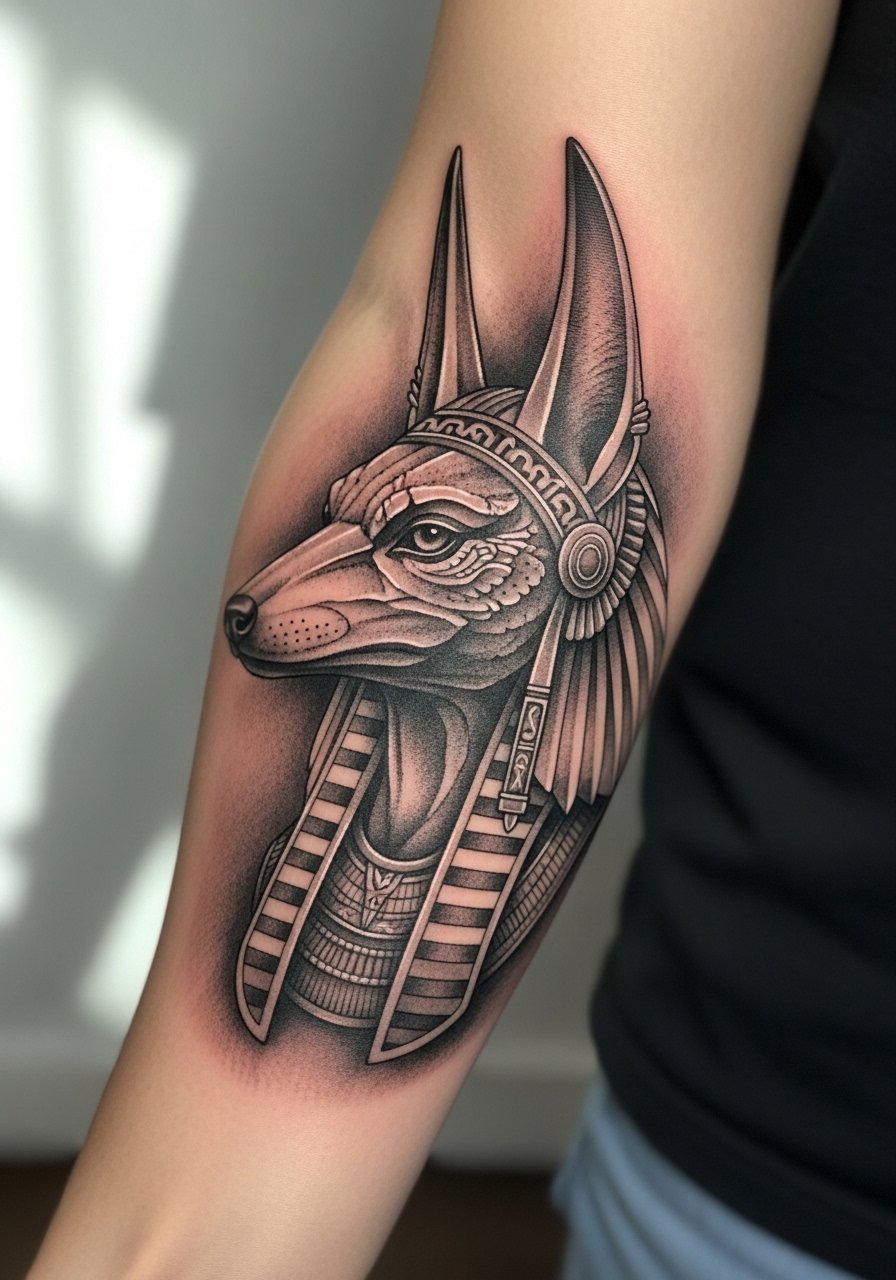
6. Neo-Traditional Anubis Silhouette on Upper Arm

Neo-traditional silhouettes make a strong anchor for future pieces because they are bold enough to read from a distance and easy to expand around. In consultation specify you want the silhouette with restrained color pops rather than full saturation so the piece stays readable as it ages. Outlines protect against early blurring and keep touch-ups minimal. Expect two sessions for color accents, and the upper arm is a forgiving and lower-pain placement. For session wear bring a loose button-down shirt you can pull aside so the artist has clean access without rubbing the site afterwards.
Studio Day Picks
Those wrist, hand, and forearm pieces above heal differently from larger thigh and collarbone work, so a few small items make the session and first week easier.
-
Stencil transfer paper kit. Lets you preview the linework on skin before committing, helpful for tiny wrist or ear silhouettes in the ideas above.
-
Topical numbing cream. Applied about 45 minutes before can reduce wrist and hand discomfort so you get clean, steady linework.
-
Thin protective film roll. Protects finger and hand tattoos from friction and water in the first week.
-
Fragrance-free body wash. Gentle cleansing for new forearm or chest pieces without stripping delicate ink channels.
-
Aquaphor healing ointment. Thin application for the first few days locks in moisture without suffocating fine line work.
7. Dotwork Anubis Head on a Shaved Scalp

This placement is rare but high-visibility if you keep a shaved head. Dotwork holds well on the scalp because the area is low-friction and the dots age into a textured wash that keeps shape. Mistake to avoid is asking for overly tight stippling too small for the three inch scale. Session is relatively short and the scalp can be sensitive, so expect an hour or so. For the session wear a fitted beanie hat you can take off easily and put back on afterwards. If you plan to keep hair longer later, consider how hair growth will obscure or reveal the piece.
8. Watercolor Anubis with Leopard Skin on the Leg Side
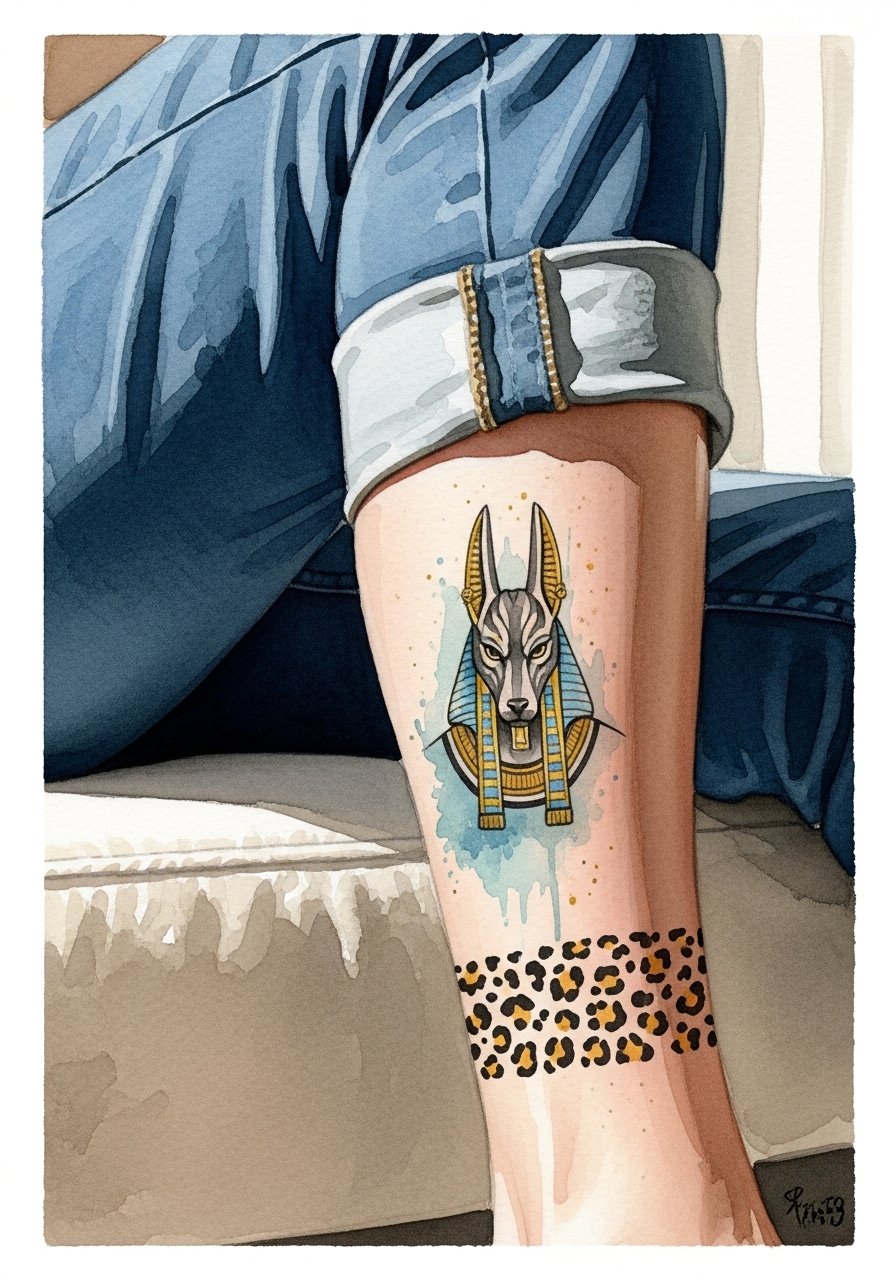
Watercolor washes look soft and ethereal fresh but they can fade faster than blackwork. For longevity ask your artist to pair the washes with a crisp black outline or micro-line anchors so the form reads even as color fades. This design works well on the leg where there is room for larger washes and geometric repeats. Sessions usually run two sittings for color saturation. For showing this piece roll up cropped chinos or wear cropped chino pants so the leg reads cleanly without visual noise from patterns.
9. Ignorant Style Anubis Outline on the Ribcage

Fair warning: the ribcage is a high-pain zone. Artists also differ on whether fine line survives here. One camp says skin stretch and breathing blur thin lines quickly. The other camp says with correct needle depth and spacing fine line can settle fine. Ask your artist where they stand and request slightly bolder single strokes if you plan to skip touch-ups. The ignorant style embraces imperfection, which helps the piece age into texture rather than ghosted detail. Expect a single session of varied intensity and plan for a longer recovery window because the area flexes with breathing.
10. Minimalist Anubis Ear Silhouette Behind the Ear

Behind-the-ear work is tiny and discreet. The biggest mistake is trying to compress too much detail into one square centimeter. Ask for a 1 inch silhouette with clean negative space so the shape remains legible after healing. Pain is low to moderate and touch-ups are often needed around year two because fine lines on thin skin can soften. For session wear bring hair ties or a shirt that lets the artist shift hairline access. Because this area is often visible in close-up social situations, think about how often you want it exposed.
11. Fine Line Anubis Multi-God Sleeve Start on Back of Leg

This is for collectors who want the Anubis motif to anchor a larger narrative. In consultation, say you want modular spacing so each god can breathe as the sleeve grows. Mistake is designing everything at the same tiny scale, which creates visual mud when added to. Back of leg skin handles fine line well but expect multiple sessions and yearly touch-ups as the composition fills. Session feel is low to moderate pain and sitting positions vary. If you plan to show work off in summer, pair the initial stages with rolled ankle trousers or cropped lengths.
12. Black and Gray Realism Anubis on the Forearm
Realism looks striking on forearms because the canvas suits tonal transitions. The common error is squeezing too much micro texture into a 3 inch piece. Ask for a 4 to 5 inch layout if you want convincing fur detail and tonal scales. Expect two to three sessions and touch-ups around year three to maintain mid-tone contrast. Forearm work shows scarring or blowout risk if the artist goes too deep in a single pass, so discuss depth and session pacing. For showing this piece try a slim gold chain on the opposite wrist for subtle contrast and balance.
13. Small Anubis Ankle Tattoo
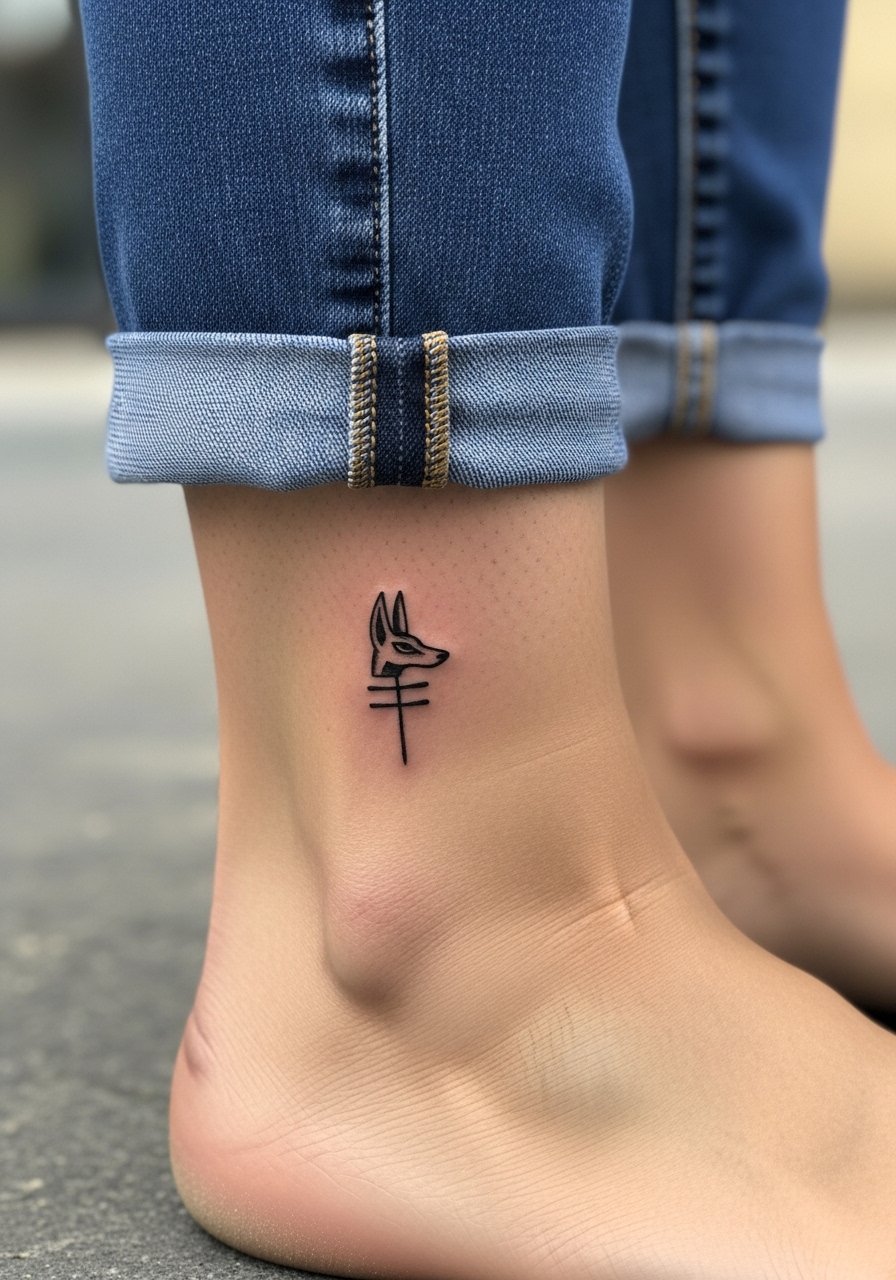
Ankle placements are low on visual real estate and high on friction from shoes and socks. A common mistake is choosing very fine internal detail that will soft-focus from footwear friction. Ask for a compact silhouette with strong linework and plan for a protective film during the first week. Pain is moderate and sessions are quick. For casual showing, roll jeans or wear sandals. Pair with a rolled ankle joggers look for off-duty days so the tattoo gets visibility without rubbing.
14. Ornamental Anubis Calf Medallion

A medallion composition gives decorative options while keeping the central jackal readable. The mistake is stacking too many micro patterns inside the border which blurs over time. Ask for clearer negative space and slightly thicker anchor lines around the medallion so the detail inside can age without merging. Calf skin handles density well and pain is low to moderate. Sessions for a five inch medallion usually take two sittings. For showing it off roll cropped chinos or slip on sandals for summer.
15. Blackwork Anubis with Negative Space Halo on the Chest

Chest placements need thoughtful scale because the sternum area moves with breathing. The error I see is overdense black fills pressed right onto the midline causing scabbing and long healing. Discuss a negative space halo so the silhouette reads even if the center detail softens. Session pain ranges from moderate to high depending on proximity to bone. For sessions wear a fitted sports bra or bandeau so the artist can access the area without full exposure. Professionals who specialize in chest color and blackwork are best for this spot.
16. Inner Bicep Micro-Realism Anubis Portrait

Inner bicep skin is softer and can hold tone beautifully if the design is scaled to 2–3 inches. The common mistake is overworking the area in a single pass which raises scarring risk. Ask for staged shading, with a plan to stop and come back if needed. Pain is moderate and session time tends to be one to two hours. Because the inner arm sees less sun, micro-realism here can keep midtones longer than on an exposed forearm. For the appointment wear a tank top you can raise cleanly so the artist has full access without tugging fabric across the site.
17. Ignorant Style Anubis on the Rib Edge for a Hidden Nod

This version leans into deliberate imperfections so it reads like a personal mark rather than a museum piece. The rib edge is a high-pain zone and lines here can blur if too fine. The biggest mistake is expecting photoreal detail in this spot. If you want the look but worry about pain, consider moving the composition slightly forward on the rib where the skin gives more. Expect a single longer session and a recovery window where movement and clothing can irritate the area. Some people choose this placement because it stays private under normal clothing.
Frequently Asked Questions
Q: Will a fine line Anubis on my forearm need touch-ups more than a blackwork piece?
A: In my experience fine line usually needs touch-ups sooner than bold blackwork, especially on sun-exposed surfaces like forearms. Plan for a possible touch-up around year two to three and ask your artist about slightly deeper initial depth and spacing between parallel strokes to extend the interval.
Q: How do I find an artist comfortable with micro-realism Anubis portraits on darker skin tones?
A: Use hashtags like #anubisblackwork and #fineLineAnubis on Instagram and filter portfolios for healed photos on similar skin tones. Also check community boards and message artists about healed images rather than fresh photos so you can evaluate true contrast.
Q: Are scalp Anubis tattoos high maintenance if I decide to regrow hair later?
A: They are low maintenance while shaved and often read as textured dot patterns if hair starts to grow. If you think you might regrow hair, discuss placement with the artist so the piece sits where hair patterns will either conceal or frame it as you prefer.
Q: What should I wear to a thigh or calf session to get easy access and comfort?
A: Bring loose athletic shorts or cropped pants that you can shift without pressure on the area. For thigh sessions I often suggest high-waisted shorts or a skirt you can adjust. A practical option is a loose athletic short so the artist can roll the fabric without creating friction.
Q: How do I decide between fine line and blackwork for an Anubis if longevity matters?
A: If longevity with minimal touch-ups matters more than initial delicacy, blackwork and thicker anchor lines win. If you prefer a lighter aesthetic and accept a touch-up at year two or so, fine line can look cleaner when fresh. Ask the artist which approach they recommend for your skin type and placement.
