
Fine line tattoos dominate Pinterest right now, and the same pieces that rake in saves often need touch-ups sooner than people expect. Bold blackwork and spaced dotwork age with less fuss, while tiny script and micro lines can blur if placed in high-friction zones. I spend time in shops and at conventions, and I want to help you pick a healing tattoo that holds up, looks intentional, and fits how you live day to day.
1. Lotus Flower Mandala on the Inner Wrist
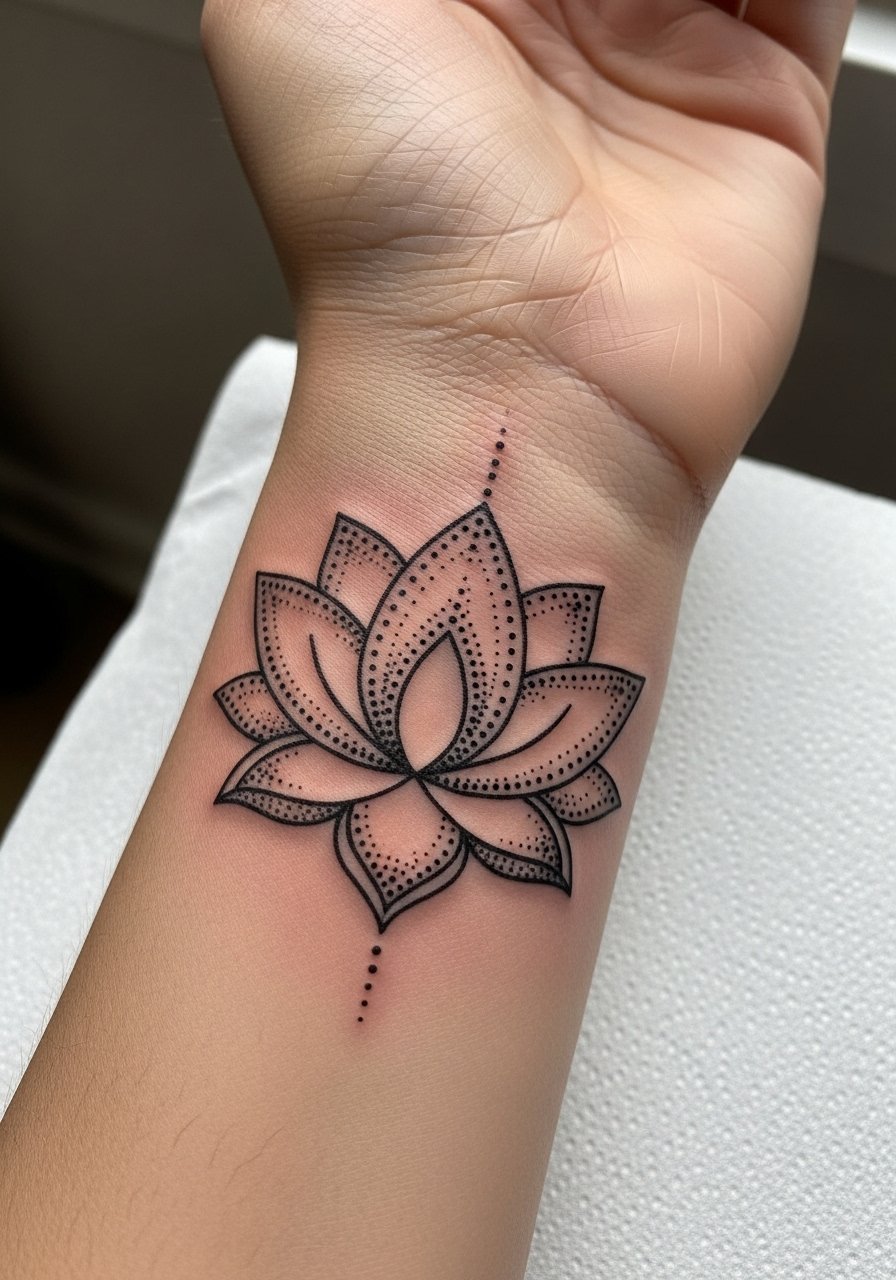
I've seen this design chosen when someone wants a compact symbol of rebirth that still reads at year five. Ask your artist for slightly thicker linework in the outer rounds so the mandala keeps its negative space as it heals. A common mistake is packing too many concentric details into a tiny wrist piece, which leads to merging after year two. Pain is low to moderate and a single short session usually does it. For showing it off, pair with a dainty gold chain bracelet on the opposite wrist so the mandala still breathes visually.
2. Phoenix Rising on the Shoulder Cap
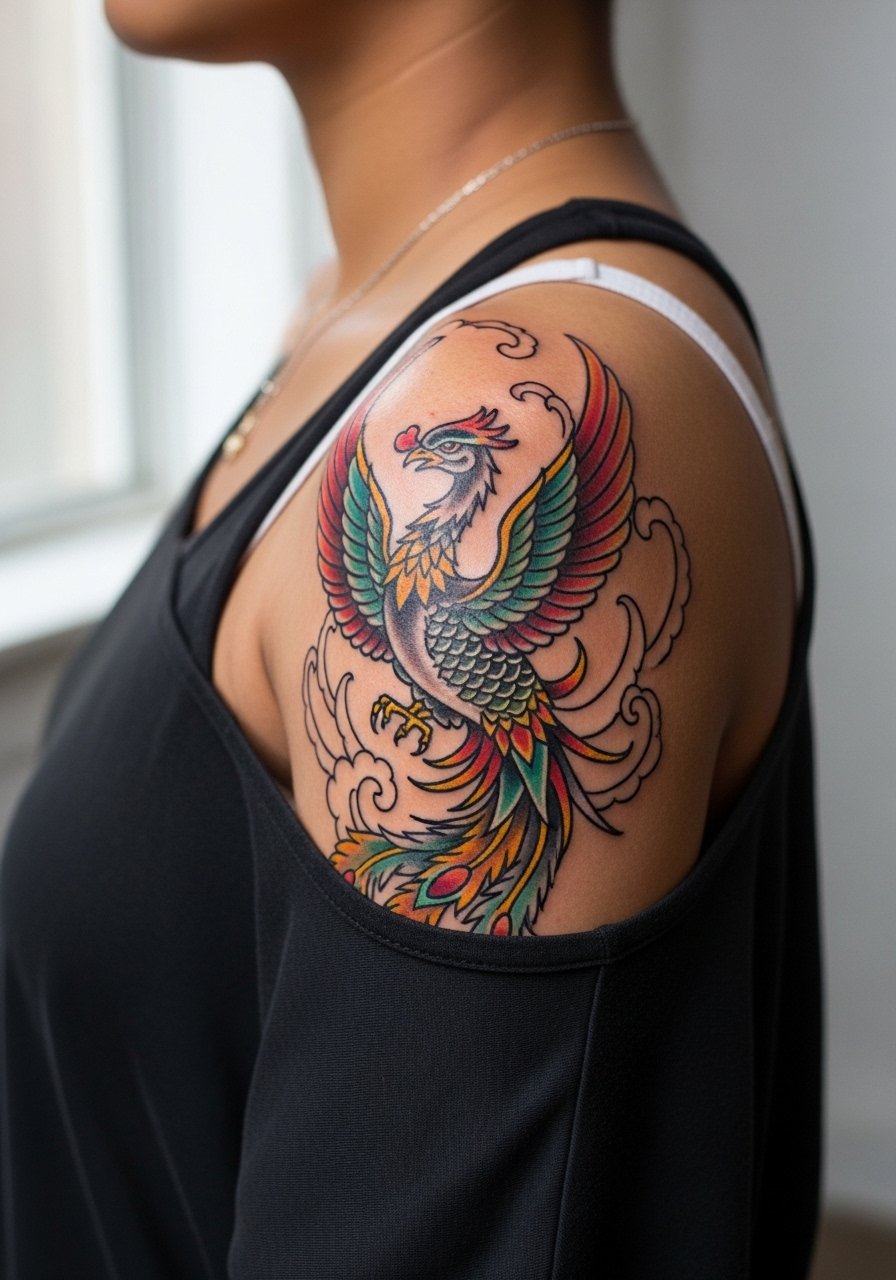
Bold neo-traditional phoenixes handle time better than tiny realism on high-motion spots. When you consult, say you want bold outlines and saturated color rather than micro feather detail. The shoulder tolerates saturation and usually needs two sessions for mid-size pieces. Expect moderate pain and straightforward healing because clothing shifts less here. For evenings out wear an off shoulder top that frames the wing without rubbing it, and during the appointment throw on a loose tank you can pull to the side.
3. Watercolor Lotus Bloom on the Forearm
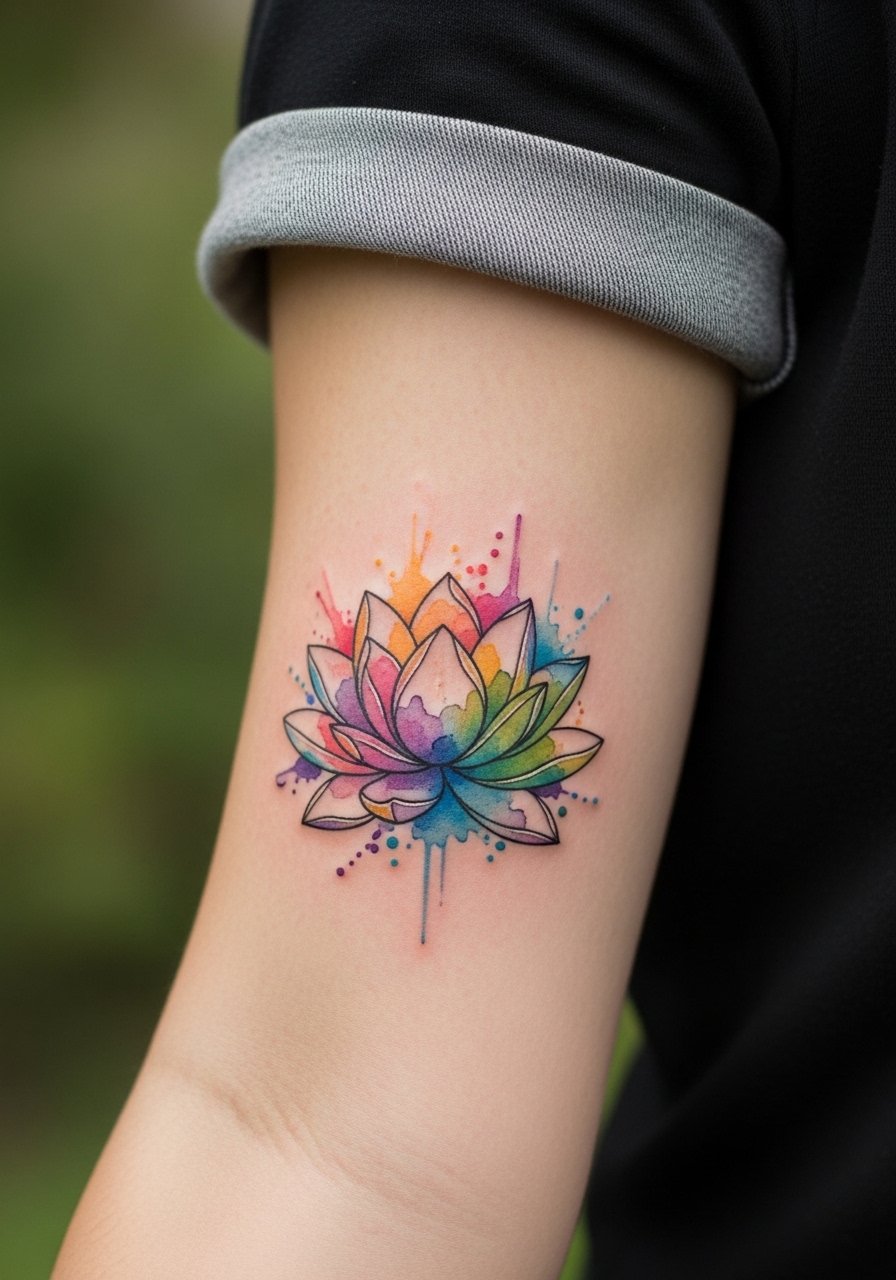
Watercolor washes look poetic but they can fade faster in direct sun. I advise asking for a subtle black outline or stippled dotwork base so the shape retains structure as color softens. One session usually covers a small forearm piece. The typical mistake is skipping a black anchor layer and losing definition after a year. For session wear, a linen button down shirt you can roll up keeps the area accessible and avoids tight sleeves rubbing fresh ink.
4. Realism Phoenix Wing on the Ribcage
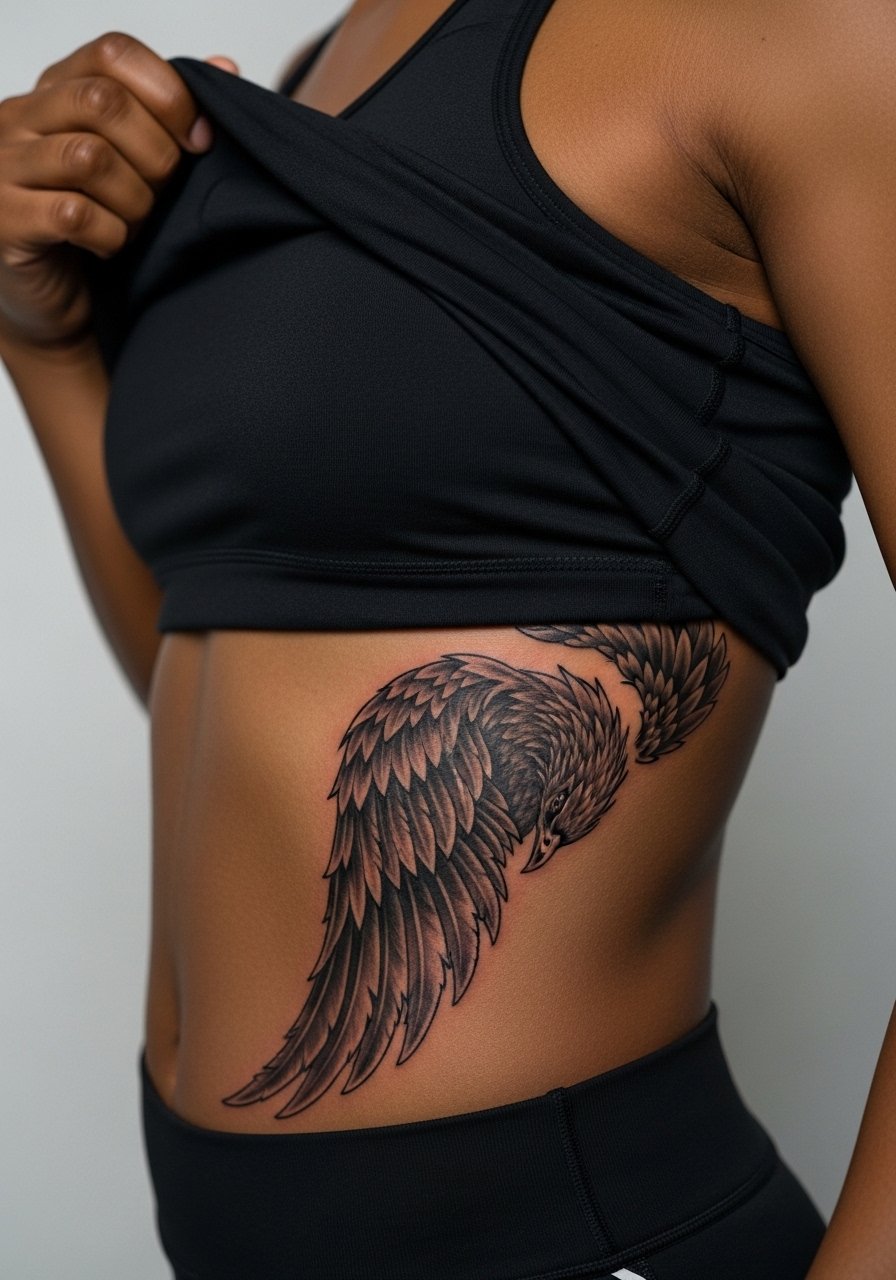
Fair warning, the ribcage is a high-pain area and the skin moves a lot while healing. Realism here needs multiple sessions to build depth and can look markedly better after touch-ups at year two. Tell your artist you want layered sessions rather than a single marathon so shading settles cleanly. A frequent mistake is requesting ultra-fine detail in one pass, which can cause blurring. Expect a tougher first week of healing and bring a loose crop top you can lift easily for the appointment.
5. Butterfly Transformation Silhouette on the Inner Wrist
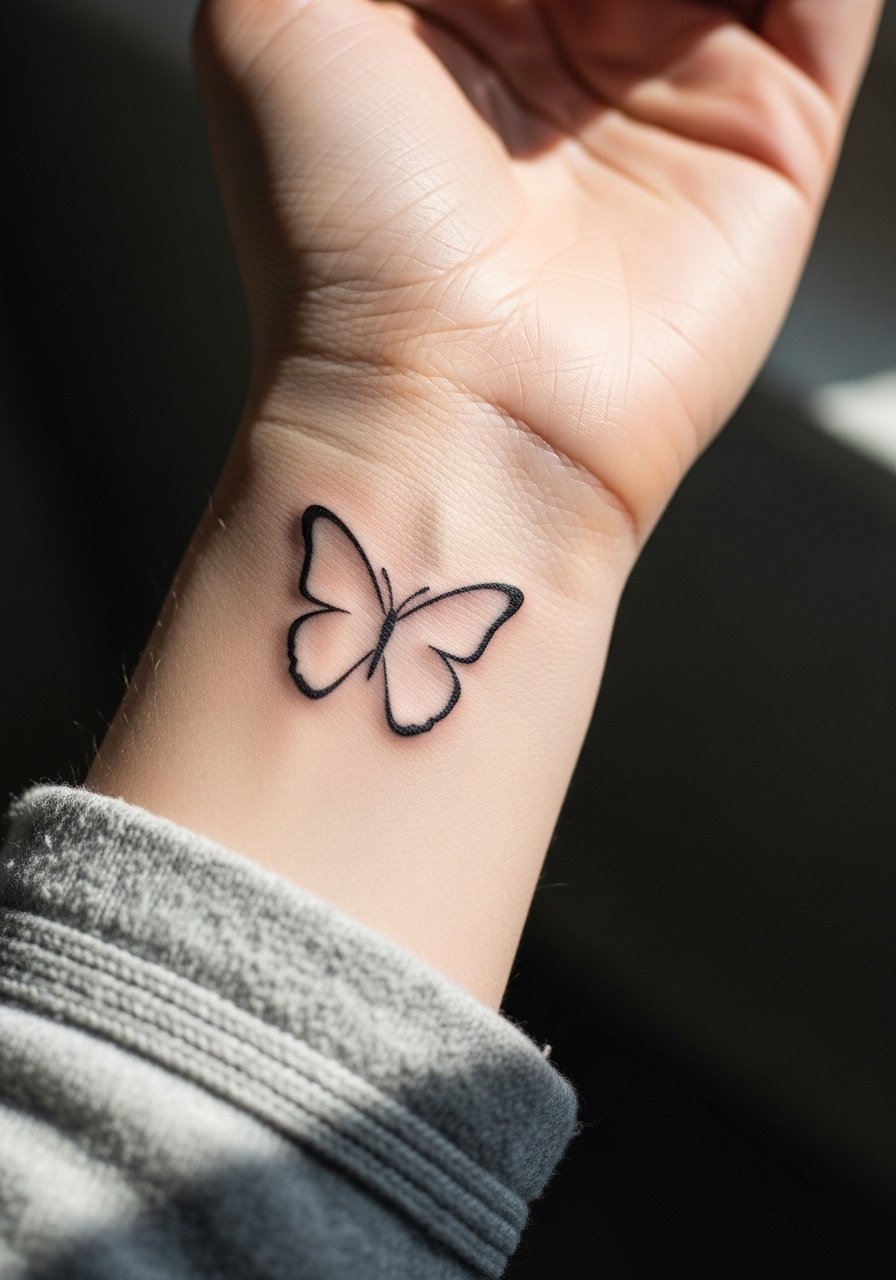
Minimalist butterflies are a classic for metamorphosis themes, but fine line on the wrist is where fading debates get loud. One camp says fine line here blurs within a couple of years in high-use hands. The opposing camp argues that with the right depth and spacing it holds for much longer. To tip the odds, pick a slightly bolder outline and avoid micro fill. It's a quick one-session piece with low pain. Style it with a minimalist wrist stack that keeps the focus on the silhouette.
6. Snake Coiled Around the Ankle
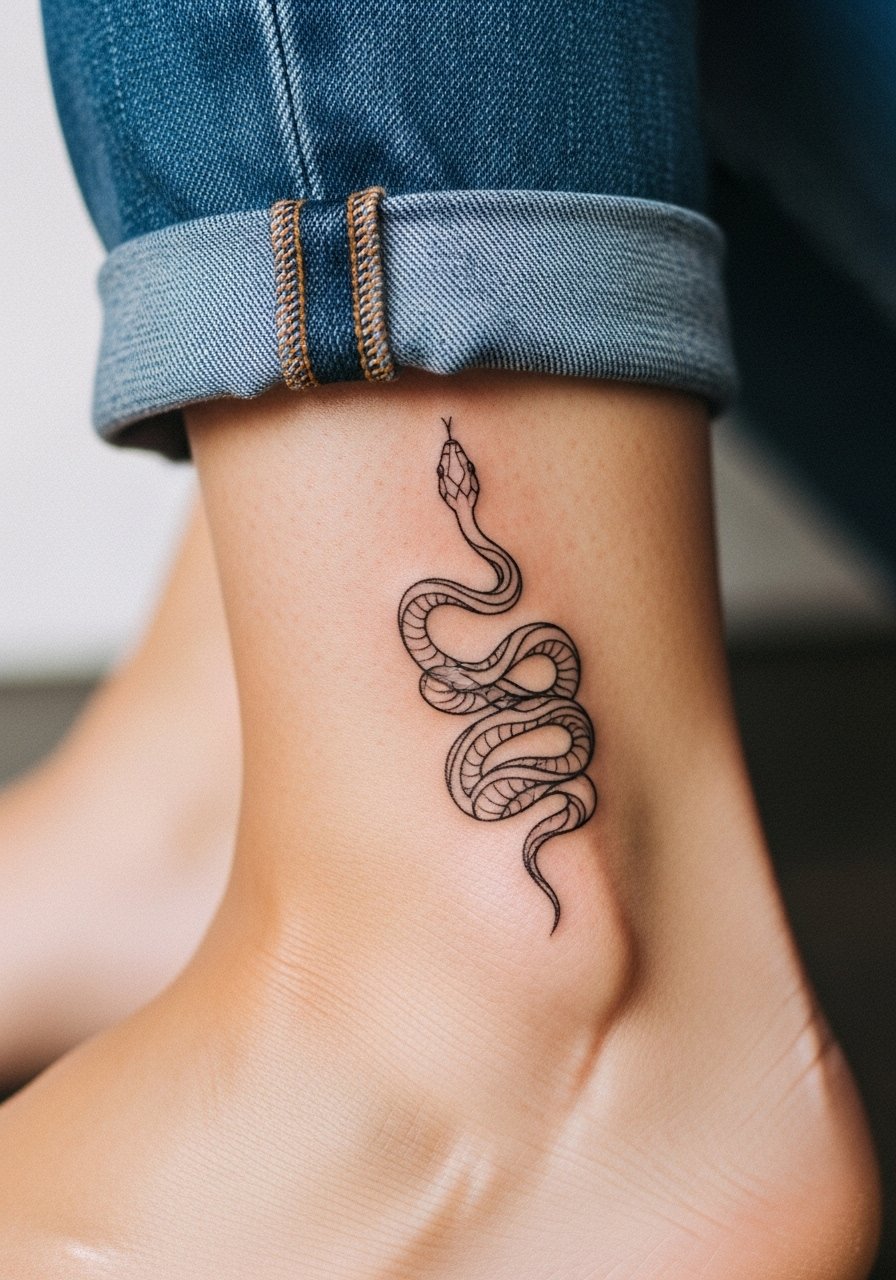
Ankle pieces live in a friction zone thanks to socks and footwear, so pick slightly heavier linework than you would for inner-arm work. The snake motif reads well when elongated along the ankle bone and the coiled version resists stretch from weight shifts. A common error is making the coil too small, which causes the center to fill in as it heals. One to two sessions usually cover a medium ankle piece. Pair with strappy flat sandals when you want it visible without rubbing the area.
Studio Day Picks
The wrist, ankle, and ribcage pieces above ask for different prep and first-week care, so these five things smooth out the session and the first few days.
-
Hildie & Jo unscented balm. A lighter balm many people prefer on fine line wrist work because it feels less greasy and absorbs quickly.
-
Australian tea tree ink fix. A thinner formula that artists sometimes recommend for watercolor pieces to avoid clogging the soft washes.
-
Dragon balm tattoo aftercare. Fast-absorbing and praised in some healed tattoo threads for working well on darker skin tones without leaving heavy residue.
-
Fragrance free gentle body wash. Useful for cleansing the first week on forearm and shoulder work without irritating linework.
-
Aquaphor healing ointment. Thin layers in the first 48 hours help lock in moisture for fine line pieces, particularly on wrists and fingers.
7. Rose with Thorn on the Outer Forearm
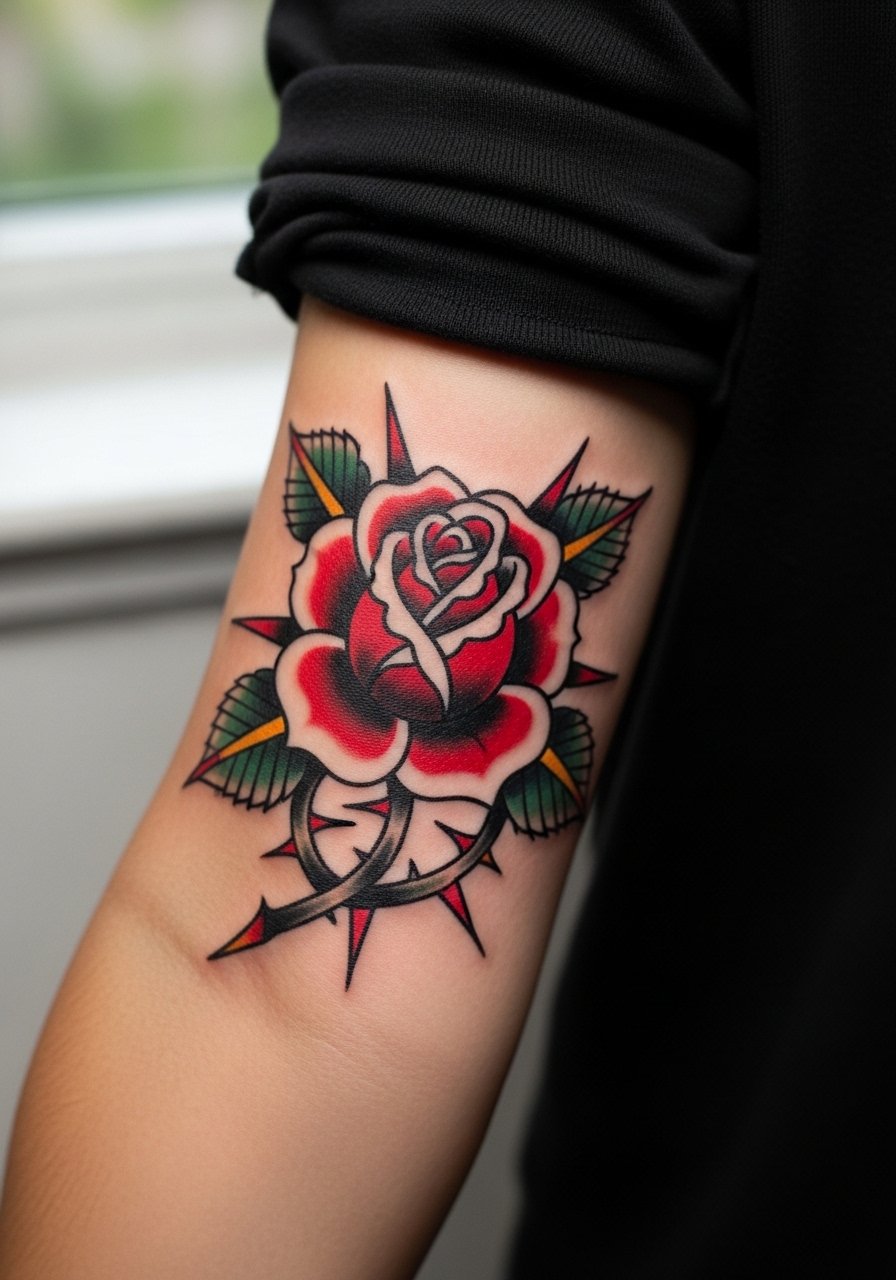
Traditional roses shine on the forearm because the skin is steady and friction is moderate. Ask for saturated red in the petals and a strong black outline so the thorns keep contrast as the piece ages. People often request tiny roses that lose petal separation as they soften. Expect moderate discomfort and a typical two-session plan for color saturation. For everyday wear, rolled cream linen shirts complement the piece, and a linen button down shirt is handy during the session.
8. Medusa Serpent Head on the Upper Arm
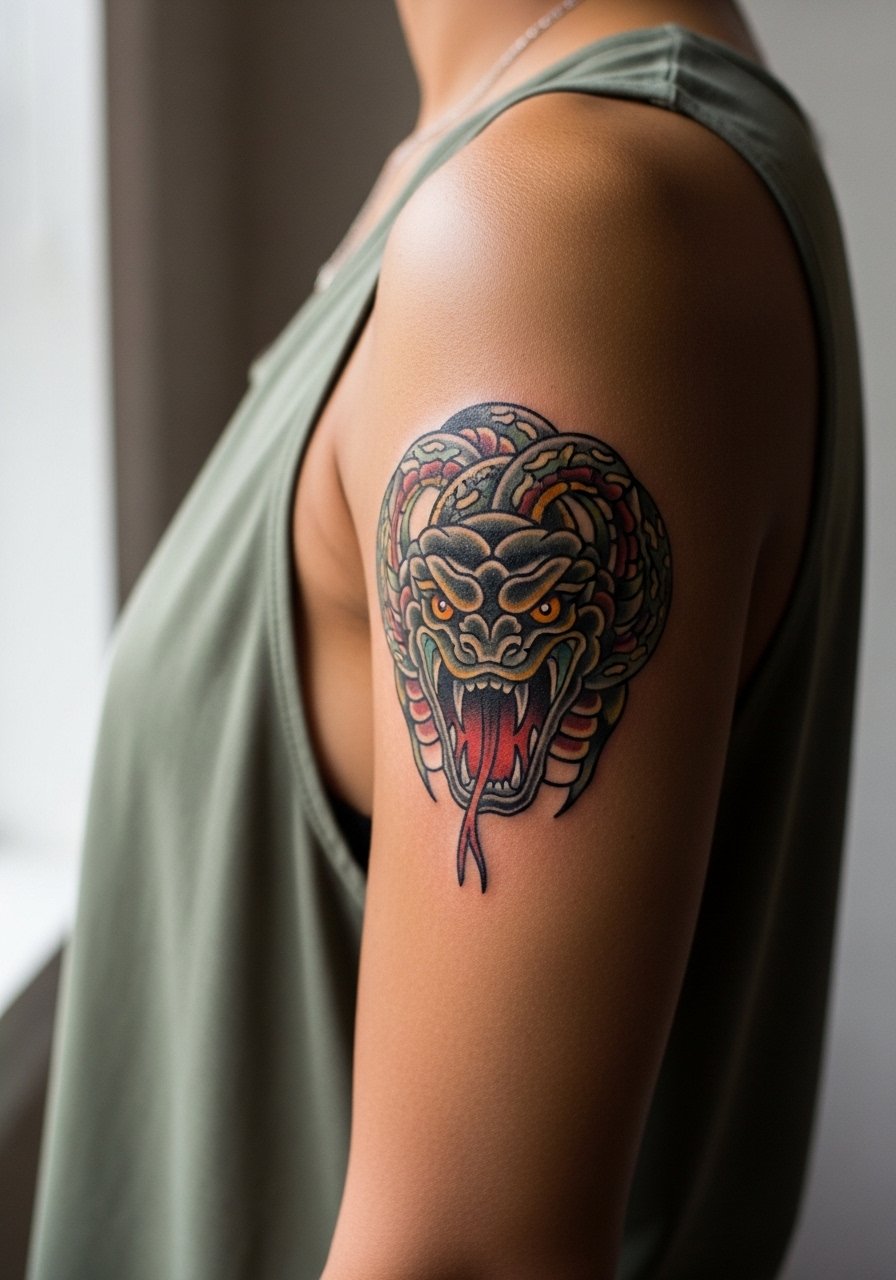
Medusa designs are booking up because they pair portrait detail with symbolic strength. For this one, request clear eye detail and bolder outlines around the serpents so the face holds up under aging. Many people try to pack portrait realism into a small upper-arm spot, which blurs faster than a medium canvas. Expect two to three sessions and plan for a touch-up around year three. For the appointment wear a loose tank top you can pull aside without rubbing paint on the new ink.
9. Abstract Wave Mandala on the Shoulder Blade
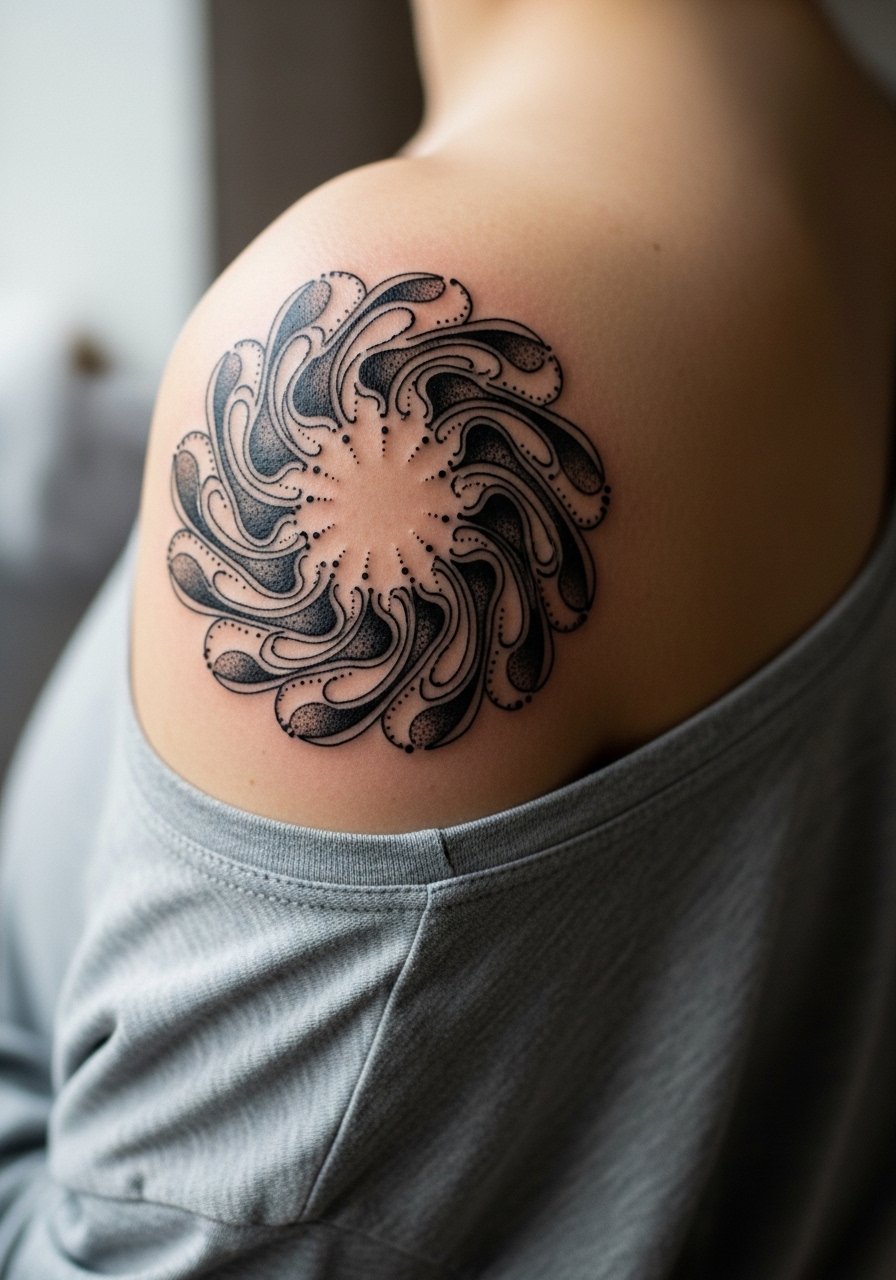
Dotwork and blackwork mandalas on the shoulder blade age well because the area avoids constant sun and friction. Tell your artist you want wider spacing between waves so the pattern keeps negative space at year five. A common mistake is compressing too many elements, which creates a muddy effect. Two sessions often give the depth needed for denser dotwork. Pair the piece with an open-back midi dress when you want to show the complex geometry.
10. Koi Fish Breaking Surface on the Calf
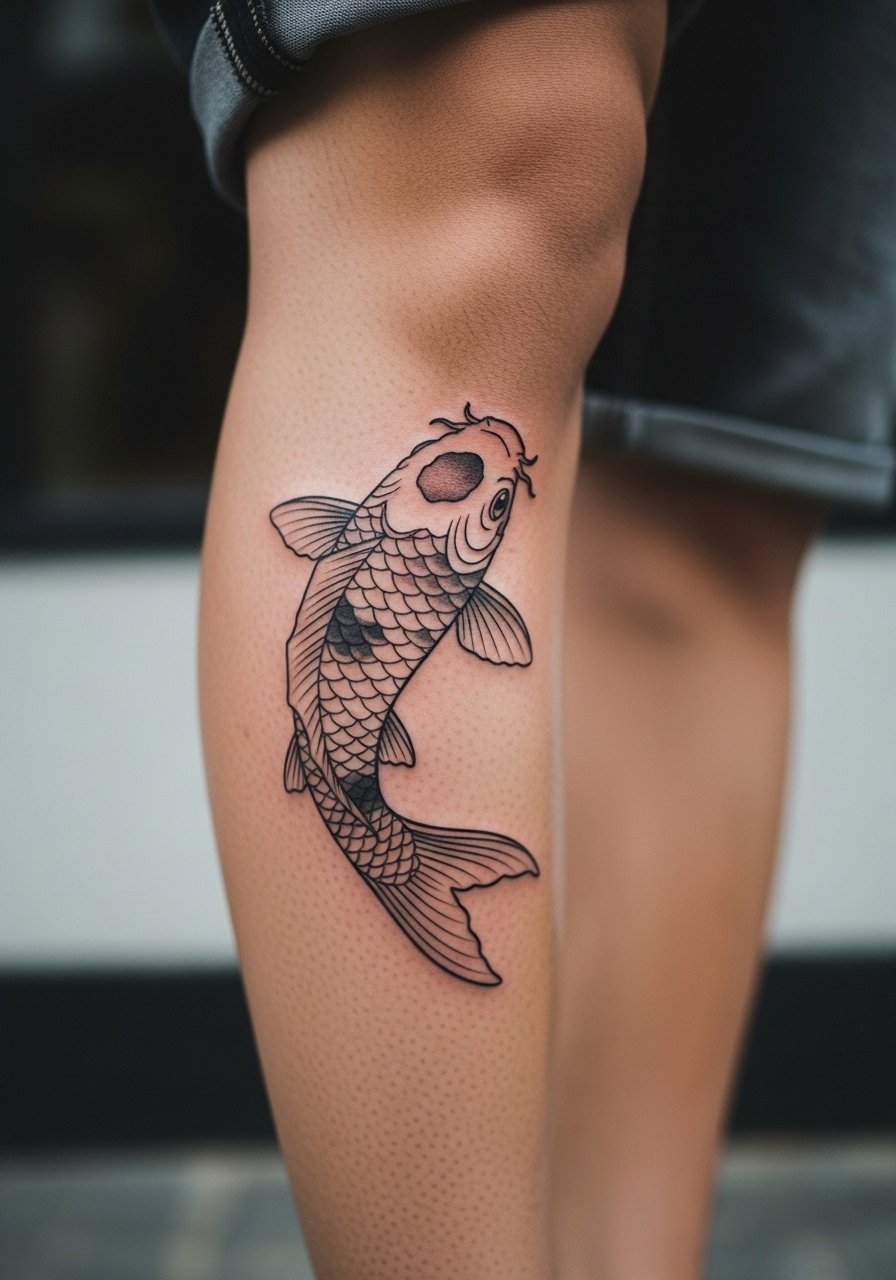
Calf pieces tolerate wraparound composition and usually age predictably. Koi designed to break the surface read well when placed to follow the calf muscle, which reduces distortion with movement. A frequent error is placing too small a koi that loses scale detail. Expect one to two sessions and low to moderate pain. For show-off days roll your bootcut jeans or wear a midi wrap skirt so the fish remains the focus.
11. Semicolon with Mini Lotus on the Side of the Wrist
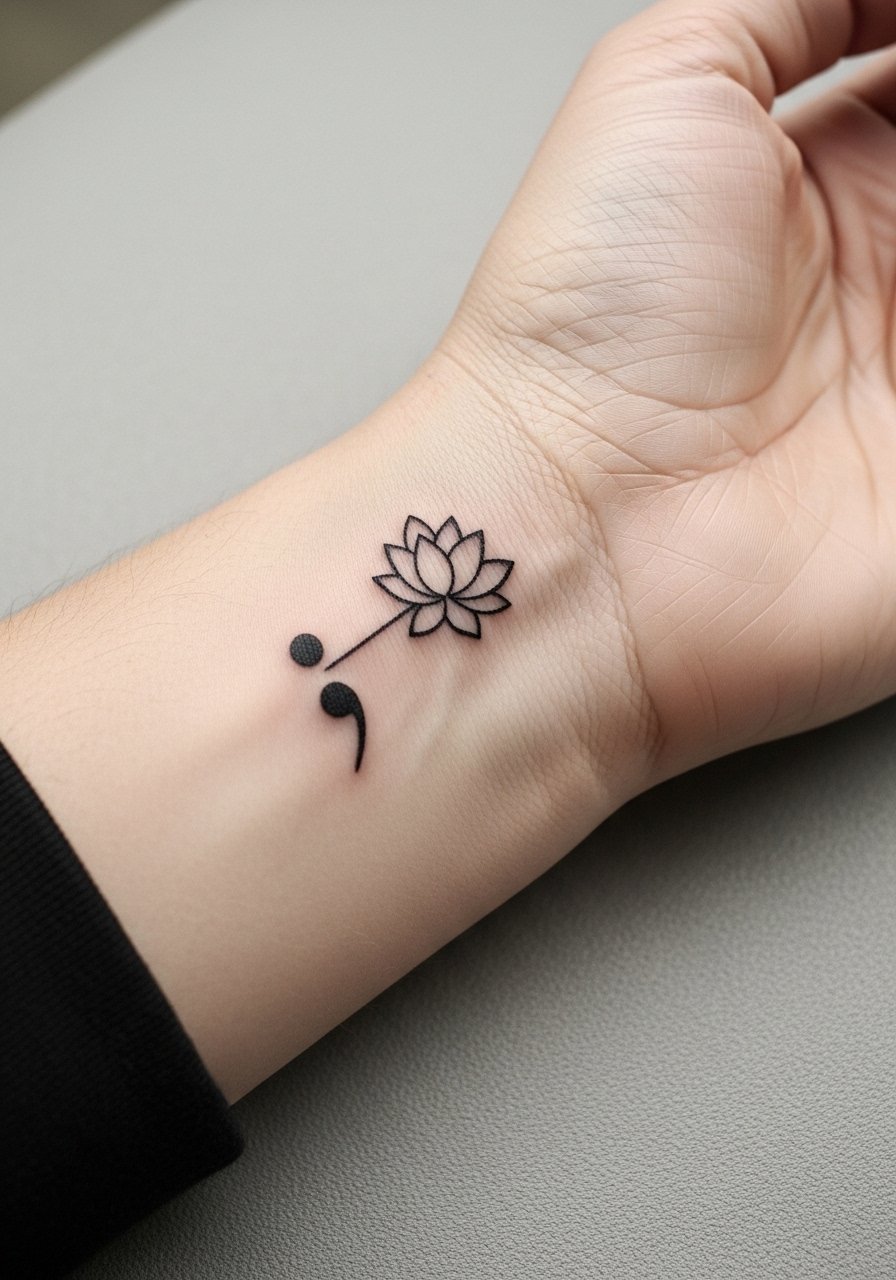
Tiny script and symbol work like this are powerful as daily touchpoints but they require realistic expectations. Fine line here can fade faster if you wash hands often or wear watches that rub. Ask for slightly deeper needle placement and a little extra spacing around the semicolon dot. The typical mistake is making the glyph too small to read after a year. One quick session usually suffices. Balance it with a minimalist wrist stack that keeps attention on the symbol without crowding it.
12. Feather with Breaking Chains at the Collarbone
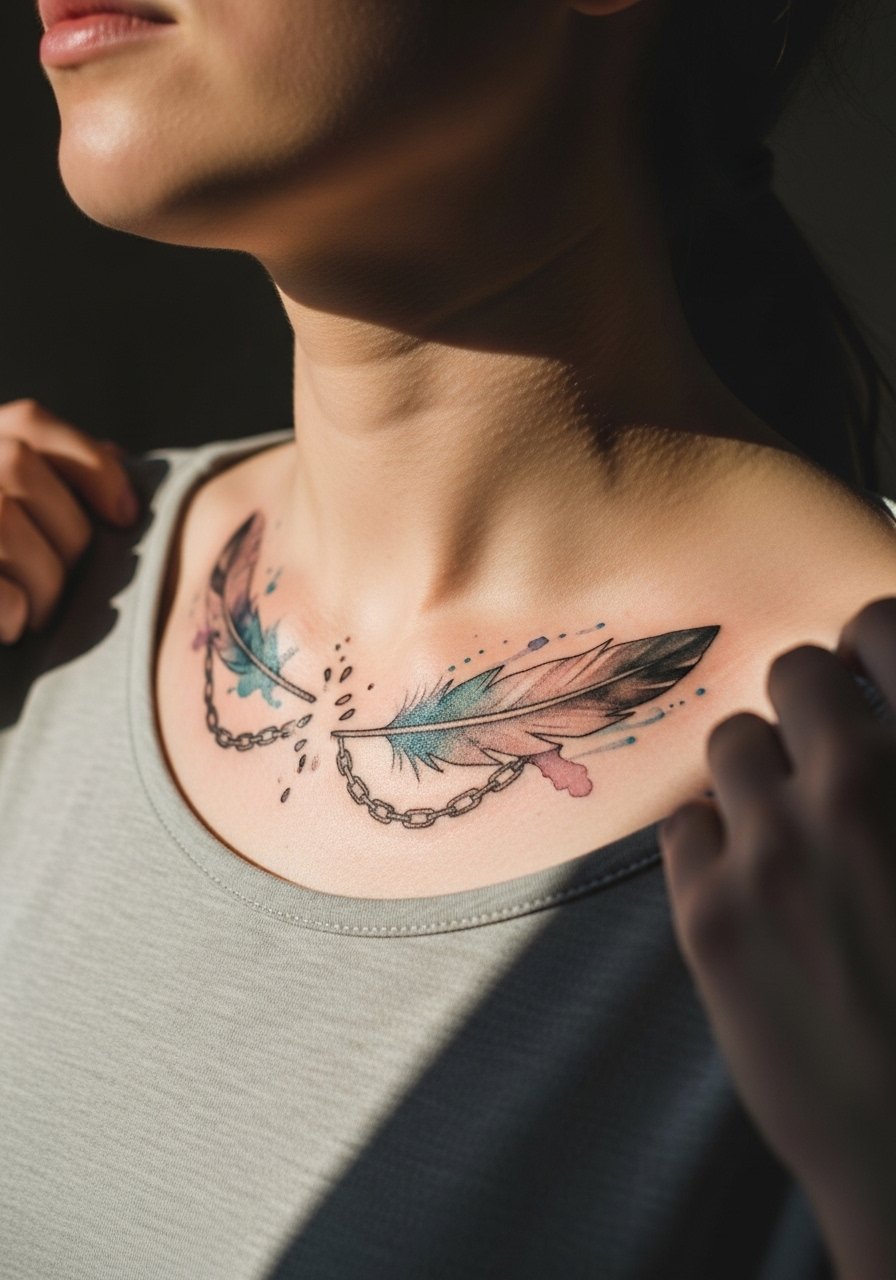
Collarbone pieces sit in a visually prominent spot and can handle delicate watercolor if you pair subtle color with defined anchors. Ask for stipple shading under the feather to protect the wash as it fades. People sometimes pick color without a black anchor, which can make the piece lose shape. Pain is moderate. When you want to show it off, a v neck silk blouse keeps the tattoo framed without rubbing directly on the ink.
13. Tree of Life Roots on the Side Ribcage
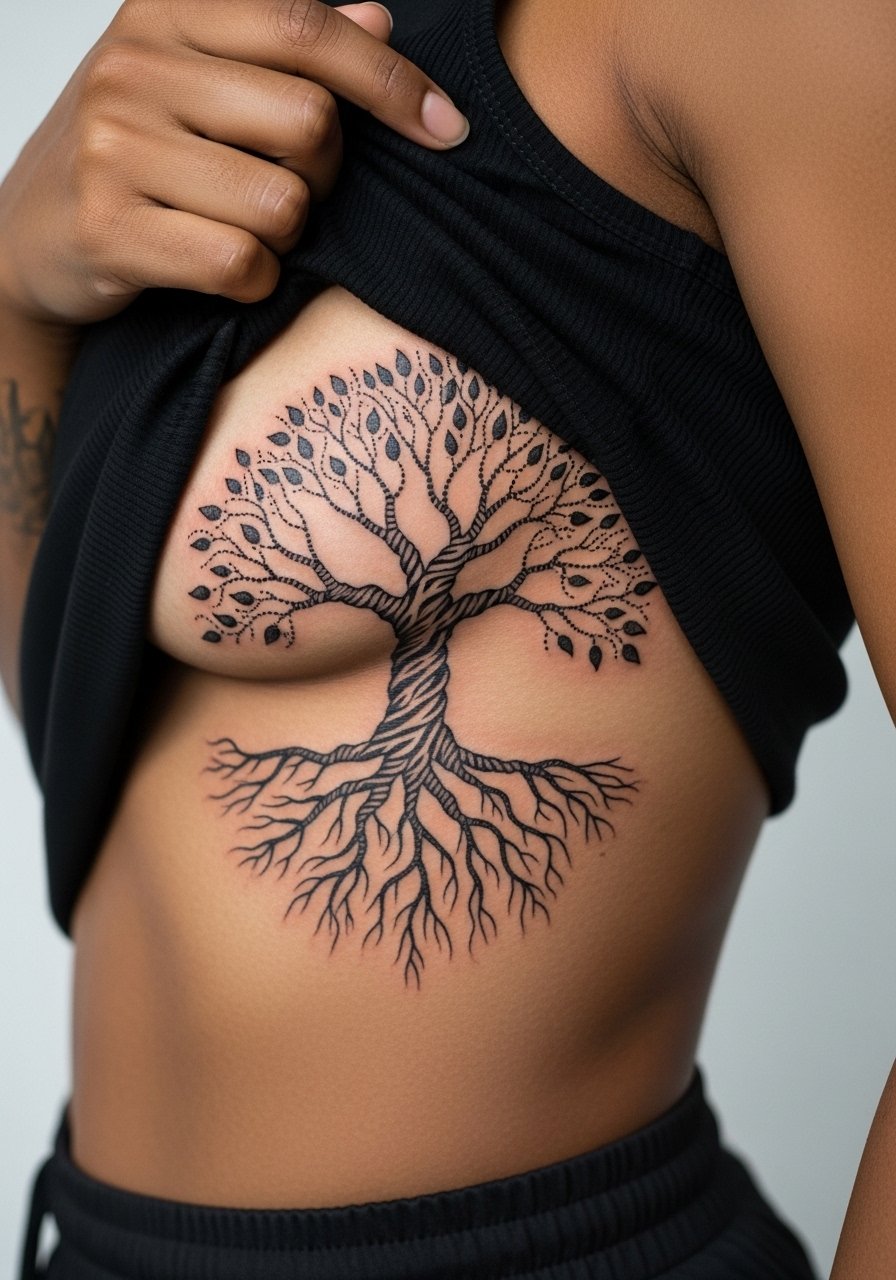
Roots on the ribcage make for a thoughtful, medium canvas, but the area is one of the tenderest while healing. Artists differ on fine line here, and placement choice matters if you expect weight fluctuations. Ask for slightly more spacing in dense root areas to prevent lines from merging at year three. The biggest mistake is going too detailed for the skin there. Expect high pain and plan for two to three sessions. Keep the area dry and avoid tight waistbands during the first week.
14. Phoenix-Lotus Hybrid Across the Upper Back
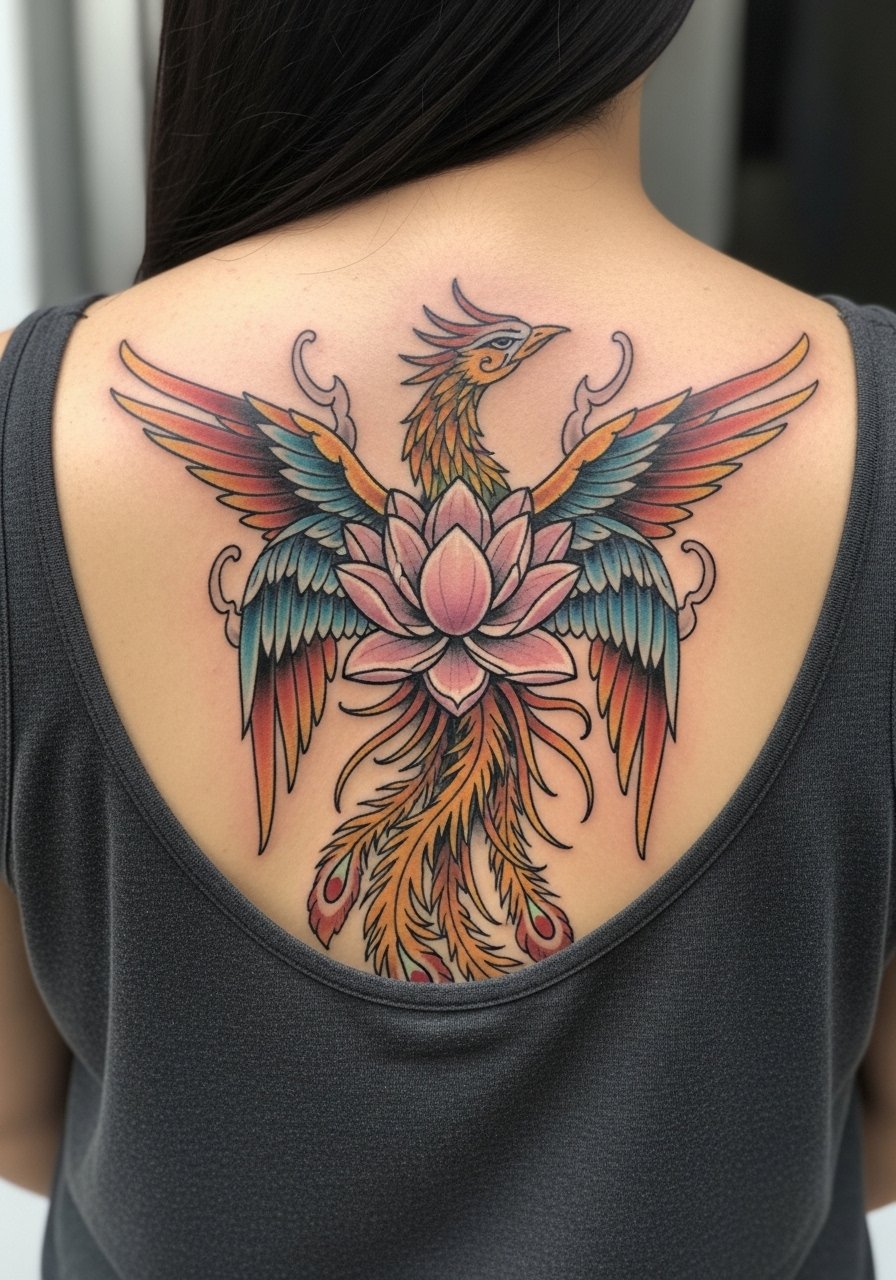
Combining a phoenix and lotus layers symbolism and gives you compositional options that age better than a single thin motif. Tell your artist you want bold contours for the phoenix and dotwork detailing in the lotus so each element reads separately as color fades. People sometimes request ultra-fine lotus petals that disappear next to saturated neo-trad wings. Two to three sessions are common and touch-ups at year three are normal. For the session wear a loose tank top you can pull aside for access without disturbing the rest of your back.
15. Wave Pattern Mandala Running Down the Spine
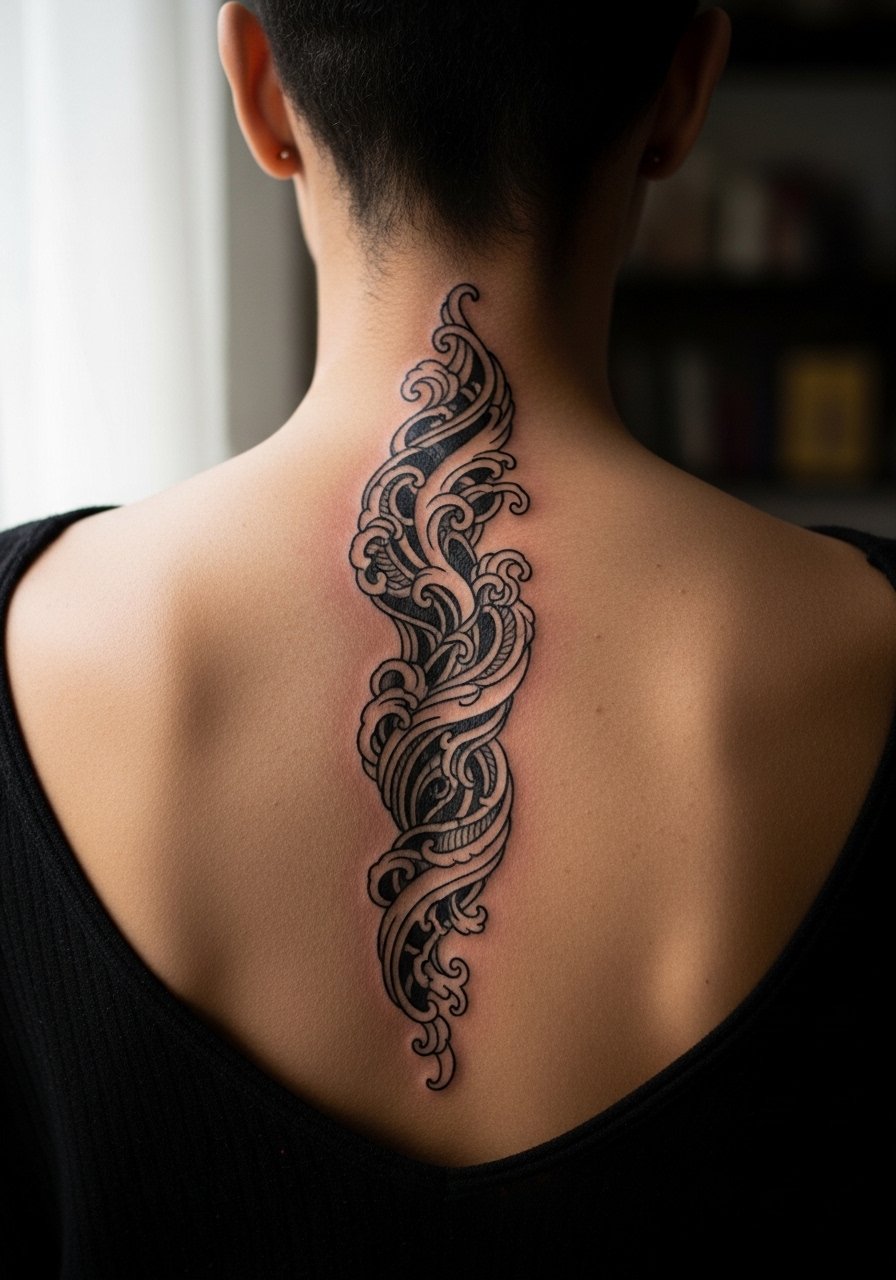
Spine pieces create vertical flow and they picture well under open-back garments, but they can be painful. Ask for larger negative spaces between concentric waves so the design holds up as the skin stretches. A common error is compressing the pattern which leads to loss of definition. Two sessions are typical for medium spine work. When you want to show it, an open-back midi dress reveals the geometry without rubbing the tattoo.
16. Healed vs Fresh Realism Study Piece on the Thigh
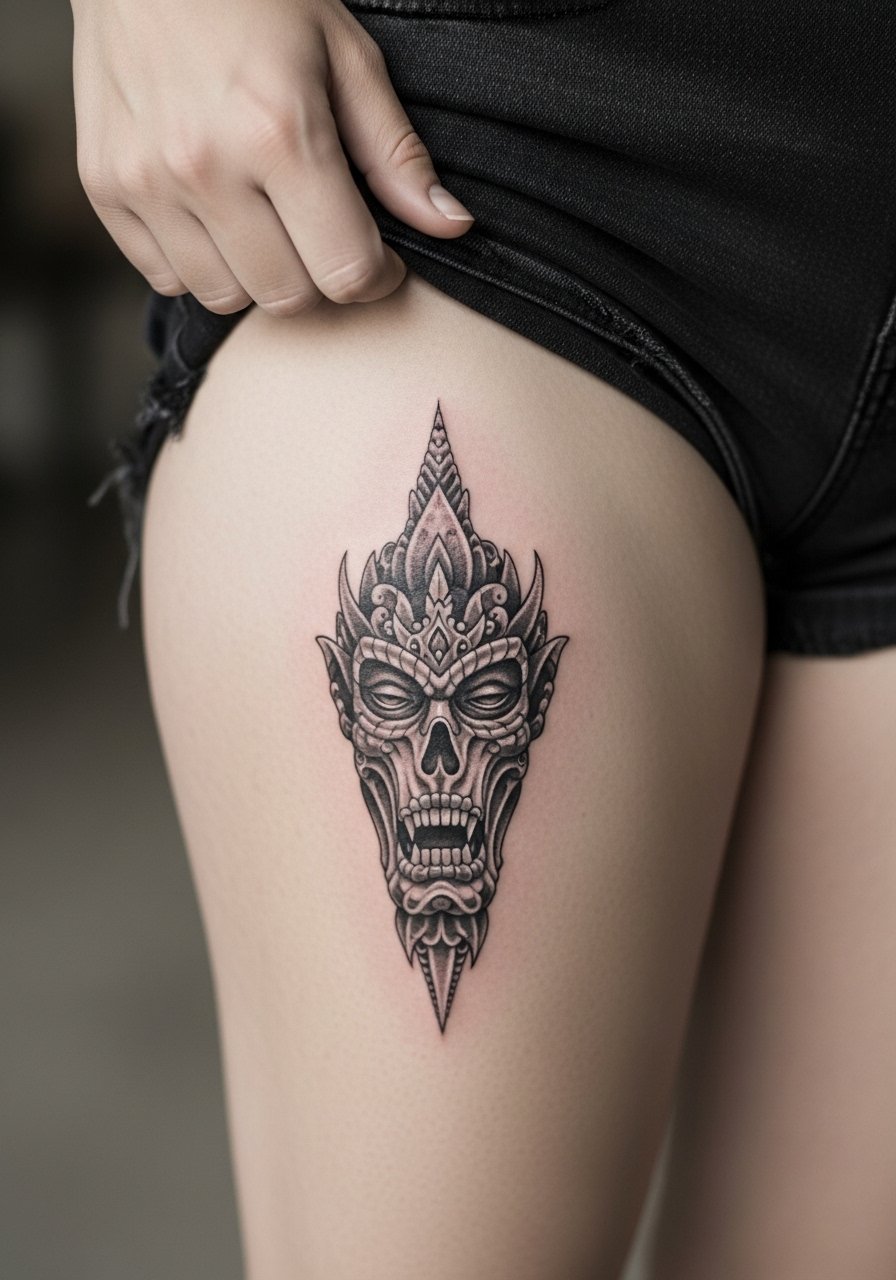
I encourage realism fans to request a test patch or a small realism study on the thigh before committing to a full piece. Thigh skin takes shading well and gives artists room to build layers across sessions. Common mistakes are demanding full photorealism in a single sitting and being surprised by how much touch-up helps the healed look. Expect moderate pain and a multi-session plan that spaces shading to allow ink to settle.
17. Crescent Moon Scar-Cover on the Inner Bicep
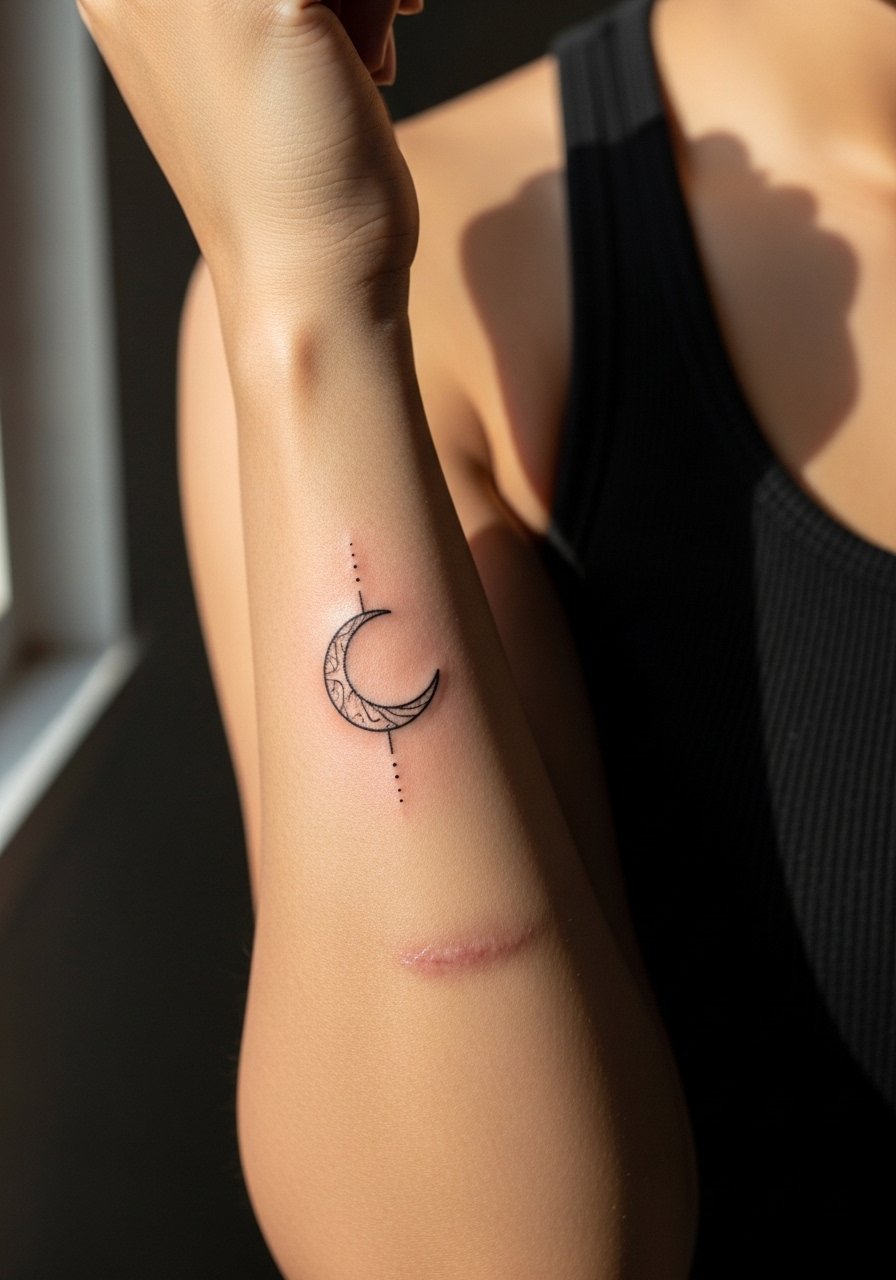
Covering or working around scars needs an honest conversation. Scar tissue takes ink differently, and the inner bicep often requires test spots to see how saturation holds. Ask the artist about how the scar responds to shading and whether multiple light passes are safer than one heavy pass. A usual mistake is assuming scarred skin will behave like normal skin. Pain can be higher depending on the scar, and touch-ups are more likely. Plan consults in person and expect variable healing.
18. Dotwork Mandala on the Ribs
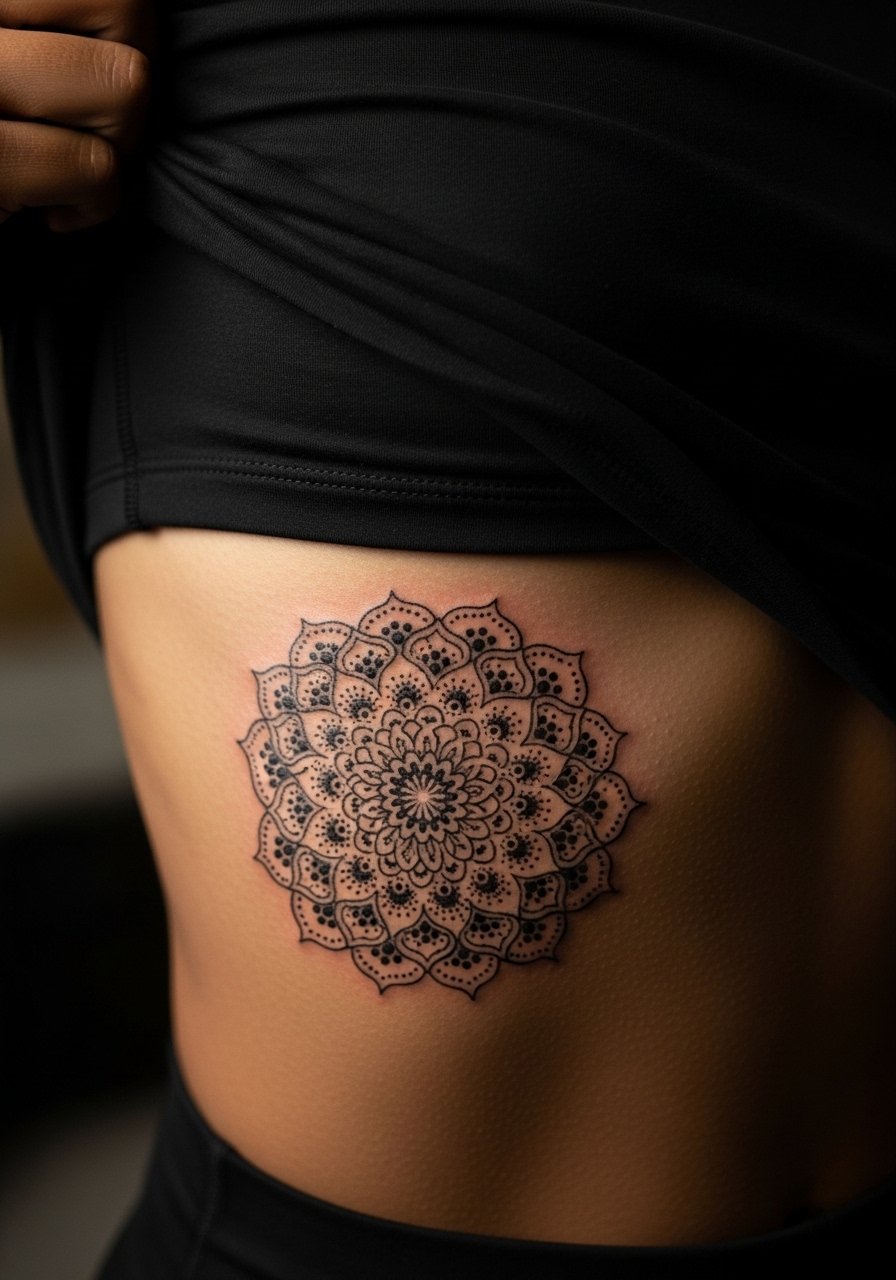
Dotwork on the ribs can look spectacular but it is one of the more painful and patience-testing placements. Tell your artist you want spacing adjusted so the dots maintain structure at year three. People make the mistake of asking for ultra-dense fill in one session, which often needs reworking later. Expect a high pain session and bring a sports bra you can lift for access. The healed texture tends to look excellent if layered gradually.
19. Micro-Realism Phoenix Eye on the Thigh
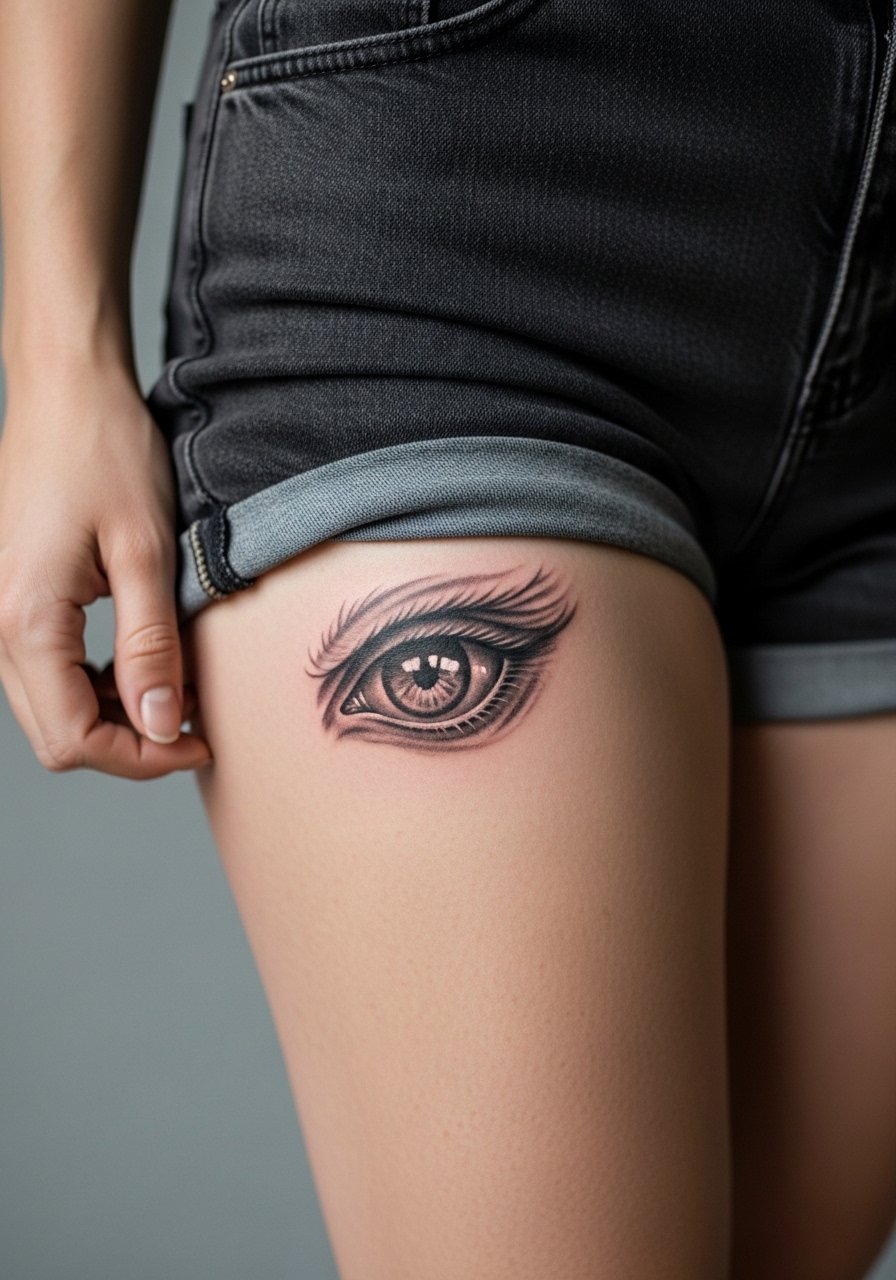
Micro-realism on the thigh benefits from large skin real estate and sits well if you want a single small focal piece that ages gracefully. Request multiple short sessions to build contrast slowly. The mistake is cramming too much detail into a tiny dot that loses nuance after healing. Pain is moderate and the environment is forgiving for touch-ups. Show it off with high cut shorts that reveal the placement without needing constant adjustment.
20. Koi for Perseverance Along the Calf Curve
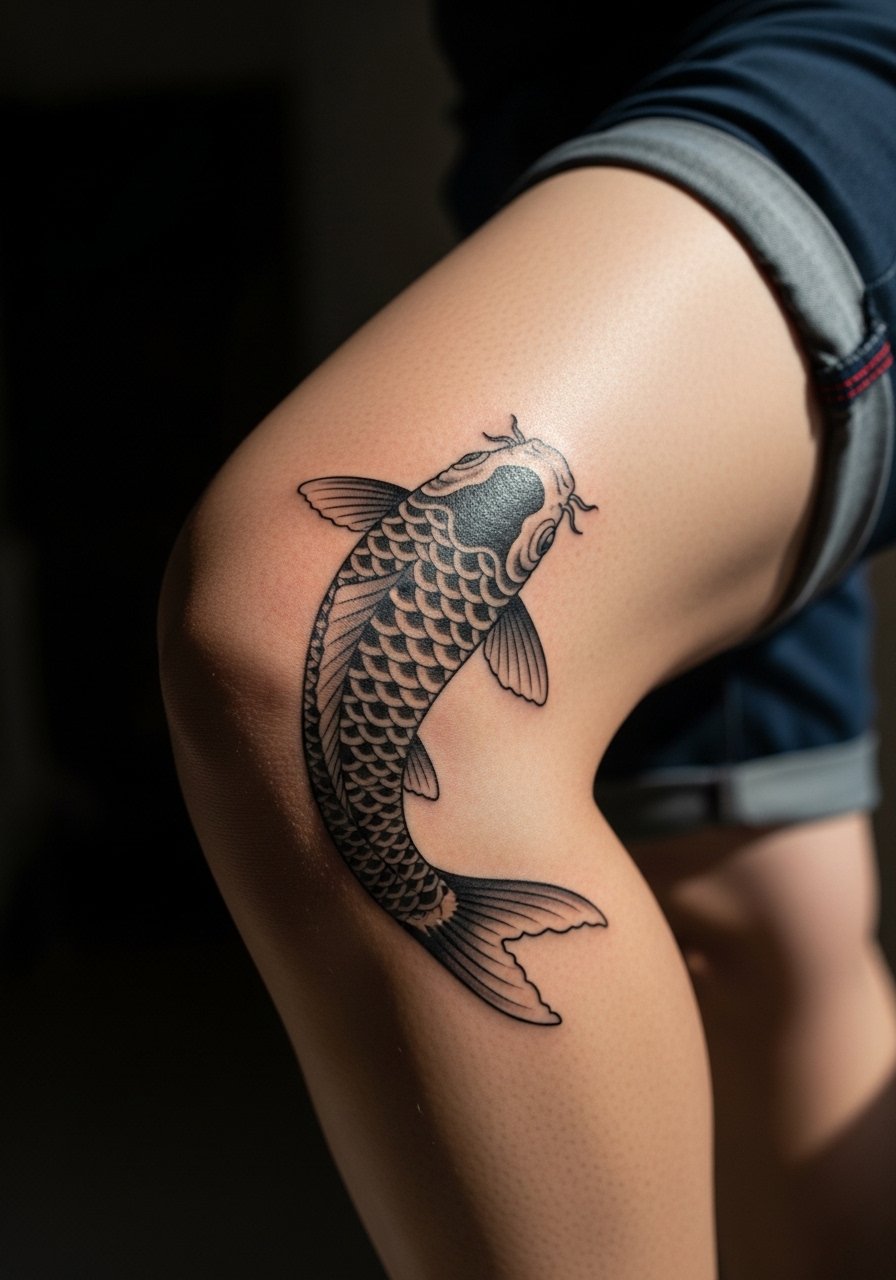
A calf is forgiving for illustrative koi because the muscle movement enhances flow and preserves detail. Ask for the fish to follow natural muscle lines to reduce distortion from weight loss or gain. Small koi packed too closely end up losing scale texture, which is a common error. One to two sessions usually complete a mid-sized calf piece. On show days pair with rolled bootcut jeans or a midi wrap skirt so the art reads from a distance.
21. Single-Line Heartbeat Over a Scar on the Forearm
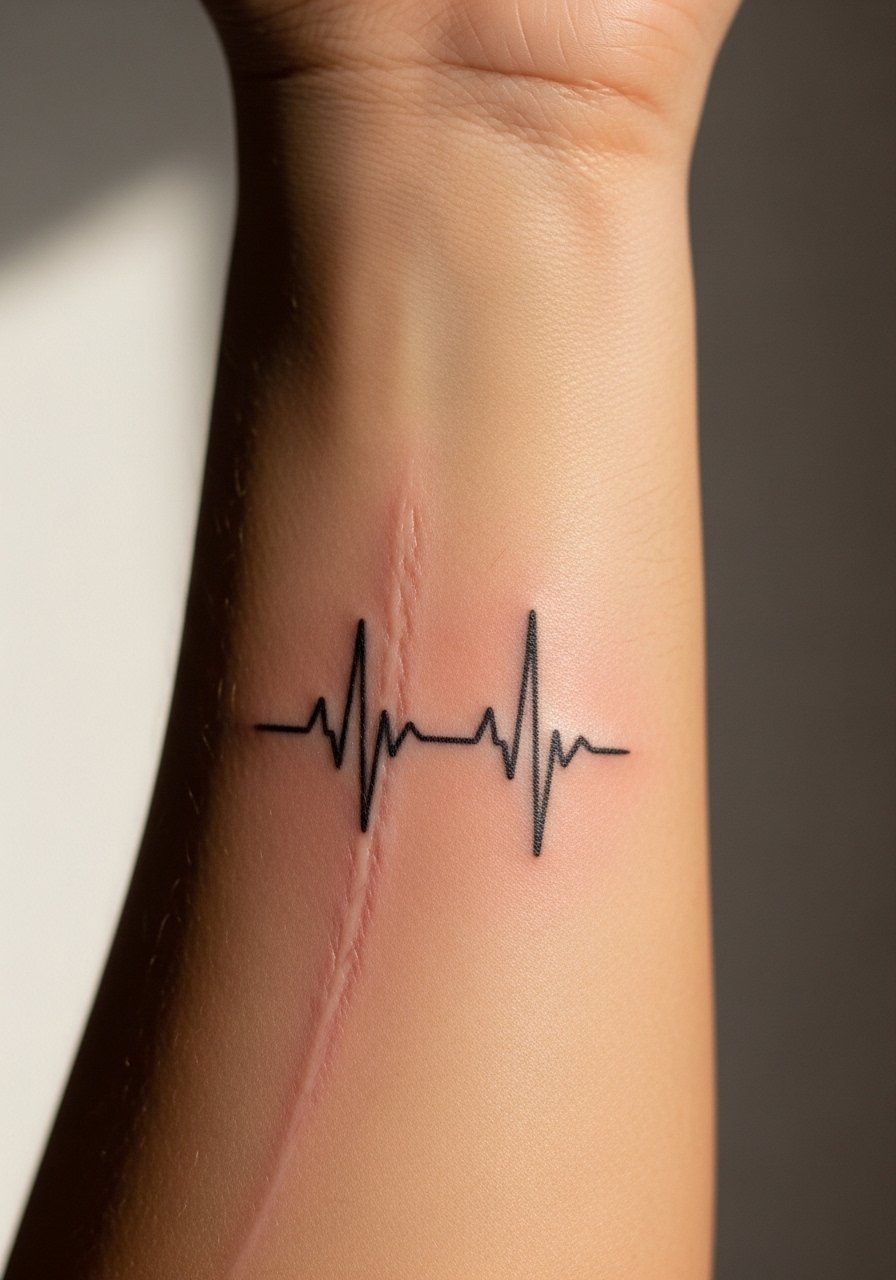
A linear heartbeat piece over scarred skin is subtle and often chosen as a daily checkpoint. Tell the artist about the scar texture and request a slow test pass so the ink settles well. Rushing to complete the stroke in one pass is a common mistake because it can create uneven saturation. Expect low to moderate pain and a single session in most cases. For the appointment wear a loose button down shirt you can roll or pull aside easily.
22. Coordinates Script at the Collarbone
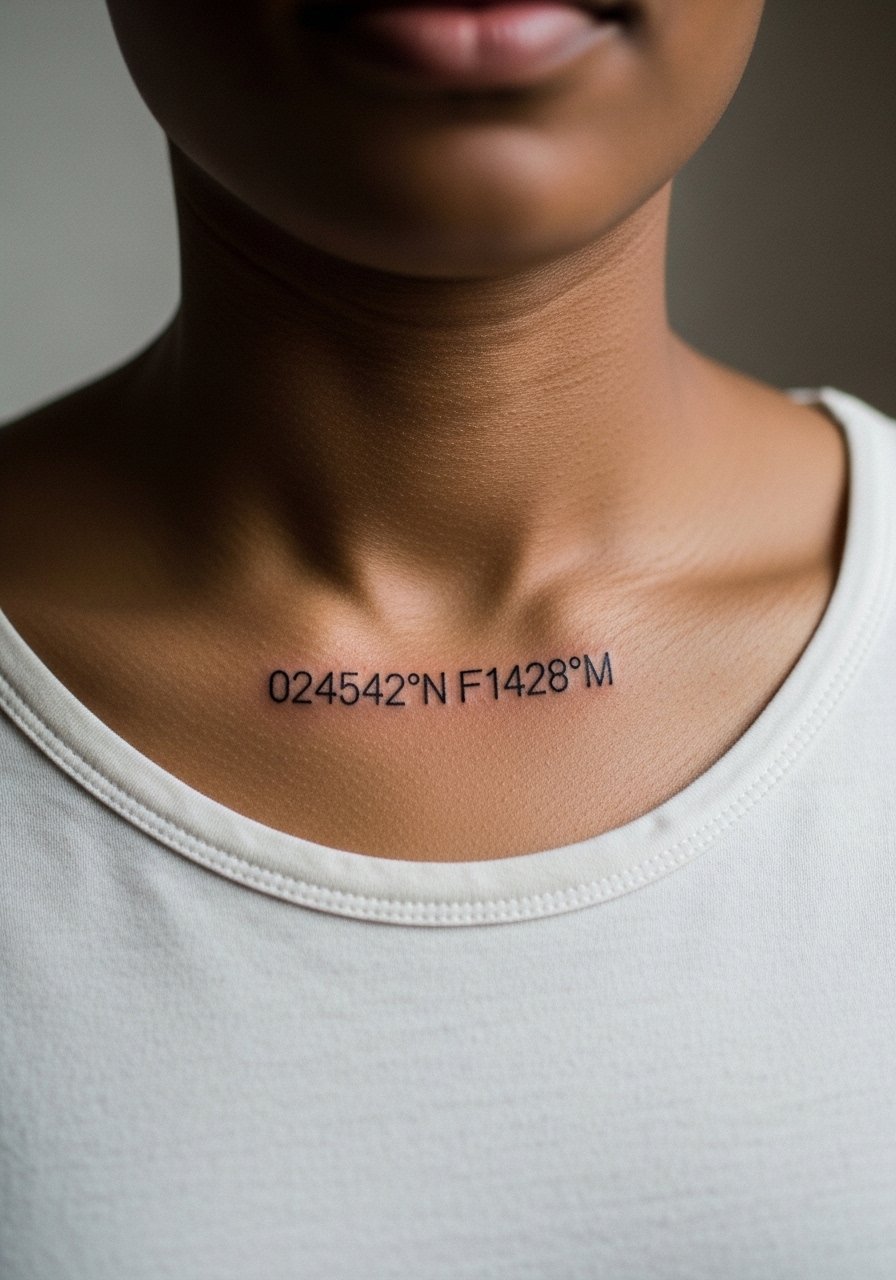
Coordinates are compact and crisp, but collarbone skin can blur tiny script if the letters are too close. Ask for slightly wider kerning and a simple sans serif style so the numbers remain legible as they age. The common mistake is choosing decorative cursive that becomes unreadable after fading. Pain is moderate and a single short session is typical. A v neck silk blouse frames the piece without putting pressure on the ink.
23. Saltwater Wave Ankle Band
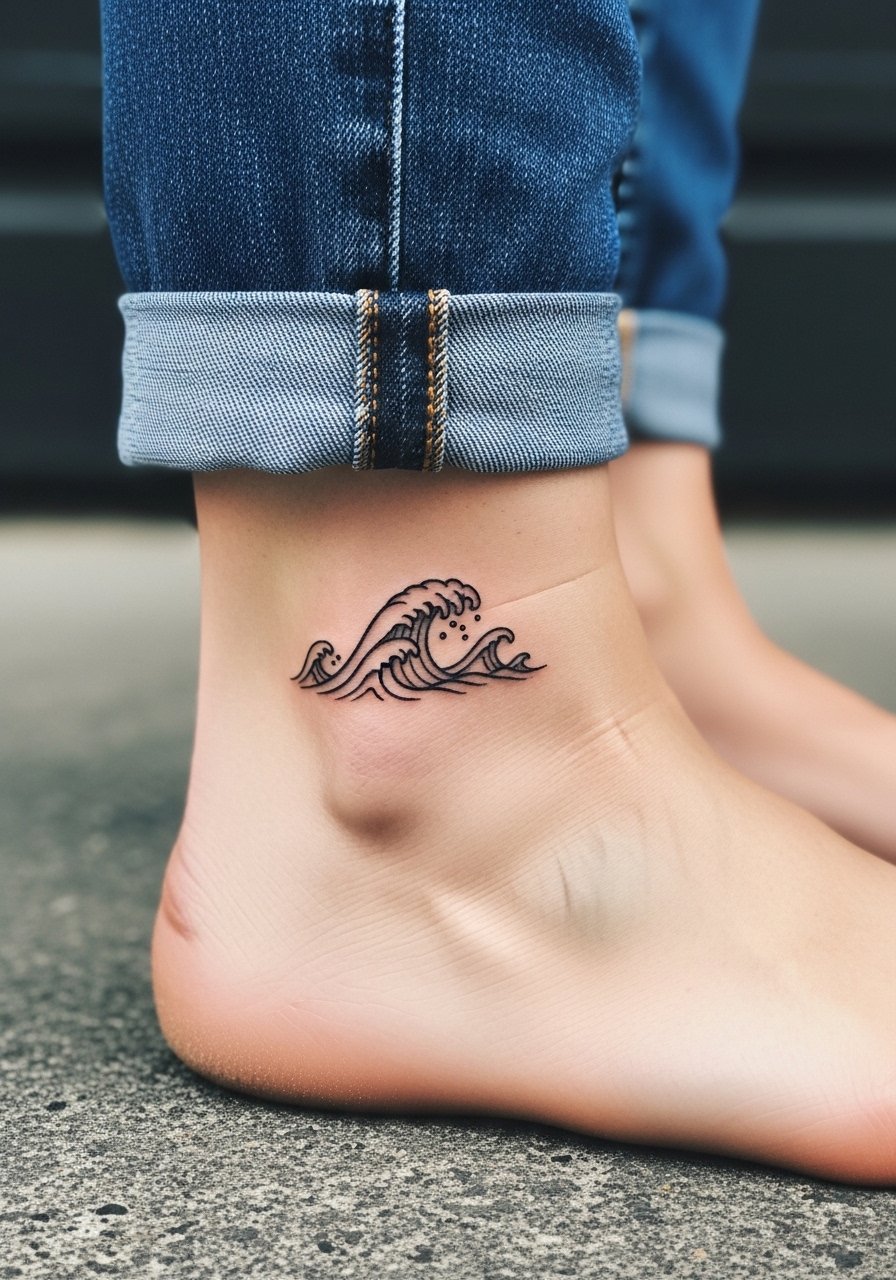
Ankle bands echo motion and look great with footwear that keeps them visible. Because ankles see frequent friction, pick a medium line weight rather than the thinnest possible line. Many people underestimate how socks and shoes abrade new ink in week one. One session often covers a simple band. For summer wear choose strappy flat sandals that show the band without rubbing it.
24. Lotus Quote Band on the Outer Thigh
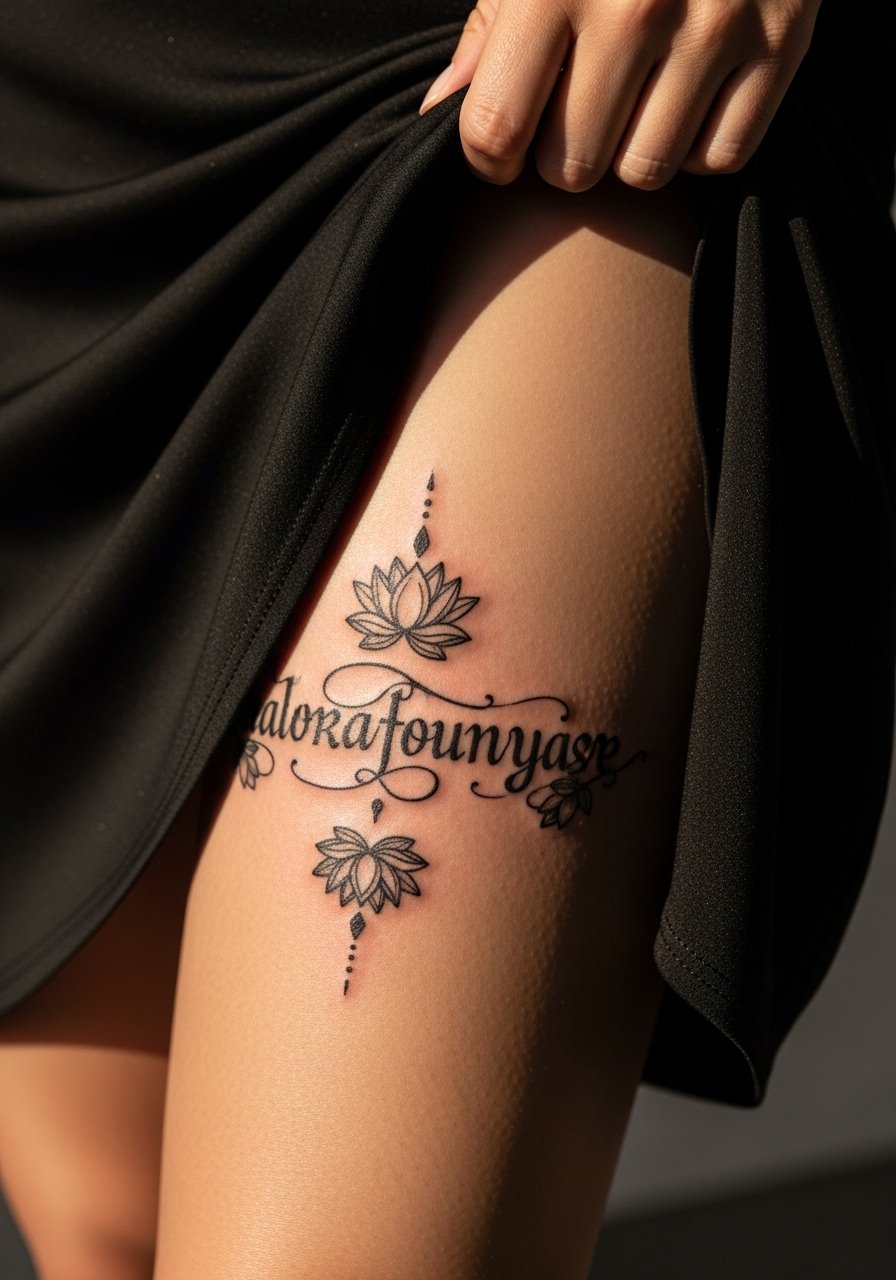
Thigh bands give you length for script plus ornamentation without the visibility concerns of hands or wrists. Ask your artist to test letter spacing across the thigh curve so words stay legible as skin stretches. The mistake is choosing tight script that becomes cramped after a year. Expect low to moderate pain and a comfortable one to two session plan. For showing it off select a slit skirt that reveals the band without tugging.
25. Rebirth Snake Segment on the Upper Arm
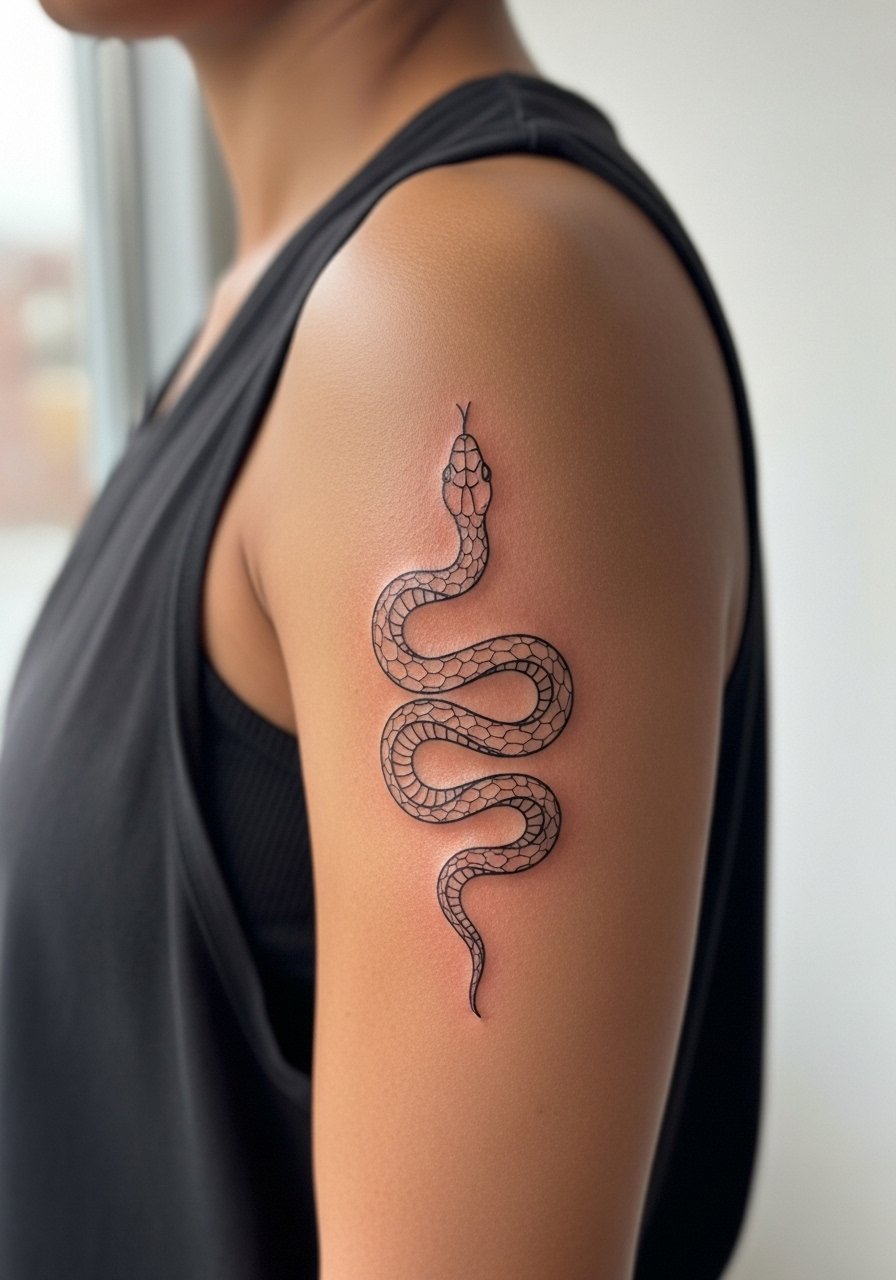
Upper-arm snake segments resist the stretch issues that can plague forearm pieces, and they look solid under bold outlines. Ask for a mix of fine internal detail with a clearer outer contour so the motif ages well. A common mistake is going too thin on the outer line, which causes the snake to lose shape over time. One to two sessions usually complete a medium segment. For the session wear a loose tank top you can shift without rubbing the ink.
26. Minimalist Arrow Over Scar on the Forearm
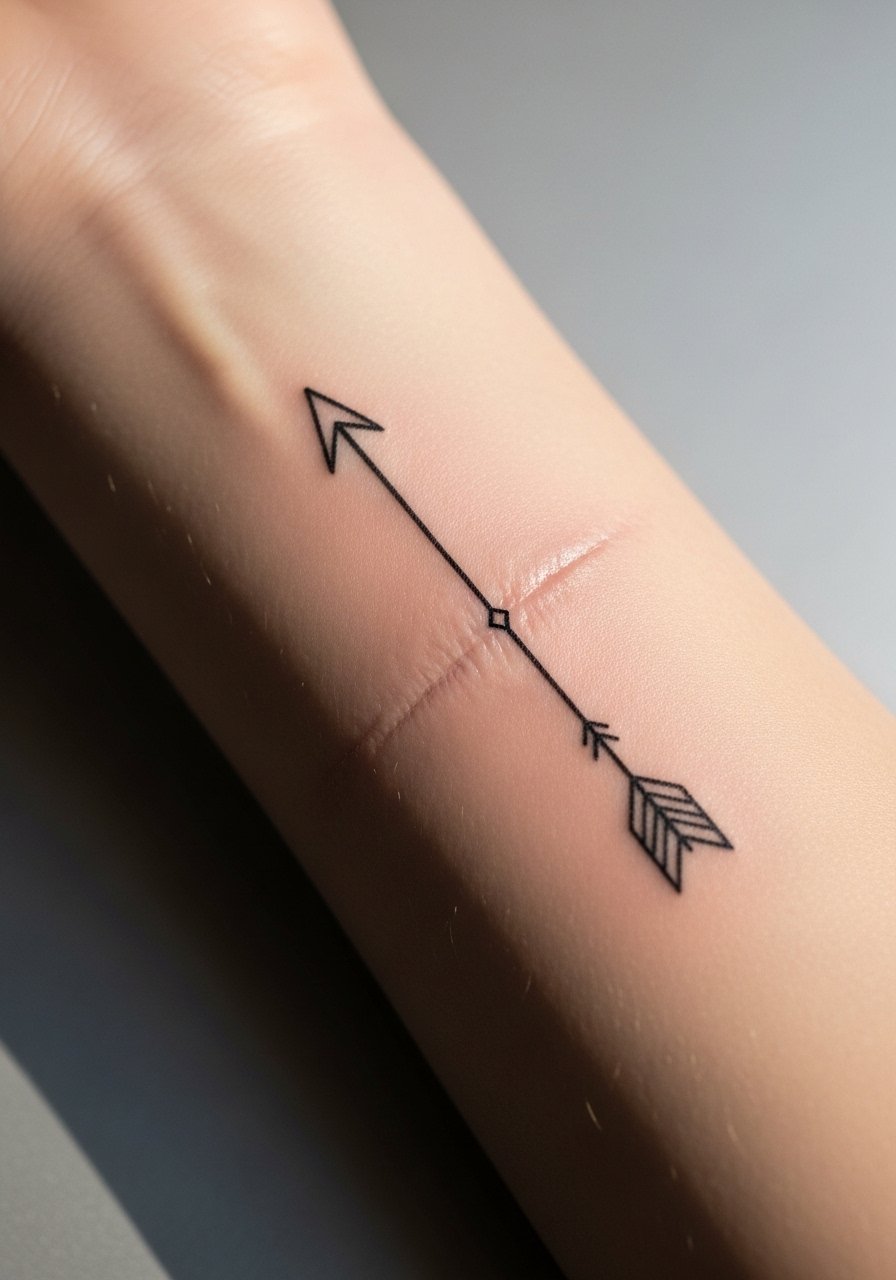
Arrows over scars work because the linear element can mask texture while remaining readable. Tell your artist about the scar age and depth, and request a single steady pass at consistent depth. The usual mistake is expecting scar tissue to accept ink evenly the first time. Pain depends on the scar and forearm sensitivity. For the appointment wear a linen button down shirt that you can roll without irritating the area.
27. Tiny Constellation on the Back of the Hand
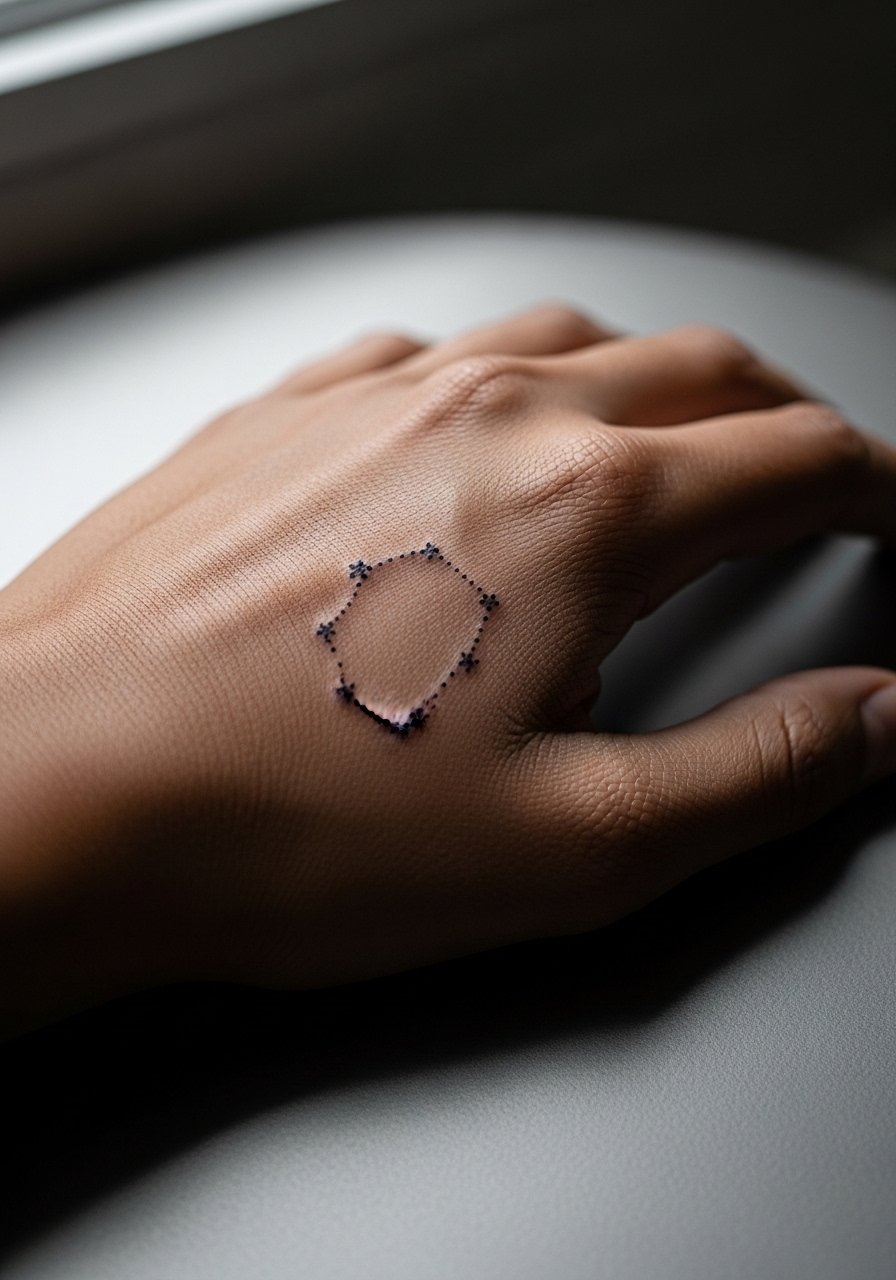
Hand tattoos spark debate because fine line here is notorious for early fading. One camp of artists recommends avoiding the hand for fine detail, saying it blurs within a year. The other camp fits slightly bolder lines and schedules regular touch-ups, claiming the look can last longer. If you choose a constellation, ask for marginally heavier dots and allow for a planned touch-up at year one. Expect faster fading and a higher touch-up rate, and plan your style expectations accordingly.
Frequently Asked Questions
Q: Will a fine line lotus on my wrist blur faster if my skin tone is darker?
A: In my experience fine line tends to soften sooner on high-contrast skin and in areas with heavy use, but many artists use adjusted needle depth and slightly bolder outlines to extend clarity. If you have darker skin, mention this in consultation and ask to see healed work on similar tones.
Q: Do watercolor tattoos need different prep than traditional saturated pieces before a shoulder session?
A: Yes. Watercolor relies on softer saturation, so avoid sunburns in the week before and wear a linen button down shirt you can roll up when you arrive. Tell the artist you want a subtle black anchor if you want the shape to remain defined over years.
Q: How often should I expect touch-ups for a realism phoenix on the ribcage?
A: Plan for a touch-up within two to three years for ribcage realism. The ribs move and heal differently, so multi-session shading upfront reduces how often you return. A small maintenance session at year three is common to restore contrast.
Q: Is Saniderm or dry healing better for small wrist pieces?
A: Artists are split. One camp prefers Saniderm because it speeds the first week and keeps the area clean. The other camp argues dry healing lets the skin breathe and avoids trapped moisture. I suggest asking your artist which they use routinely and why, and follow their process for best results.
Q: What should I wear to a shoulder or upper-arm appointment so the artist has easy access?
A: Choose loose layers you can move aside. A loose tank top or an off-shoulder blouse that can be shifted without rubbing the fresh ink works best. Bring a sweater to wear after the session if the salon is cool.
Q: Are ankle and hand tattoos worth the maintenance if I want longevity?
A: They are worth it if you accept maintenance. Ankles see friction from shoes, and hands face constant washing and exposure. Both placements often need touch-ups sooner than forearms or shoulders, so factor that into your plan and budget.
