
Fine line tattoos are trending online, and a lot of what looks flawless on a phone screen does not hold up the same way after a year in real life. What keeps a tiny neck piece readable is placement, line weight, and honest expectations about touch-ups. Read these 17 small neck ideas with practical notes on how they age, what to ask your artist, and how to wear them so the design works both at the session and a few years down the line.
1. Fine Line Arrow on Side Neck

The arrow is a minimalist classic that reads directional without taking over your collar. I recommend 1.5 to 2 mm line weight rather than a single needle to slow early fading. Tell your artist you want the shaft slightly bolder than the tip and that it should sit on the flatter part of the side neck, not the curve where skin stretches. Expect a single short session and a touch-up around 6 to 12 months for fine lines. Fair warning, sweat and constant collar friction speed fading, so plan placement near where collarbones meet the neck if you want longevity. For showing it off, pair with an open-collar henley so the shirt frames the line without covering it.
2. Micro-Realism Skull Behind Ear
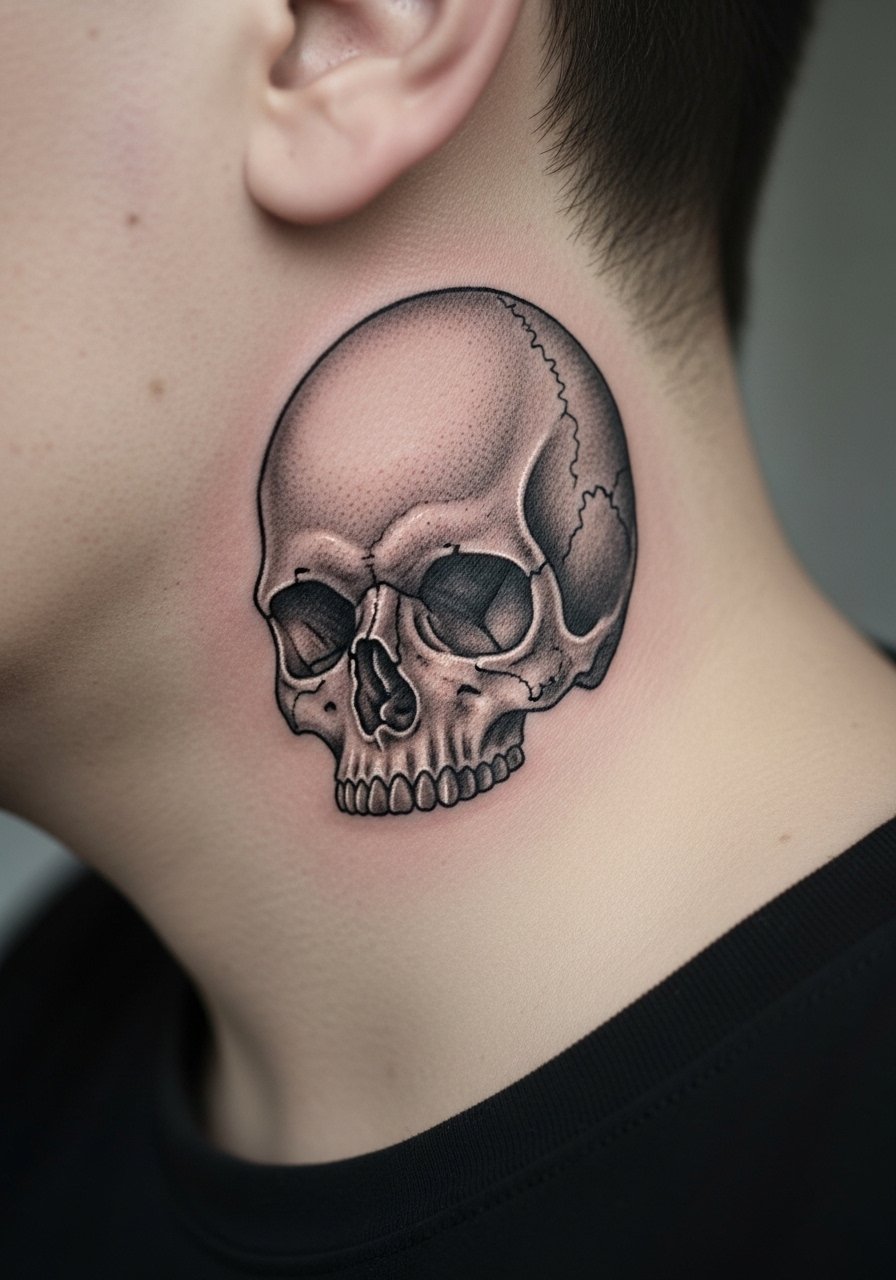
Behind-ear placements are small but punchy because they peek out when you sweep hair back. A 2 cm micro-skull should use tight graywash and high contrast for image clarity. Ask your artist for micro-realism reference photos at the same scale so they know how compact detail reads. The session feels quick but fiddly, and blowout risk is lower there than on the front neck. Many people make the mistake of requesting extreme tiny detail that blurs into gray after a year. Choose solid contrast and accept a clean black outline to protect the tones. For a casual display, a simple crewneck tee with hair swept back keeps the piece visible without shouting.
3. Minimalist Cross at Nape
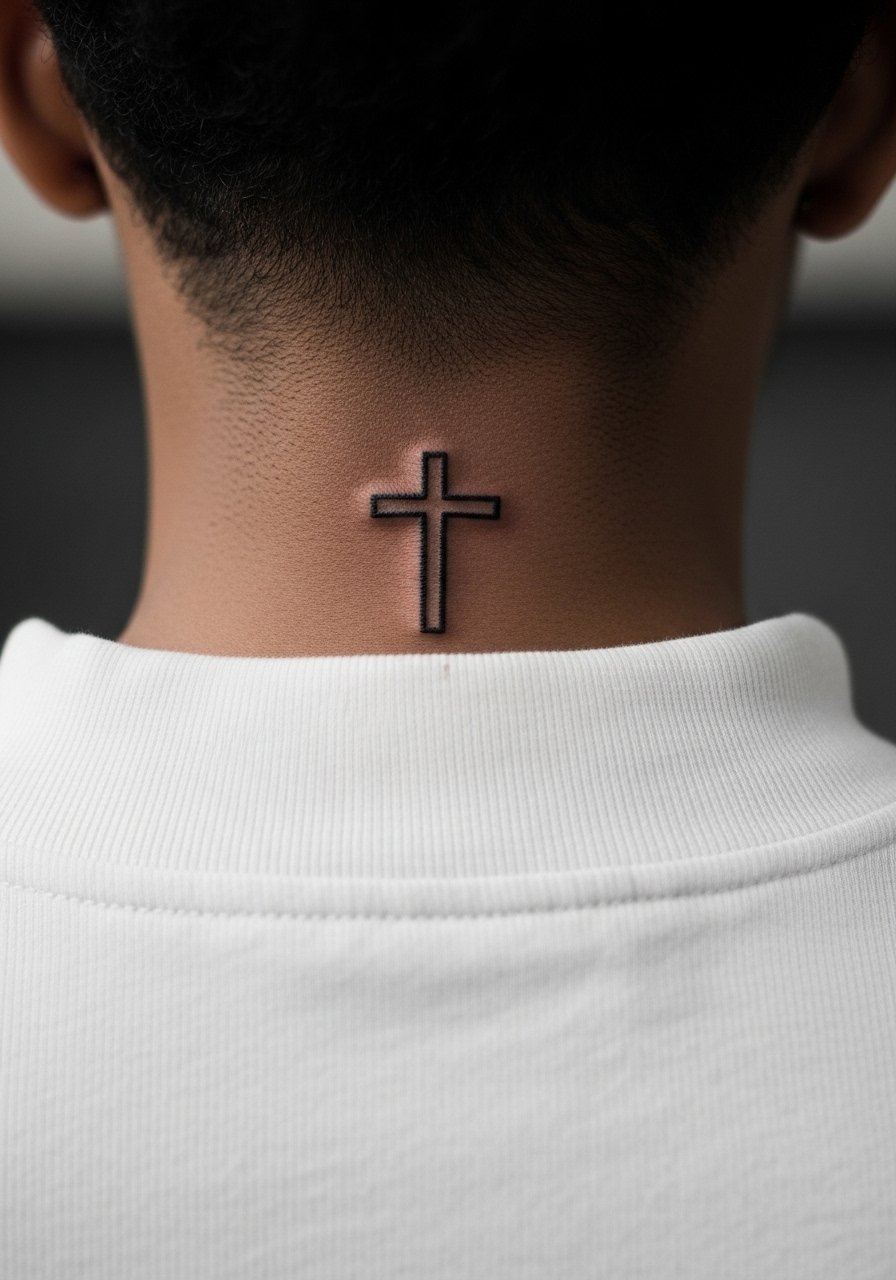
A small cross at the nape hides easily under hair and shows when you want it to, which is why lots of desk-job folks pick it. Placement matters here. Put the cross over the bony spot at the base of the skull to reduce movement during healing. The session is short and typically single-needle linework works fine, but artists disagree on whether single-needle holds on neck skin. Name both camps in your consult: one says thin needle holds with touch-ups, the other prefers slightly heavier lines to avoid early fading. Expect to book a touch-up at 6 to 12 months if you want crisp edges. For showing off, a high-neck tee pulled down a touch or a half-up hairstyle frames the area cleanly.
4. Blackwork Geometric Triangle on Lower Neck

Blackwork holds up better than light color or fine stipple in high-friction zones, and a filled triangle gives you strong contrast that stays readable. Tell your artist you want full saturation and crisp edges, and ask about spacing so the triangle does not crowd the Adam's apple. This is a single-session piece but expect some tenderness when swallowing. The mistake people make is going too small; keep each side at least 2.5 to 3 cm so the fill does not become a gray smudge over time. For a clean visual, pair this with a v-neck polo that leaves the lower neck in view.
5. Neo-Traditional Lion Outline on Side Neck

A small neo-traditional lion reads as leadership or personal grit without full-color saturation. For a neck curve, ask the artist to follow the natural muscle line so the face looks balanced at different head angles. Expect two short sessions if you want light shading; pure outline can be one. Common mistakes include over-detailing the mane in a 3 to 4 cm piece, which turns into busy gray after a few years. If you have facial hair, discuss how a beard will interact with the silhouette. To show it off, roll a collar or wear an olive button-down shirt that contrasts with the ink.
6. Ignorant Style Dagger at Nape

The ignorant style keeps a raw, hand-drawn energy that looks intentional when executed with confident, uneven linework. A 2.5 cm dagger at the nape heals faster than neck-front pieces because hair and collars can protect the area. The session is quick and rough lines age into the messy texture the style embraces, yet if you want the scribble look preserved ask the artist to use slightly heavier passes to avoid early fade. One controversy here is Saniderm versus dry healing for nape work. Some prefer a protective film to block sweat during festival season. Others say dry healing gives a cleaner scab and better long-term saturation for bolder lines. Name both camps to your artist and decide based on your sweat profile. For studio day comfort, throw on a short-sleeve button-up so you can move without tugging at the neck.
Studio Day Picks
The first six neck ideas above include collar and nape placements that need different prep than a sleeve session, so pack a few targeted items for comfort and cleaner healing.
-
Tattoo Goo balm. A thinner, non-greasy balm recommended by many community threads for neck areas that rub against collars, helps reduce itching without heavy shine.
-
Frida Ink Balm. Breathable formula that users praise for sun-exposed neck tattoos, useful if your piece sits where UV hits daily.
-
Curel tattoo lotion. Lightweight, low-residue lotion that suits sensitive neck skin and avoids the white cast some balms leave on darker tones.
-
Badass Balm. Thinner than many mainstream options, it helps maintain saturation on bold blackwork pieces without clogging.
-
Saniderm protective film. For people who sweat or wear helmets, a short initial film can keep the area clean for the first three days, but discuss removal timing with your artist.
7. Ornamental Mandala Behind Ear

A tiny mandala behind the ear is striking up close and discreet at a glance. For symmetry choose a simple radial pattern under 2 cm so the negative space reads clearly as it heals. The typical mistake is asking for extremely dense linework in a tiny circle. Dense mandalas need spacing or they merge as the skin settles. Many people report dry healing worked best for this placement because trapped sweat under film can soften lines. Ask your artist about line spacing and whether they prefer Saniderm or dry aftercare for that exact design. If you want an everyday balance, pair the piece with a single small stud earring on the opposite side and a small stud earring that keeps attention balanced.
8. Traditional Anchor on Lower Side Neck

A classic anchor reads as stability and works visually when kept compact. Use solid black outlines and a single block of red for a punch without risking early color loss. The lower side neck sits near clothing seams, so wear loose collars the week after to avoid rubbing. The session is straightforward and quick. A common mistake is packing too many color accents into a tiny piece. If you want longevity, prioritize linework and one accent. This placement is visible with open collars, so consider shirt choices when you need discretion.
9. Fine Line Script at Base of Neck

Horizontal script at the neck base reads intimate and personal, but fine lines there can soften faster than you expect. For a one-centimeter tall script pick a slightly heavier script weight and ask for spacing between letters. Tell your artist if the word will be exposed to sun daily, because even black ink needs SPF to preserve edge crispness. Touch-ups at 12 to 18 months are common for small scripts. Avoid overly ornate calligraphy in a tiny space. For a layered look, wear a zip hoodie or beaded choker that sits above the script to frame it.
10. Micro-Realism Rose with Thorn on Side Neck
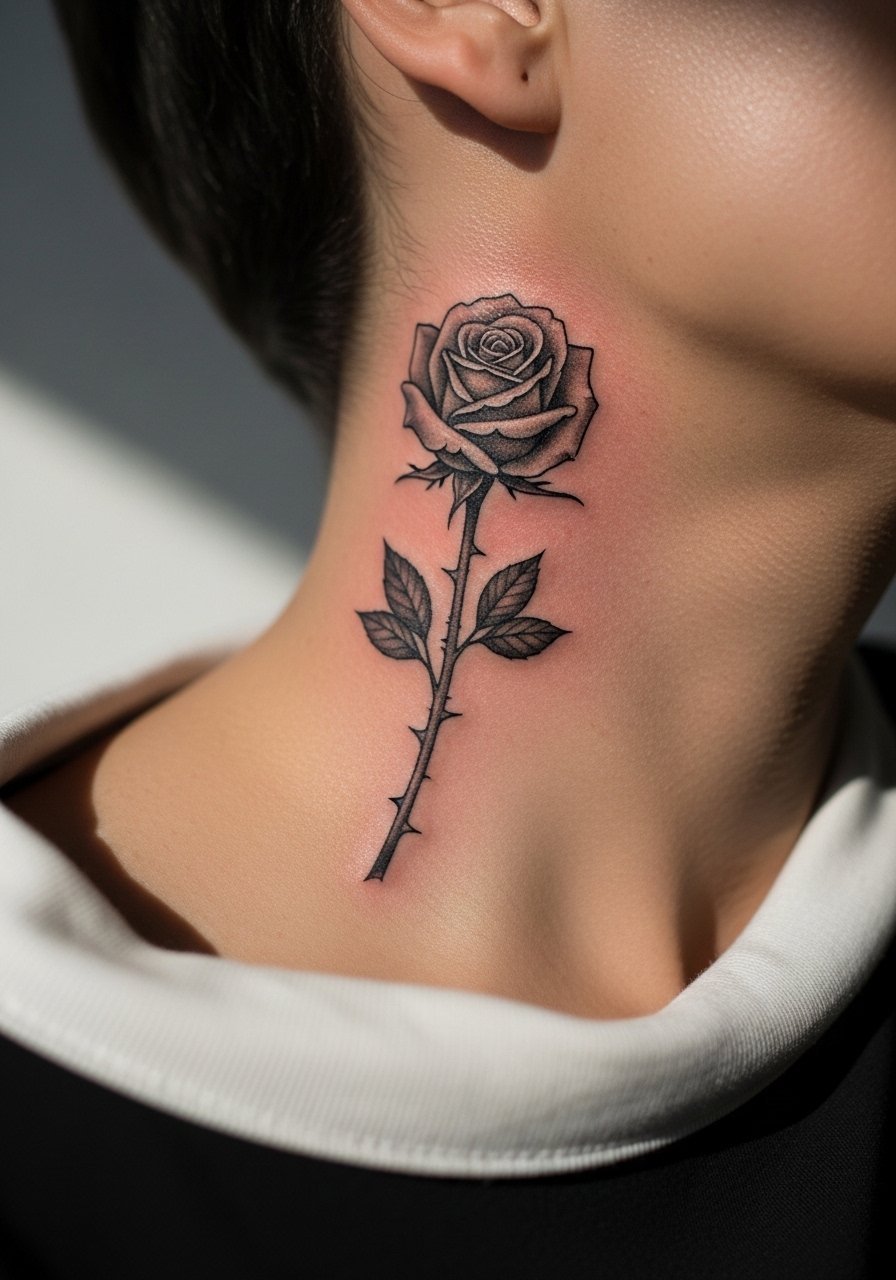
A small rose plus thorn line gives you a narrative of contrast in a compact vertical layout. For micro-realism, prioritize high contrast and fewer tiny details to avoid muddying. Ask for heavier petal edges and lighter interior shading so the bloom reads at a distance. The thorn stem should follow the neck's vertical so it does not collide with motion folds. Sun exposure can gray the mid-tones, so expect a touch-up schedule of 12 to 24 months depending on time outdoors. For studio day, wear a loose crewneck tee so the artist has clean access and you do not irritate the site afterward.
11. Blackwork Barcode at Nape

A barcode at the nape sits in stealth mode under most collars but peeks when you unbutton a shirt. Solid black bars are forgiving because saturation ages well compared to thin script. Place it horizontally across the bony nape to reduce blowout risk. The mistake people make is compressing too many thin bars into a tiny width. Keep the bars broad and the white space deliberate so the pattern stays crisp. If you work in a professional setting and want control over visibility, this placement is a smart compromise.
12. Minimalist Star Cluster Behind Ear
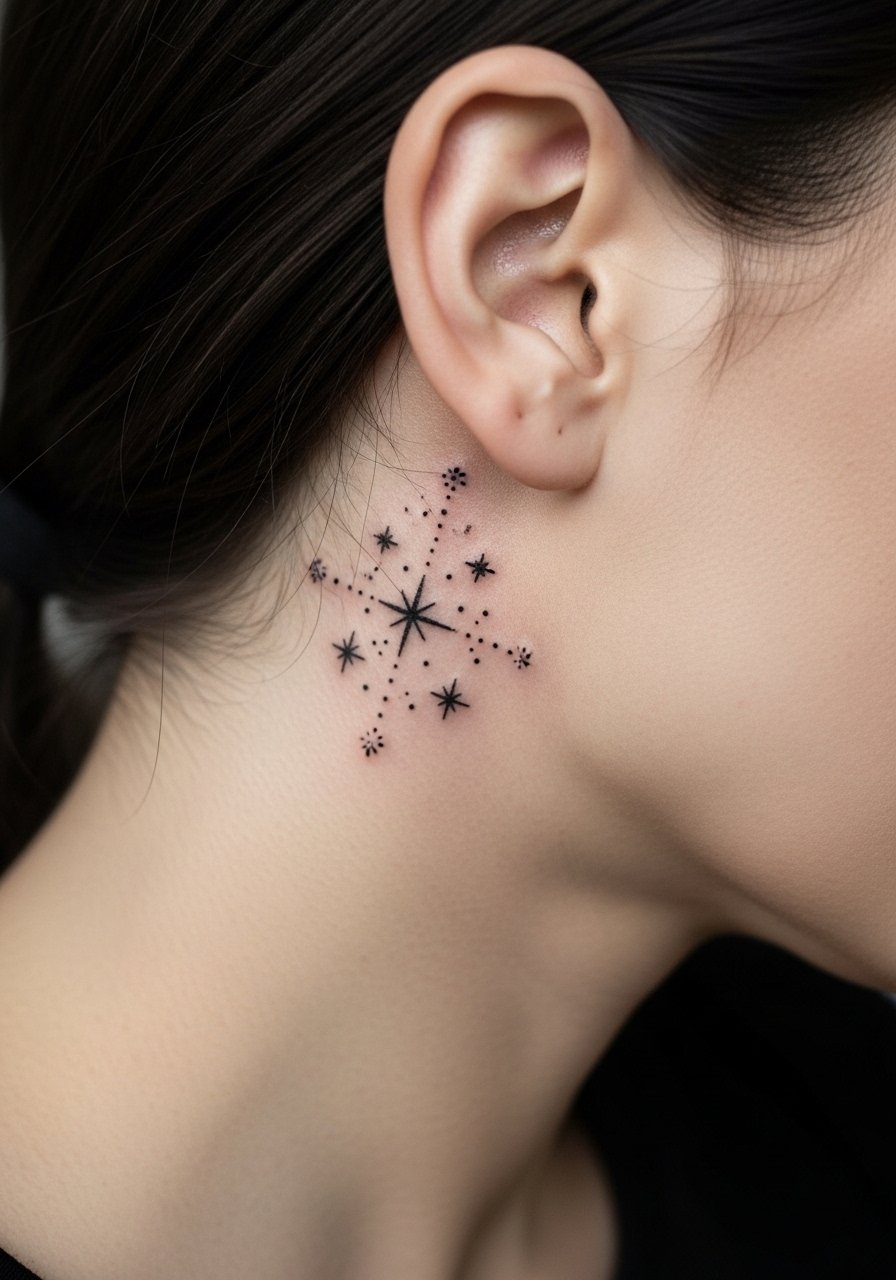
A three to five star cluster usesdots and short lines to create depth without dense shading. Behind-ear clusters need spacing so the dots do not join over time. Ask for dot work that transitions into small lines rather than tight stippling. Healing is easy when the area is protected by hair but keep hair oils away the first week. For a balanced look wear a side-parted hairstyle and a crewneck tee that lets the piece peek out casually.
13. Thorn Vines from Below Ear to Collarbone

A wrap that moves from behind the ear toward the collarbone creates a guarded-heart narrative with a single continuous line. This piece demands a consultation about curve and negative space so the thorns do not crowd a collar or necklace area. The common error is making the vine too dense in a small span, which blurs. For those who sweat or wear necklaces, plan a slightly raised line weight to hold better and schedule a touch-up at year one. In the studio pick a top you can pull aside easily like a crewneck tee so the artist can work without tugging.
14. Hybrid Fine Line and Dotwork Stars Fading into Hairline
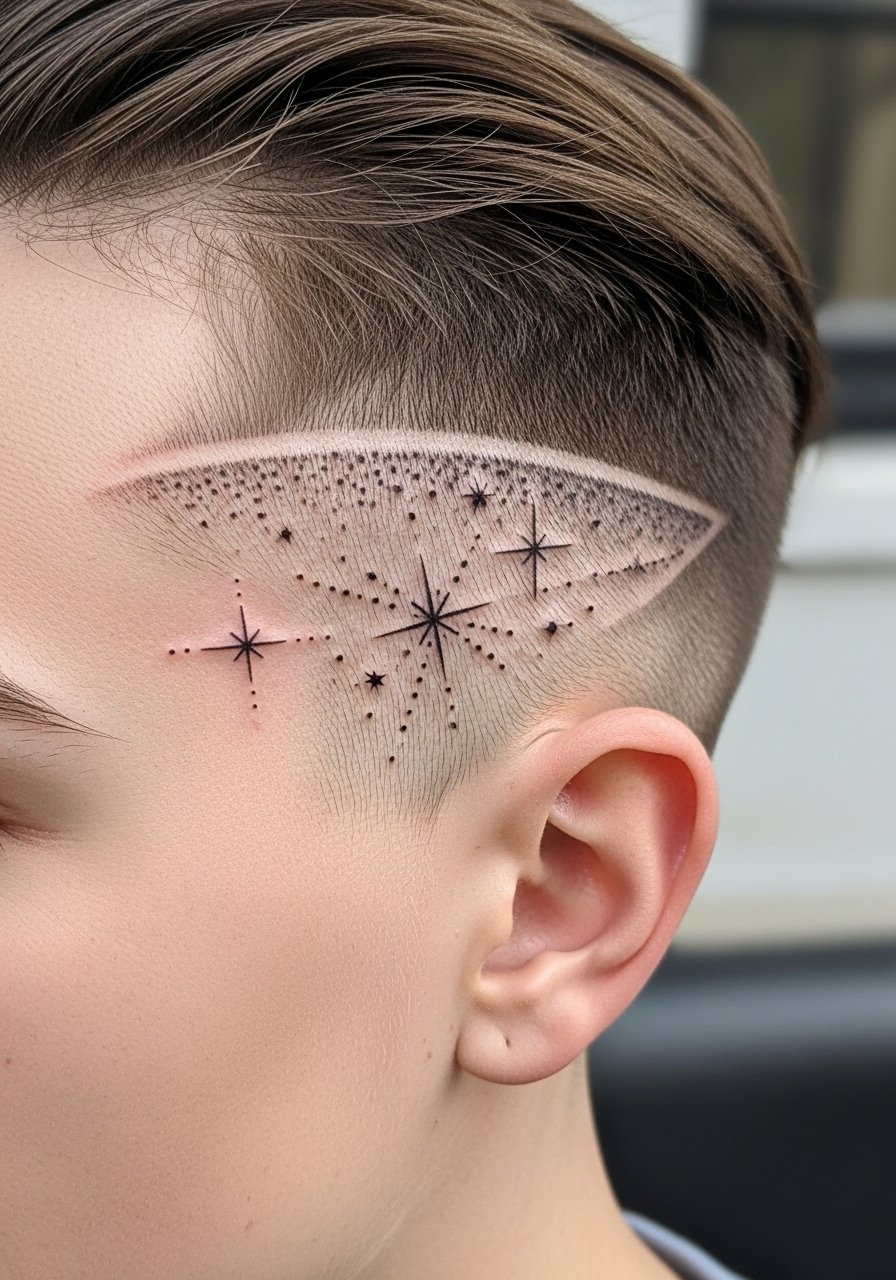
This idea plays with negative space so the design disappears into your hair when desired. The trick is transitioning dotwork into small hairline spacing so individual dots do not merge. Ask your artist to map the fade into your natural hairline and to test a scale on the arm first if you are unsure about contrast on darker skin. The session is delicate, and blowout risk rises near softer skin. Expect touch-ups around year two if you want the dot gradients to remain crisp.
15. Micro-Realism Portrait at Lower Neck

Tiny portrait work on the lower neck is bold for its scale. Micro-realism portraits demand high contrast and a simplified palette so facial features do not blur together as the ink settles. Ask for a proof stencil and request the artist show examples at equal scale. Portraits age differently based on placement and sun exposure, so plan for a scheduled touch-up at 6 to 18 months to retain key highlights. This piece reads well with open necklines, so balance visibility with daily profession needs.
16. Beard-Friendly Chain Link on Side Neck
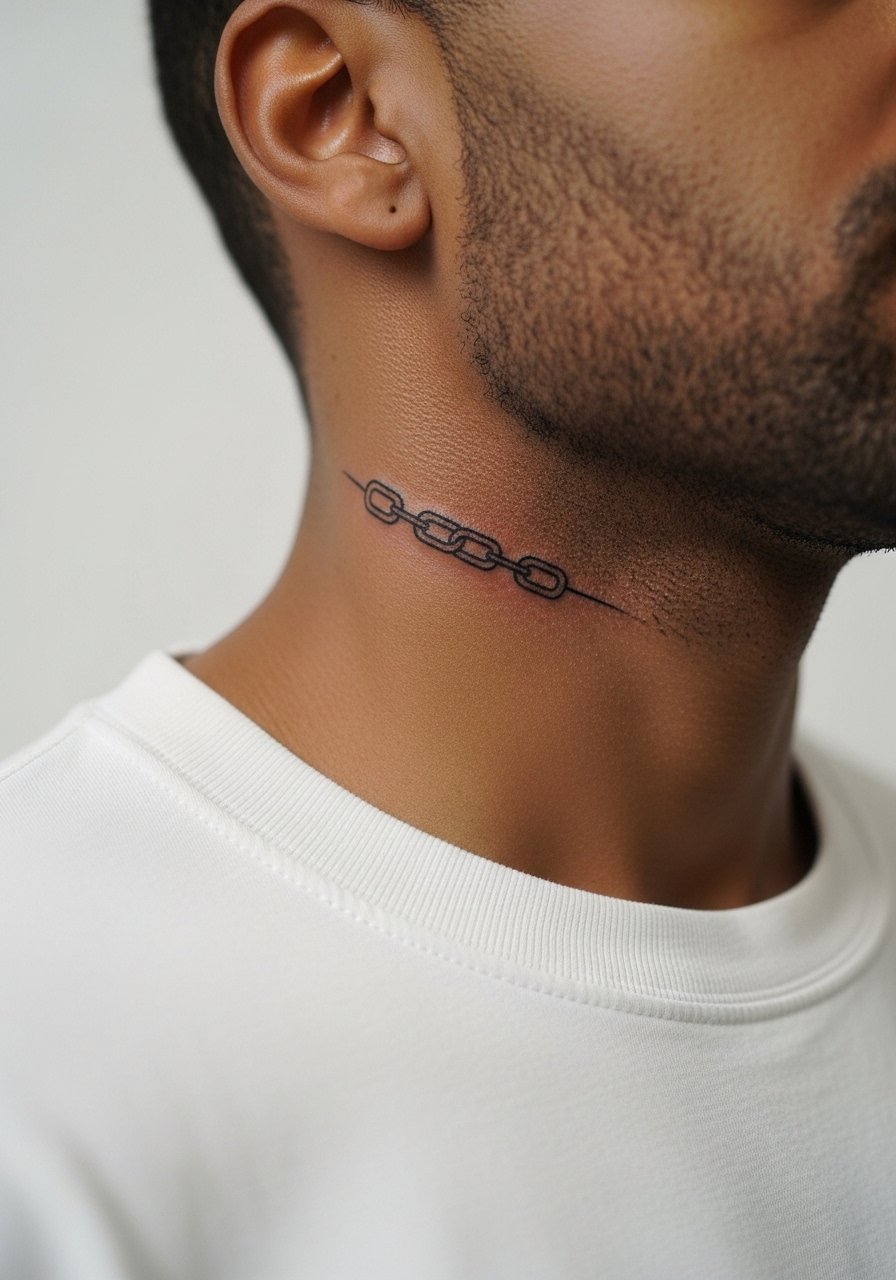
If you have facial hair, think about how stubble and beard growth will meet neck ink. A small chain link along the jawline or side neck sits next to a beard and can frame a face nicely. During consults mention beard length and typical growth patterns so the artist can place the piece where hair will either mask or complement the ink. Common mistakes include sitting the design too low where a beard will hide it. For session comfort wear a loose crewneck tee so you can tilt your head without fabric rubbing the area.
17. Tiny Crescent Moon with Stipple Behind Ear

A small crescent with stipple shading creates a nocturnal accent that reads well in that tucked spot. Keep the crescent under 2 cm and use spaced stippling so the dots do not merge. The studio session is quick, and common user error is asking for heavy solid shading in such a tiny area. If you want a soft fade into hairline, ask the artist to use fewer dots with wider spacing. Behind-ear pieces heal well with dry care in many cases, but discuss the Saniderm versus dry healing split with your artist because neck sweat can complicate protective film use.
Frequently Asked Questions
Q: How fast do fine line neck tattoos fade, and can touch-ups really fix that?
A: Fine line neck tattoos tend to soften faster than heavier work because the neck moves and gets more sun exposure. Touch-ups can restore crisp edges, often at six to twelve months and again every few years depending on your lifestyle. If you want less maintenance, ask for slightly heavier line weights or blackwork fills at your consult.
Q: Should I use Saniderm or dry healing for a nape tattoo after the session?
A: Artists and clients are split. One camp favors short-term protective film for sweaty necks because it keeps the area clean for the first few days. The other camp prefers dry healing to avoid maceration under film, especially for bold lines. Ask your artist which method they prefer for that exact placement and follow their removal timing closely.
Q: Will a tiny neck tattoo affect job prospects, and which placements hide best during interviews?
A: Neck visibility is often judged in interviews, so nape placements or pieces that tuck behind the ear are easiest to hide with collars or hair. Side-front neck pieces are most visible. If hiring climate matters to you, pick a nape or behind-ear placement or plan clothing choices like high-neck tees during sensitive meetings.
Q: How should I dress for a neck session to give the artist access and stay comfortable afterward?
A: Wear a loose top you can pull aside without touching the fresh ink. For side and lower neck work a loose crewneck tee or an open-collar button shirt works well. For nape work, opt for a button-up you can leave unbuttoned at the back or a high-neck tee you can slide down gently.
Q: Are there special considerations for darker skin tones when picking tiny neck designs?
A: Yes. On deeper tones, bolder blackwork and clearer negative space often hold better than ultra-fine single-needle detail. Many folks test the scale on a less visible arm patch first or ask for a slightly heavier line weight. Discuss contrast and spacing with your artist so the design reads on camera as well as in person.
