
Fine line eye motifs are everywhere on saved boards, but the look that lasts is not always the look that trends. I've seen perfectly crisp eyes blur into soft smudges after a few years when placement and spacing were ignored. Expect questions about pain, touch-ups, and blowout risk up front. Read the first idea and you will already have a clearer sense of which eye motif fits your skin, wardrobe, and long-term plans.
1. Sailor Eye on Outer Forearm
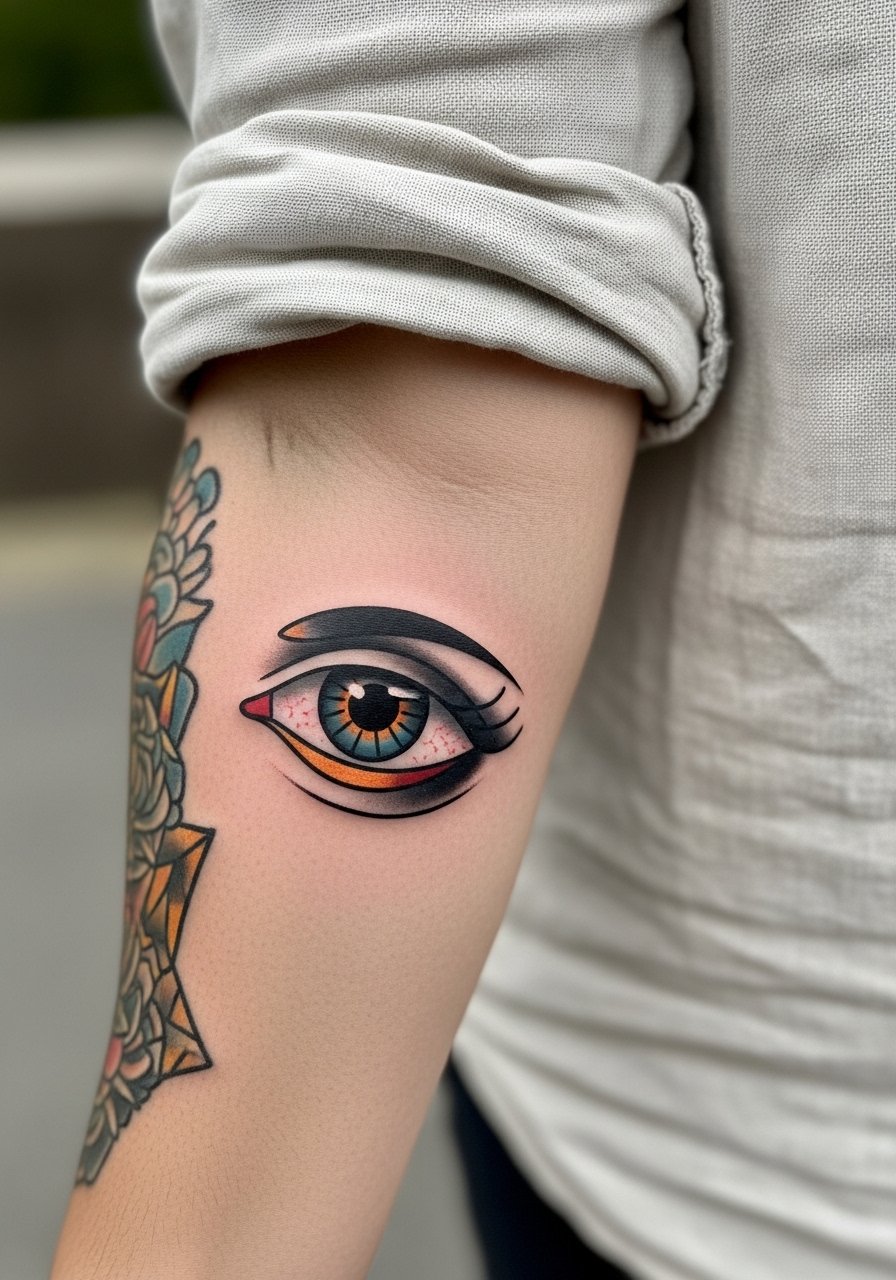
I recommend this when you want an eye that reads from across a room, not a tiny detail lost in motion. Tell your artist you want bold linework and moderate spacing so the pupil and lashes keep definition as the skin moves. Common mistake is asking for the same line weight used in micro work, which invites blurring. Expect a two-hour session for a standard forearm piece and a possible touch-up around year three if you spend a lot of time in the sun. For showing this off, roll sleeves up with a linen button-down so the forearm sits center stage.
2. Nautical Eye with Banner on Upper Arm
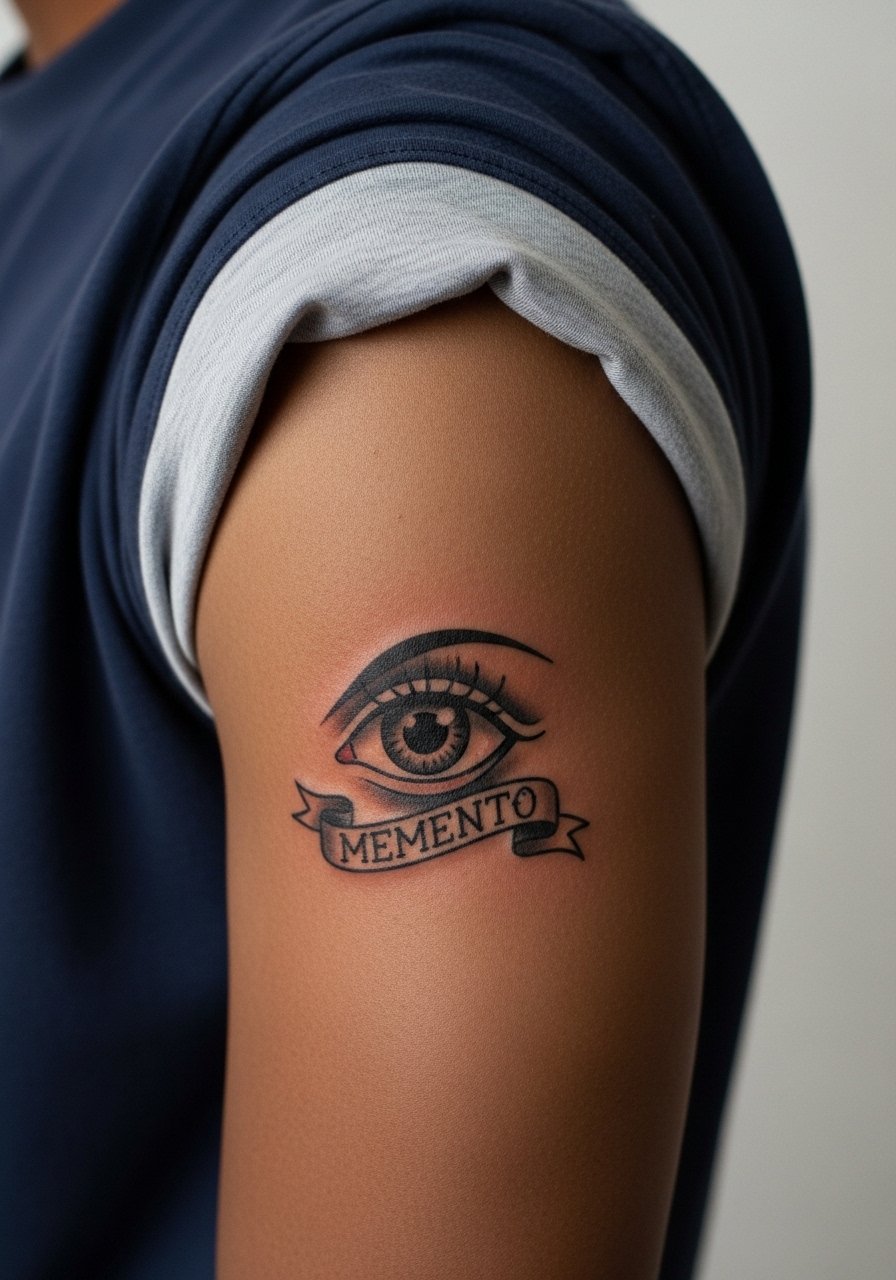
Upper arm muscle takes saturation well, which helps this style hold color longer than thin work. If you want the banner legible in years, ask for slightly thicker serif letters and spacing between characters. The session feels like steady pressure, not sharp pinches, and it typically finishes in one session under three hours. A frequent error is crowding the banner with extra ornamentation. Wear a loose short-sleeve tee to the appointment so the artist can move the sleeve without tugging.
3. Tiny Eye on the Side of the Wrist
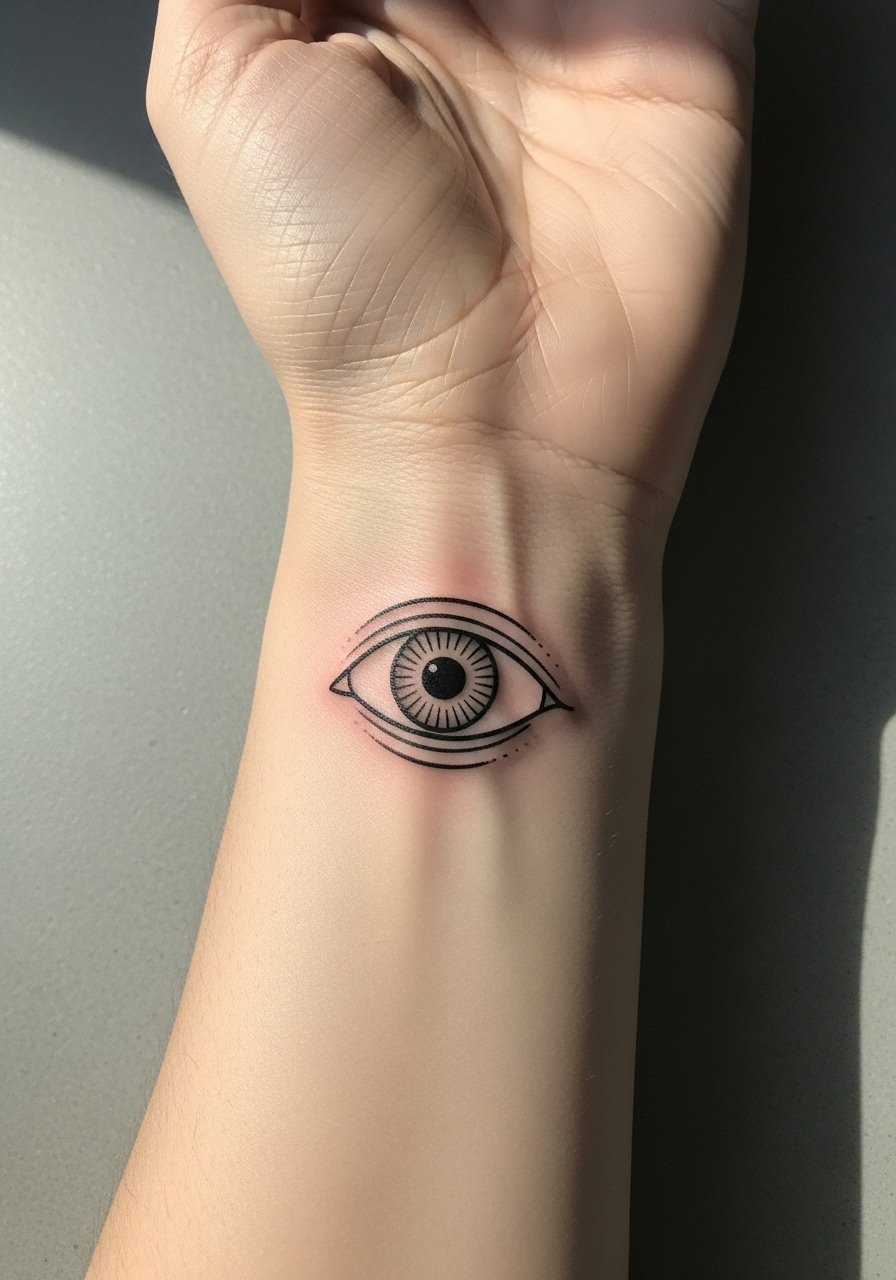
Wrist pieces are honest about trade-offs. They show well but they live in a high-friction zone and often need touch-ups sooner. During consultation, agree on a slightly bolder outline than your initial preference so the eye does not smudge into the creases. Pain is moderate and sessions are short, often 30 to 60 minutes. The most common mistake is choosing tiny decorative details that age into a blur. Pair this with a minimalist watch or thin stacked bracelets to frame the art without rubbing it raw.
4. Sternum Eye Framed by Leaves
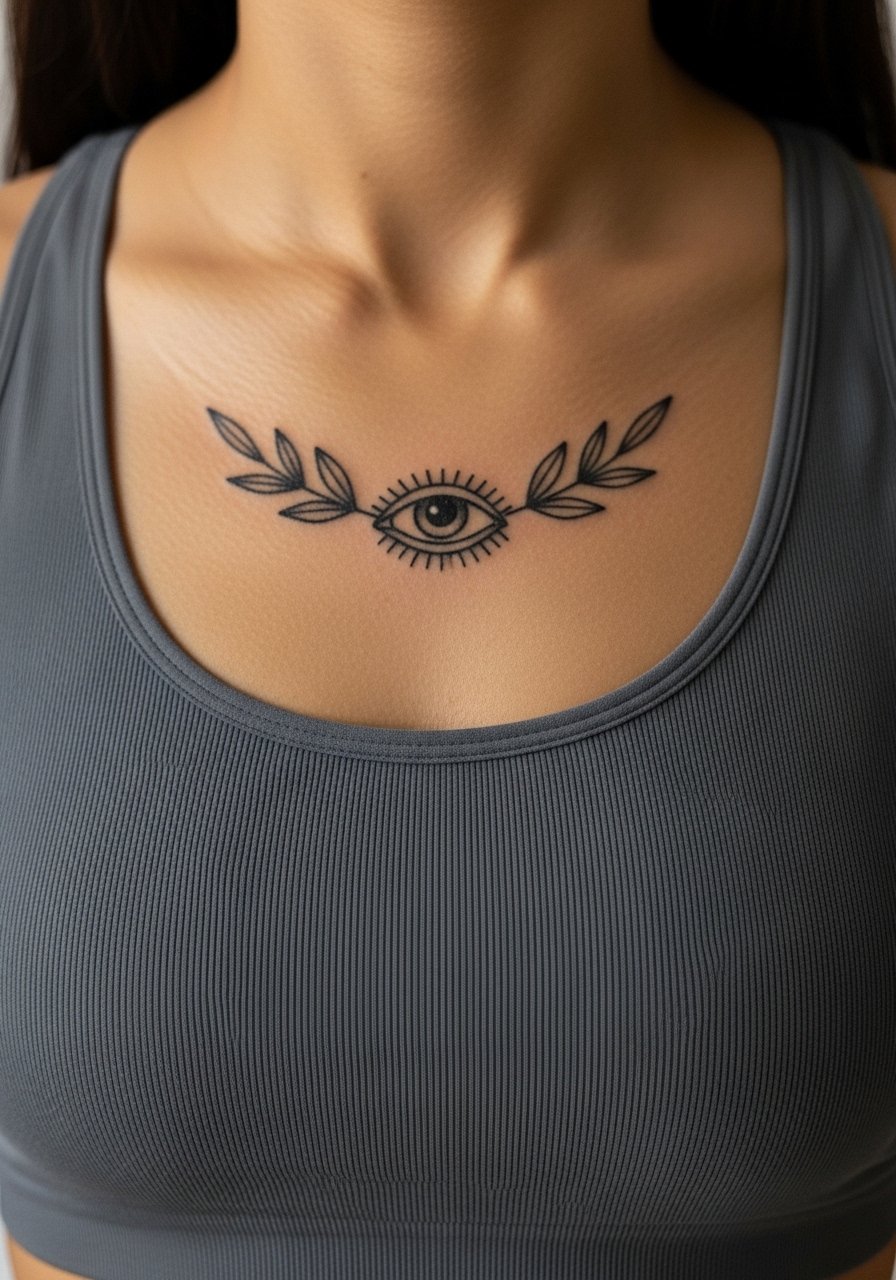
Sternum work reads intimate and dramatic, and it asks for a thoughtful stencil placement because curves change line weight as you breathe. Artists split on very fine lines here. One camp says the stretch will blur thin strokes quickly. The other camp argues that with correct depth and spacing, fine work settles nicely. Ask which side your artist is on before booking. Sessions can be an endurance test and may require breaks. Wear a fitted sports bra for easy access while keeping modesty intact.
5. Ribcage All-Seeing Eye with Rays
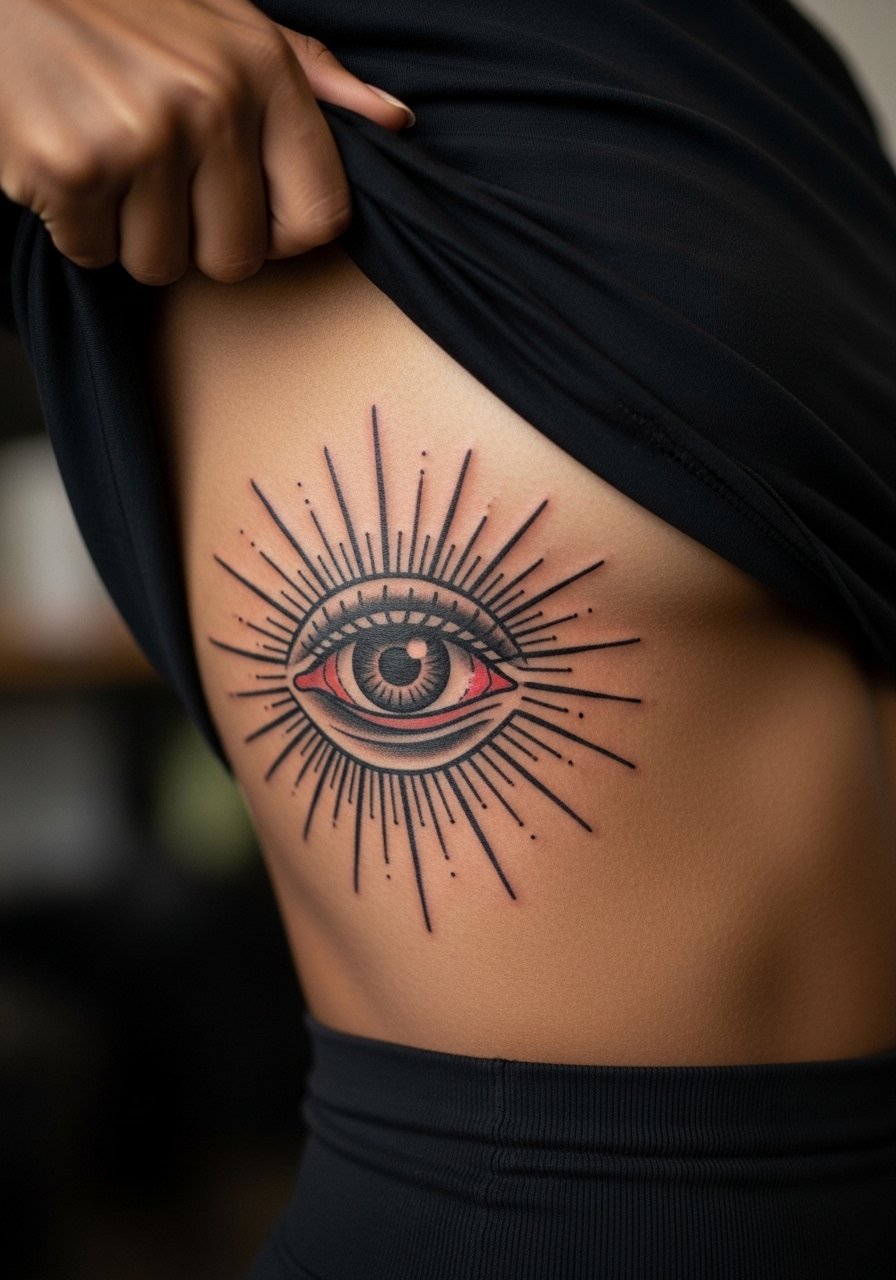
Ribcage pieces can be painful. Fair warning, the ribs score high on most pain scales, but the canvas makes a strong statement. The big mistake is going too small and dense. Give the rays breathing room and ask for heavier outlines in the most intricate areas so the design keeps contrast over time. Expect a session that can run two to four hours depending on size. Touch-ups are common at year two for people who favor low coverage clothing. For the appointment, bring a cropped tee you can lift slightly and still stay comfortable.
6. Ankle Eye with Tiny Stars
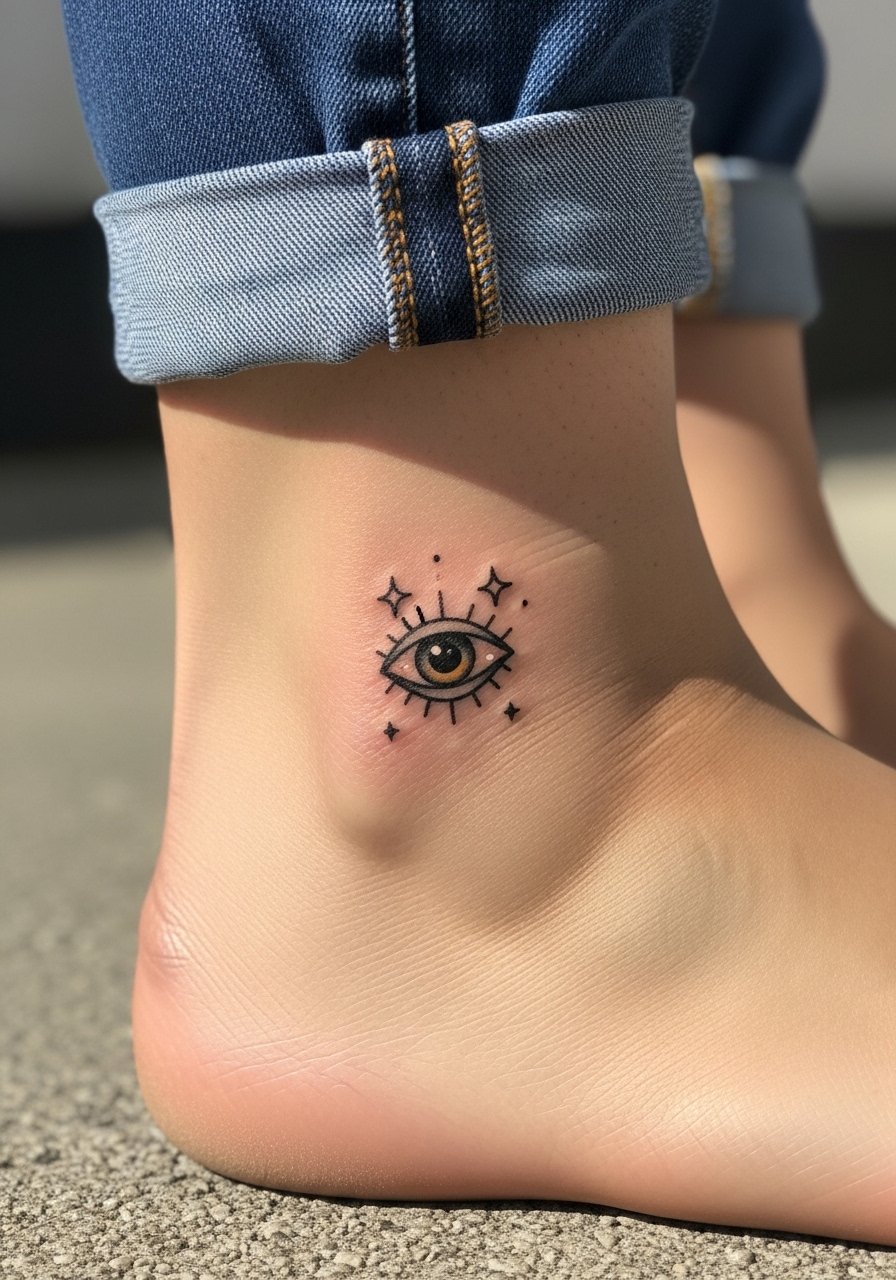
Ankle tattoos sit where shoe friction and socks pull at the healing surface. The ideal approach is a compact, bold outline and modest saturation. Tell your artist you want solid black saturation rather than delicate shading, because that holds better under rubbing. The session is short and the pain is brief with repeated needle taps. Common errors include expecting long lifespan for ultra-fine detail. For the session, wear rolled jeans or slip-on sandals so the artist has clear access without stretching fabric over the area.
Studio Day Picks
The forearm, upper arm, wrist, sternum, ribcage, and ankle pieces above each have different prep needs. A few targeted items smooth the session and the first week of healing so the linework in those eye motifs stays clean.
-
Stencil transfer paper kit. Lets you preview line placement on skin, which is helpful for the wrist and forearm pieces where scale feels different on a screen.
-
Topical numbing cream. Applied 30 to 45 minutes before the session eases the edge on rib and sternum work without interfering with the artist's stencil.
-
Thin protective film roll. Keeps ankle and wrist pieces cleaner during the first week when friction and showers are a constant.
-
Fragrance-free gentle body wash. Cleanses healing skin without irritating the fresh linework so delicate eye details do not scab aggressively.
-
Aquaphor healing ointment. Thin layers in the first days lock in moisture for fine lines and prevent excessive dryness that can pull at tiny strokes.
7. Eye Inside a Rose on the Shoulder Blade

Shoulder blade skin takes saturation well, so a rose-framed eye keeps its contrast longer than similar chest pieces. Tell your artist to leave space between petals and the eye so each element reads separately as the piece ages. Sessions are comfortable and typically under three hours. A common mistake is overloading the area with filler that flattens the focal eye. For show-off outfits, an open-back dress keeps the shoulder blade visible while framing the rose.
8. Single-Line Eye on the Collarbone

Collarbone placements make delicate designs feel bold because of the bone silhouette beneath the skin. If you prefer thin single lines, ask for slightly increased line weight at the start so the eye does not lose definition near the bone. Pain is variable because the area is close to bone, and sessions are short. Most people underestimate how jewelry sits over this spot. Pair the tattoo with a thin chain pendant that sits above the ink rather than rubbing it.
9. Eye with Teardrops on the Inner Wrist
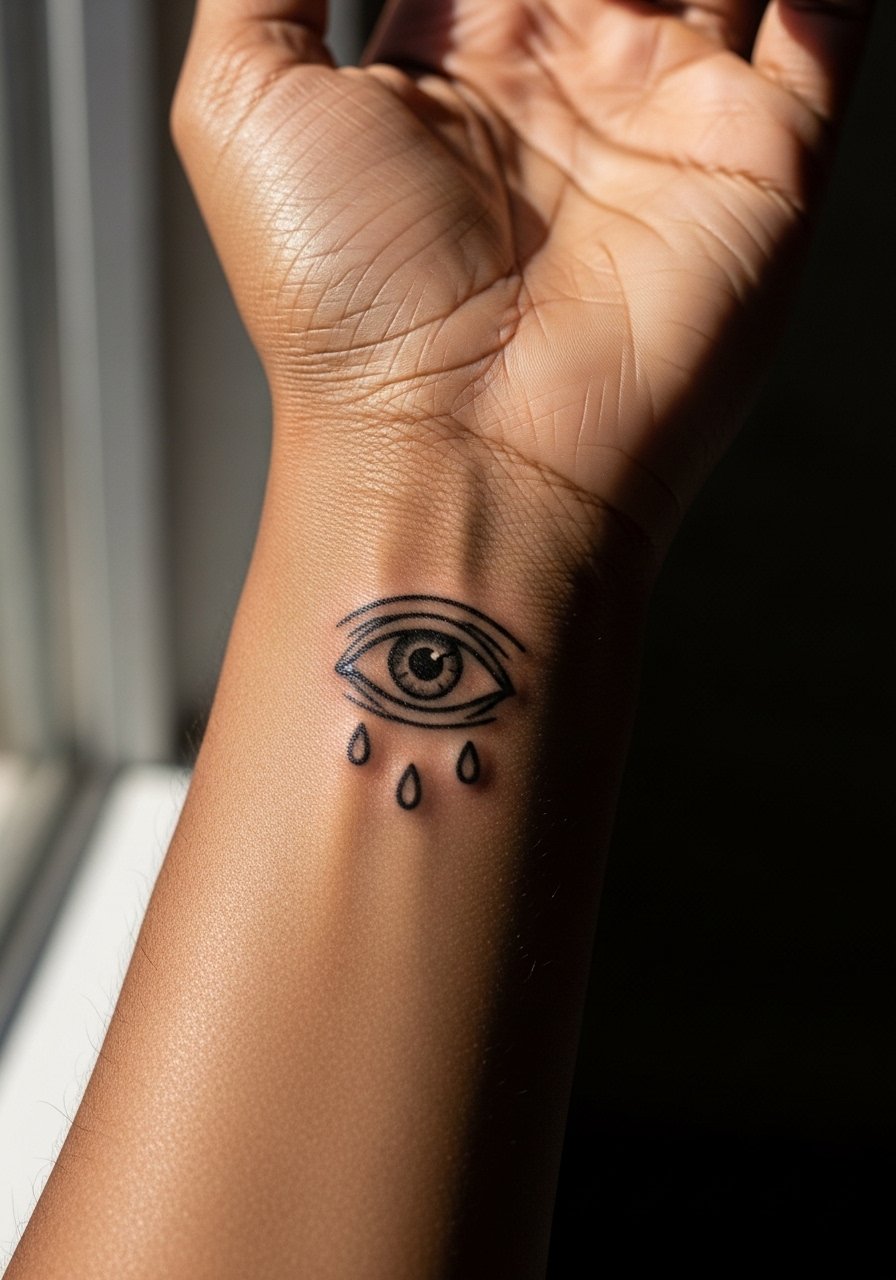
Inner wrist work ages in a high-movement zone, which affects the teardrops more than the central eye. During consultation, state you want bold, slightly thicker teardrop outlines to keep the shapes defined over time. The session is quick but expect touch-ups earlier than arm pieces if you wash hands frequently. A frequent mistake is choosing ornate dot work in the teardrops that blurs into a gray patch. Keep rings minimal while the area settles and show it off with a thin bangle bracelet.
10. Eye with Sunburst on the Upper Chest
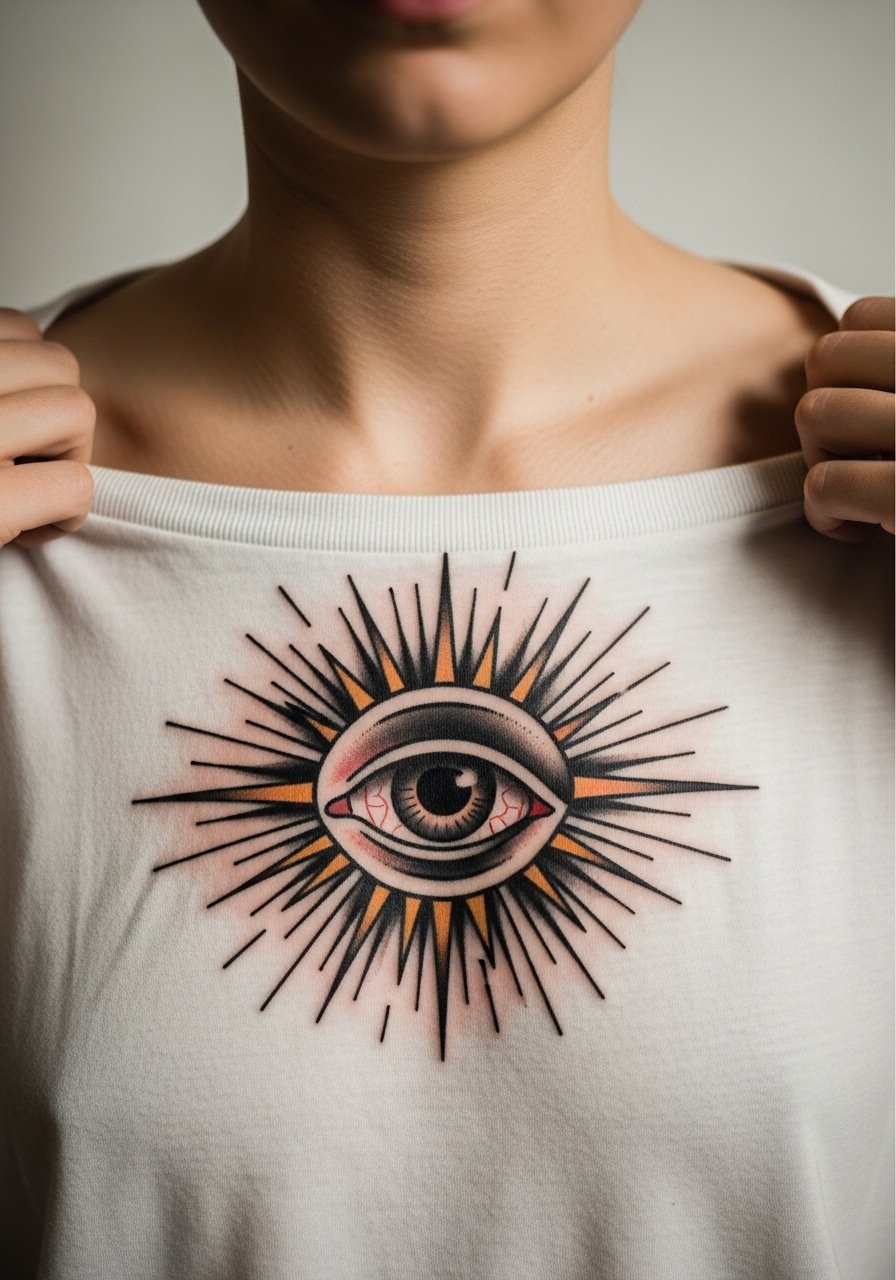
Upper chest provides a broad canvas that suits radiating designs. Ask your artist to space the rays so they do not become a shaded block over time. Pain is manageable but sessions standing over the sternum edge can be sensitive. One common error is compressing too many rays into a small radius. For evenings out, an open-neck blouse frames the sunburst while keeping the look intentional.
11. Eye Encased in a Triangle on the Forearm

Geometric frames give the eye structure and reduce the risk of blowout blending the pupil into the surround. When you show references, include photos that highlight the exact line weight you prefer. The session feels methodical and often takes one to two hours. A pitfall is requesting micro-line geometry too close to the eye detail. Keep the triangle bold enough so the border remains crisp. Roll sleeves up on a casual chambray shirt to show the forearm cleanly after the session.
12. Tiny Eye Behind the Ear
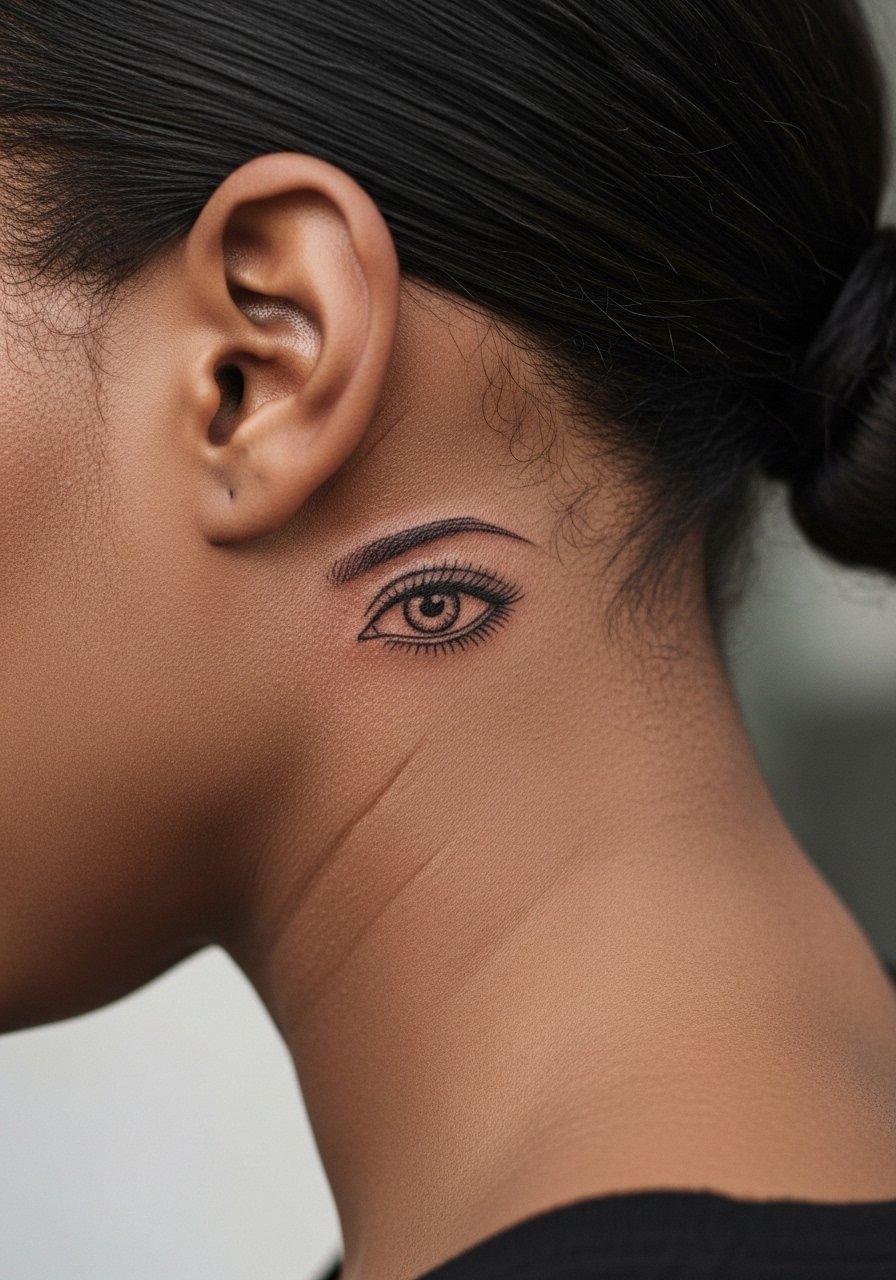
Behind-the-ear placements are discreet and subtle. Artists warn that very fine details can get lost because of the small canvas and curved skin. One camp prefers slightly bolder outlines here, the other still works ultra-fine when the spacing allows. Ask which approach your artist uses. Sessions are brief and healing is fast if you keep hair away from the site. For the appointment, pin your hair back and wear a button-down shirt you can adjust without shifting the collar.
13. Eye with Clock Hands on the Bicep
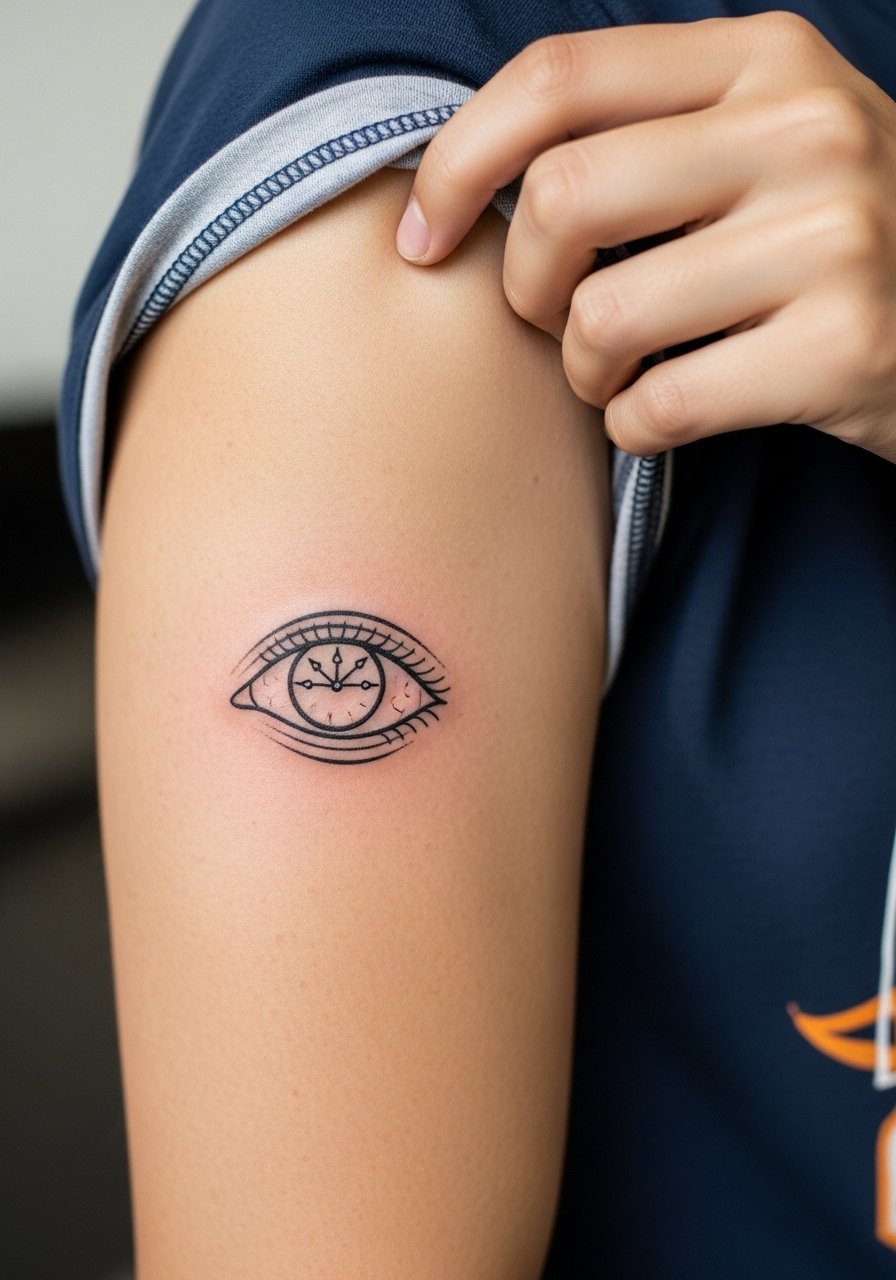
Bicep flesh gives room for detail and is forgiving for touch-ups. If you want tiny clock hands legible years from now, request slightly thicker hands and space around the central eye. The session is comfortable and often under two hours. Mistakes occur when clients cram date numerals or extra elements into the same halo. Show it off with a rolled sleeve linen tee that highlights the bicep without distracting from the motif.
14. Micro Eye on the Side of a Finger
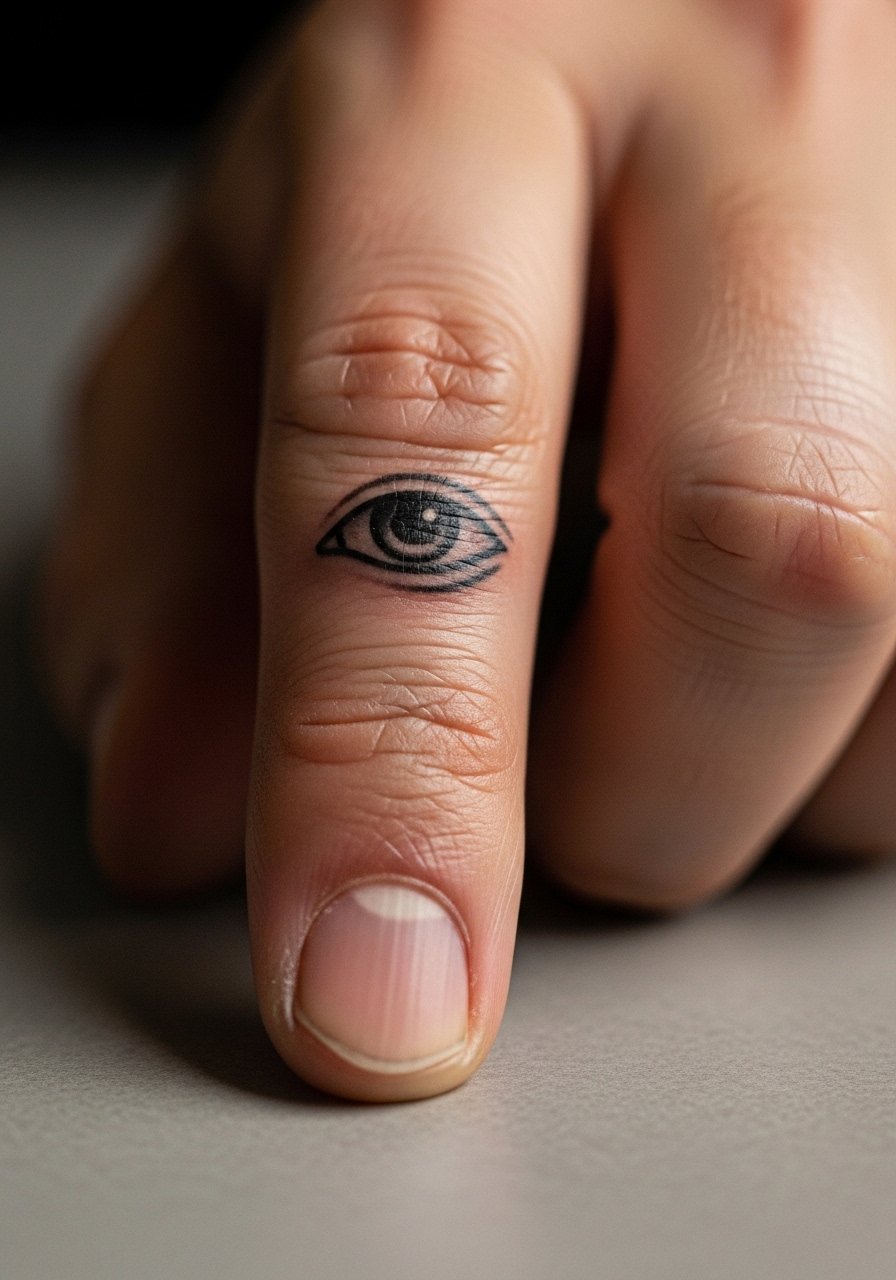
Finger placements are convenient for small symbols but they live in a brutal wear zone. Expect more frequent touch-ups and potential fading on the outer edges. If you want this, accept the reality of maintenance and ask your artist about bolder edge lines to slow dispersion. Sessions are fast and often under 30 minutes. Common error is expecting a lifetime result with micro detail. Keep jewelry minimal while healing and consider a thin silicone ring if you usually wear rings that sit nearby.
15. Eye with Crescent Moon on the Calf
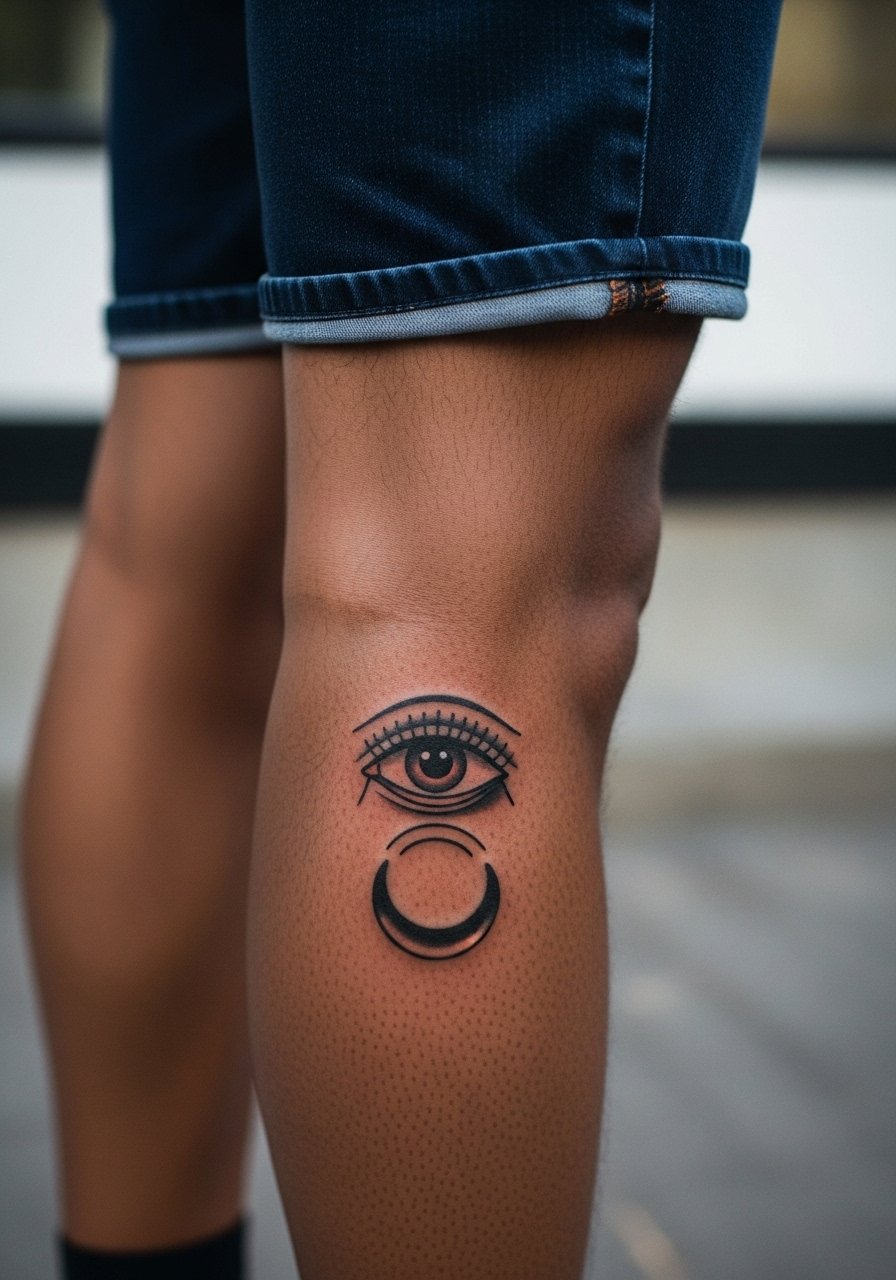
Calf skin tolerates saturation and movement without rapid blurring. For crescent accents, ask for moderate spacing and solid black fill in the moon area to maintain contrast. Sessions are comfortable and can be one to two hours depending on size. A common mistake is compressing all elements too close to the midline. Pair the design with mid-calf boots or cropped trousers to show it off while protecting the area when needed.
16. Eye with Wings on the Shoulder Cap
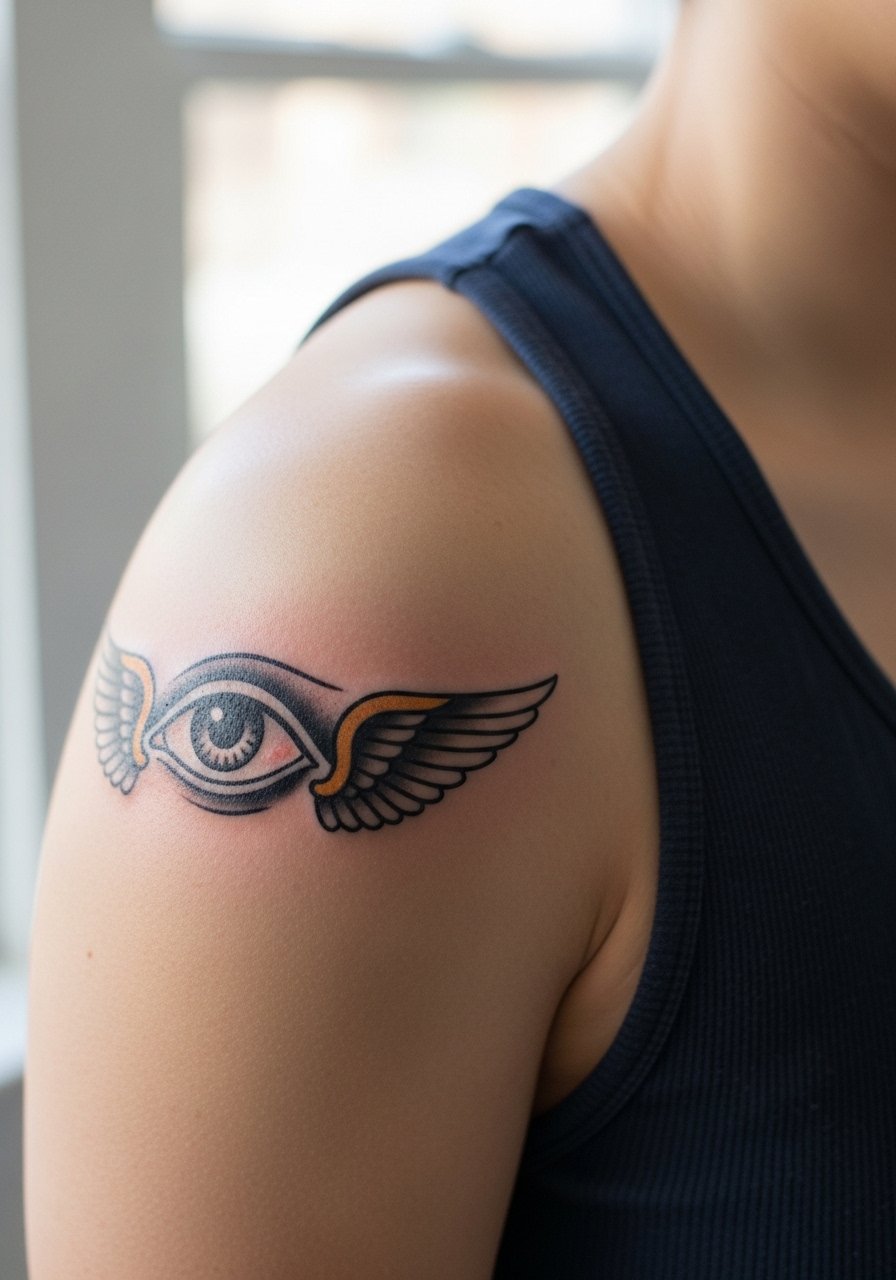
The shoulder cap handles motion nicely, which helps wings keep their feather definition longer than dense shading. Ask your artist to leave small negative spaces between feathers for long-term clarity. Sessions are moderate in discomfort and often done in one sitting. Mistakes include crowding the wing tips with filler that ages into flat shading. For showing off the piece, a sleeveless tank keeps the shoulder cap visible and flattering.
17. Eye of Horus Inspired Motif on the Upper Arm
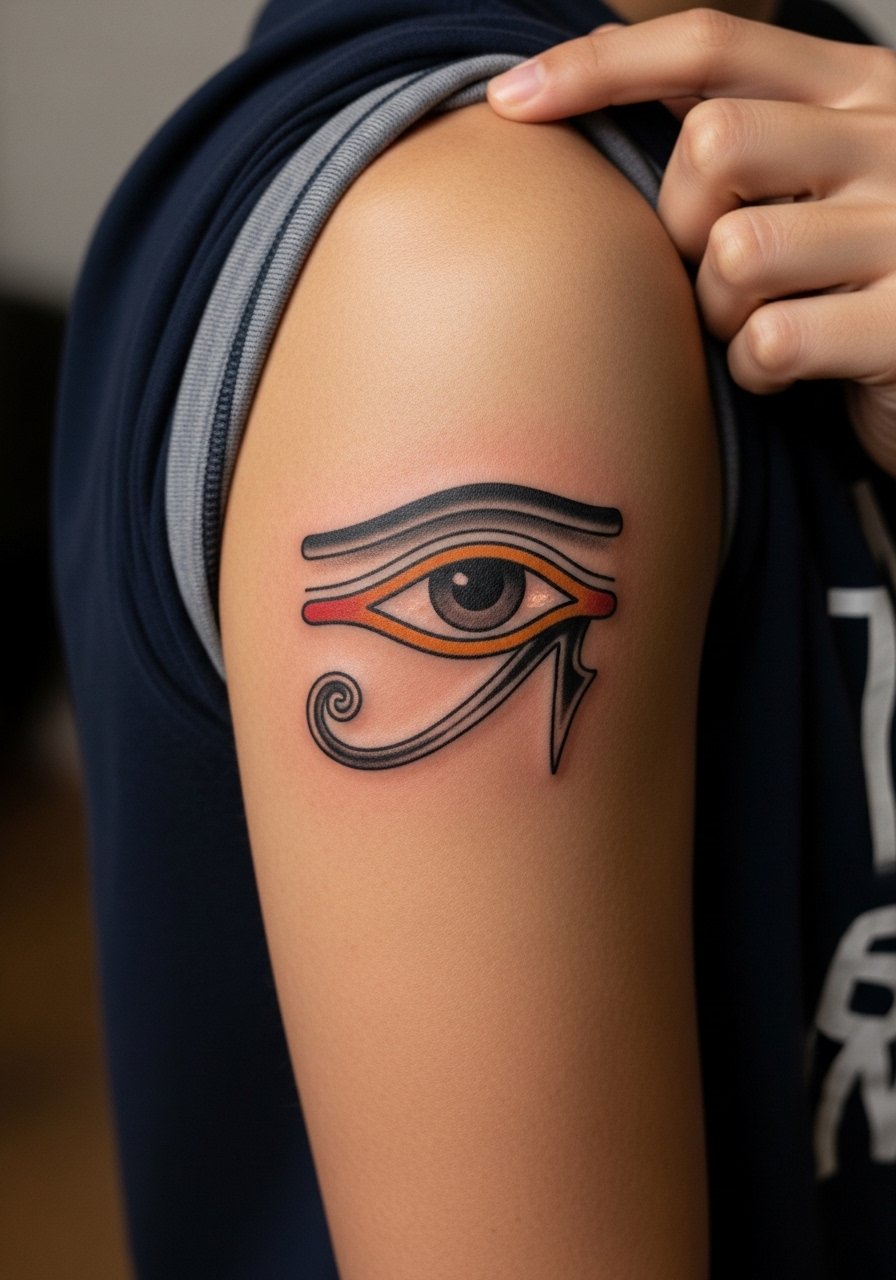
Designs with clear cultural origins deserve respect. The Eye of Horus traces to Egyptian tradition, so many people opt for subtle variations rather than direct replicas. State your intent in the consultation and ask the artist about appropriate line choices that honor the motif. The arm handles detail well and sessions are usually under three hours. A pitfall is copying a sacred piece without understanding context. For appointments, choose a short-sleeve cotton tee that gives easy access and breathability.
18. Eye in a Keyhole on the Sternum Side

Sternum-side pieces are intimate and demand careful stencil placement for symmetry. Artists disagree on how fine you can go there. One view cautions thin lines under stretch, the other trusts experienced hands and solid spacing. Ask your artist which technique they recommend. Sessions can be sensitive and may need breaks. For the session, wear a bandeau or fitted sports bra so the area is visible without overexposure.
19. Geometric Eye Mandala on the Back

Back canvases allow complex geometry while reducing blowout risk because skin here is less mobile than hands or wrists. Tell your artist you want distinct negative space between mandala rings to prevent merging into a gray mass over time. Sessions can be longer and may require multiple sittings. A common error is shrinking the mandala to fit a busy area. For the appointment, bring a tank top you can adjust so the artist can access the upper back without discomfort.
20. Eye with Lightning Bolts on the Calf Side
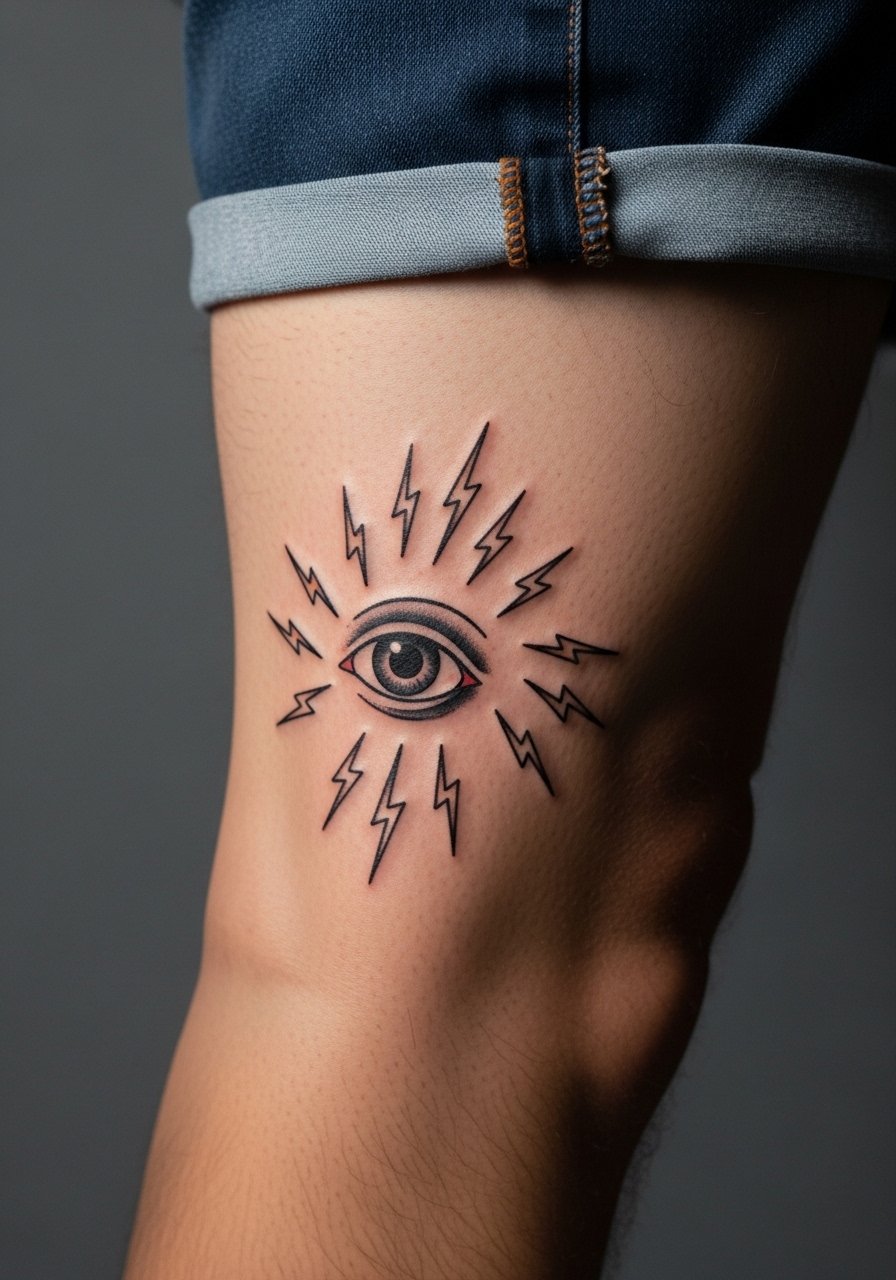
Sharp motifs like lightning benefit from crisp, confident strokes and clear spacing from the central eye. If you want the bolts to pop over time, request solid black fills and avoid dot shading that can fade unevenly. Sessions are steady and usually under two hours. People sometimes jam too many bolt variations into a small heel-to-knee span. Show it off with cropped shorts that frame the calf without rubbing.
21. Eye with Compass Points on the Wrist Wrap

Wrap-around wrist designs need symmetry and planning so the compass points do not disappear into creases. Ask for a simple map of how the design will sit when your wrist rests naturally. Sessions are brief. The most common mistake is making the wrap too tight, which causes the compass tips to blur into the crease. For showing off, use a delicate leather strap bracelet that complements the compass without rubbing the ink.
22. Tiny Micro Eye on the Inner Thigh
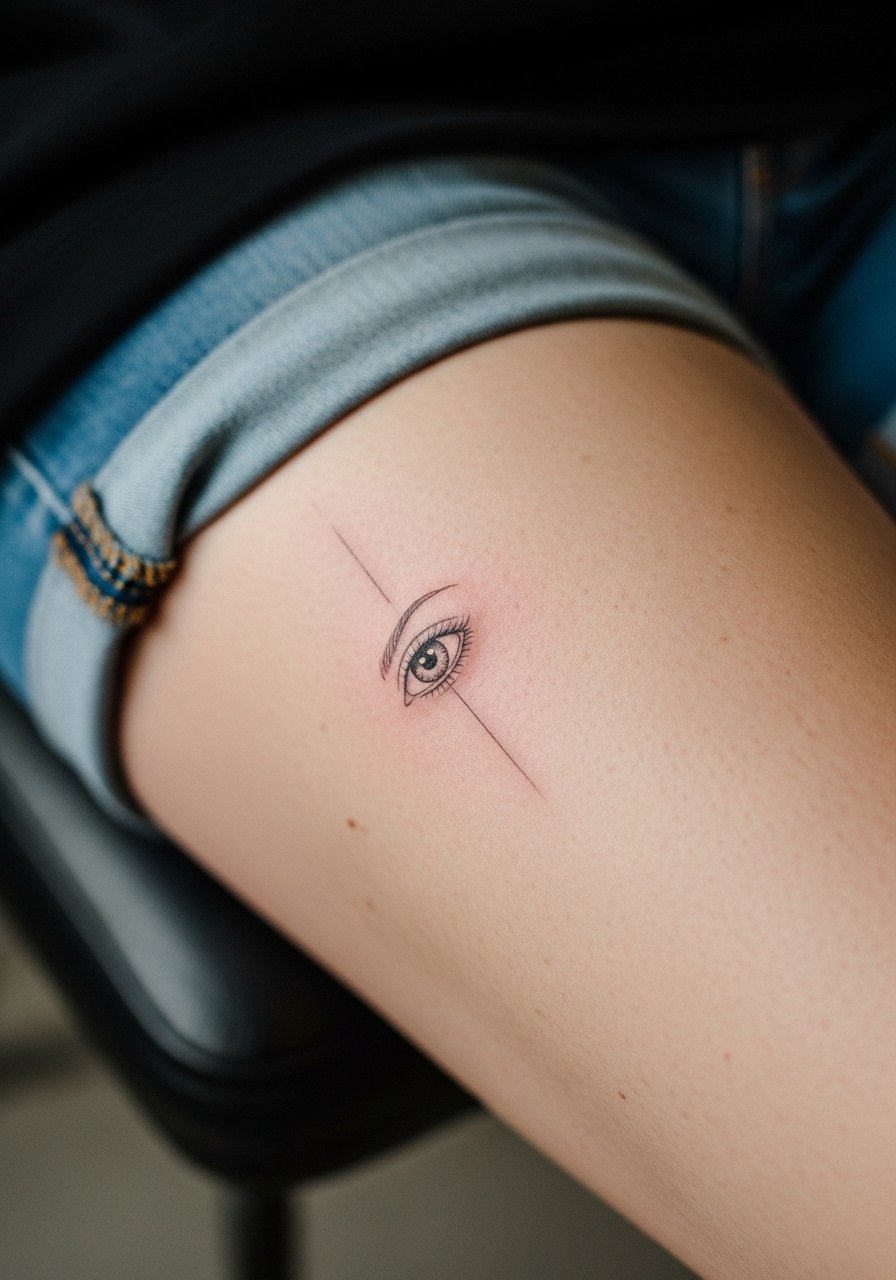
Inner thigh ink sits in a warm, less exposed zone and can hold fine detail if spacing is respected. Pain varies but many find this area sensitive. A common mistake is expecting no smudging from friction with clothing. Ask for slightly stronger contour lines around the eye so the central detail keeps shape. Sessions are usually quick. For the appointment, wear loose shorts you can move aside without creating pressure on the tattoo.
23. Clockwork Eye on the Chest Center
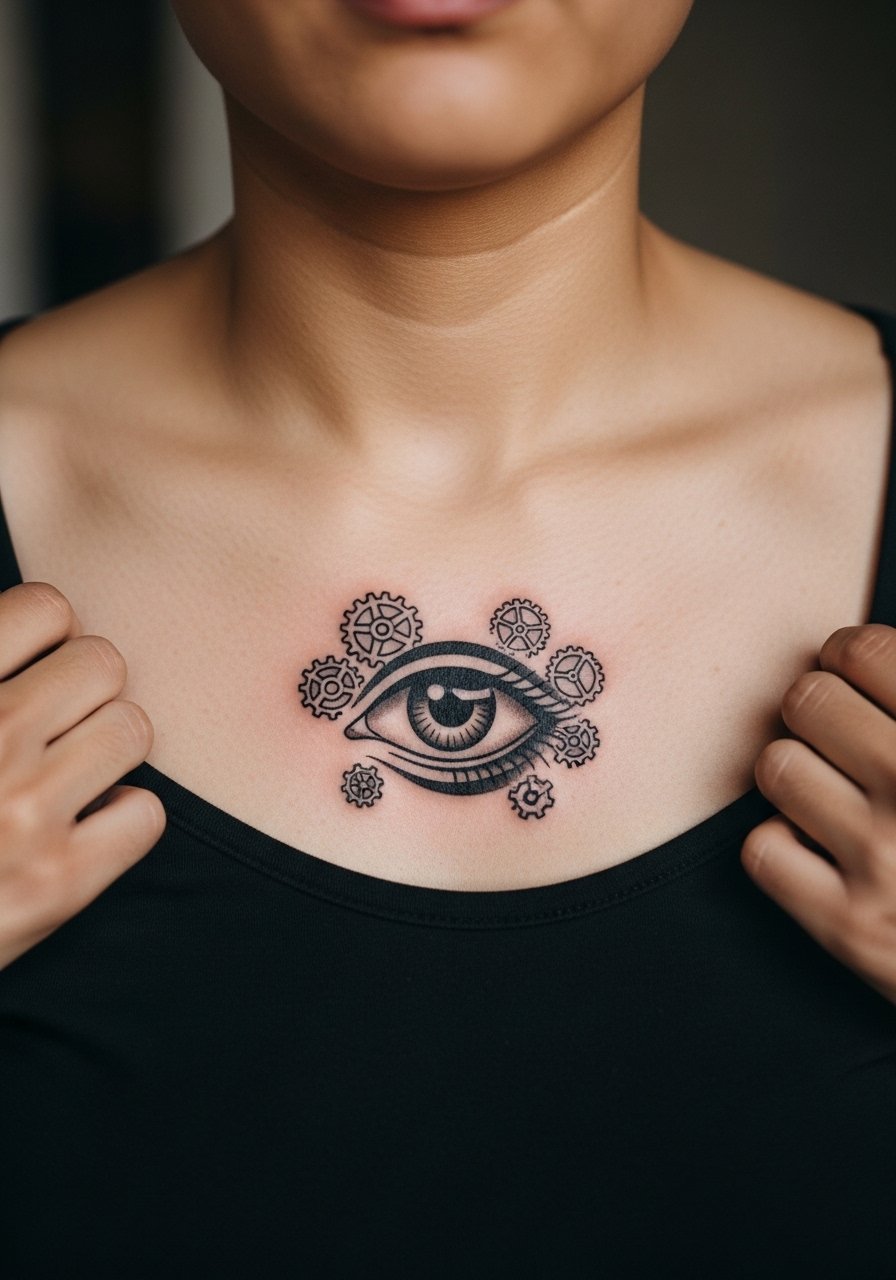
Center-chest placements are striking and require that small gears are not crowded near the main eye. Tell your artist you want negative space between gears so each cog stays readable for years. Sessions over the sternum can be a bit sharp, so expect breaks. The typical error is adding micro-etching inside every cog which becomes muddled. For layering with jewelry, a thin pendant necklace sits above rather than over the ink.
24. Eye with Snake Coil on the Upper Arm Inner Side
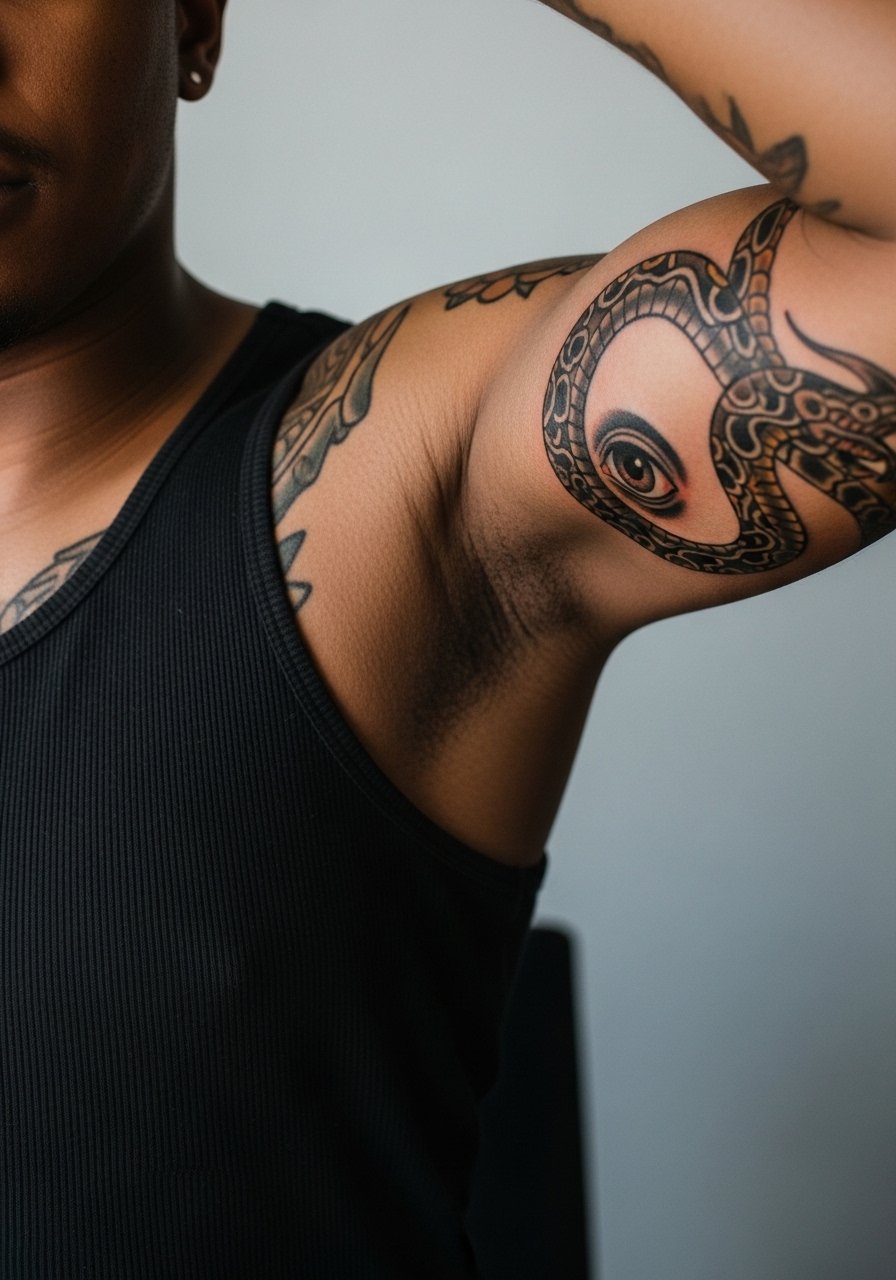
Inner arm placements flex with movement, so designs that coil need breathing space to keep the snake's scales and the eye distinct. Artists caution about too-small scale in this area. Sessions can be ticklish and may require short breaks. A common mistake is choosing dense stipple shading close to the eye that merges later. For comfort, wear a sleeveless top you can lift slightly while keeping modesty.
25. Eye with Script Banner on the Collarbone Corner
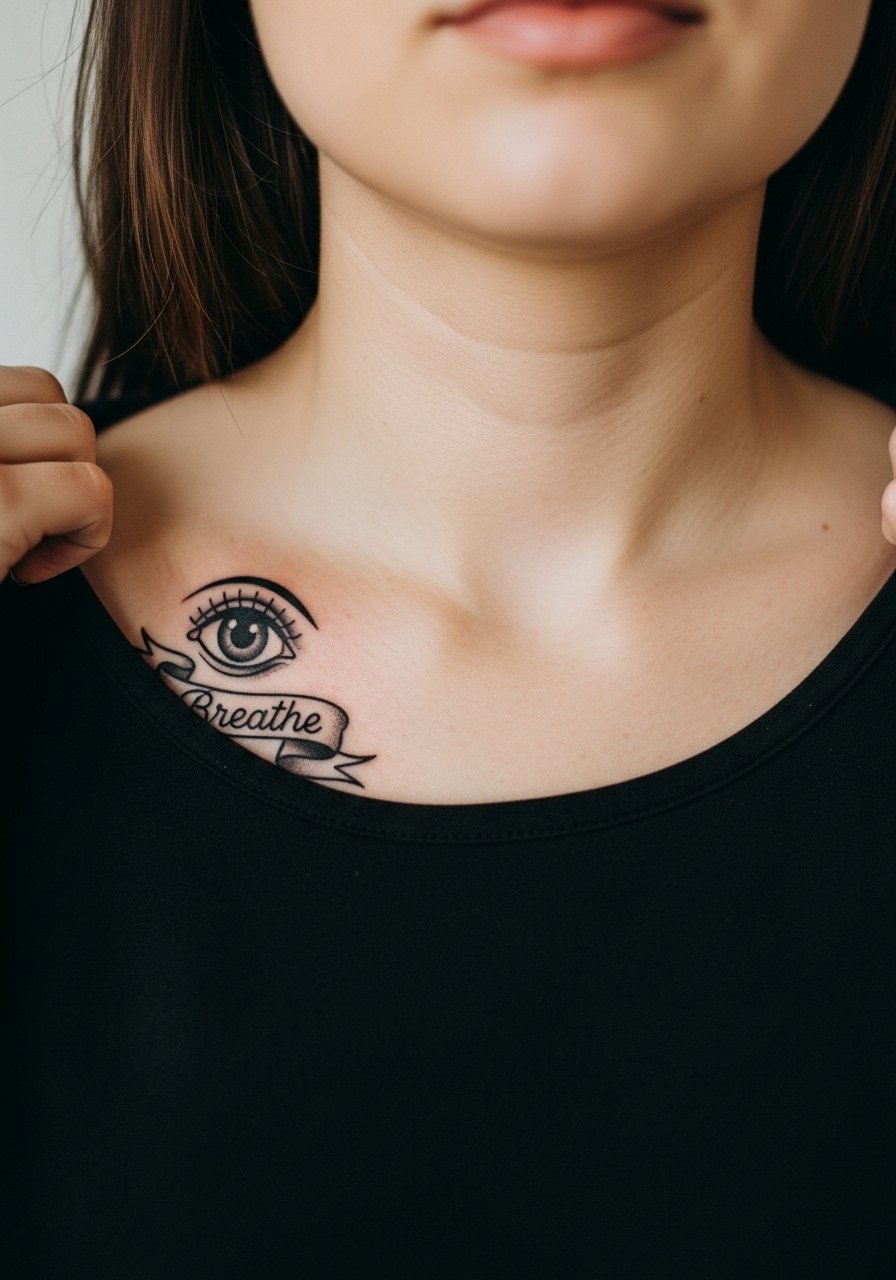
When text sits near an eye, legibility is everything over time. Specify that the banner script should be slightly bold with open counters so letters do not close up as the skin ages. Sessions are short and can be delicate near bone. The common error is picking ultra-fine cursive that blurs into a line. For styling, a thin chain pendant sits just above the banner and adds balance.
26. Tiny Eye as a Finger Ring Accent

Finger ring accents look elegant but need maintenance because hand washing wears ink. Expect touch-ups more often than forearm or calf pieces. Ask your artist to build slightly bolder edge lines to slow fade. Sessions are short but healing requires care. The mistake is assuming permanence without maintenance. For daily wear that does not rub the site, try a thin adjustable ring you can slide away while showering.
27. Eye with Stippling Halo on the Back of the Neck
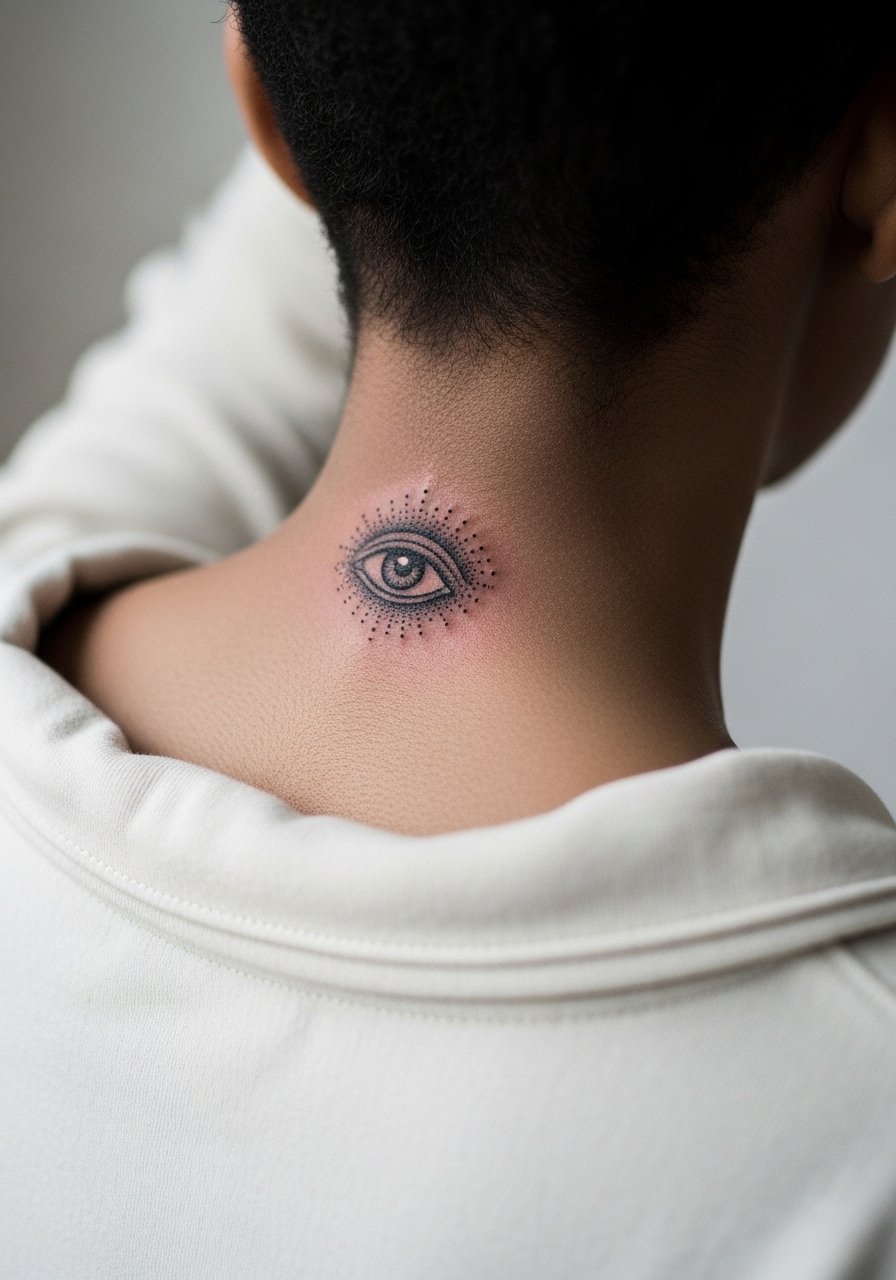
Neck placements demand experienced hands because skin here moves and stretches differently than the arm. Stipple shading can read beautifully at first but it may soften faster than solid black outlines. One camp prefers denser dots to age into texture. The other favors bolder outlines to preserve shape. Ask your artist which technique they have success with on neck pieces. Sessions are quick but consider workplace implications. For the appointment, wear a wide-neck shirt you can shift without stretching the collar over the area.
Frequently Asked Questions
Q: Will a fine line traditional eye on the ribs blur faster than a bolder traditional eye on the forearm?
A: In my experience ribs tend to show fine lines softening sooner because the skin stretches with breath. A bolder traditional eye on the forearm uses heavier outlines and higher saturation, which usually keeps contrast longer. If you love fine detail on ribs, plan on a touch-up at year two or three and discuss spacing with your artist.
Q: Are hand and finger eye tattoos likely to affect job prospects?
A: Hand and finger tattoos still carry risk in certain fields. Some industries are more accepting than others, and small discreet designs can be easily covered in many work situations. If your job path matters, consider placement slightly lower on the arm or choose a tiny, easily concealed location while you assess workplace culture.
Q: How do I talk to an artist about cultural designs like the Eye of Horus without being disrespectful?
A: Be upfront that you want to honor the origin and ask the artist for a variation that respects the symbol. Many artists will suggest subtle adjustments or recommend resources. Saying you want a respectful adaptation rather than an exact replica is a good starting point.
Q: How long after getting an ankle or wrist eye should I avoid tight shoes and bracelets?
A: Keep tight shoes and heavy bracelets off the area for at least two weeks while scabbing subsides. Light, non-rubbing accessories are usually fine after the first week if the skin looks settled. Your artist will give a site-specific timeline because healing varies by placement and personal skin response.
Q: If I want the eye detail to stay sharp for five years, what should I ask my artist during consultation?
A: Ask them about line weight recommendations for your chosen placement and how they space elements to avoid future merging. Ask to see healed pieces they did on similar skin tones and placements. Discuss realistic touch-up timelines so you both set expectations.
Q: Can I get a small eye tattoo while wearing makeup or perfume to the session?
A: Avoid heavy makeup and leave perfumes at home for hygiene reasons. Surface oils and fragrances can interfere with stencil adherence and healing. Wear clean clothing that gives the artist access without shifting fabric over the site.
Q: Do stipple or dot shading techniques hold up differently across skin tones?
A: Stipple can look beautiful across skin tones, but it depends on contrast and spacing. On darker skin tones, slightly more spacing between dots helps maintain the halo effect longer. Ask to see healed examples on similar skin tones so you know what to expect.
