
Fine line tattoos are everywhere on social feeds right now, and the same hands that make them look effortless are often the ones booking touch-ups at year two. Fresh photos do not tell the whole story. Placement, skin tone, and how you dress the area matter more than most first-timers expect. Read on for a range of options that balance trend appeal with real-world wear so you pick a version that holds up.
1. Traditional Feathered Chest Piece
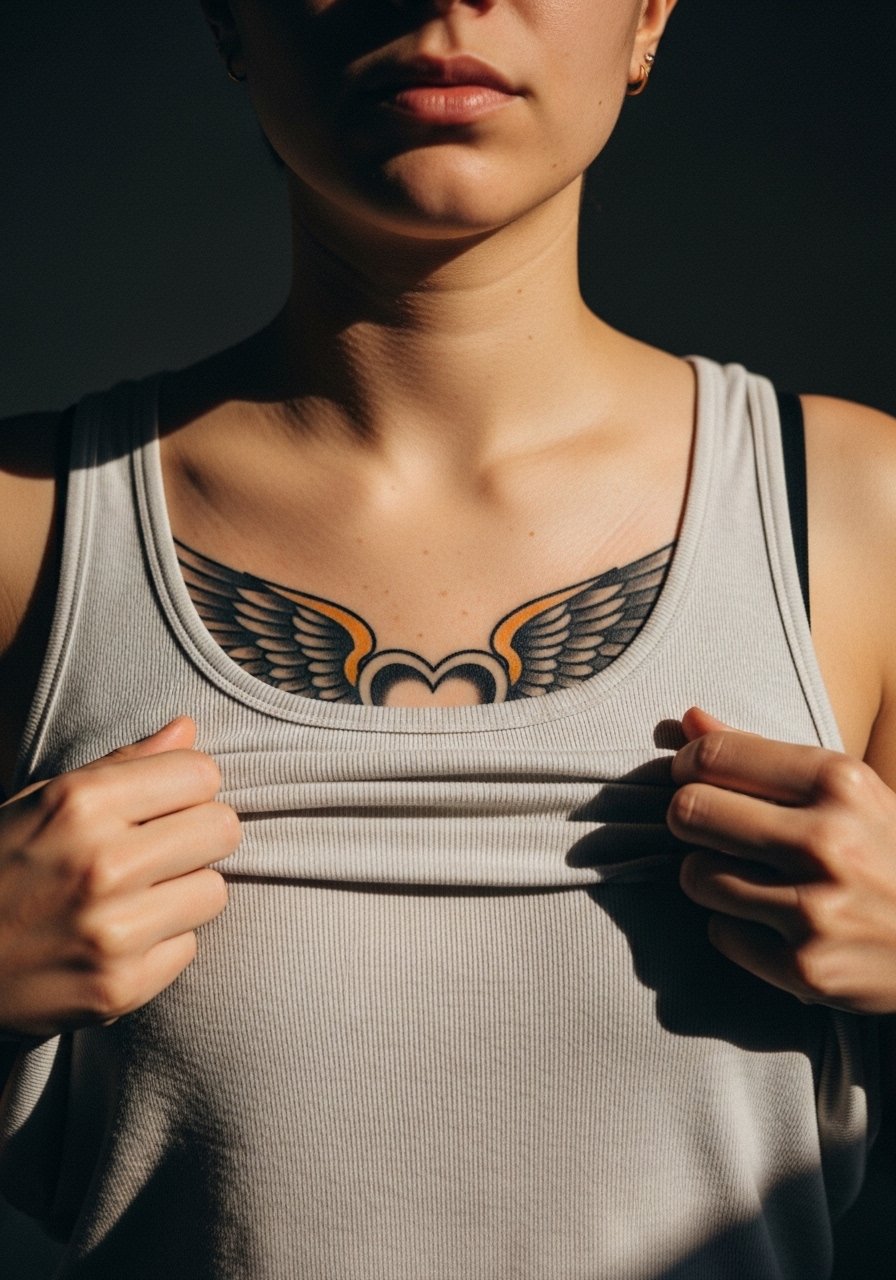
I have seen traditional feathered chest pieces survive years because artists lay bold outlines and saturation rather than relying on ultra-fine detail. Tell your artist you want clear outer lines and full color saturation so the feathers retain separation as the piece ages. The ribcage and sternum are higher-risk areas for stretch, so chest placement across the sternum gives visual symmetry and more stable skin. Expect moderate session pain and two sessions for a six to ten inch chest piece. For showing it off, a men’s v neck tee or a loose linen button shirt frames the work without hiding the shape.
2. Realistic Memorial Portrait on Upper Arm
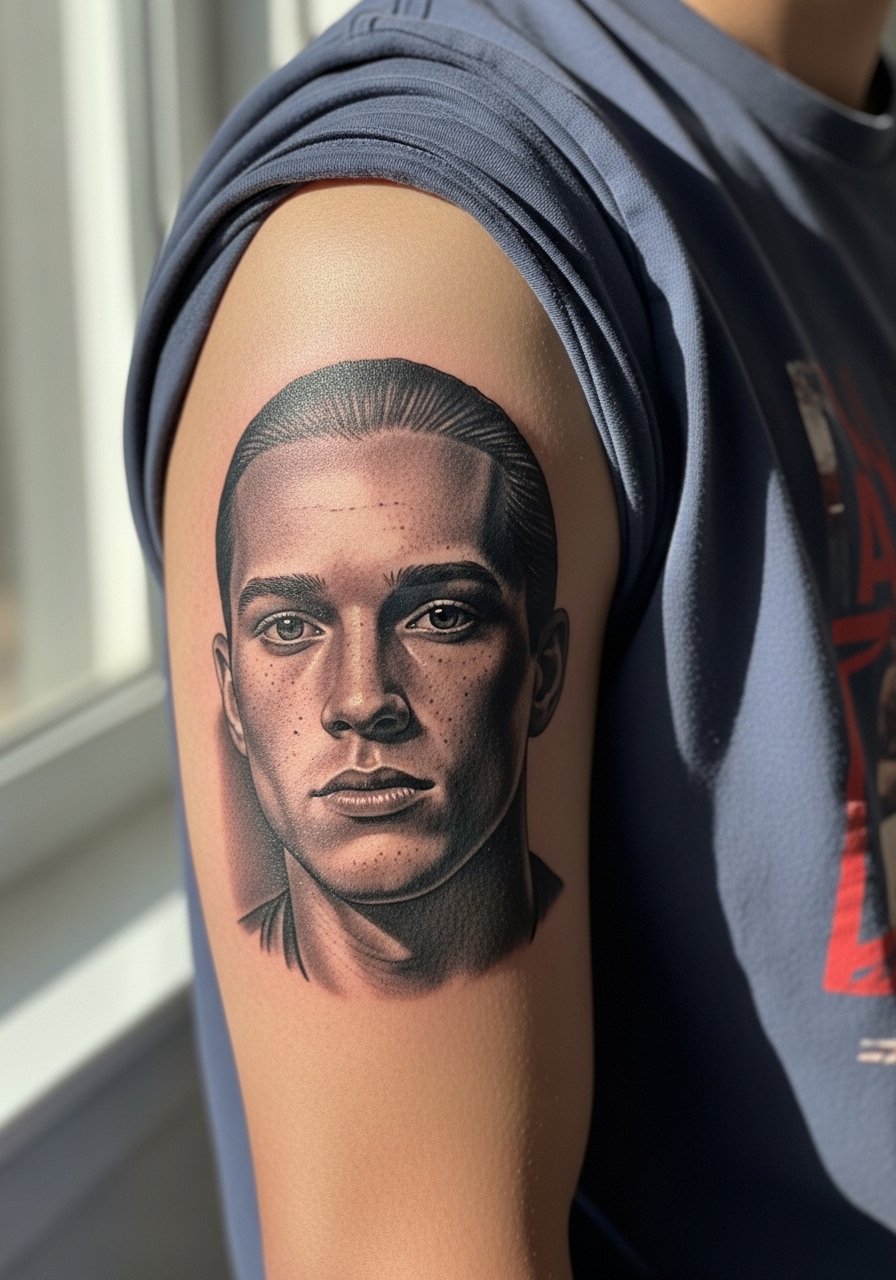
Fair warning: full-portrait realism on the upper arm asks for long sessions and detailed shading, and that leads to more tenderness during the appointment. Bring several reference photos that match the lighting and expression you want so the artist can translate features accurately. The common mistake is shrinking reference material too much, which loses key facial planes. Plan for multiple sessions and expect a high-contrast healed look at six months that softens by year two. For session comfort wear a short sleeve tee you can pull up without tugging on the shoulder.
3. Minimalist Line Wings for the Wrist
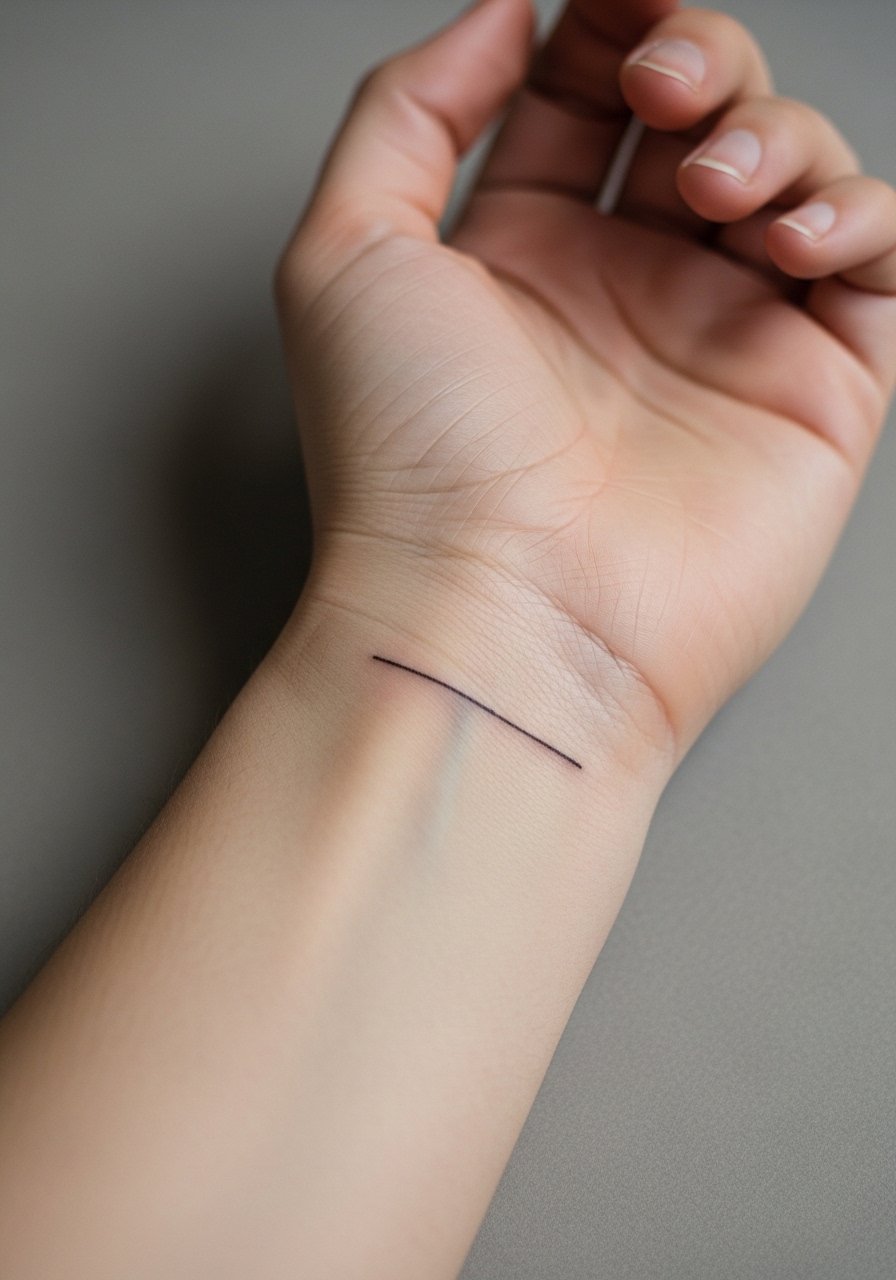
Most wrist fine line pieces look gorgeous the day they are done and then surprise people at six months when lines soften. Artists split into two camps on this one. One camp says fine line on high-movement areas blurs faster and needs touch-ups at year two. The other camp says with precise depth and spacing a single-line approach can last longer. If you lean fine line for a wrist piece, ask for slightly thicker main strokes in the parts that will see friction. The appointment is quick, but expect yearly touch-ups. Pair this with a dainty cuff bracelet when you want to draw attention without covering the art.
4. Heart-Shaped Negative Space on the Neck
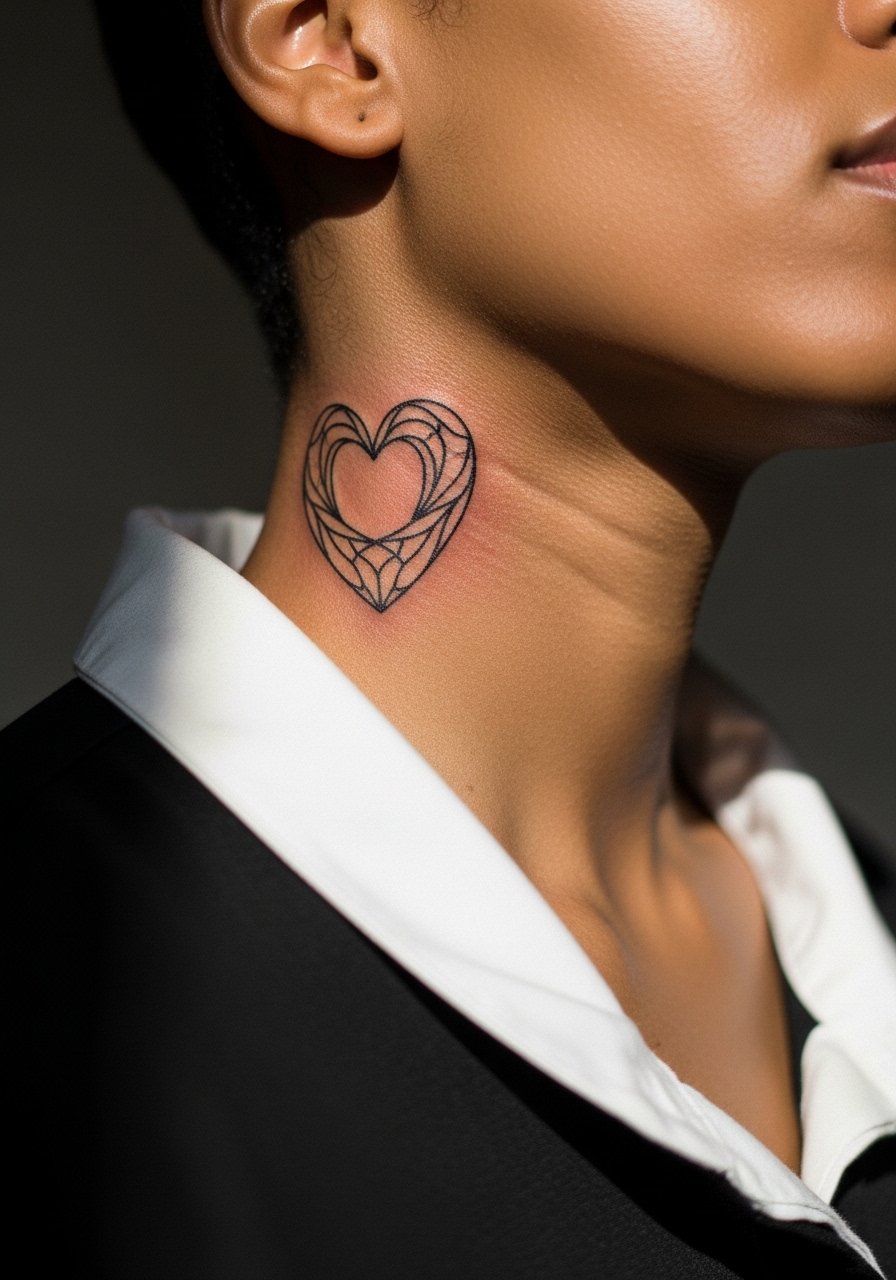
A negative space heart formed by curved feathers gives a neat graphic read in small sizes. The neck is sensitive for both pain and career considerations, so plan placement slightly off-center for easy concealment under collars. The common aging problem is overworking the tiny internal details. Ask for simpler inner contours and stronger outer lines so the silhouette remains clear at two and five years. For session wear, a open collar shirt lets you expose the area without being uncomfortable.
5. Tiny Cherub on the Ankle
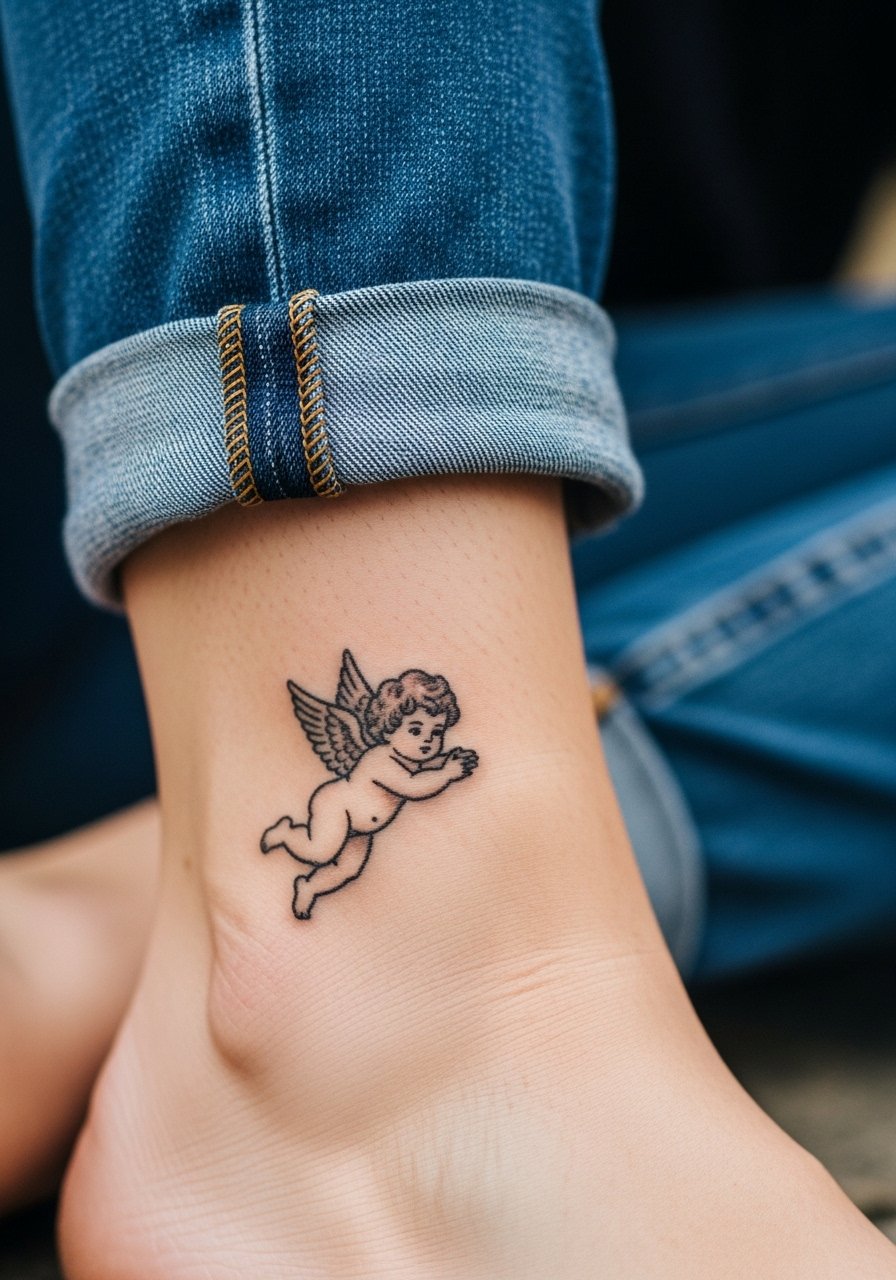
Tiny illustrative cherubs on the ankle are quick wins for first-timers that want charm without commitment. The ankle sees a lot of rubbing from socks and shoes while healing, so the typical mistake is placing the piece too low near seams. Ask for a slightly higher placement above the bony area to reduce friction and expect one short session. At two years the micro linework will hold if the lines are not too hairline thin. Style it with ankle strap heels or rolled cuff jeans to show the piece on casual days.
6. 3D Emerging Sternum Wings
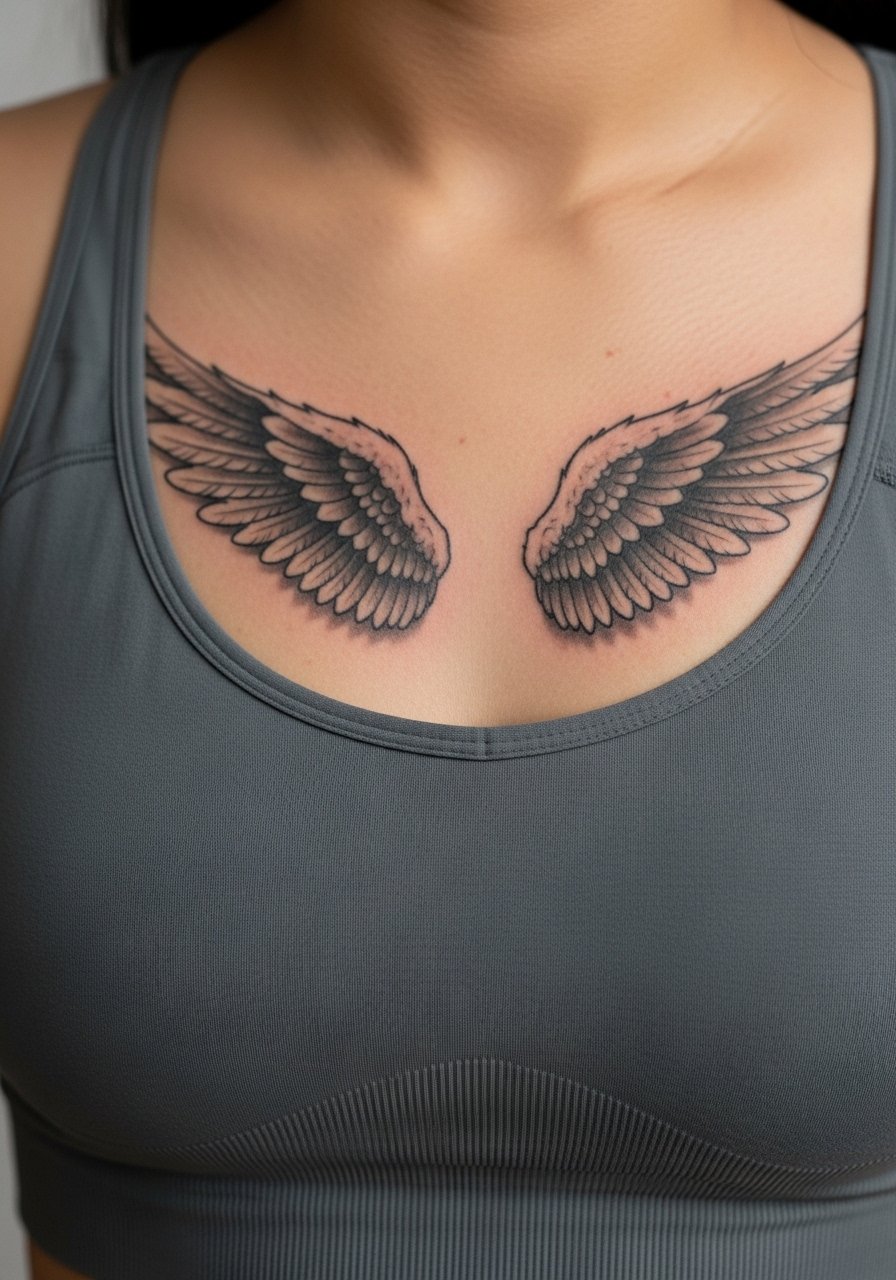
Sternum work is intense in both shading and session time, and the skin there takes saturated black and gray differently than flank areas. The biggest mistake is packing too much tiny detail into a small sternum canvas. Tell your artist to prioritize contrast and gradual shading for that lifted, popping-off-skin effect. Expect longer sessions and higher pain than the forearm. Sternum pieces sit beautifully under deep V shirts, so bring a deep v tank top for the appointment.
Pack Smart
The chest, wrist, ankle, upper arm, neck, and sternum pieces above have different prep needs, so pack a few items to smooth the session and the first week.
- Badger Tattoo Balm. A lighter balm option that many people prefer over greasy ointments for non-clogging moisture during early healing, ideal for ankle or sternum pieces.
- Green Sheep Aftercare. Breathable cream recommended by some artists for color retention on chest and back work.
- Aussie Ink Healer Spray. No-touch spray that reduces irritation for lower leg and calf work during the sweaty months.
- Indie Dotwork Salve. Fast-absorbing salve that works well on blackwork and stipple pieces to avoid residue on delicate dot shading.
- Hustle Butter. Thinner than heavy ointments and useful for keeping color vibrant on larger traditional chest pieces without clogging pores.
7. Floral-Wrapped Shoulder Silhouette
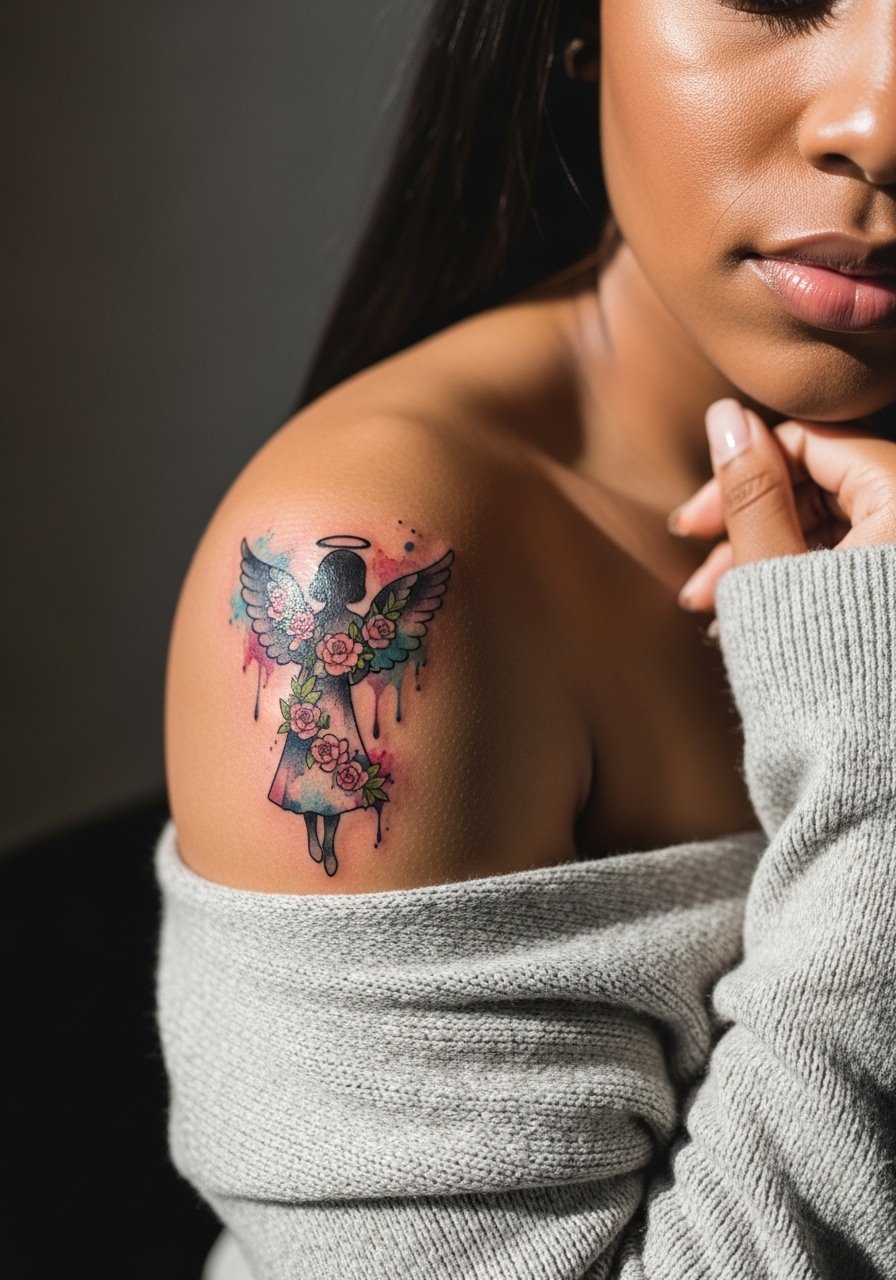
There is a romantic quality when wings are suggested by botanical elements that wrap the shoulder blade. The shoulder is forgiving because the skin moves less than the wrist or ribs, so softer washes age more gracefully there. Ask for a watercolor wash that respects negative space so the flowers do not merge into the feathers as the piece heals. Session wear should be a strapless top or button-down you can shift aside for access. If you want the piece to read from across a room, insist on a slightly stronger outline where the floral and wing shapes meet.
8. Geometric Forearm Motif
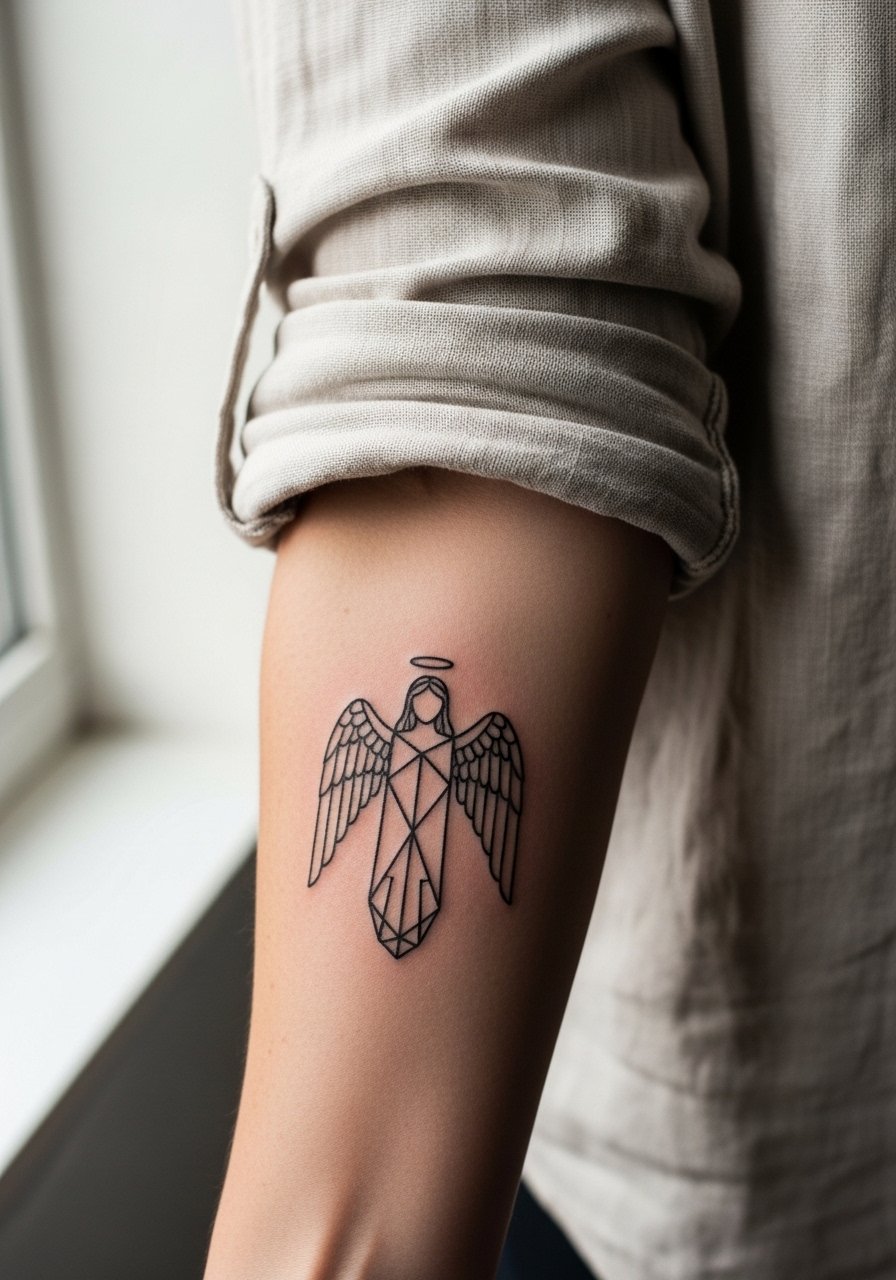
Geometric motifs translate well into forearm placements because the arm gives enough canvas for spacing to breathe. The frequent mistake is going too small. Dense mandala work needs room or the lines will merge within a couple of years. During consultation bring clean references that show exact line weight and symmetry so the artist can scale appropriately. For show-off days, rolled sleeve linen shirts in cream or olive frame the forearm without stealing the spotlight. Grab a rolled sleeve linen shirt to complete the look.
9. Blackwork Calf Band
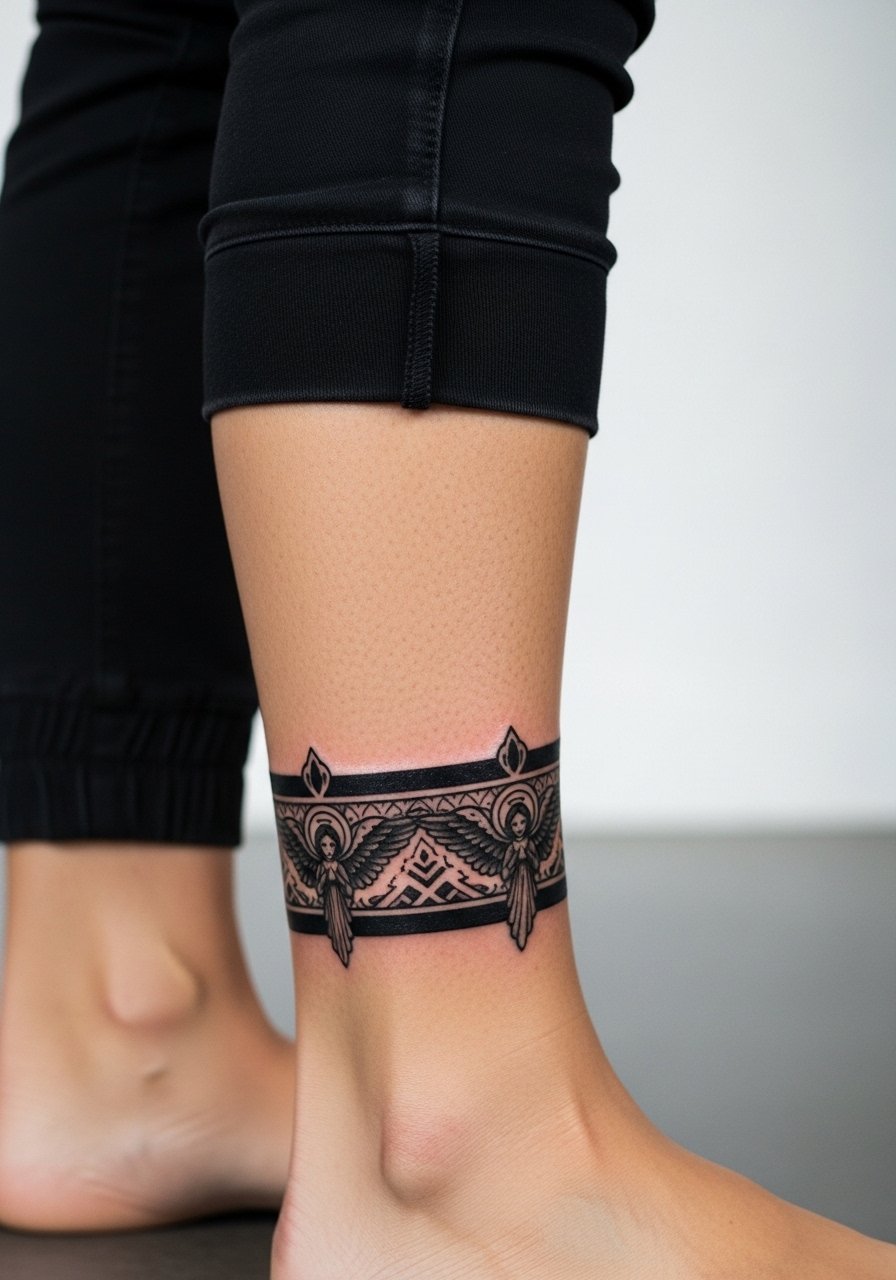
Blackwork bands are a solid choice when you want bold longevity. The calf tends to tolerate heavy saturation well, but summer sweating and friction from athletic wear can make early healing tricky. Tell your artist you plan to wear shorts while it heals so they can advise on placement that avoids seams. Expect two sessions for large black fills and a slightly longer initial scabbing period. Pair with slim joggers or Chelsea leather boots to show the piece off in colder weather.
10. Fine Line Cherub at the Collarbone
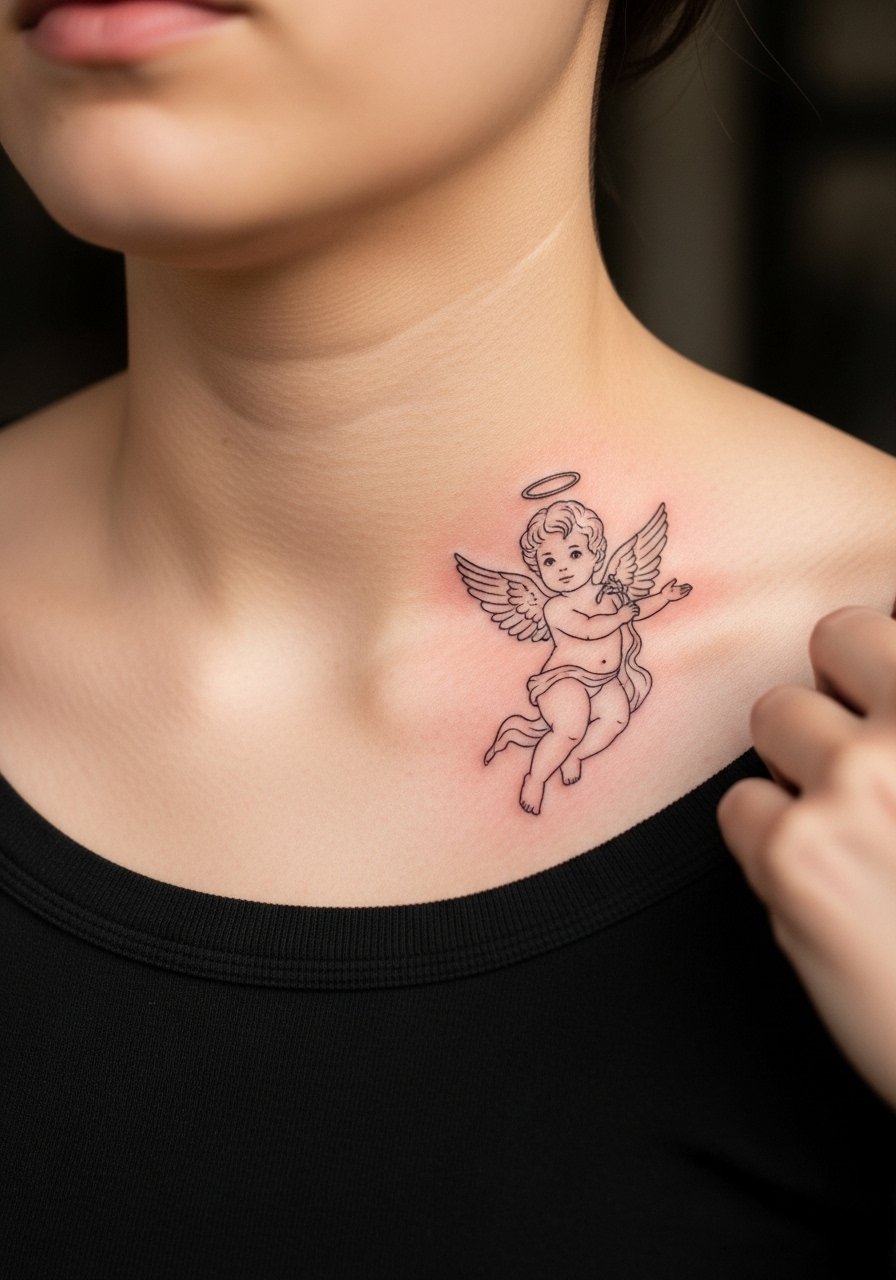
Fine line ornamentation across the collarbone can look refined when the lines are planned for movement. The collarbone area is less abrasive than the wrist, so single-line elements last a bit longer here. The mistake people make is asking for hairline strokes across busy anatomy without extra spacing. Ask for slightly bolder main contours and minimal interior detail so the halo and cherub silhouette stays legible at two years. For session comfort wear a wide-neck shirt you can slide aside without tugging.
11. Neo-Traditional Fallen Pose on the Thigh
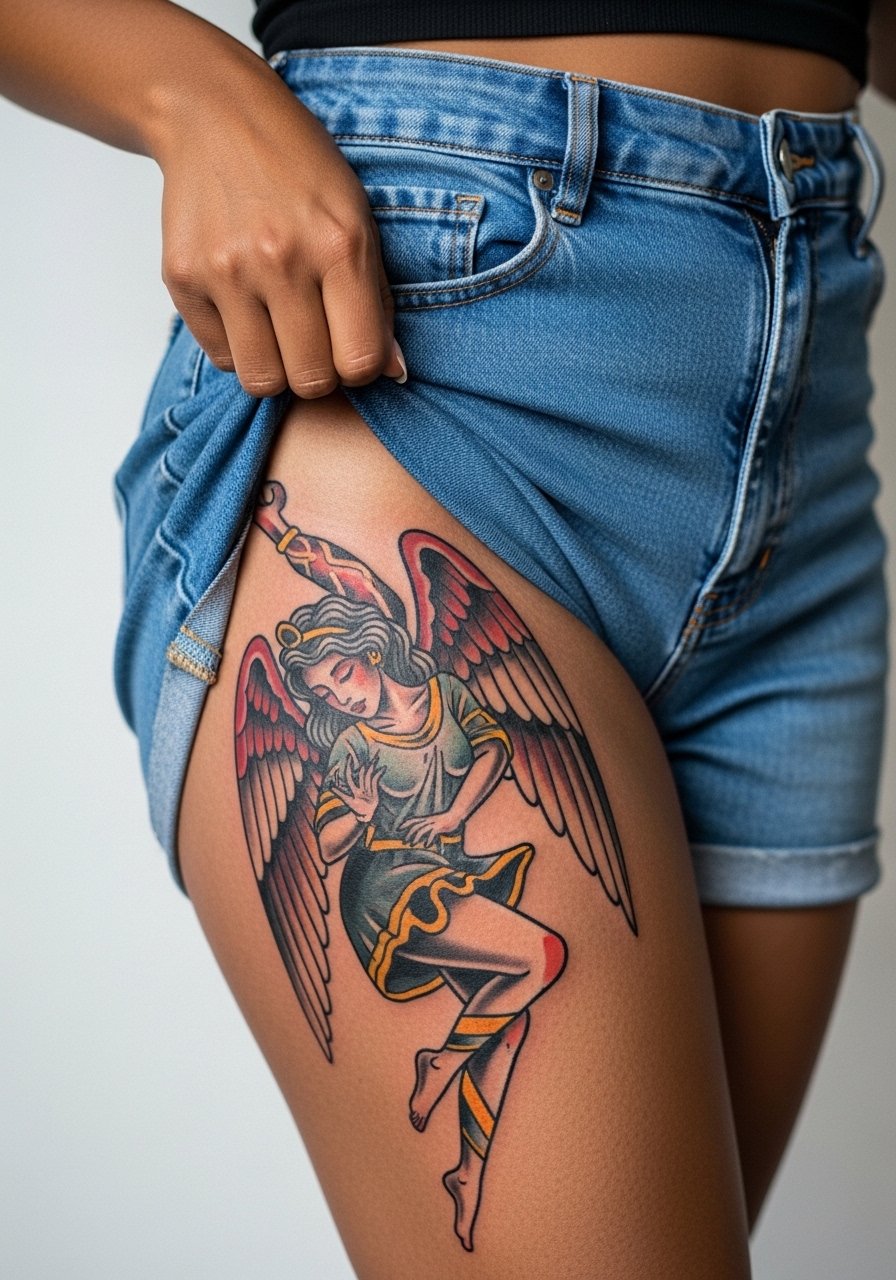
Thigh pieces age well because the skin is relatively stable, but weight fluctuation can change proportions. I have seen thigh portraits distort after major body changes. Discuss future body plans with your artist so they can place the focal point where stretch is least likely. The session will be longer and can be painful on the inner thigh. For appointment ease bring loose shorts or a skirt you can adjust. For nights out, off-shoulder sweaters or draped skirts show the thigh piece selectively.
12. Micro Wing Pair Behind the Ear
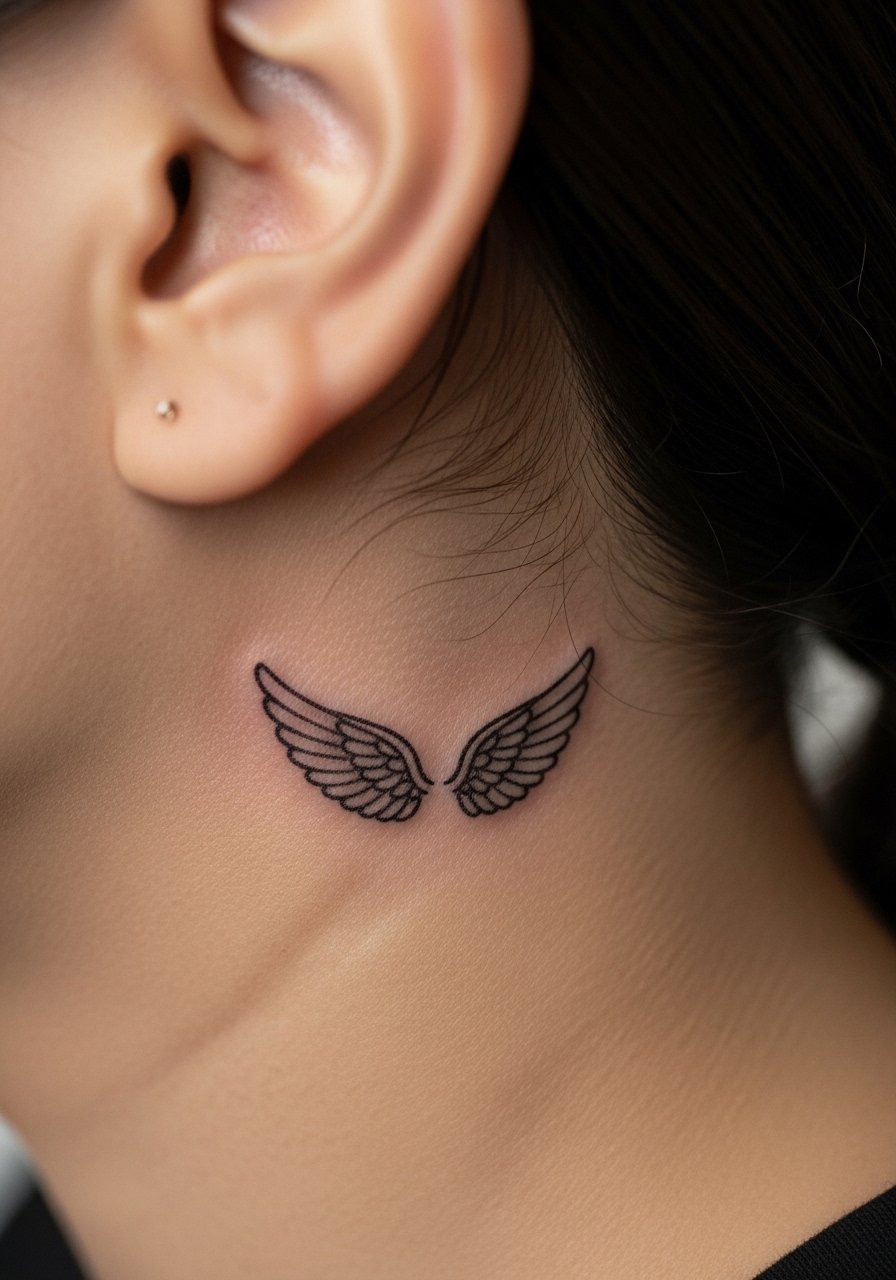
A micro pair tucked behind the ear is subtle and easy to conceal with hair. The trick is to avoid hairline-only strokes near the skull where blowout risk is higher. Ask for single-line outlines with minimal interior work and expect a one-session quick appointment. For session wear have hair up and ready, and use a dainty choker necklace to balance the look when you want it visible. Hands-on touch-ups might be needed at year two, especially if you expose the area to frequent sun.
13. Ornamental Back Mandala
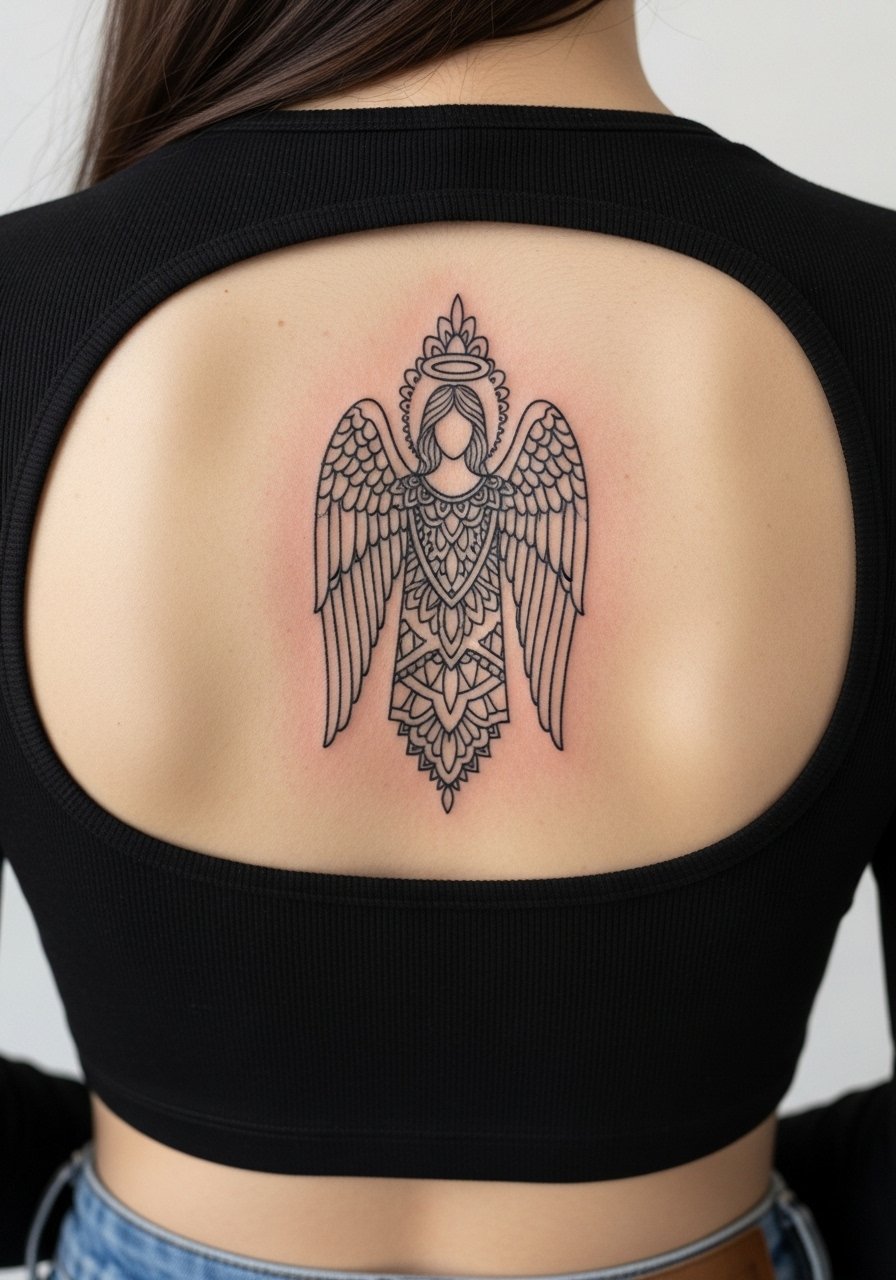
Mandala compositions that incorporate wing-like arcs work well as back centerpieces because there is space to breathe. The common error is compressing too many elements into a small back tattoo, which ages into a muddy block of detail. Go larger, let symmetry breathe, and choose heavier main spokes to maintain graphic clarity at five years. For sessions, a front-open robe or loose shirt makes lying face-down simple. On show days, a backless crop top frames the piece for evening wear.
14. Script Etched into the Wing Span
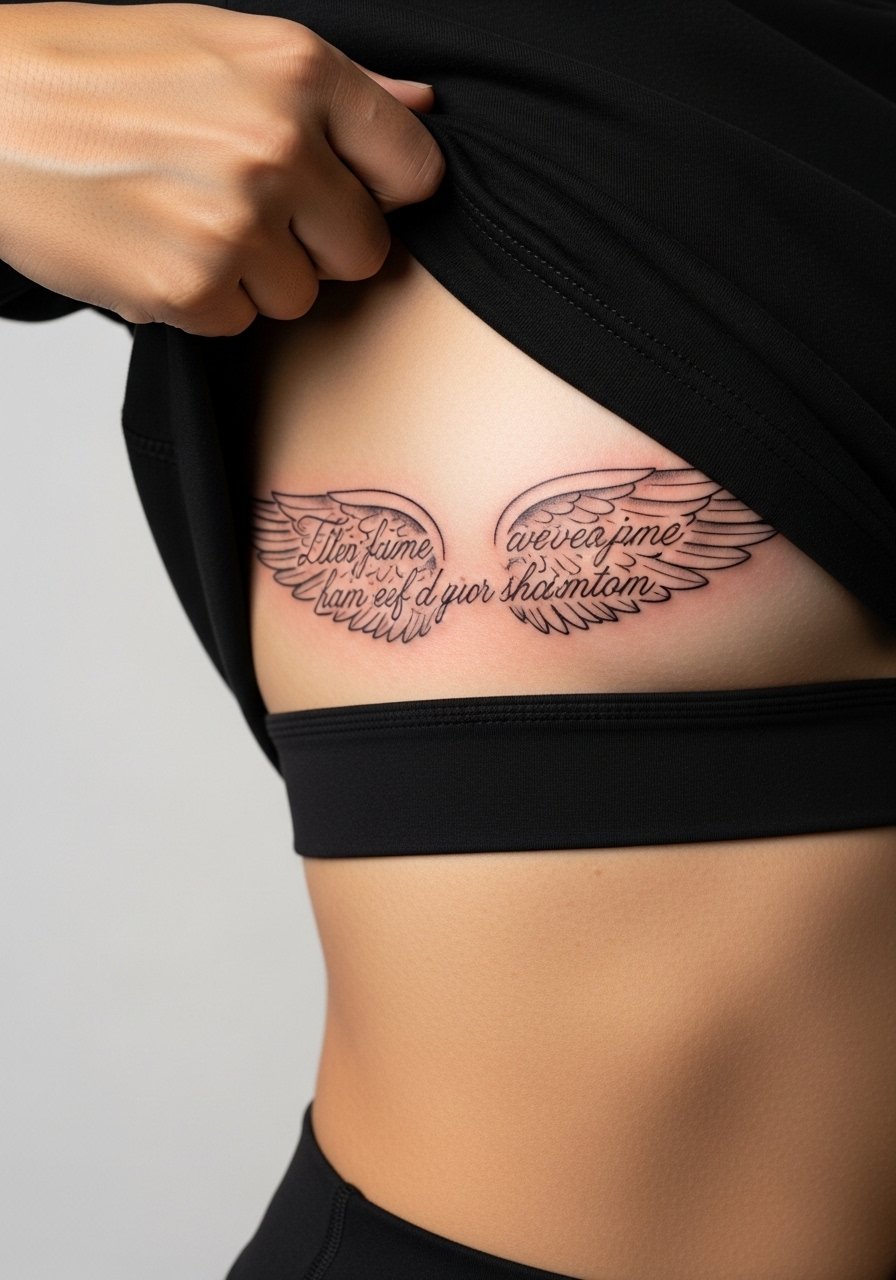
Etching small script into the negative space of feathers is one of those personal touches that rarely appears in gallery roundups. The ribcage is a mobile area, so plan for the letters to be slightly larger than you think. A common mistake is choosing tiny type that becomes illegible once the skin settles. Tell the artist the exact phrase and ask to see a stencil twice before ink. Sternum and rib placements are painful but look striking under open shirts. For the session choose a cropped athletic top so the artist can lift fabric without you being cold.
15. Motion-Blur Flight on the Calf
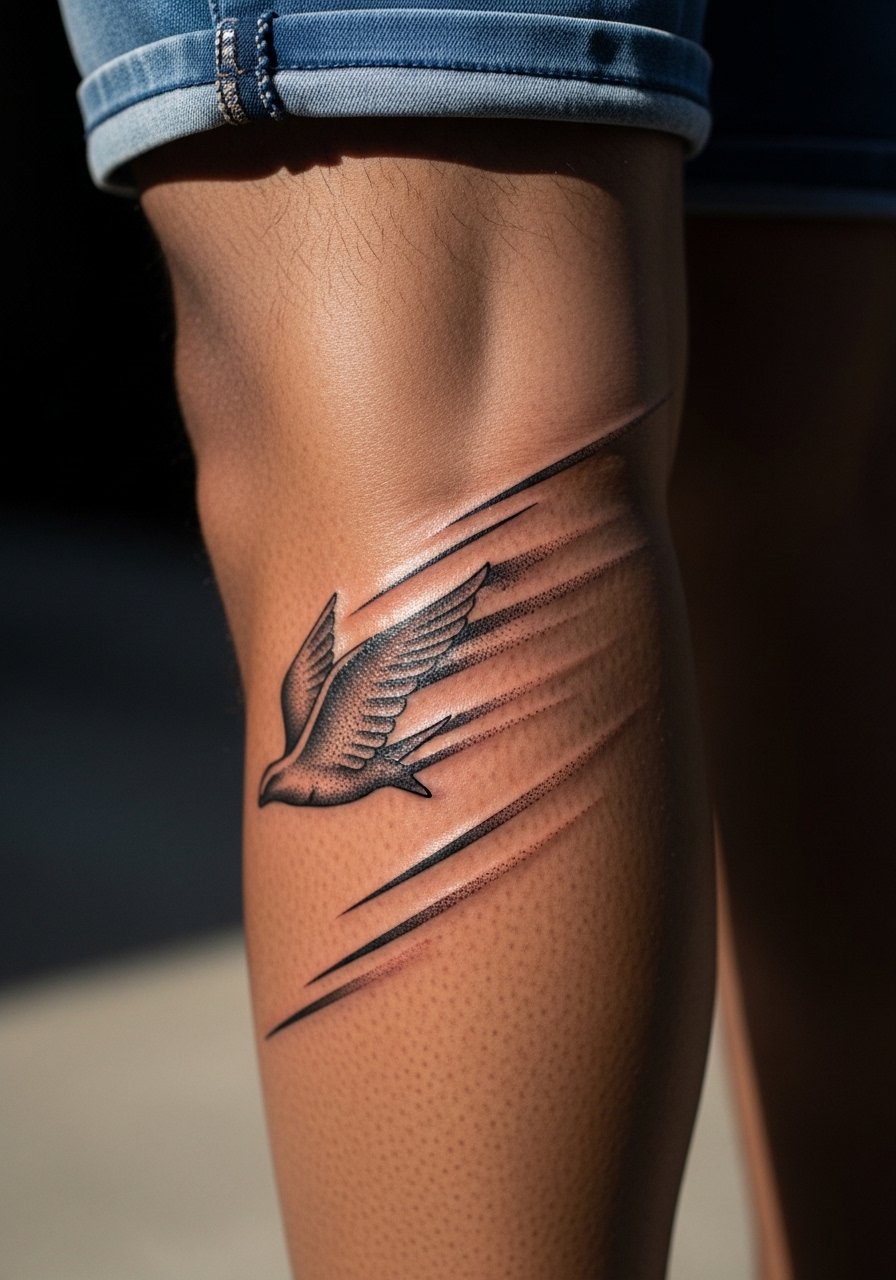
Calf pieces that mimic motion with selective blur shading read very well while still aging predictably if the blur areas are kept sparse. The risk is overdoing motion strokes in dense black, which can turn into a dark patch years later. Ask for a mix of stipple shading and whip strokes so the effect keeps texture instead of a single wash. This placement is ideal for showing with shorts and boots. Wear slim fit joggers to reveal or conceal the work as needed.
16. Dark Skin Optimized Dotwork Wings
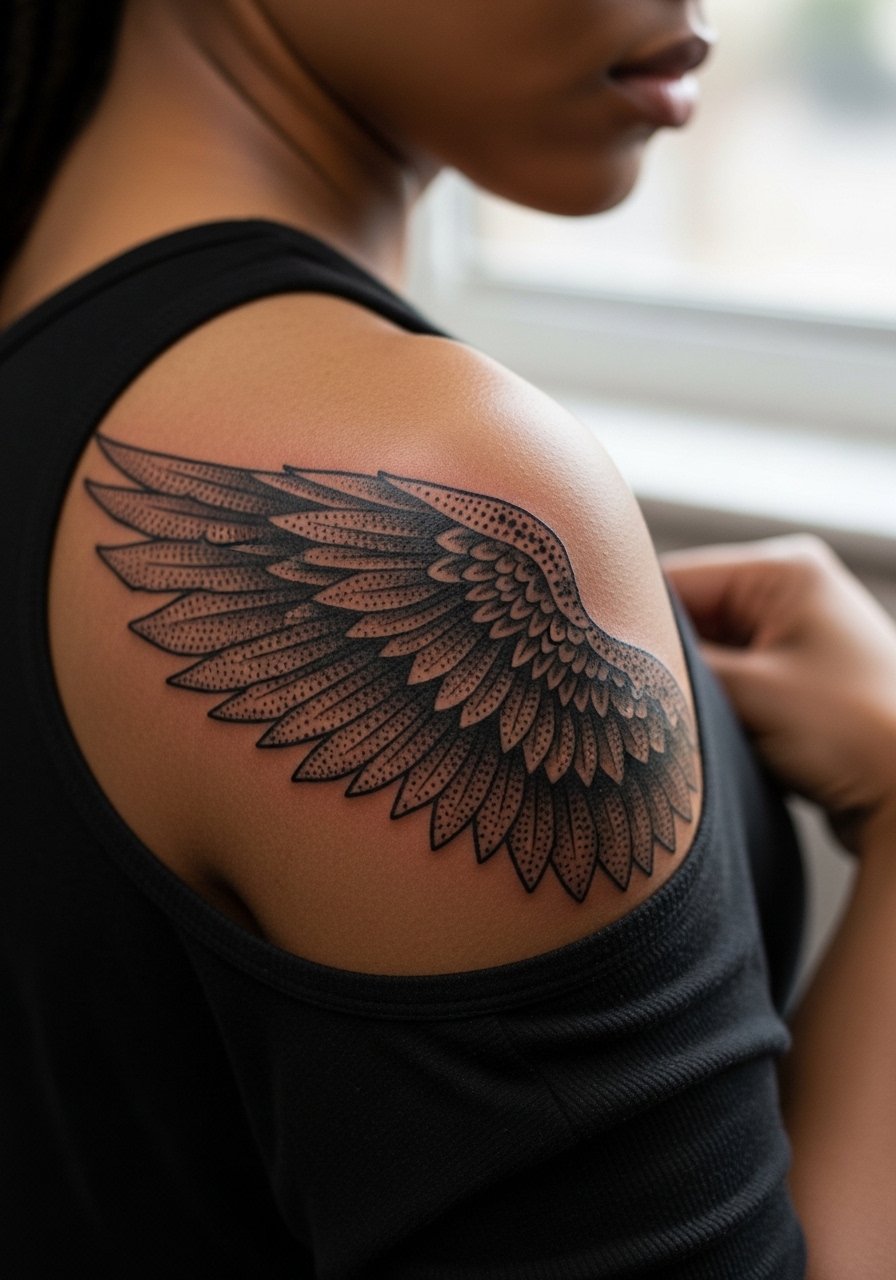
People with darker skin tones often report that ultra-fine linework can disappear in photos after tanning. For darker complexions I recommend dotwork and bold black frames that preserve contrast without relying on pale shading. The common error is copying low-contrast references that only work on lighter skin. Ask your artist to design using bold negative space and stippling rather than pale gray washes. For showing the shoulder, an off-shoulder sweater or tank top lets the artwork breathe.
17. Patchwork Sleeve Progression
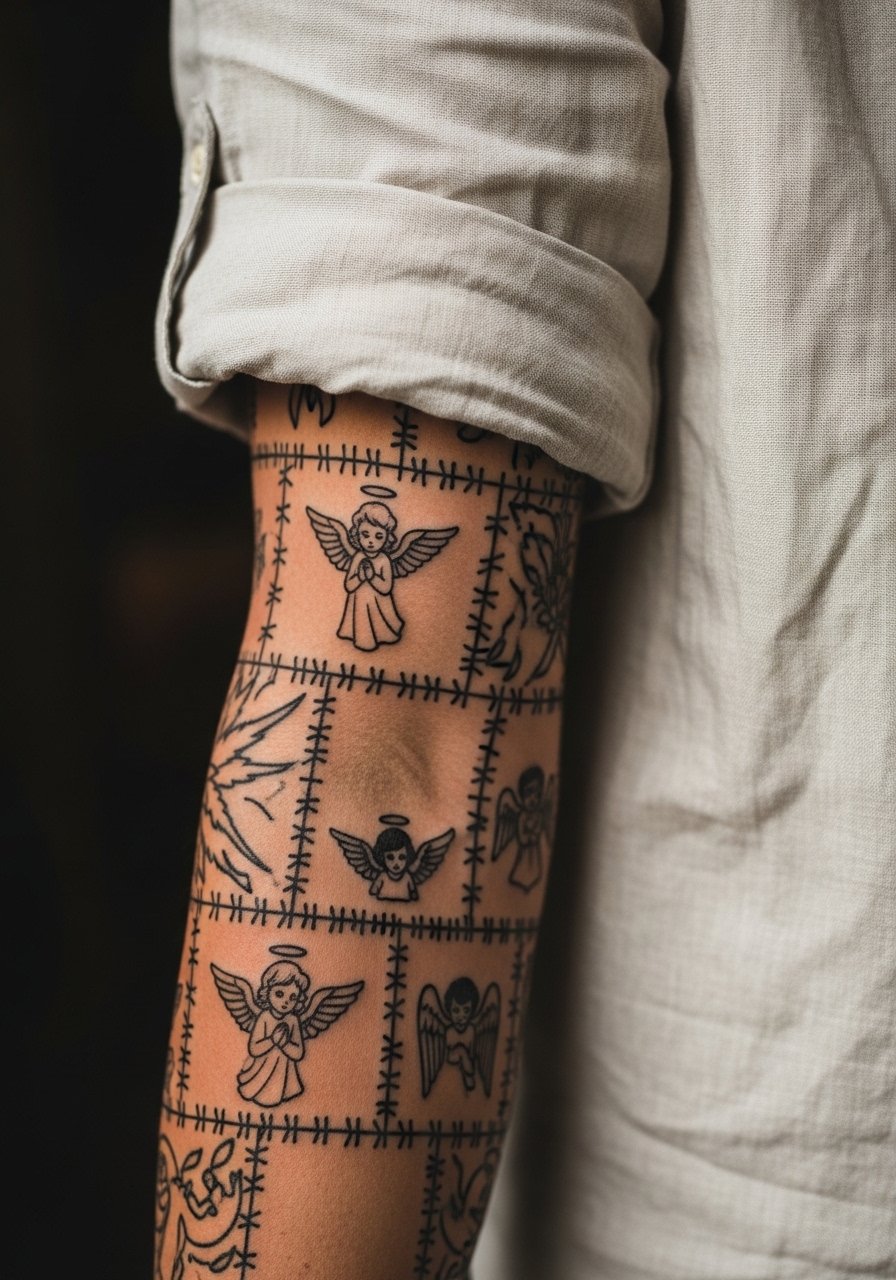
A patchwork sleeve that starts with small pieces and grows over time is both practical and forgiving. The advantage is you can test different styles, from fine line to blackwork, and prioritize the ones that age well on your skin. The mistake is trying to force everything into one sitting. Instead plan sessions seasonally, add connectors later, and keep main anchor pieces bolder so the overall silhouette holds. Bring references and request a rough progression timeline with your artist. For the session wear a rolled sleeve linen shirt to make arm access simple.
18. Watercolor Floral Silhouette on the Shoulder Blade
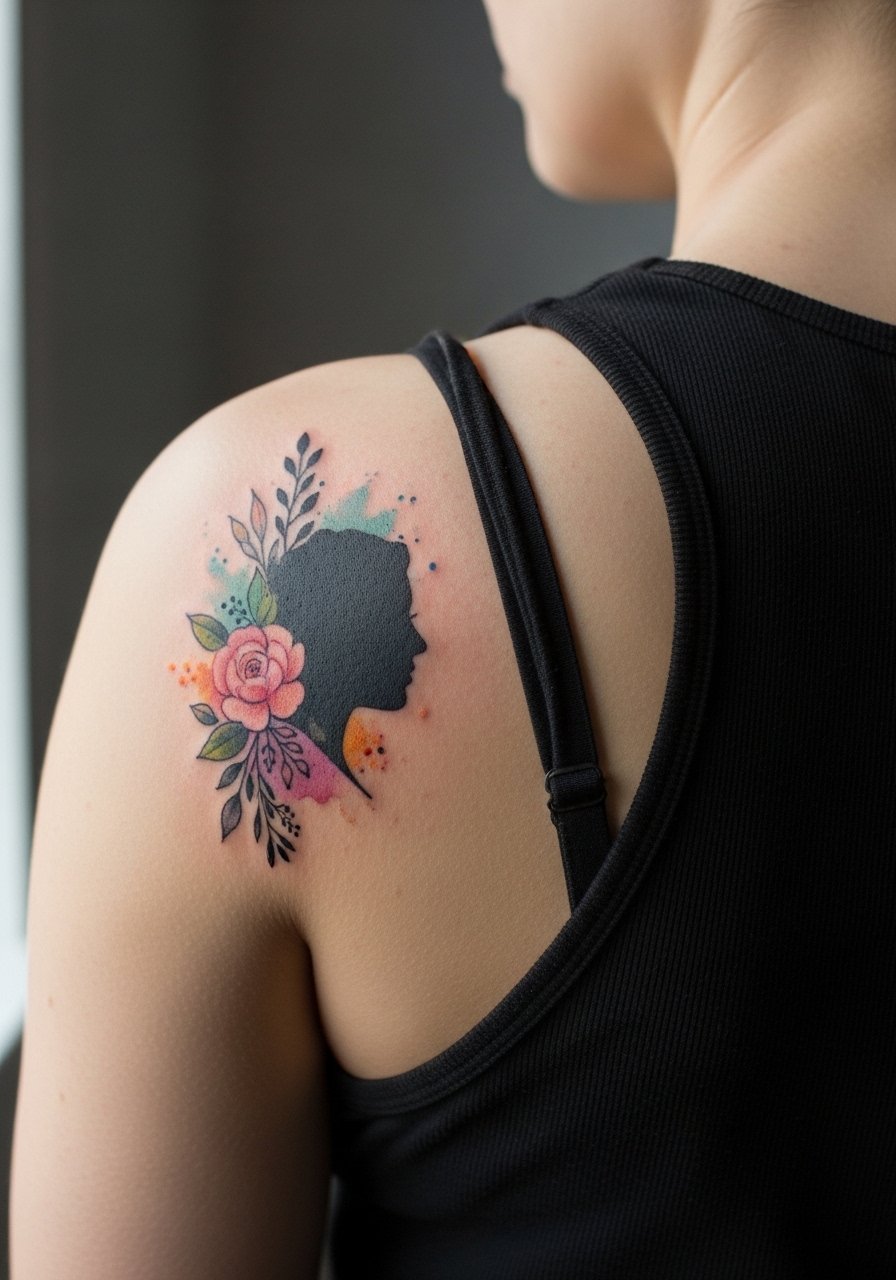
Watercolor treatments look ethereal on shoulder blades when the artist keeps colors airy and avoids deep saturation in narrow areas. The aging risk is color migration and fading if the washes are too thin or placed on high-friction zones. Ask for a subtle outline anchor to keep the silhouette readable against the color wash. Session wear a tank top with wide straps to make shifting easy. For long-term contrast, request touch-up windows at the year mark for the light washes.
19. Stipple Shaded Inner Bicep Portrait
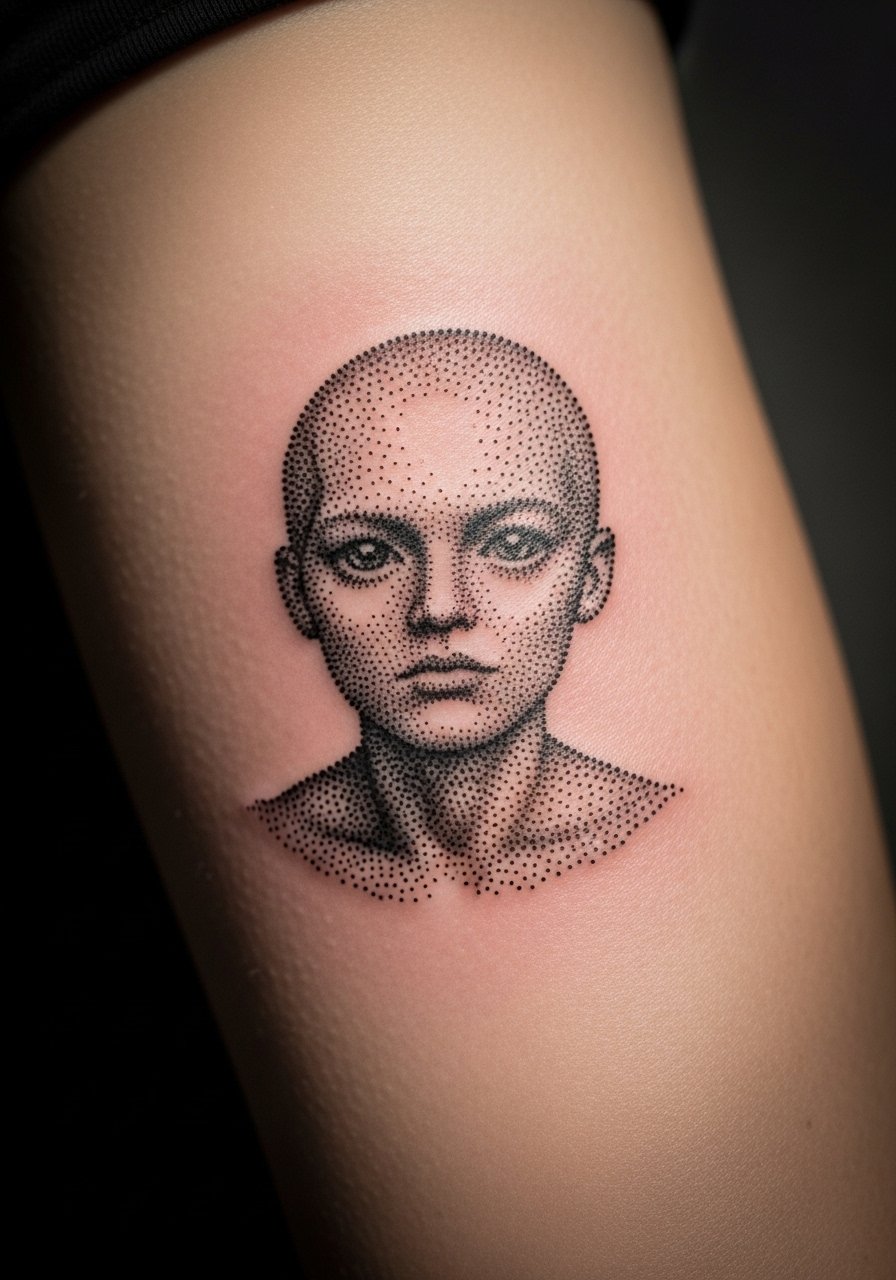
Inner bicep portraits read softer than outer arm work because stipple shading blends nicely there. Expect this area to be more sensitive and to bruise during longer sessions. The principal mistake is compressing contrast that should live on outer planes. Ask your artist for higher contrast in key shadow zones and softer stippling elsewhere. For session ease, a tank top that allows arm elevation keeps the process smooth. Touch-ups at year two are common for highly shaded inner bicep work.
20. Minimalist Ankle Constellation
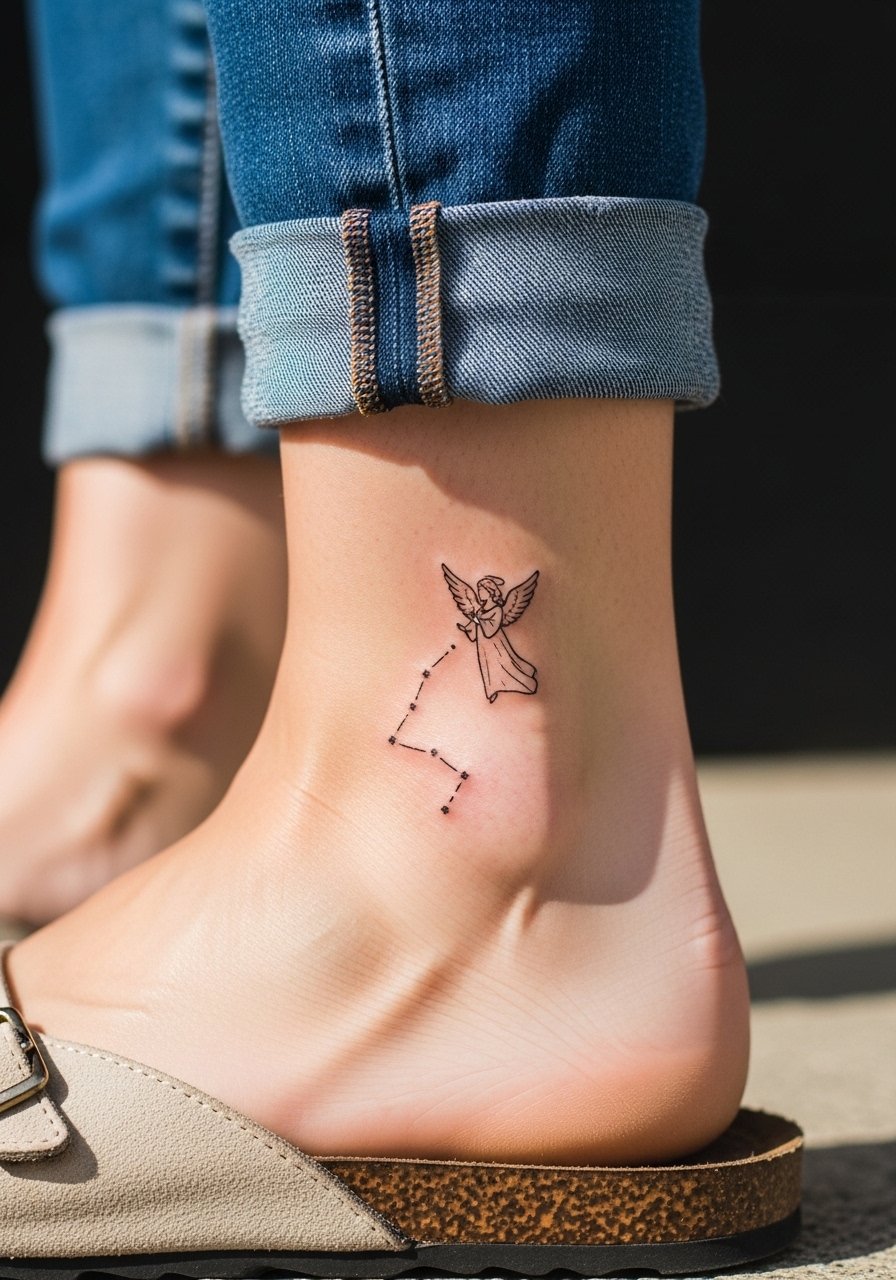
Ankle constellations are discreet and age well if kept very simple and away from seams. The big mistake is placing them where shoe straps or sock lines repeatedly rub the area. Request placement slightly above the bony ankle and keep internal detail minimal. The session is fast and tolerable. For showing it off pair with sandals or rolled jeans for summer visibility.
21. Sternum Script with Feathered Accents
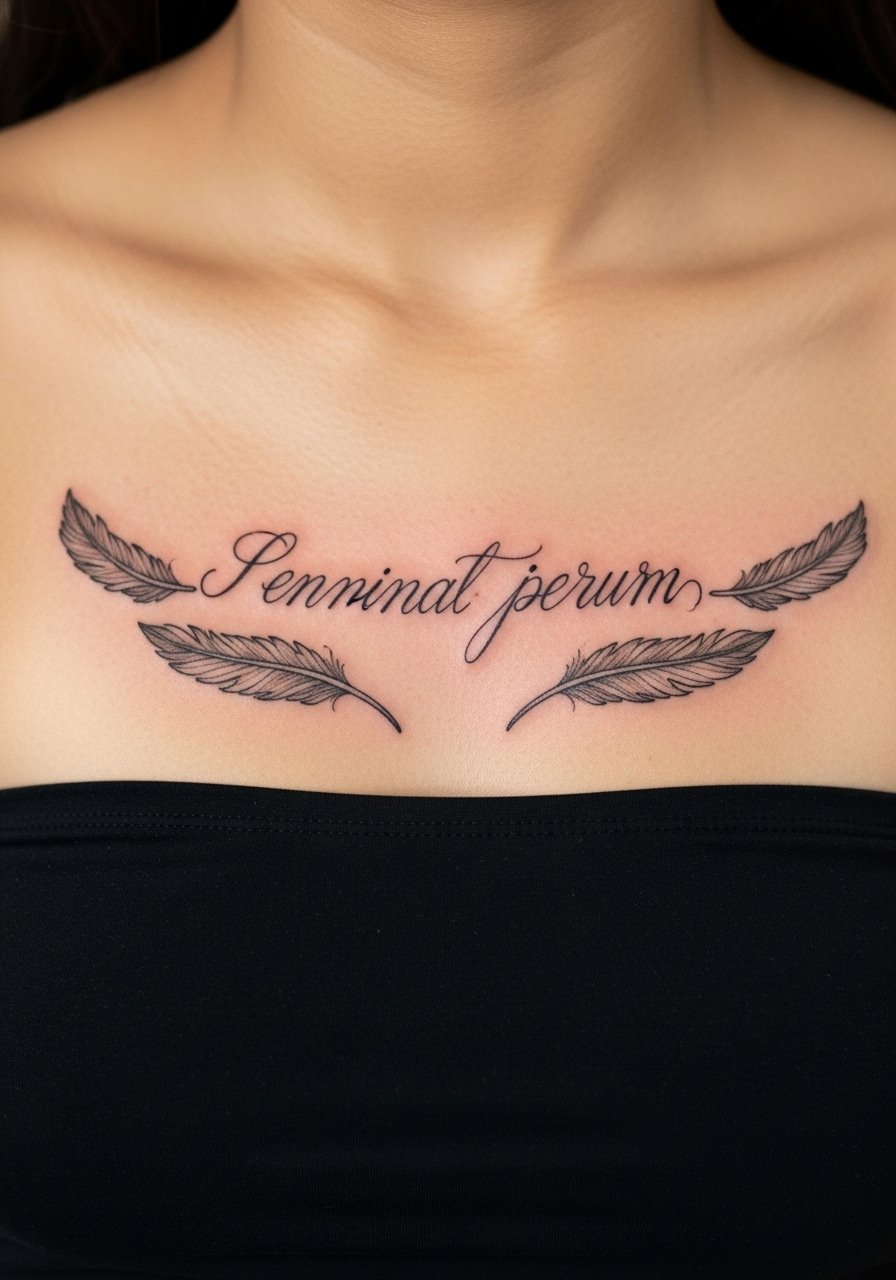
Sternum script can be quietly personal and sits nicely beneath low-cut tops, but script on mobile skin needs margin to avoid creeping together. The common error is choosing compact type that loses legibility after settlement. Ask for slightly taller letterforms and feathered accents that provide breathing space. Pain is higher here but the visual effect can be striking. Bring a bandeau top for a clean reveal during the session.
22. Tiny Necklet: Subtle Heart with Wings
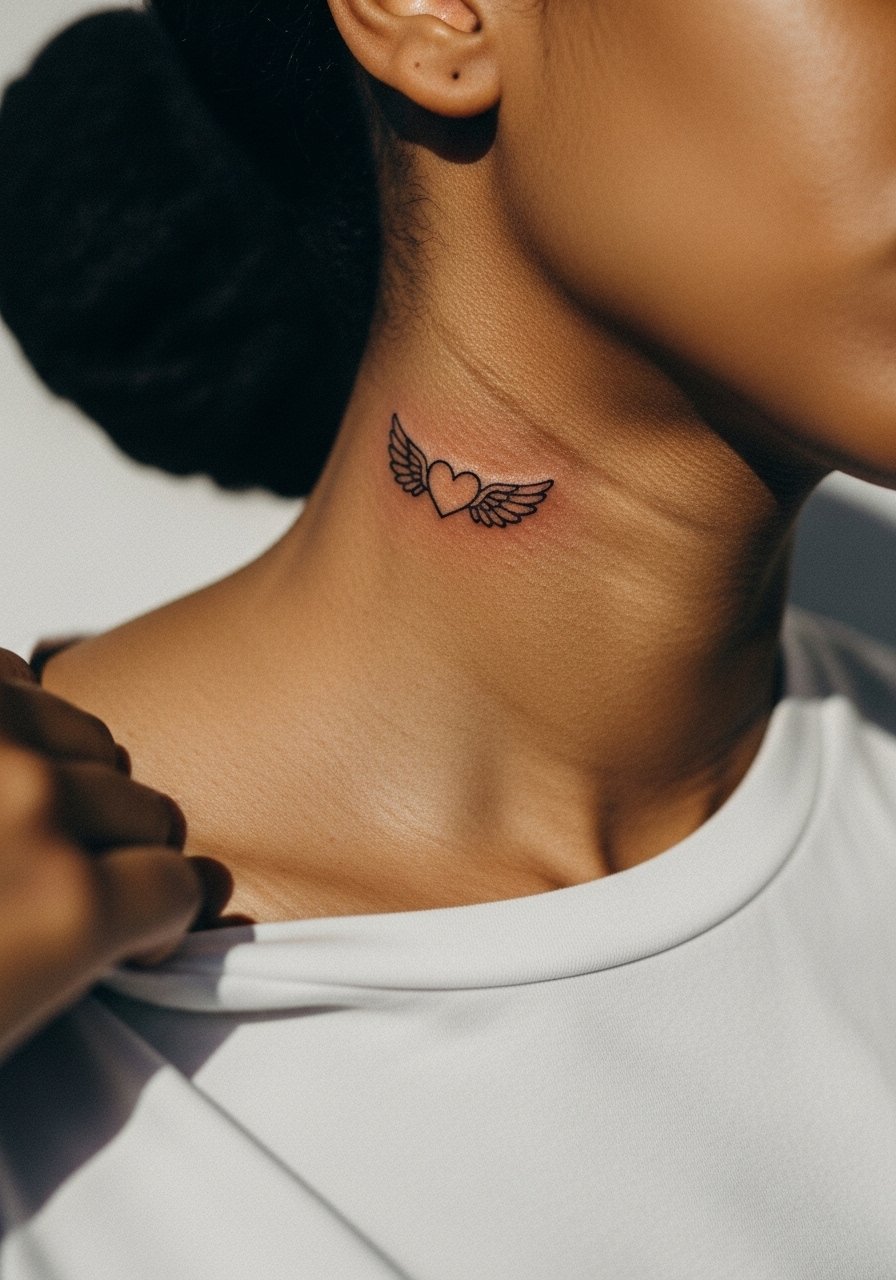
Necklet-sized designs are excellent for those who want a visible but small statement. The neck is a high-contact zone and may require touch-ups more frequently. Avoid hairspring-fine strokes near motion lines. Ask for a slightly stronger silhouette and minimal interior detail so the heart and wing shapes remain readable. Session wear a wide-neck shirt so you can show the artist the exact placement without fuss.
23. Backpiece Realistic Emerging Figure
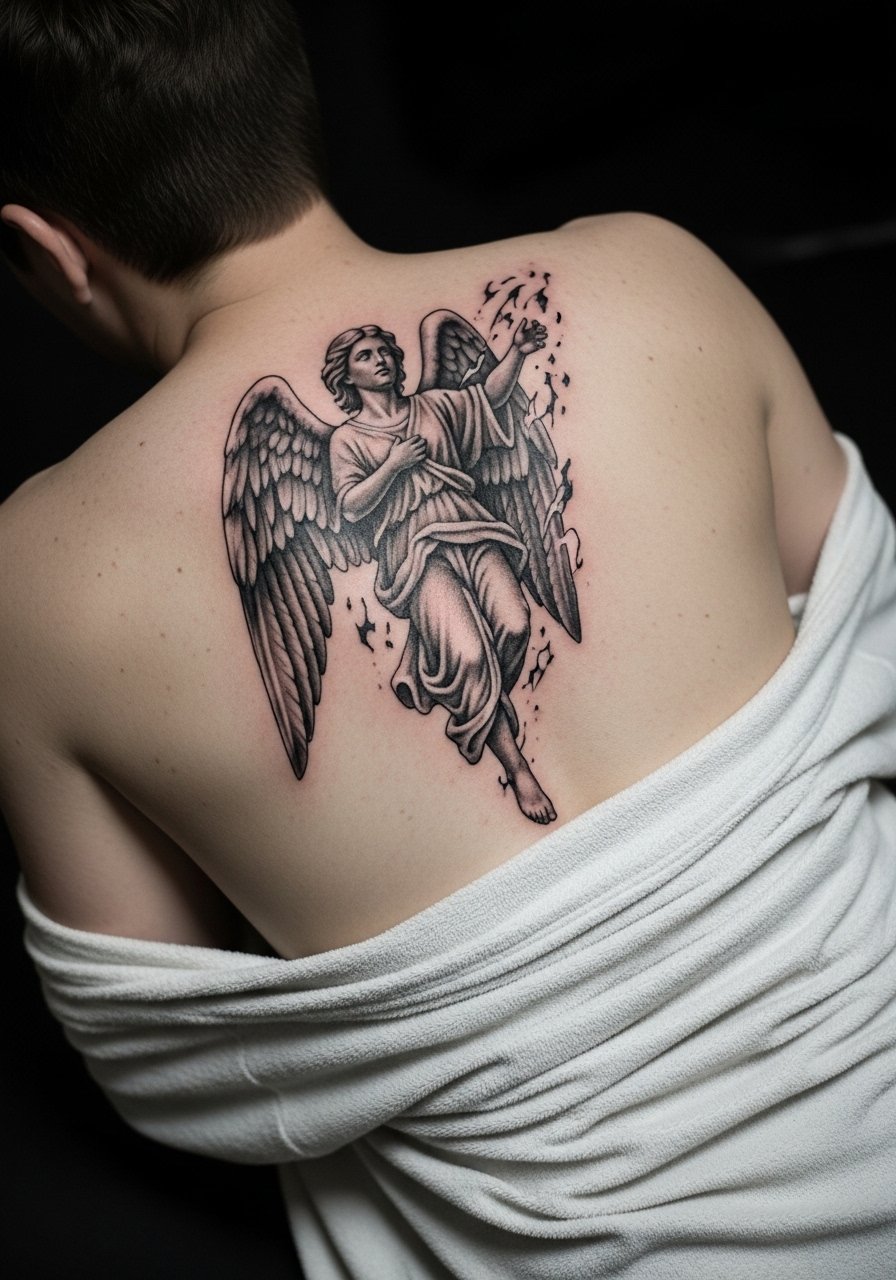
Large backpieces with three-dimensional emerging figures deliver drama and longevity because the skin there is stable and forgiving for large shading gradients. The downside is the commitment and the need for multiple long sessions. Ask your artist to map the composition on a life-size stencil to ensure the figure fits muscular contours. For the appointment choose a loose muscle tank or front-open robe so you can lie comfortably.
24. Finger Micro Cherub with Halo
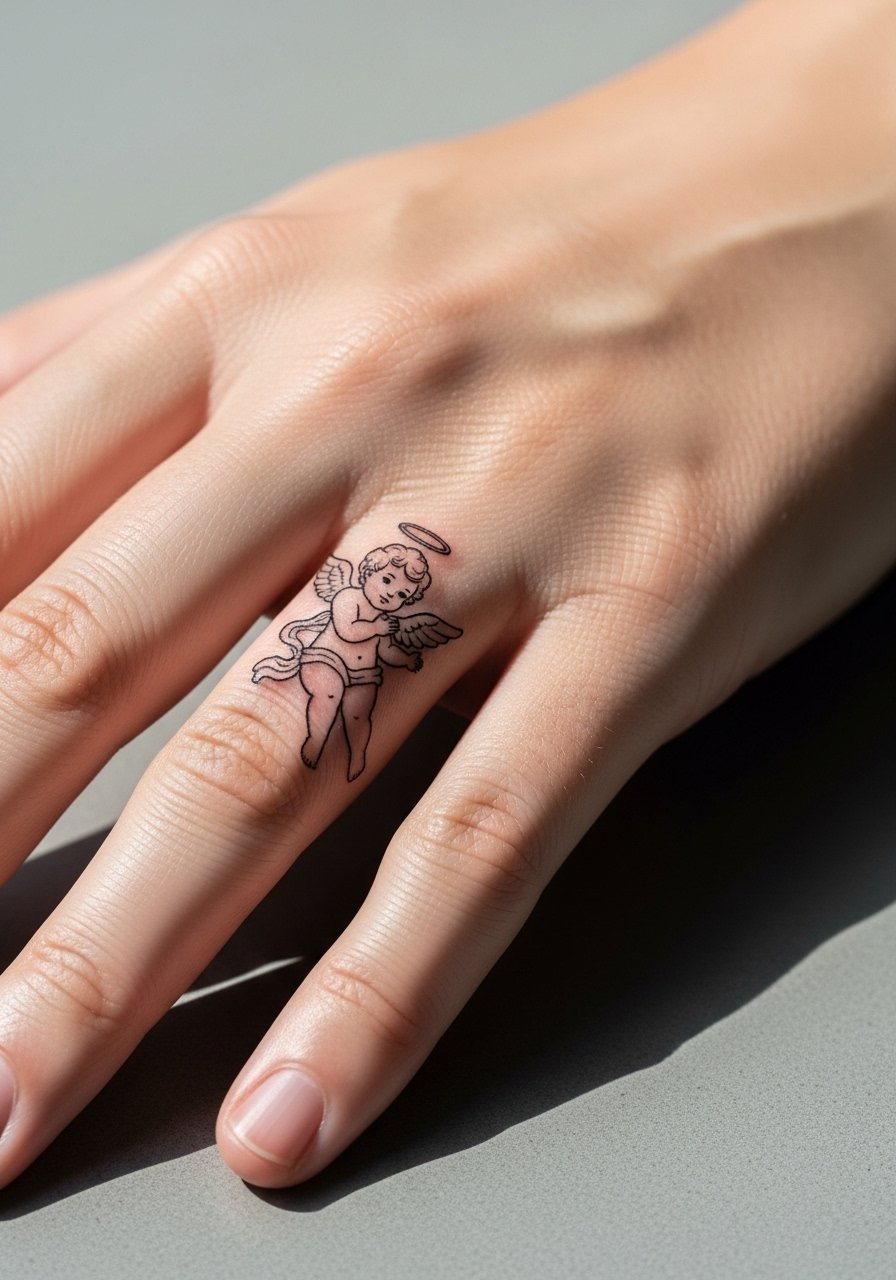
Fingers are high-touch zones and micro imagery there is the most likely to need yearly touch-ups. The common mistake is requesting dense shading on such a small platform. For a finger cherub stick to thin outlines and minimal interior dots, and plan for maintenance. The short session makes it tempting to add details, but restraint yields better long-term legibility. Consider stacking a dainty ring on the opposite finger to balance the hand visually.
25. Ornamental Sternum Lace
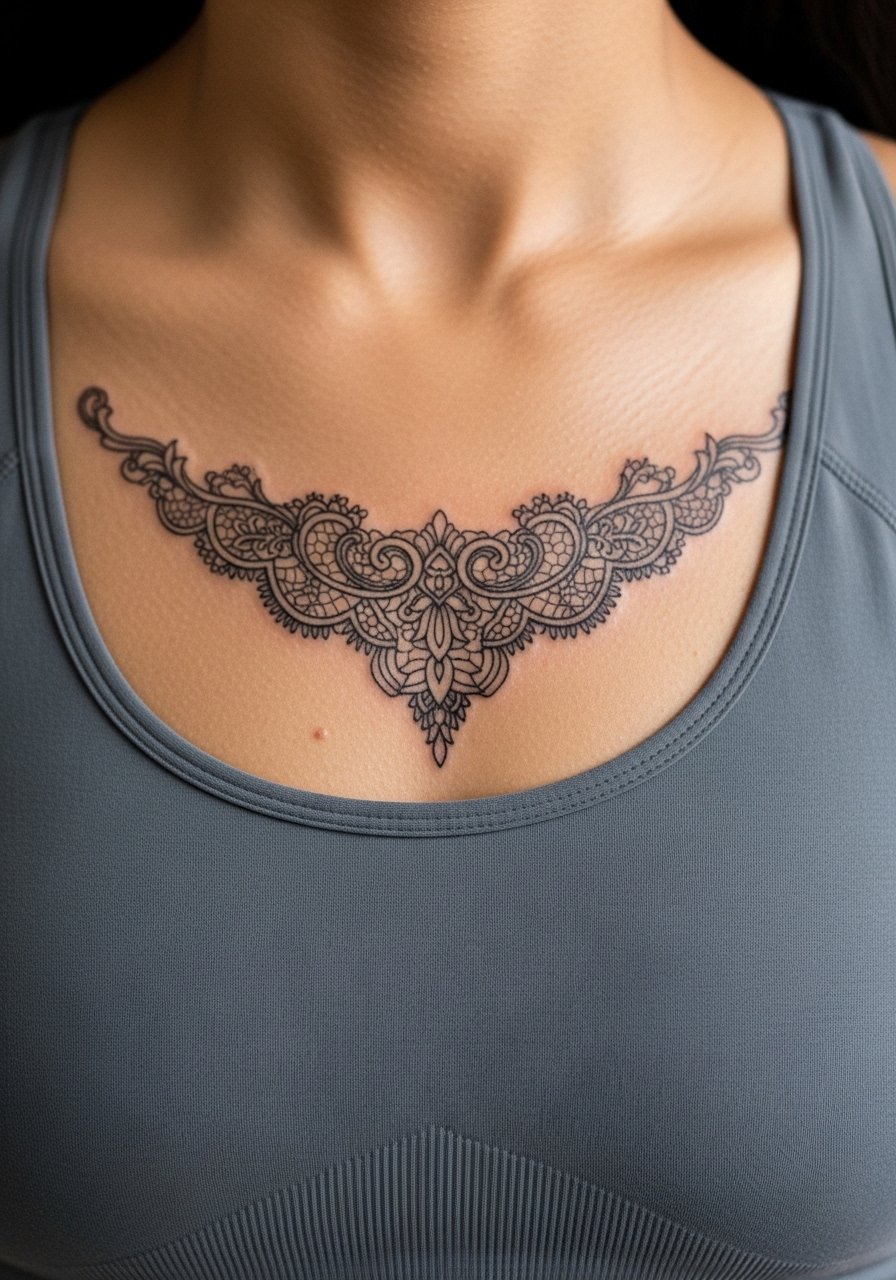
Ornamental lace on the sternum reads like jewelry and sits neatly under bras and low necklines. Because the sternum moves with breath, avoid extremely tight interior filigree that will blur. Ask your artist to use slightly bolder outer anchors and airy negative space inside so the lace reads at a distance. Appointments can be long for dense detail. For recovery pick a fitted sports bra that does not chafe the area.
26. Small Upper Thigh Silhouette with Floral Trim
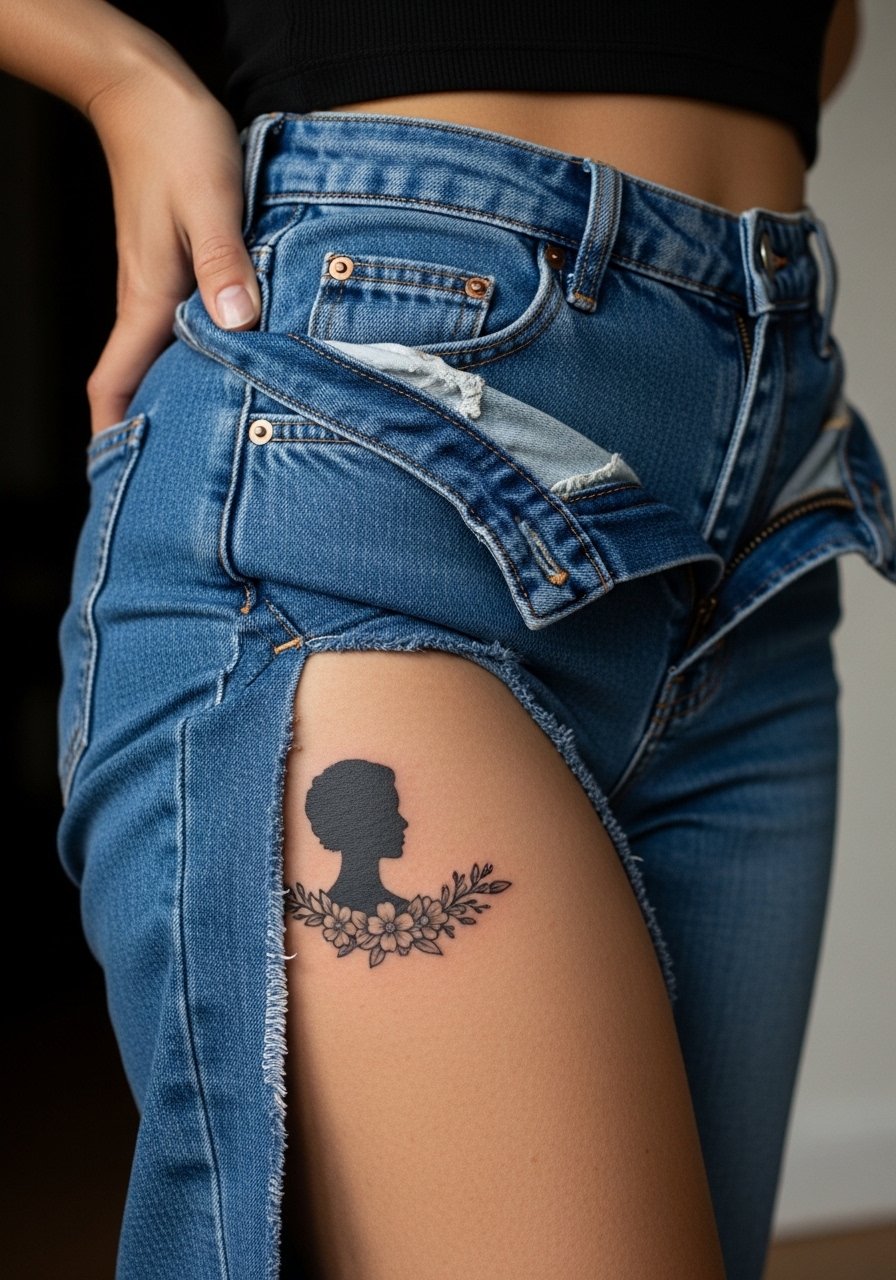
Upper thigh placements offer privacy and ample room for small silhouettes decorated with floral trim. The skin here is stable but can be subject to stretch with weight changes. A common mistake is placing the piece too close to the groin or crease where frequent motion blurs edges. Ask for the focal point to sit higher on the outer thigh. For the session wear high-cut shorts or a skirt you can shift without discomfort.
27. Haloed Torso Script with Subtle Dotwork Accents
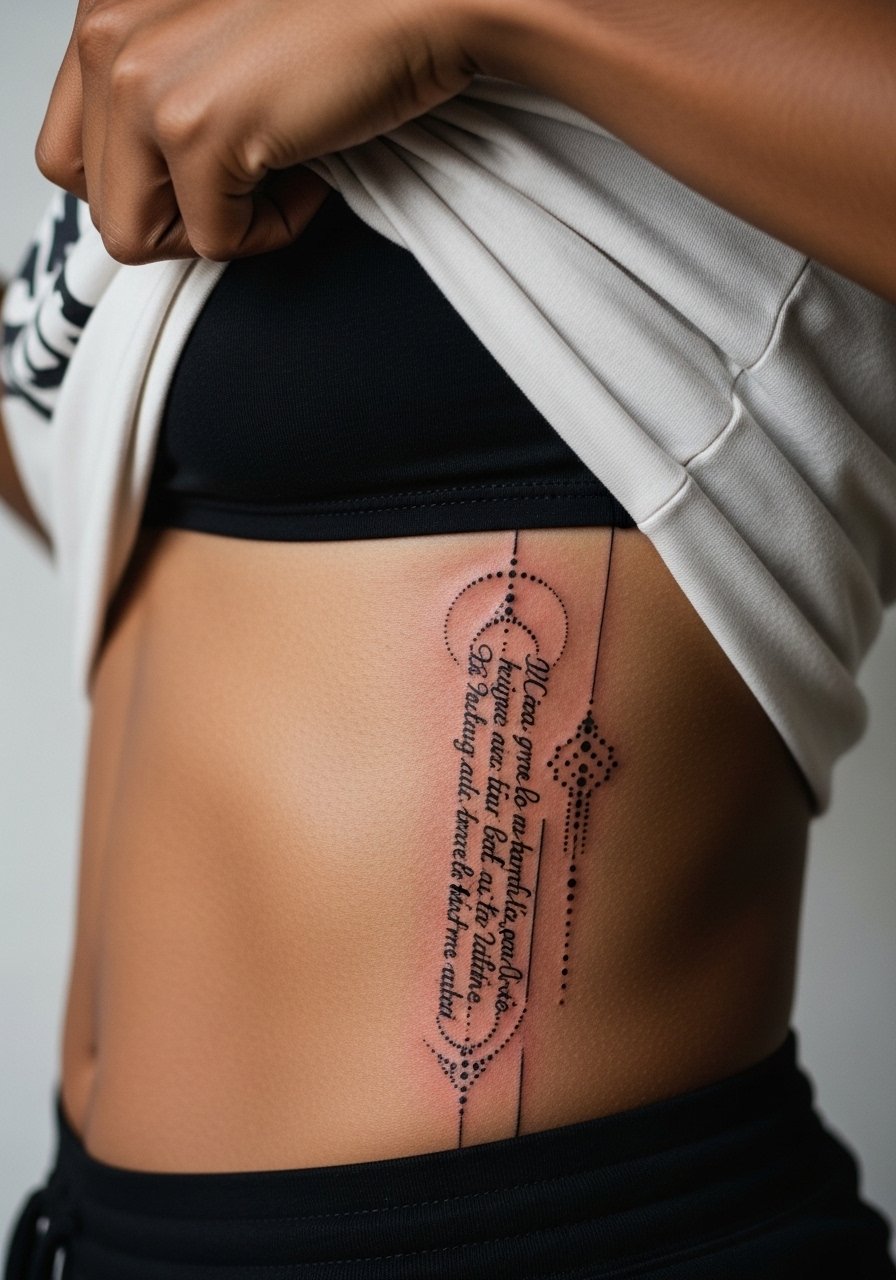
A haloed script across the torso can be quietly expressive without being overt. The torso shifts with weight and posture, so plan slightly larger letter spacing than you might expect. The common error is tight letter spacing that becomes illegible after settlement. Ask your artist for a mockup on standing and lying positions to check how the type stretches. Bring a cropped tee that you can lift for access during the appointment.
Frequently Asked Questions
Q: Will fine line wrist pieces blur faster than forearm versions?
A: Yes, in my experience wrists see more movement and friction so fine line work tends to soften sooner than inner forearms. Two camps argue this point. One group says fine line will blur in a couple of years on wrists. The other group says careful depth and spacing can extend longevity. Expect touch-ups at year two to three for wrists, and ask your artist about slightly bolder main strokes for the busiest spots.
Q: How should I approach a memorial portrait if I plan to change weight in the future?
A: If you anticipate weight fluctuation avoid placing key facial features across areas that stretch a lot such as the ribs or lower abdomen. The upper arm and upper back are more stable options. Ask for a placement sketch that maps the portrait within the most stable skin pocket and plan for a staged session approach to handle saturation without overworking the skin.
Q: Are film-based coverings better than dry healing for small delicate linework?
A: Artists and community members split into two camps here. Film-based covering users argue the barrier stops skin from sticking and reduces scabbing. Dry-healing proponents worry that sealed film can trap moisture and increase the risk of blowout in some cases. It depends on the product, the placement, and how strictly you follow removal timing. Ask what your studio prefers and why before deciding.
Q: What should I wear to a sternum or upper chest session?
A: Wear a fitted sports bra or a wide-neck shirt you can pull aside without exposing more than the work area. Bring layers so you stay warm between passes. Comfortable, loose clothing avoids pressure on the area while it starts to scab and form new skin.
Q: Which placements work best on darker skin tones to keep contrast?
A: Bold black frames, stipple shading, and high-contrast negative space translate best on darker tones. Light gray washes can disappear visually, so ask your artist to design with contrast in mind and to show healed examples on similar skin tones if possible.
Q: Do ankle and finger tattoos need different maintenance than back pieces?
A: Yes, fingers and ankles are high-friction and often need more frequent touch-ups compared with back or chest work. They also react differently to soaps and sunlight. Expect maintenance windows every one to three years for high-contact placements, and discuss realistic upkeep with your artist during consultation.
Q: How do I find local portfolios that match these styles without relying on names?
A: Search style hashtags like #finelineangel or #blackworkangel on social platforms, add your city name, and check recent posts for healed photos. Use booking apps that filter by style and read community recommendation threads for recent guest spots. Make sure the artist’s healed examples match the exact scale and skin tone you want before booking.
