
Fine line portraits look perfect on a phone screen, but the pieces that still read like a quiet memory years later are planned around placement, negative space, and how the design lives with clothing. These 27 memorial ideas focus on what actually heals well, what to say during the consult, and small styling choices that help the piece feel like part of daily life rather than a museum object.
1. Micro-Realism Portrait on Inner Forearm
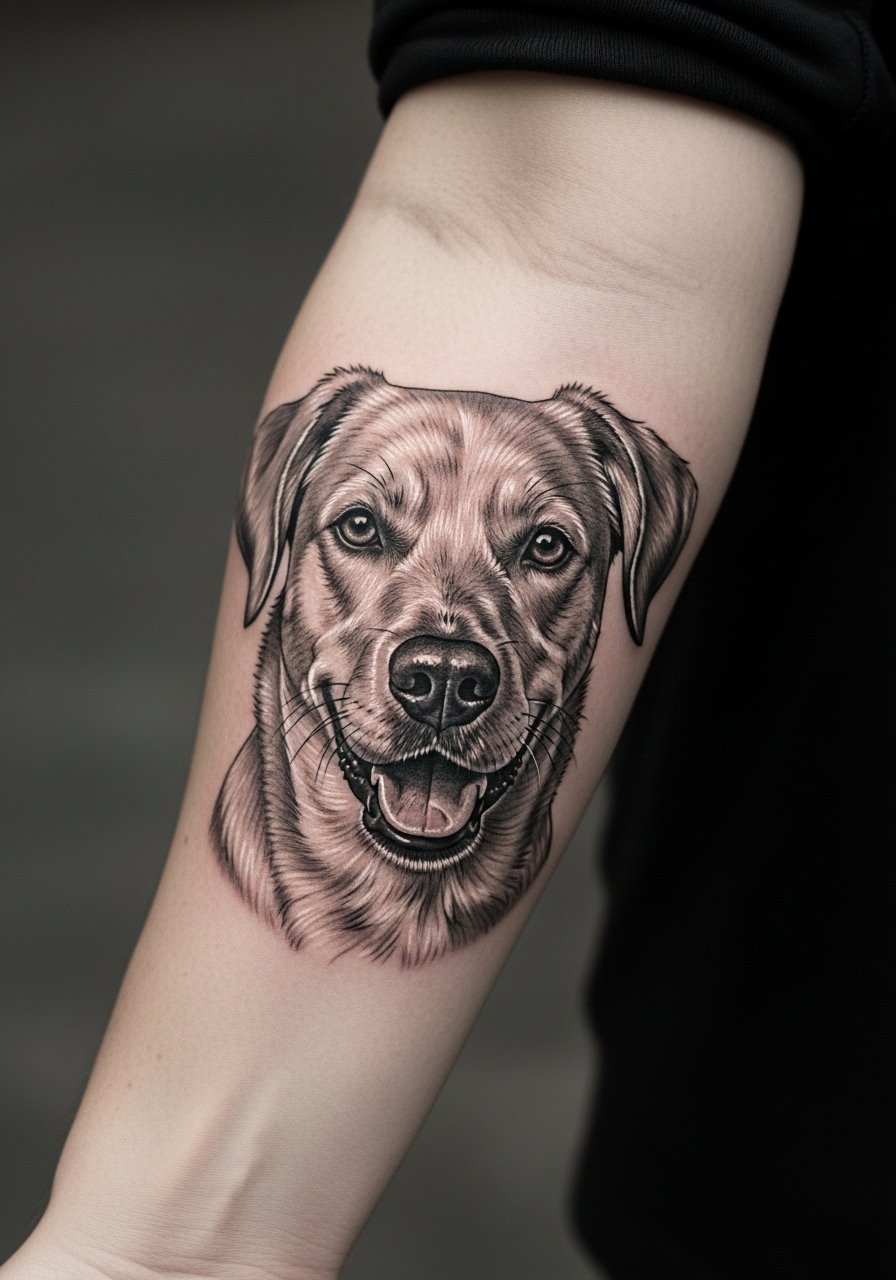
A lifelike portrait on the inner forearm reads intimate and easy to check through the day. I've seen versions at five shops across Brooklyn where careful spacing around the eye and muzzle prevented the darks from collapsing after a year. Tell your artist you want slightly more breathing room around the snout than the reference photo needs, and ask about touch-up plans at year two. Fair warning, the inner forearm sees plenty of sun, so plan for annual sunscreen habits. For showing it off, roll sleeves and pair with a rolled-up linen shirt that keeps attention on the portrait.
2. Tiny Paw Print on the Wrist
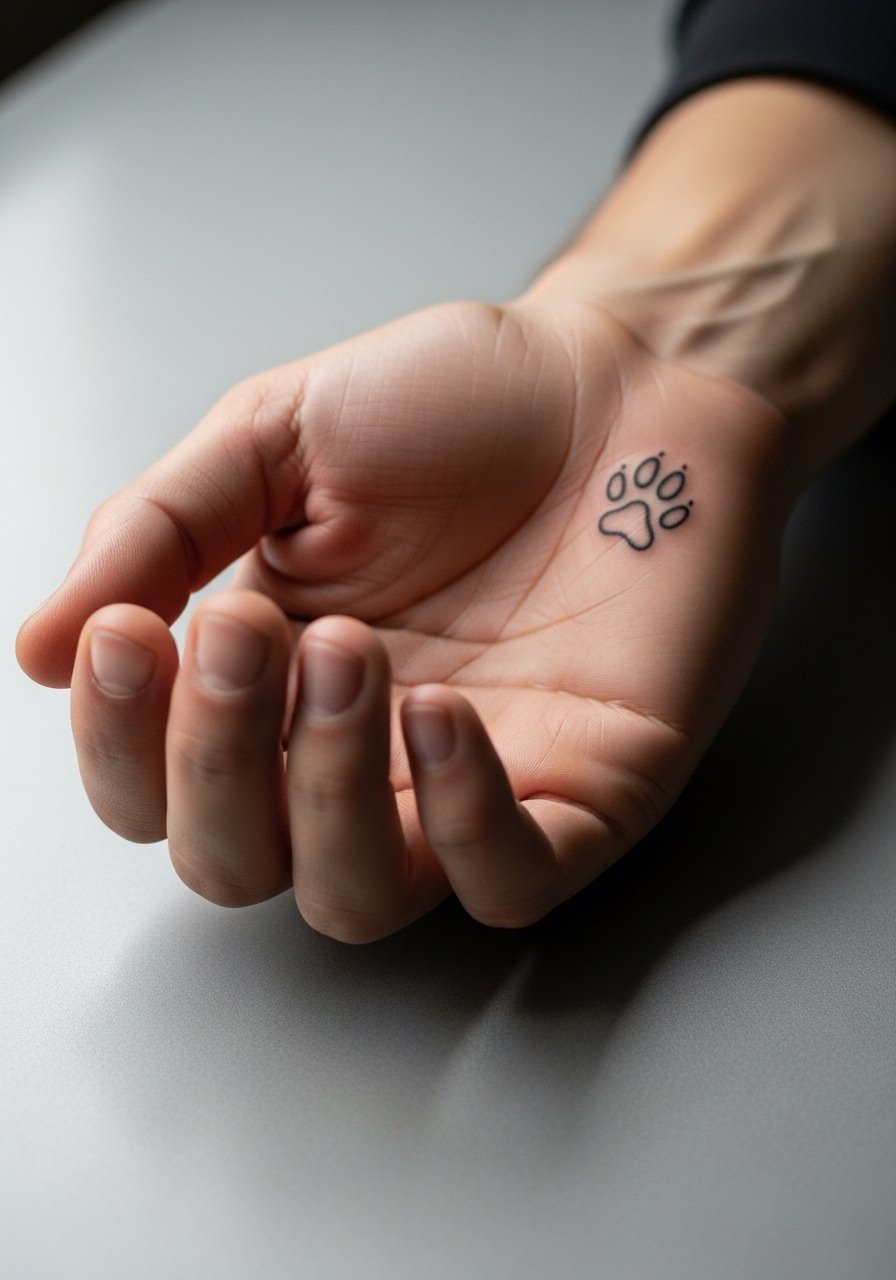
A single tiny paw on the wrist reads quiet and wearable. Pain is low and sessions are short, which makes it a good choice for someone who wants a clean memorial without a long appointment. The common mistake is making the print too small. Give the artist a slightly larger reference so the paw pads do not blur with everyday washing. Expect a touch-up sooner than with bolder work. For everyday wear, layer a minimalist thin chain bracelet that frames the wrist without covering the paw.
3. Heartbeat Line with Paw on the Chest
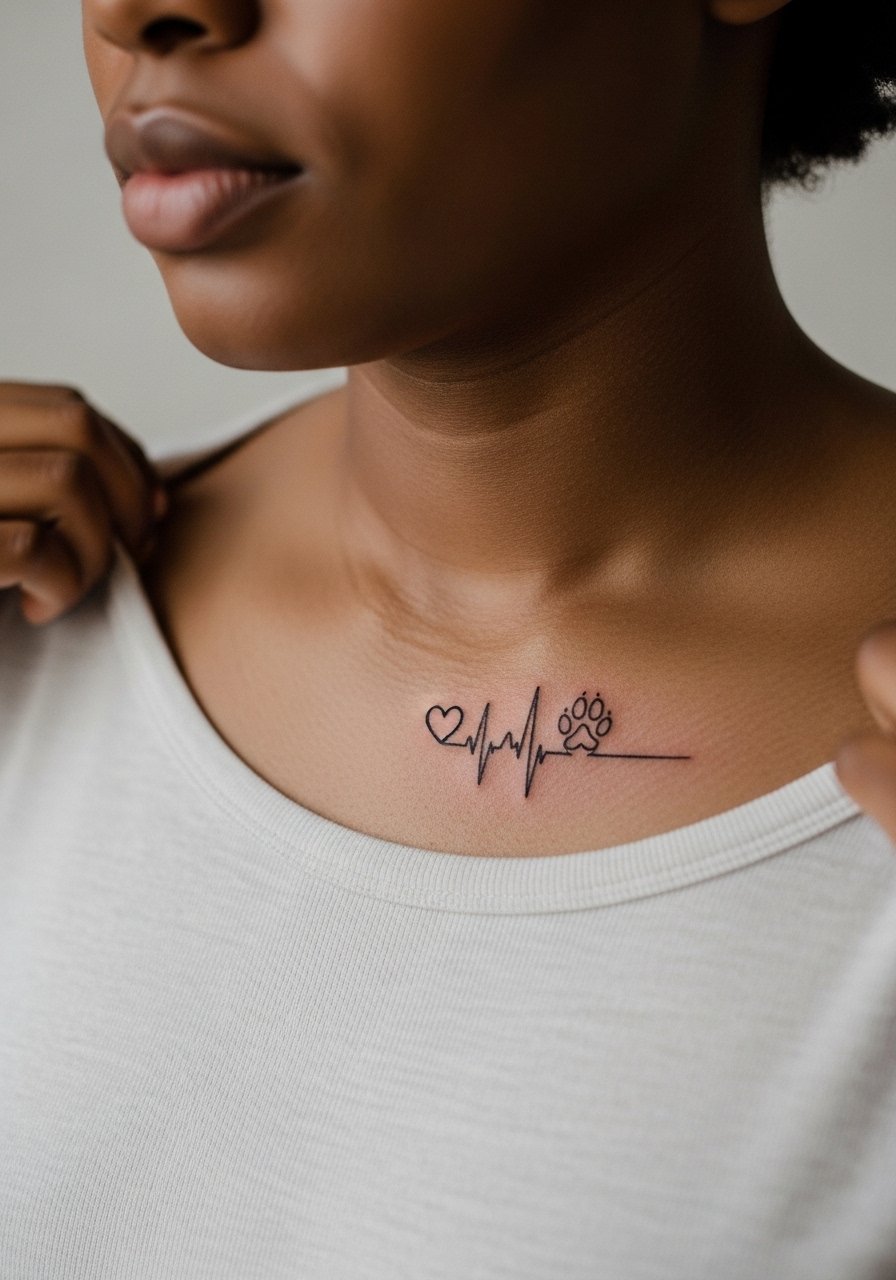
A heartbeat line that ends in a paw balances sentiment with subtlety. The upper chest placement feels close to the heart and photographs well under open-neck tops. Artists split on whether very fine linework on the upper chest holds up under movement. One camp worries about skin stretch and blurring, and the other says proper needle depth and spacing addresses that risk. Ask where your artist stands before booking. For nights out, an open-neck blouse shows the piece without exposing too much skin.
4. Watercolor Silhouette on the Ribcage
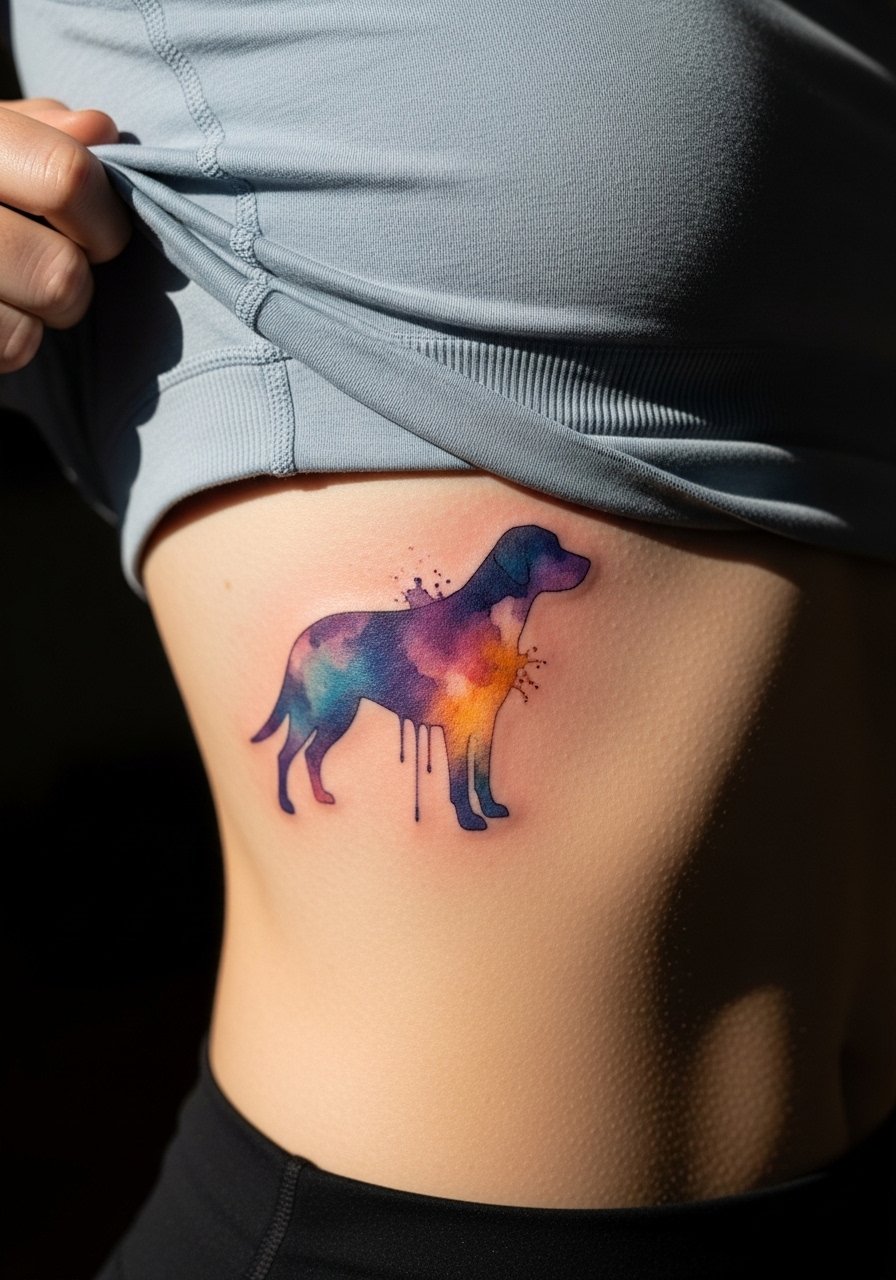
Ribcage watercolor reads poetic but it is a sensitive placement. Pain ranges high, and swelling can flatten soft gradients in the first days. The way the color sits at six months versus two years varies wildly with saturation. A common version that ages poorly uses thin stipple for large areas, which fans out. Ask your artist to use slightly denser initial saturation in the core of each wash and plan for a touch-up at year two. For the session, wear a cropped athletic top that you can lift slightly without fuss.
5. Paw Print Made from Fingerprints
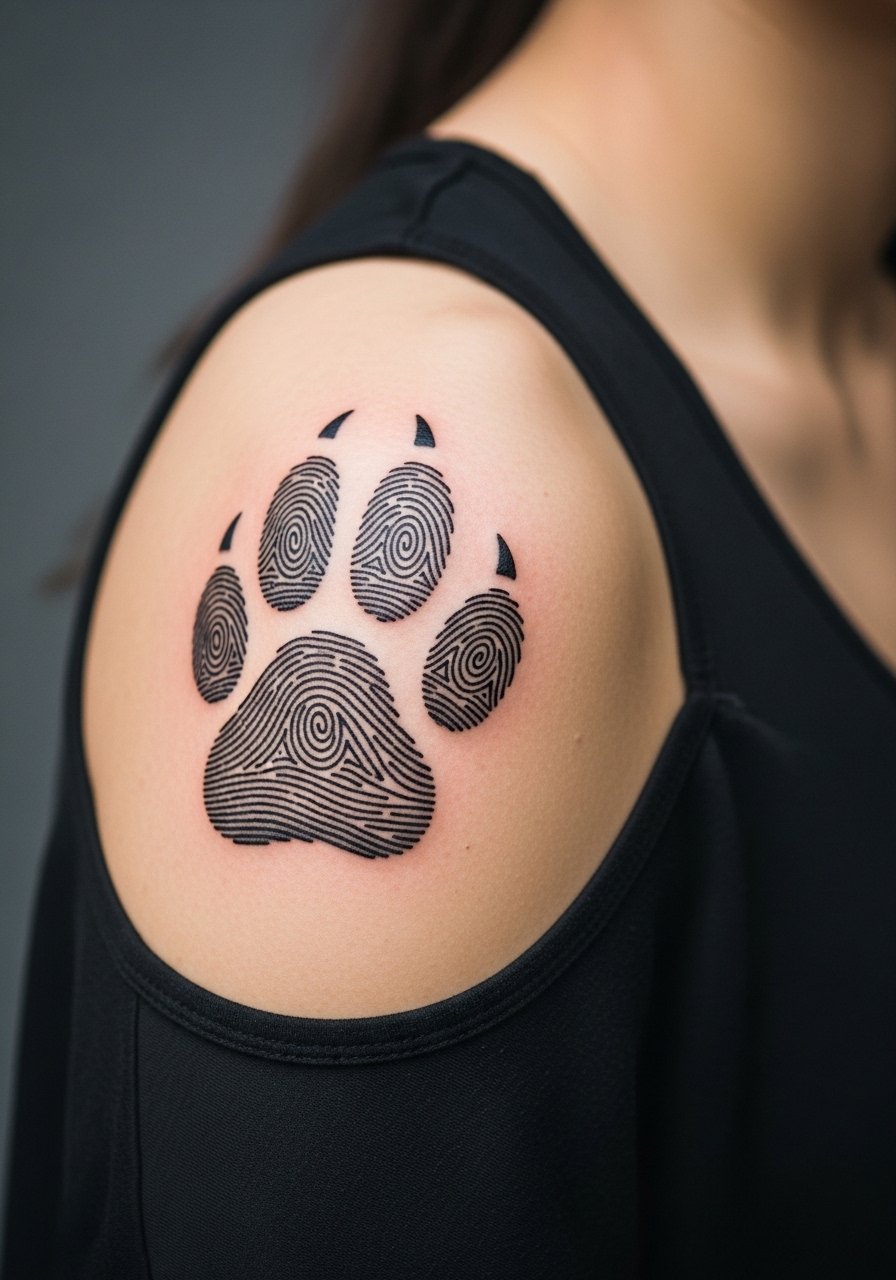
Turning a real fingerprint into the paw pads makes the design uniquely personal without being overt. The extra line detail means you need slightly more space than a flat paw. During consultation, bring clean fingerprint scans and ask the artist to simplify small whorls so they read after healing. Avoid requesting too many tiny spirals since they merge over time. Shoulder placement keeps the piece from constant friction and is low pain. Pair it with a tank top you can slide off one shoulder to show the paw on occasion.
6. Floral Wreath Around a Paw on the Back of the Arm
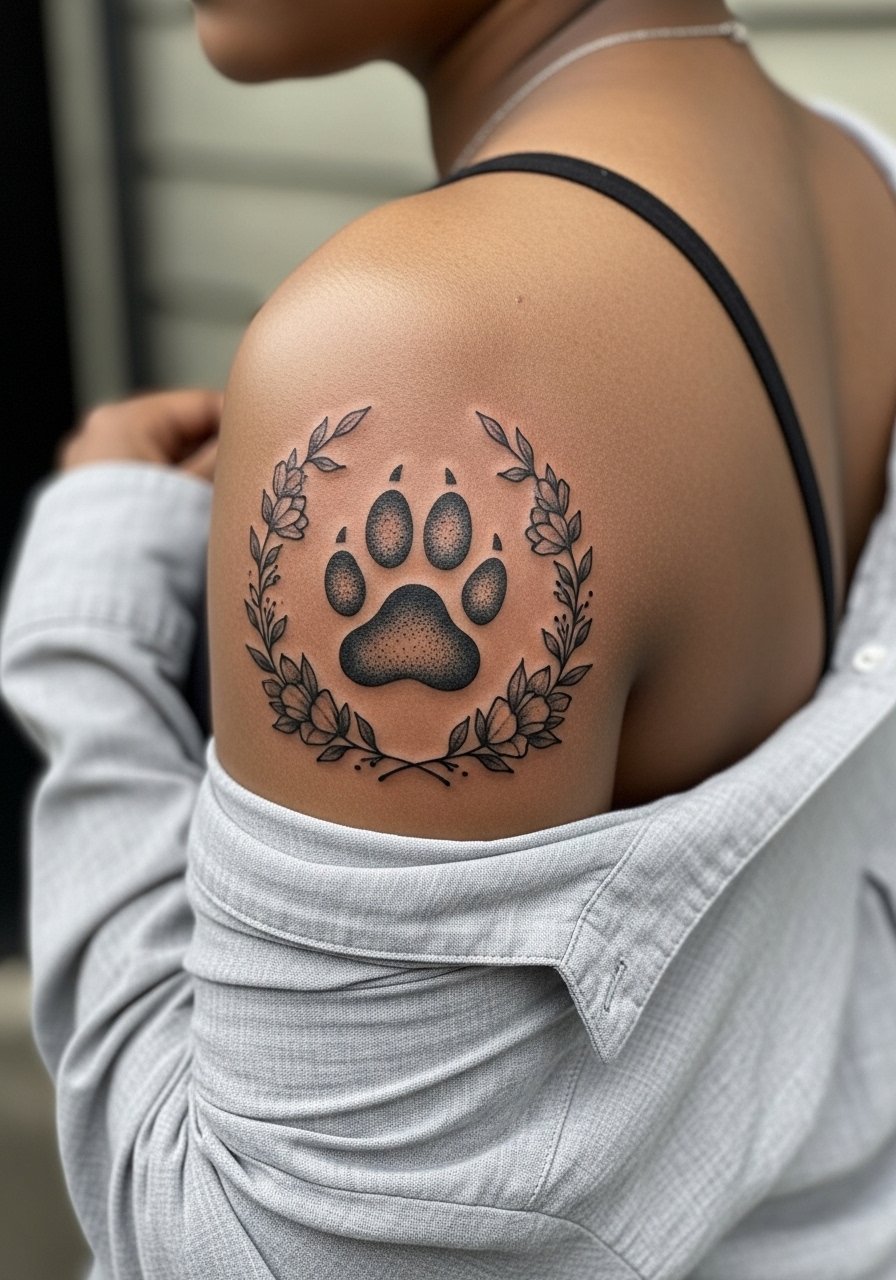
A wreath frames the paw like a small medal for your pet. The back of the upper arm fares well for stipple shading and medium-sized blackwork. A common mistake is overloading the wreath with dense detail, which makes it read cluttered once healed. Tell your artist you want clustered petals but leave negative space between blooms. The session is moderate in length and pain. For showing it, wear a loose button-down shirt you can pull aside so the wreath sits just under the sleeve.
Pre-Session Essentials
The chest, wrist, and rib ideas above ask for different prep depending on visibility and pain level, so a few items smooth the session and first week.
-
Stencil transfer paper kit. Lets you preview exact placement and scale on skin before the needle meets the area, useful for portrait and paw designs.
-
Topical numbing cream. Applied about 45 minutes before can ease rib and sternum sessions without blurring linework when used correctly.
-
Thin protective film roll. Keeps wrist and finger tattoos clean through early washing and typing, reducing scabbing risk from friction zones.
-
Fragrance-free gentle body wash. Cleanses healing skin without irritation for pieces that need frequent rinsing.
-
Aquaphor healing ointment. A thin layer for the first few days locks in moisture without suffocating fine line channels.
7. Minimalist Line Dog Silhouette on the Ankle
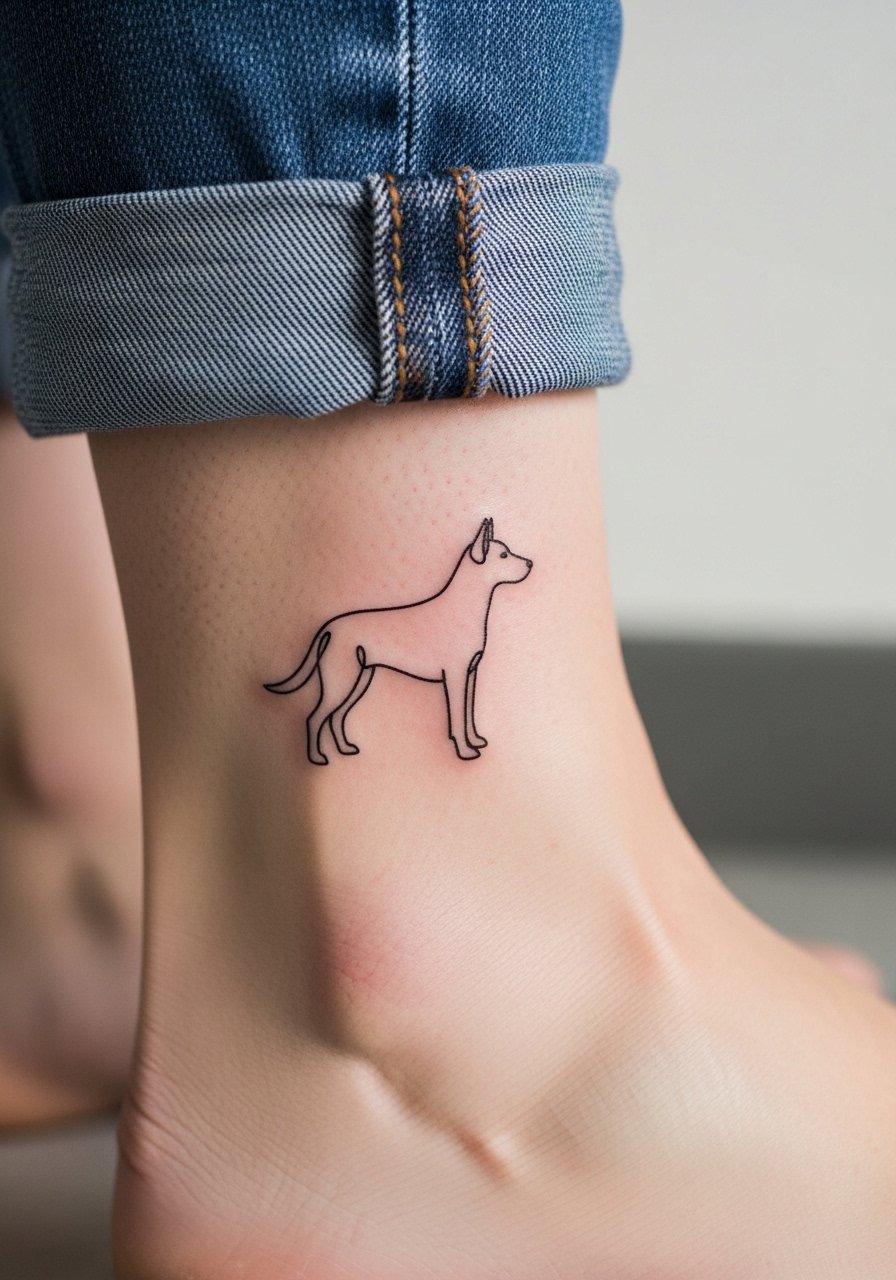
An ankle silhouette is discreet and low commitment. The common mistake here is placing too close to the bone where blowout risk grows. Move it slightly higher onto soft tissue for cleaner healing. Session time is short and pain is moderate because of proximity to bone. For show-off outfits, pair the piece with jeans rolled above the ankle or delicate sandals that keep attention on the silhouette.
8. Collar and Tag Script on the Inner Wrist
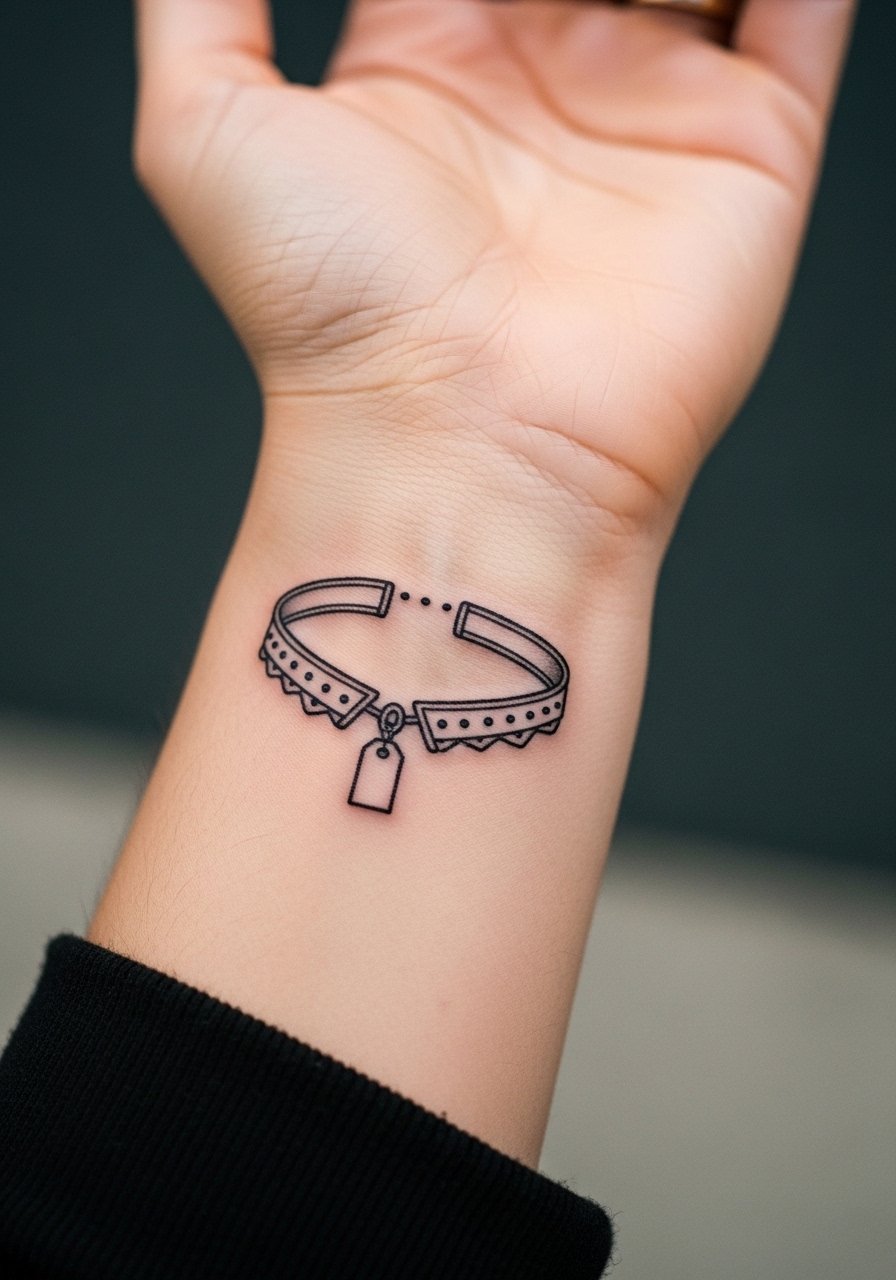
A collar and tag in script feels literal without being heavy. Ask for slightly thicker lineweight on the tag to prevent the small letters from resolving into a smudge by year three. The inner wrist sees frequent washing so expect a touch-up earlier than a bolder chest piece. In the consult, request the artist mock the text at actual size on your skin. For session ease, a short appointment and minimal movement are ideal.
9. Constellation Paw on the Top of the Foot
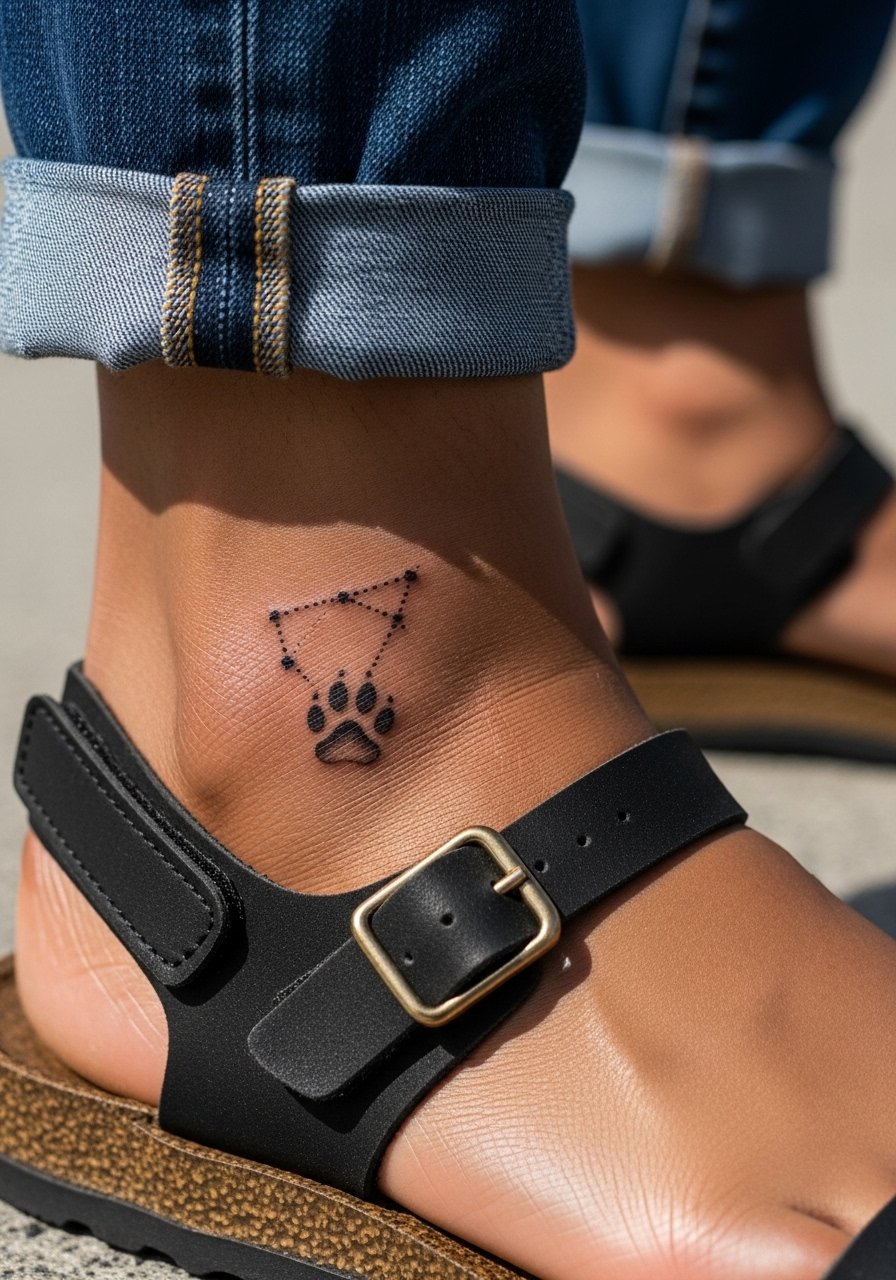
Dot work constellations translate nicely into paws for a small, ethereal memorial. The top of the foot is a high friction zone from shoes, so the dots need room and a cautious touch. Plan for longer healing and avoid tight shoes for the first two weeks. A common mistake is packing dots too close. For footwear, slip into simple slide sandals after the session to reduce rubbing.
10. Micro-Realism Nose Print on the Calf
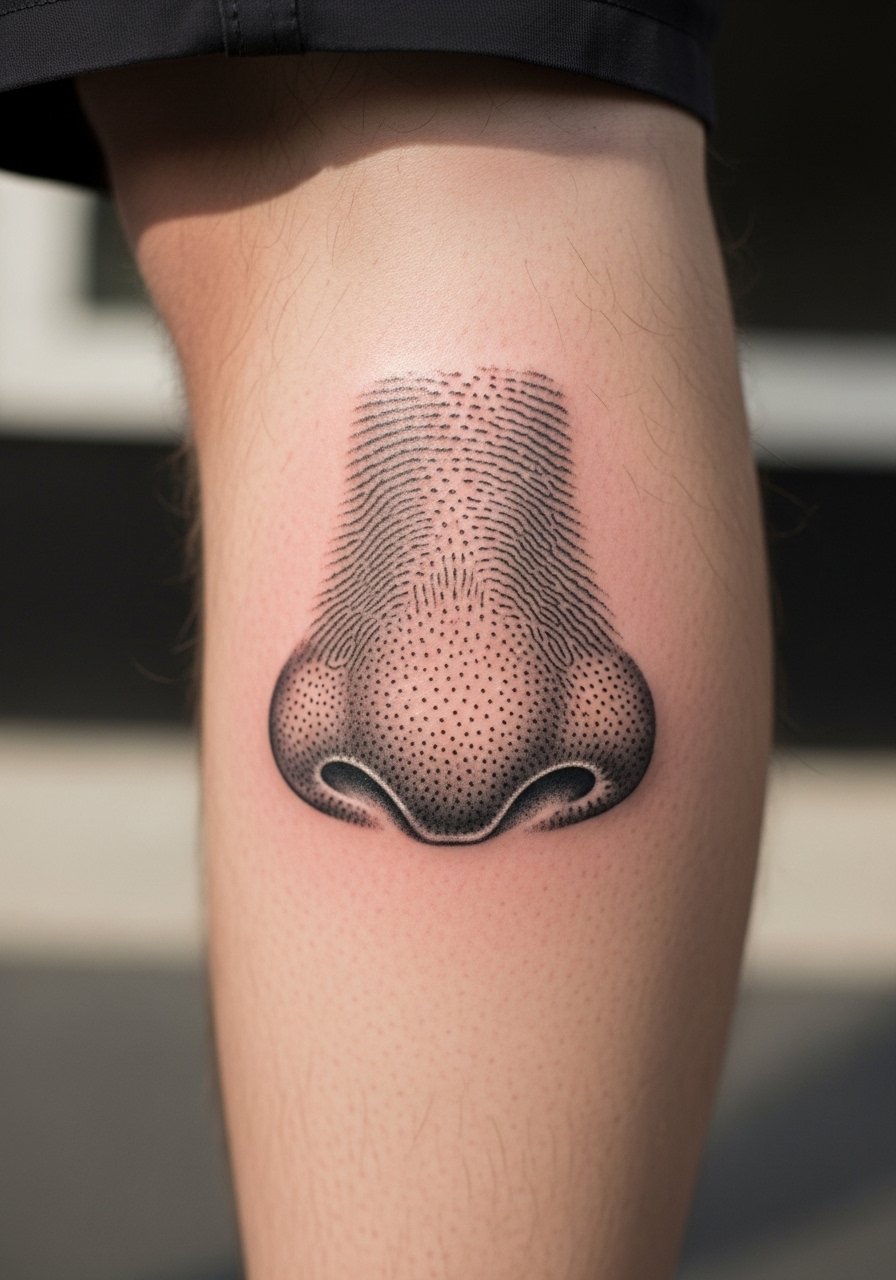
A nose print carries a lot of personality in a compact area. Calf placement is forgiving for session length and heals under clothing well. Ask for a slightly bolder outer contour so the print keeps definition at five years. Avoid asking for ultra-tiny pores which blur. The session feels like a medium-length appointment with manageable discomfort. For summer looks, a pair of casual shorts shows the print without overexposing the limb.
11. Scripted Name Along the Sternum
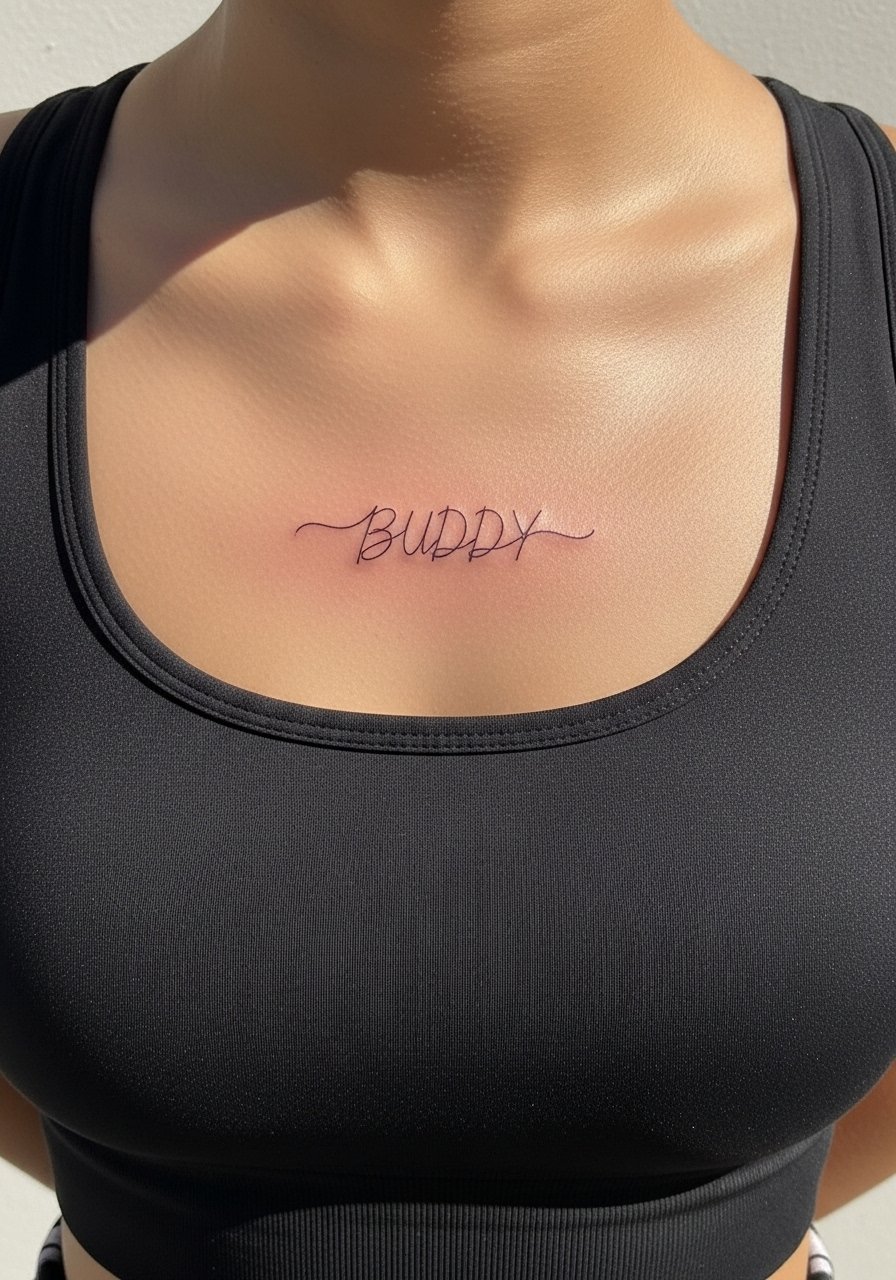
Putting a pet name across the sternum reads solemn and personal. Sternum placements require a specialist who handles the curvature and tender tissue. The biggest mistake is asking for very thin single-stroke script on moving tissue. Ask for slightly increased lineweight and spaced lettering so the letters do not merge. Sessions here are more intense, and you should plan for rest afterward. For outfit integration, a fitted sports bra or a bandeau reveals the script without being overt.
12. Paw Trail Along the Spine
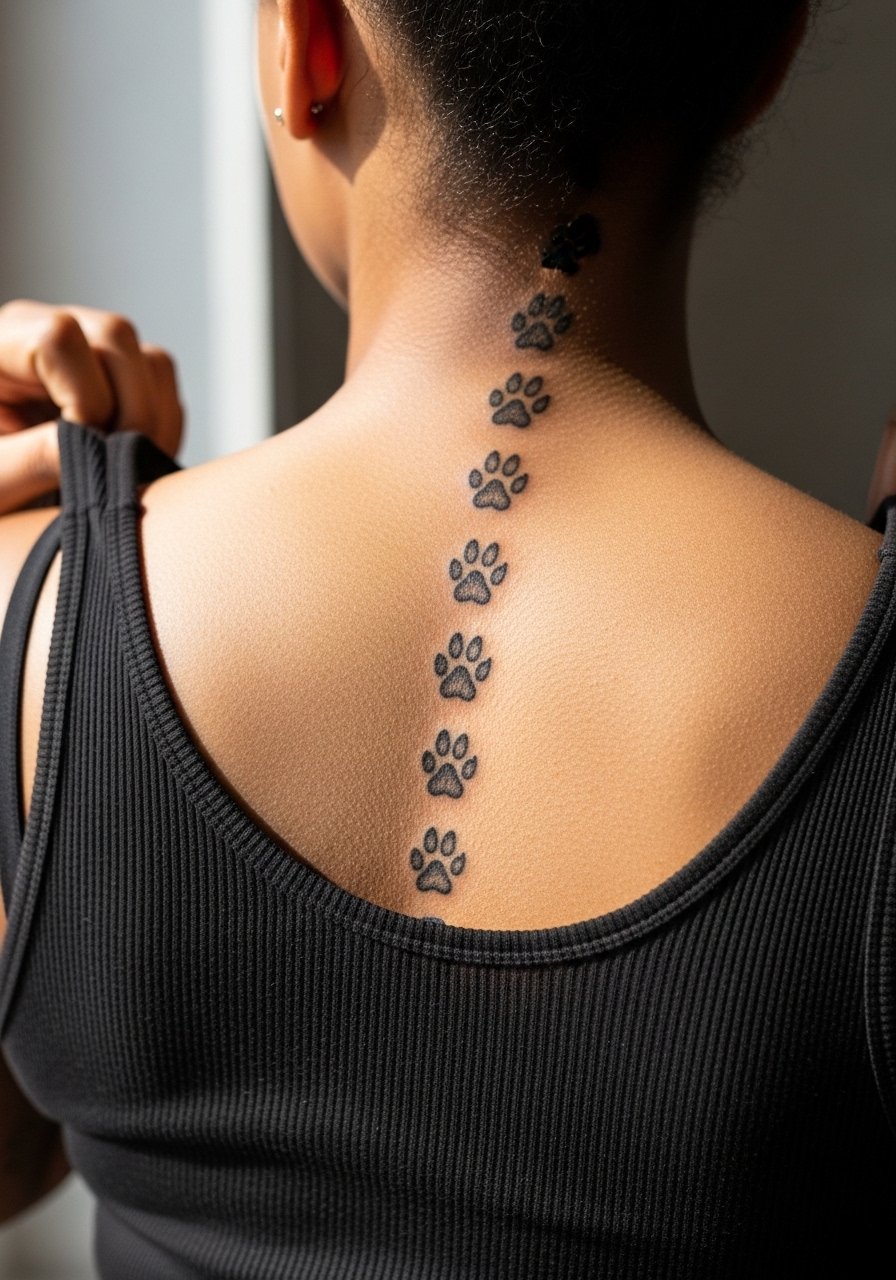
A paw trail down the spine creates movement and reads as a quiet journey. The spine is a high-visibility area when you wear open-back tops. Sessions require multiple positions which can lengthen the appointment. Common errors include spacing paws too tightly. Keep consistent gaps so each print heals distinctly. If you plan to show it, open-back dresses present the trail elegantly, and a low-back dress works well.
13. Geometric Paw on the Forearm
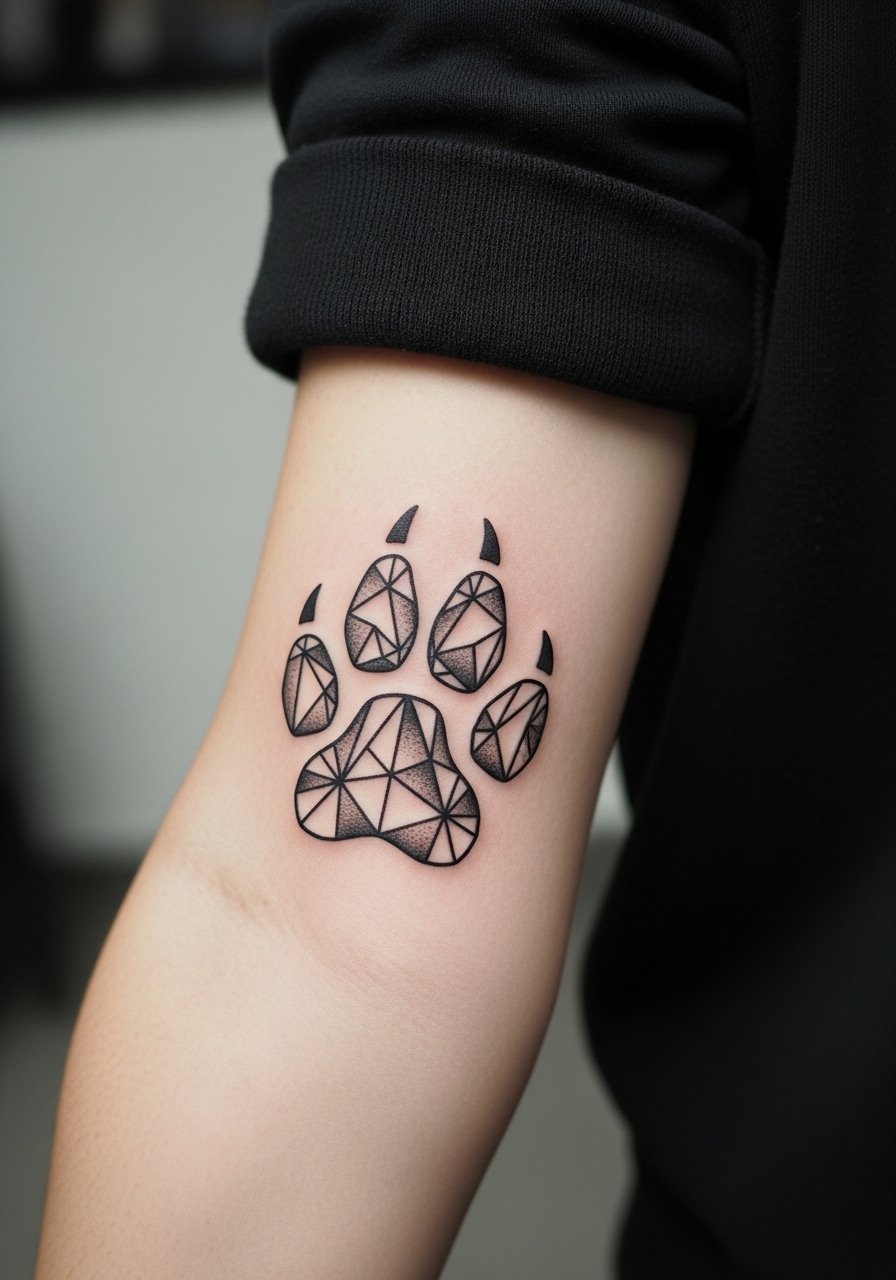
Geometric compositions age well because they use bold negative space. The forearm is friendly for touch-ups and photographs cleanly. A common mistake is making the shapes too small. Ask for moderate sizing so lines do not merge over time. For daytime wear, a short-sleeve linen shirt with sleeves rolled keeps the forearm visible and frames the geometry.
14. Paw with Date in Roman Numerals on the Ribcage
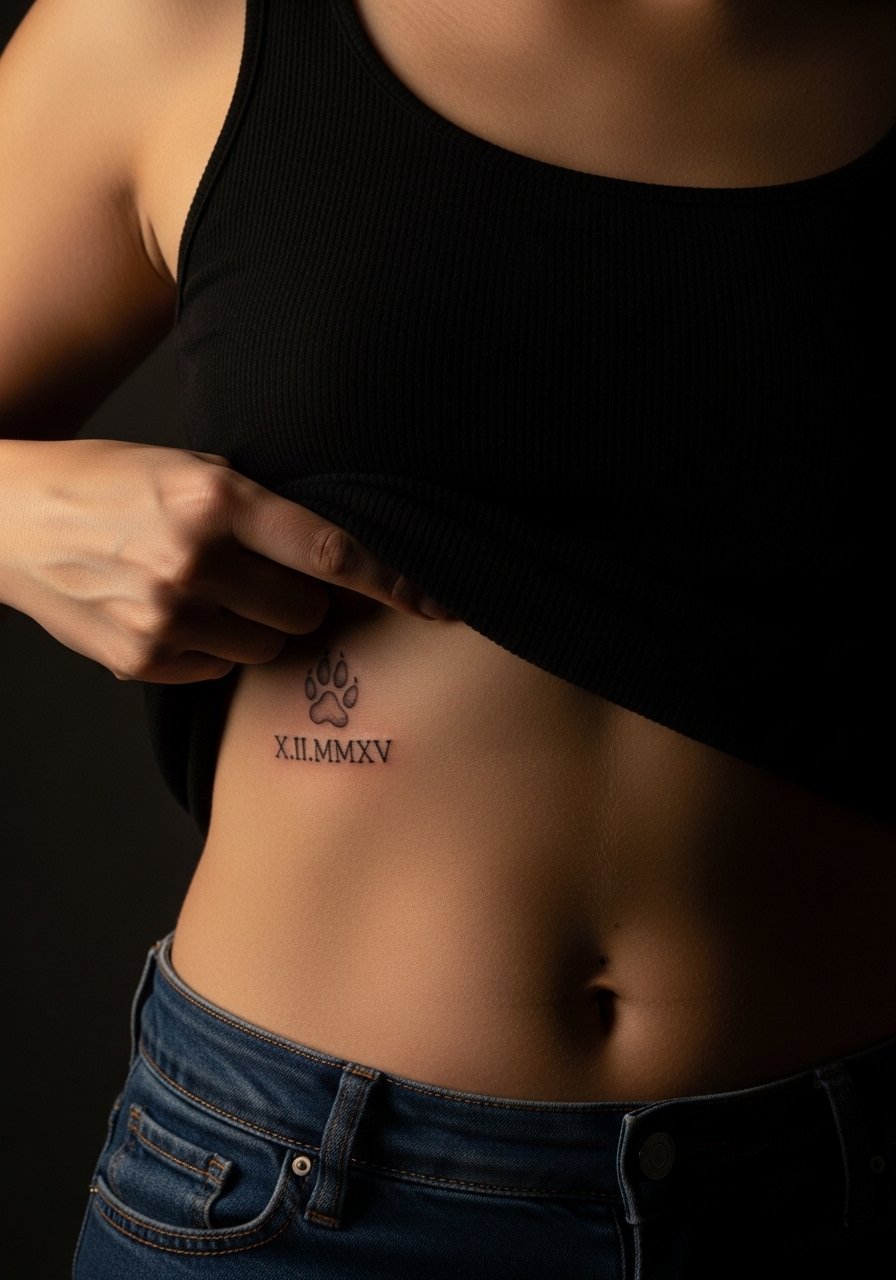
Dates in Roman numerals feel timeless but ribs are unforgiving for very fine numbers. The controversy around fine line on ribs is real. One group of artists says the skin stretch and frequent movement cause numerals to blur within two years. The other group insists that with correct needle depth and slightly larger spacing numerals hold. Ask your artist how they handle numerals on curved tissue and consider spacing each character slightly wider than you think necessary. For the appointment wear, a cropped top you can lift easily makes access simple.
15. Paw Made of Floral Dot Work on the Shoulder Blade
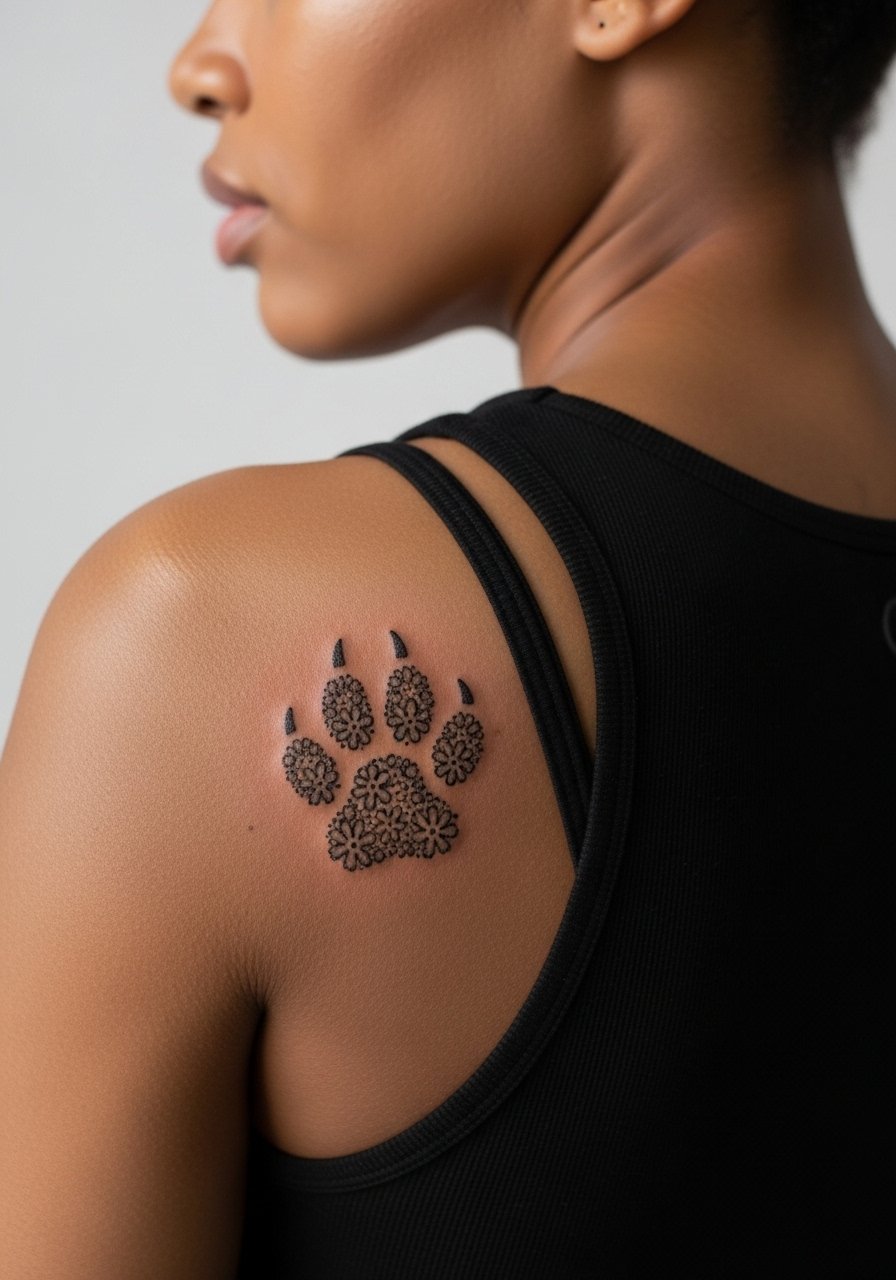
Combining florals with a paw keeps the memorial soft and decorative. Shoulder blade placement tolerates stipple and dot work well without much friction. A usual error is overpacking dots into tiny petals which merge. Request slightly larger petal kernels and plan for a follow-up at year two to refresh stippling if needed. For displays, a scoop-back top frames the shoulder blade beautifully.
16. Tiny Finger Paw Behind the Knuckle
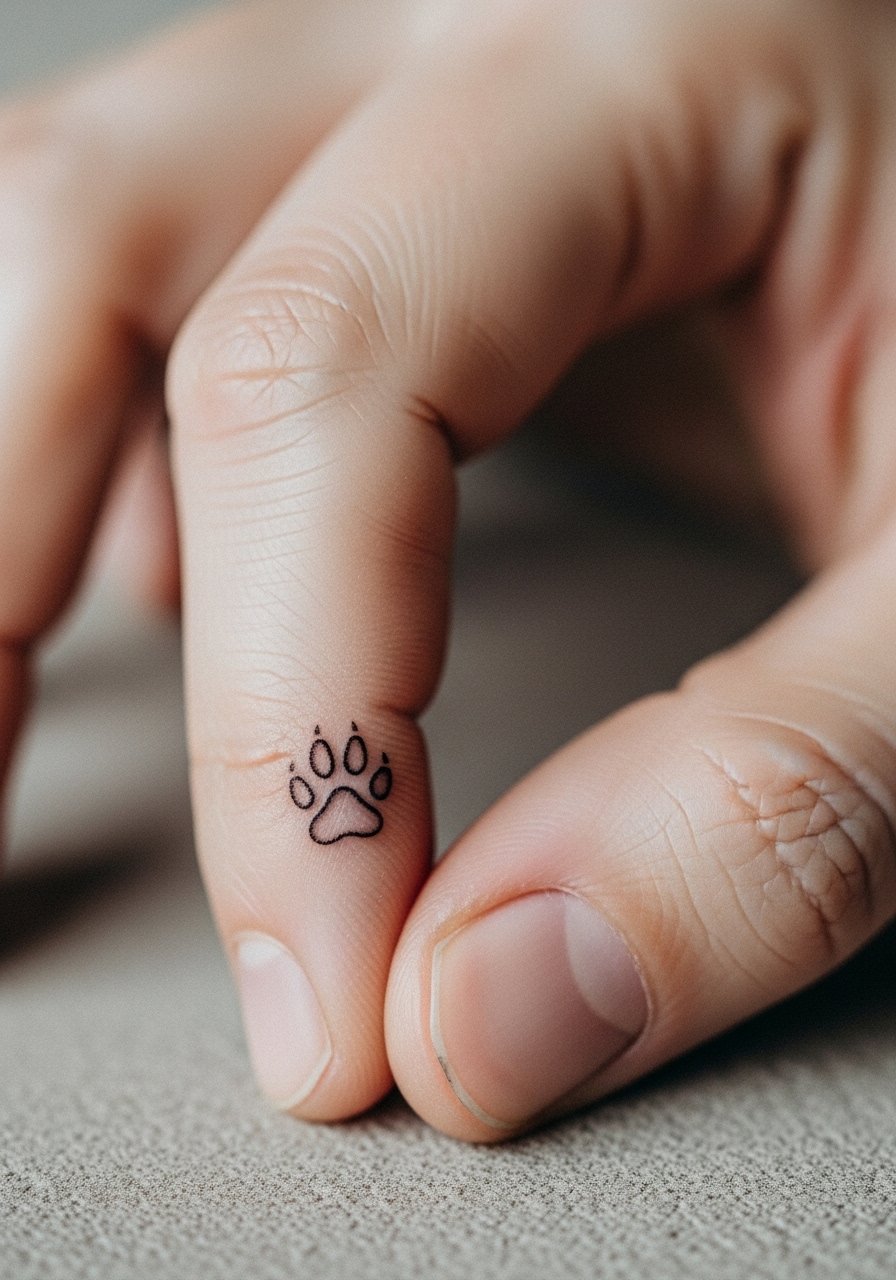
Finger placements are highly visible but also prone to fast fading. The main mistake is expecting permanence like forearm work. Plan for touch-ups at year one and accept that outline softness is common. The session is quick but can sting more than a wrist piece. If career concerns exist, consider a spot slightly lower on the hand or the inner wrist. For accessories, a thin silver ring can sit near the paw without covering it.
17. Negative Space Paw in a Floral Sleeve
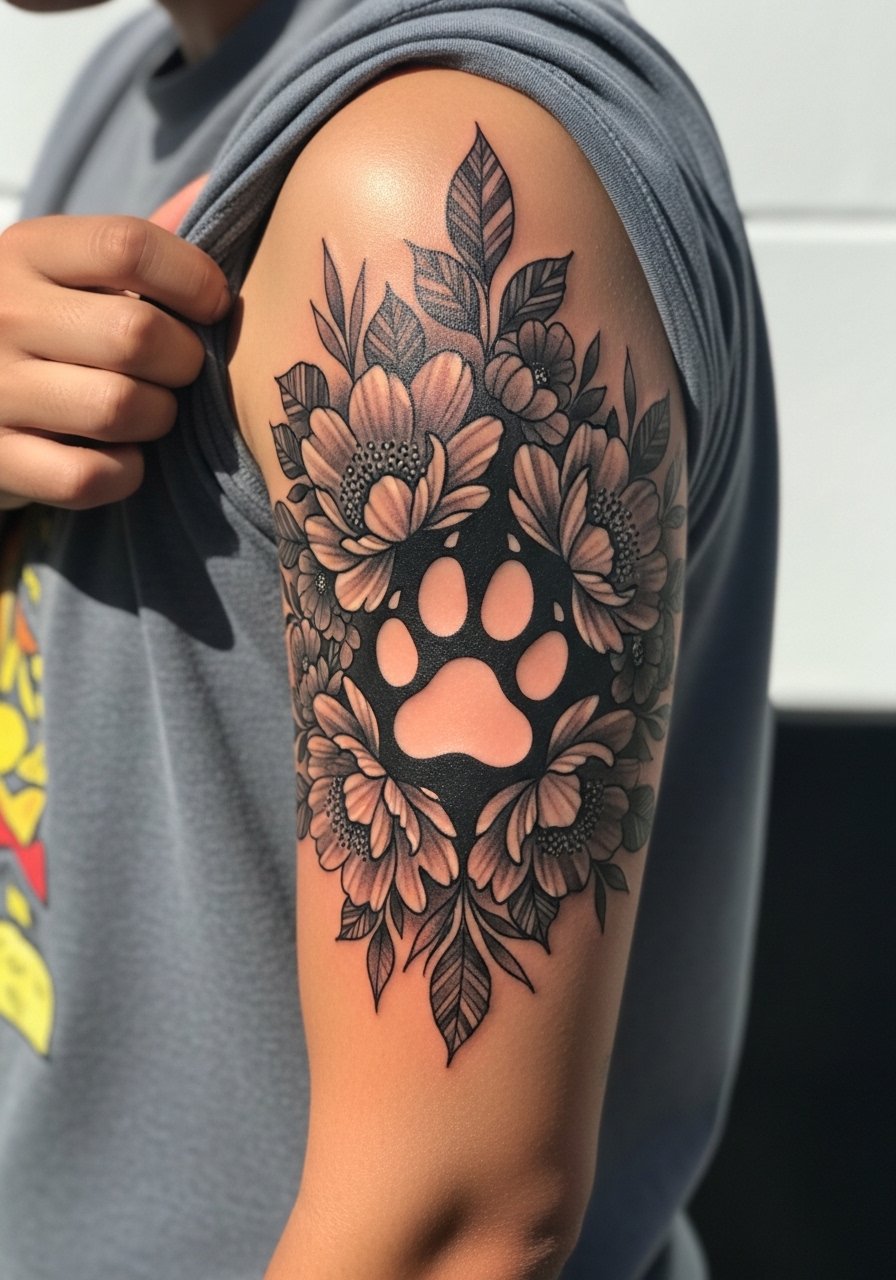
Using negative space for a paw inside a darker sleeve makes the memorial subtle yet bold. Sleeve work ages predictably because saturation hides small drift better than fine lines. Tell your artist you want the paw area left uninked with crisp edges and ask for slightly extra spacing so the negative shape remains readable after five years. The session is longer, expect multiple sittings. For showing, a short-sleeve tee keeps the sleeve visible without distraction.
18. Cartoon-Style Portrait on the Thigh
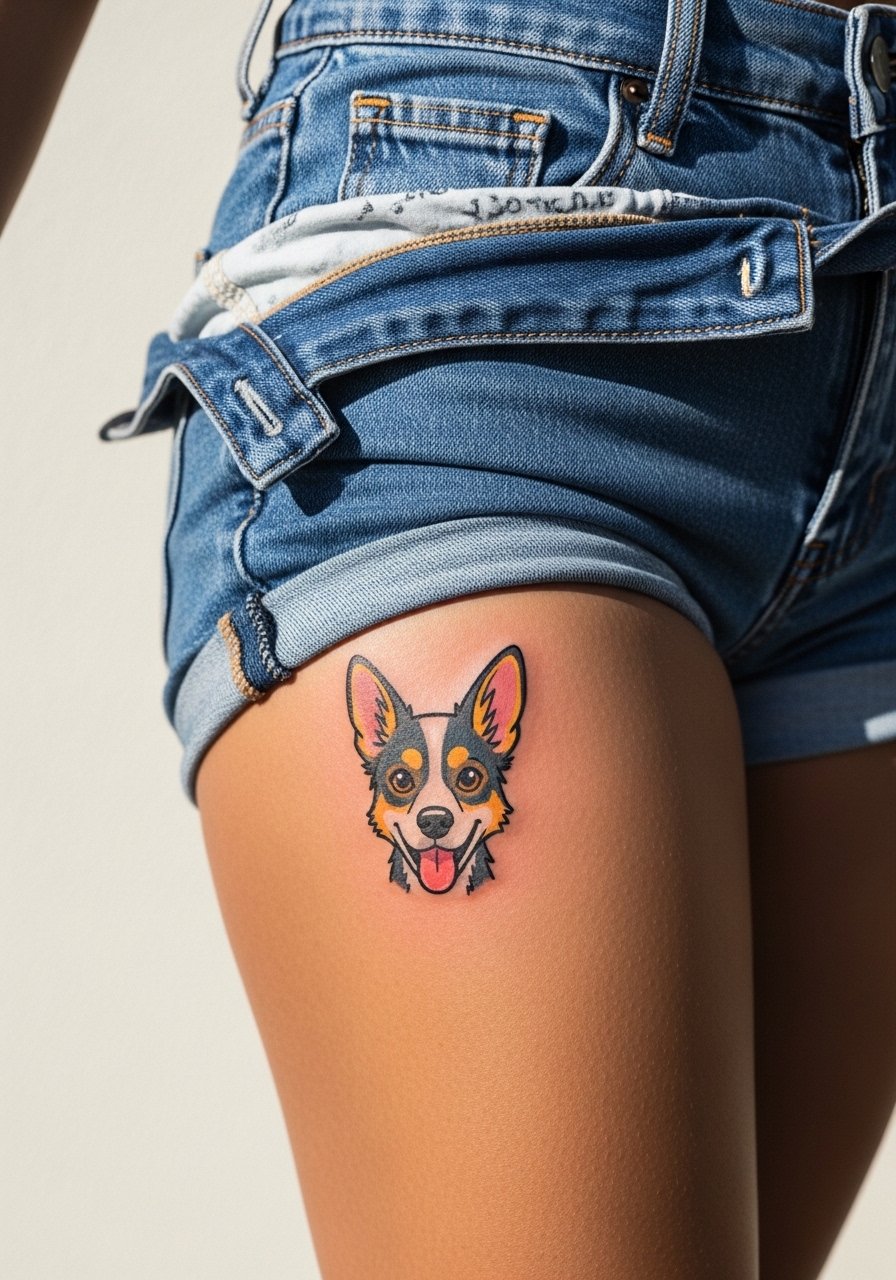
A softer, stylized portrait reads playful and personal, and the thigh is forgiving for color work and saturation. The common mistake is tiny facial details in cartoon faces that get lost. Ask for clean, confident outlines and moderate color fills so the piece keeps its character after healing. Thigh sessions can be lengthy but are often lower in perceived pain. Wear high-waisted denim that you can shift to access the upper thigh easily.
19. Paw with Halo Above on the Back of the Neck
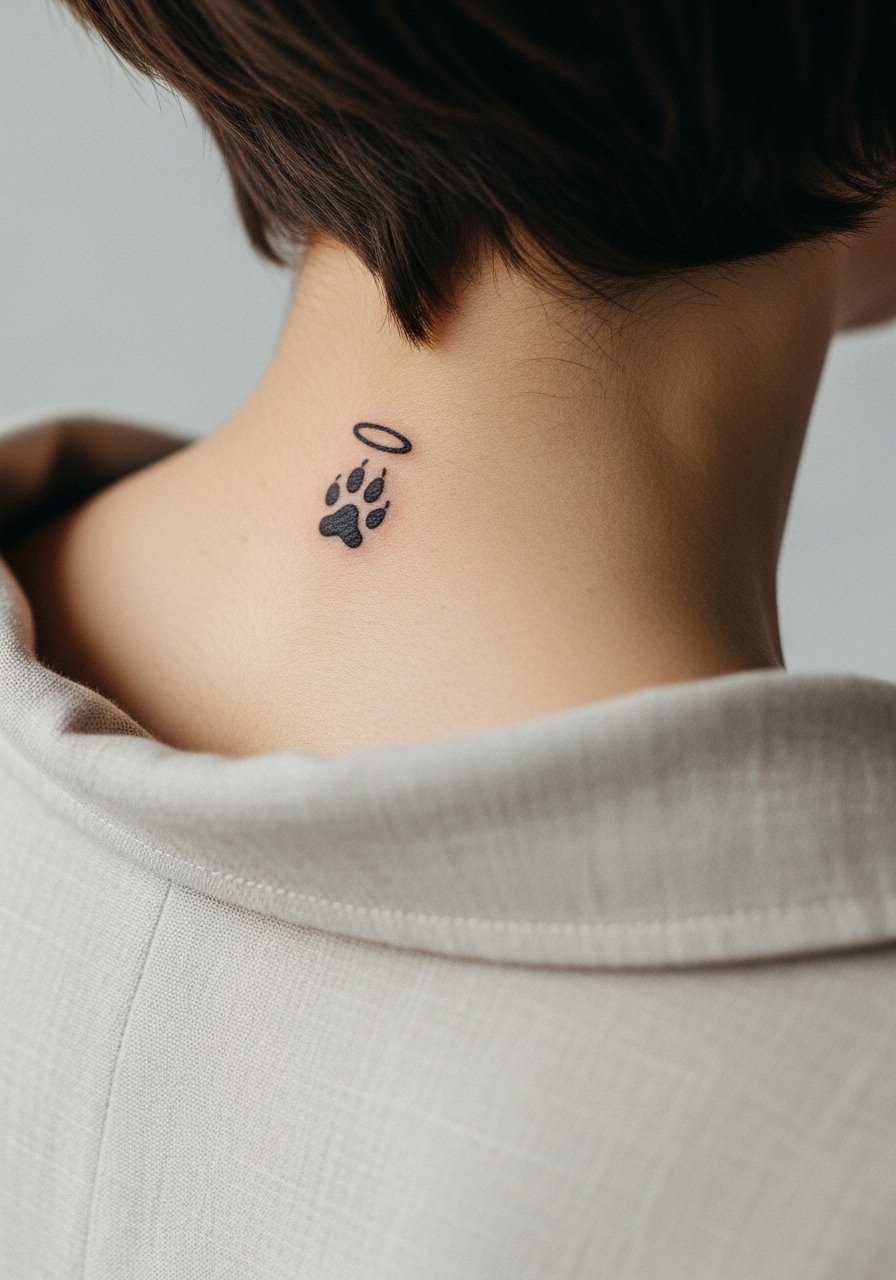
The back of the neck is discreet yet easy to hide with hair or a collar. Fine line here can age well if the artist places lines with a little extra depth. A specialized hand for neck work matters. One short caution is workplace visibility. If that is a concern, place the piece lower so it is covered by shirts. For styling, a wide-neck top shows or hides the tattoo depending on the occasion.
20. Paw and Coordinates on the Inner Bicep

Coordinates anchor a memorial to a place you walked your dog. The inner bicep is a tender spot but great for text paired with a small image. Avoid ultra-tiny digits. Ask the artist to space numbers and use a slightly bolder type than you think you need. Sessions require arm positioning which can add time. A tank top that you can lift makes the session smoother.
21. Tiny Paw Behind the Ear
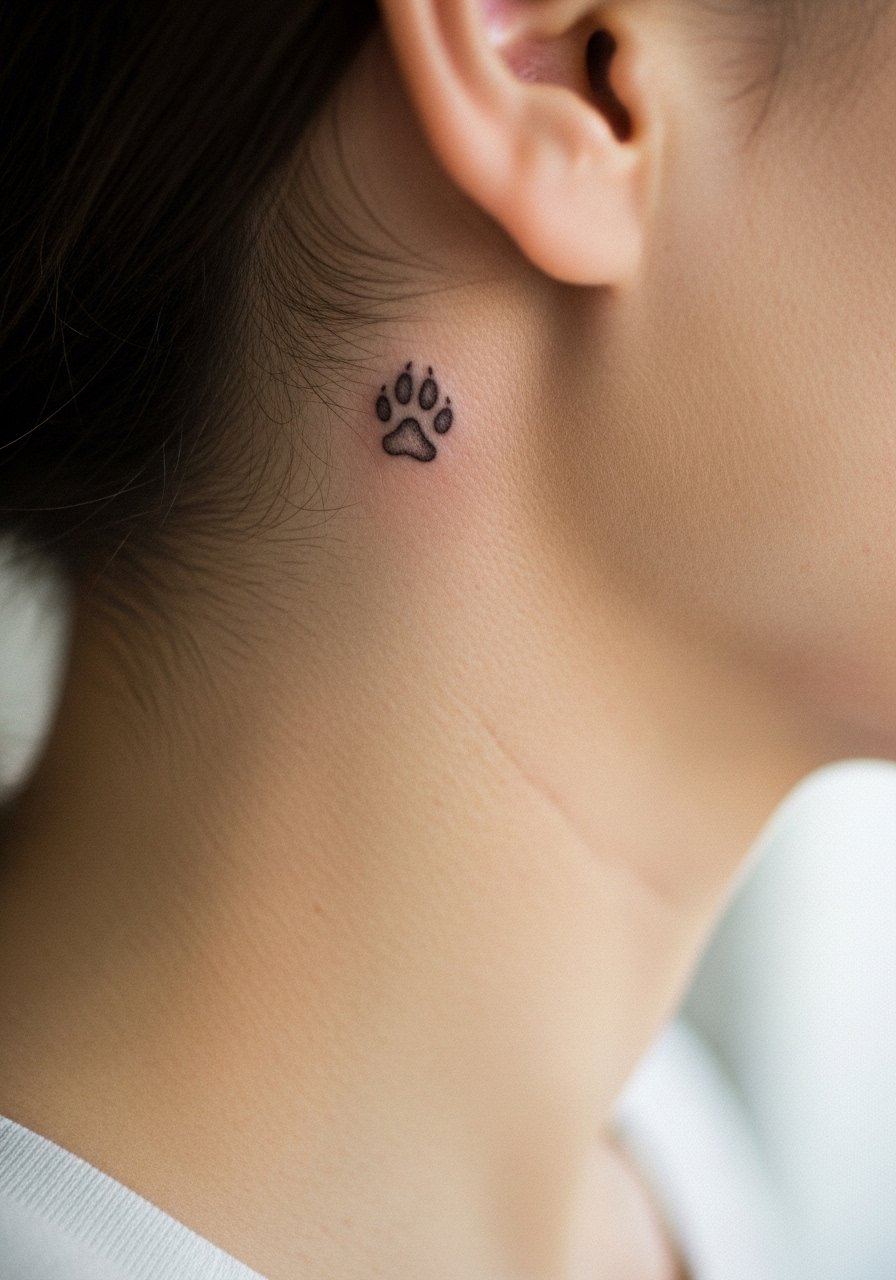
Behind-the-ear placements read intimate and can be hidden by hair. The area is sensitive and the lines must be very clean because touch-ups are tricky. Ask about how the artist manages tiny placements near hairlines. The session is short but stinging. For care and styling, grow the hair a touch or pin it when you want to reveal the spot.
22. Memorial Paw with Watercolor Bouquet on the Hip
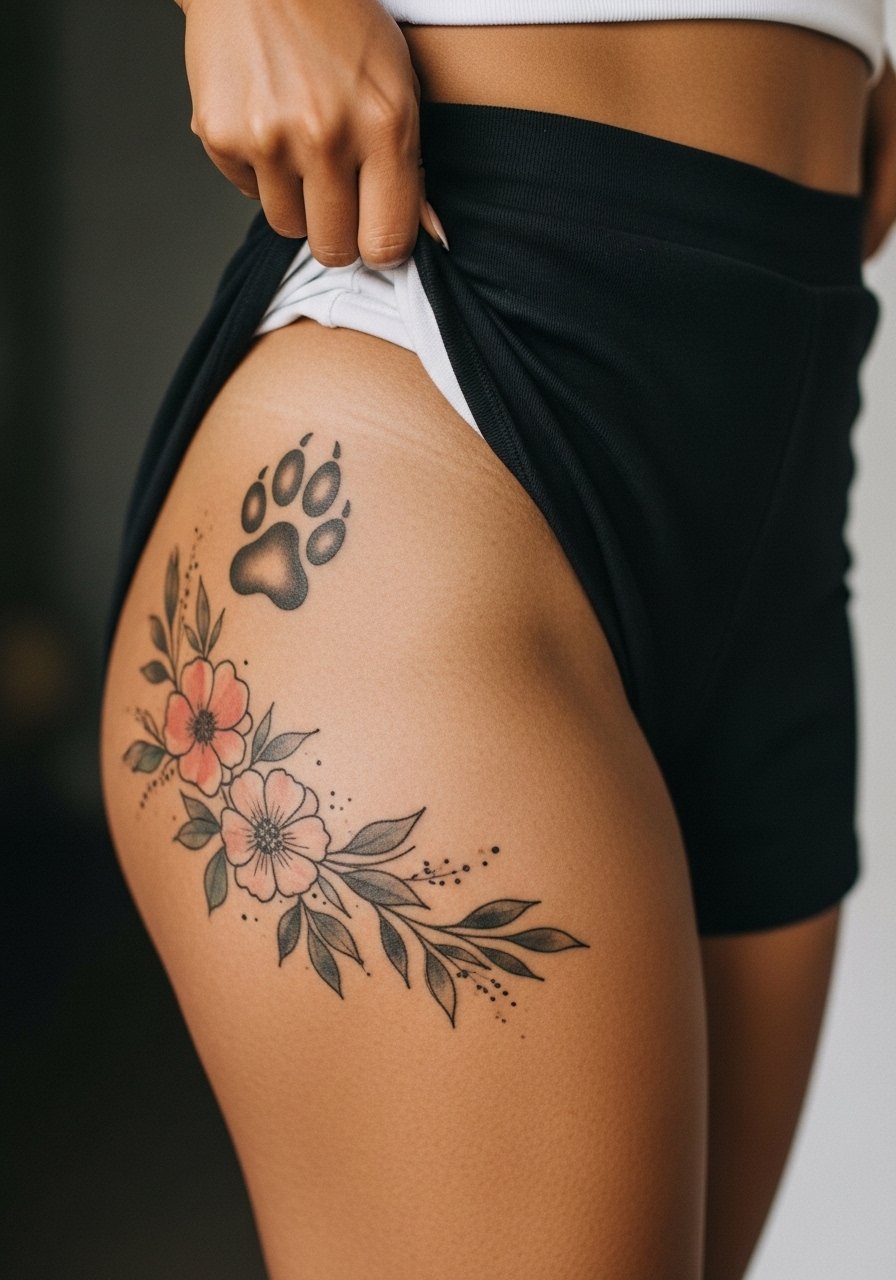
Hip placements let watercolor breathe and read as a secret tribute when covered. Watercolor on hips fares reasonably well since friction is low if you pick comfortable clothing. The usual error is washing out the color with thin needlework. Request moderate saturation in the blooms and expect a touch-up at year two. For the appointment wear, high-cut shorts make access easy.
23. Small Paw with Leash Script Around the Wrist
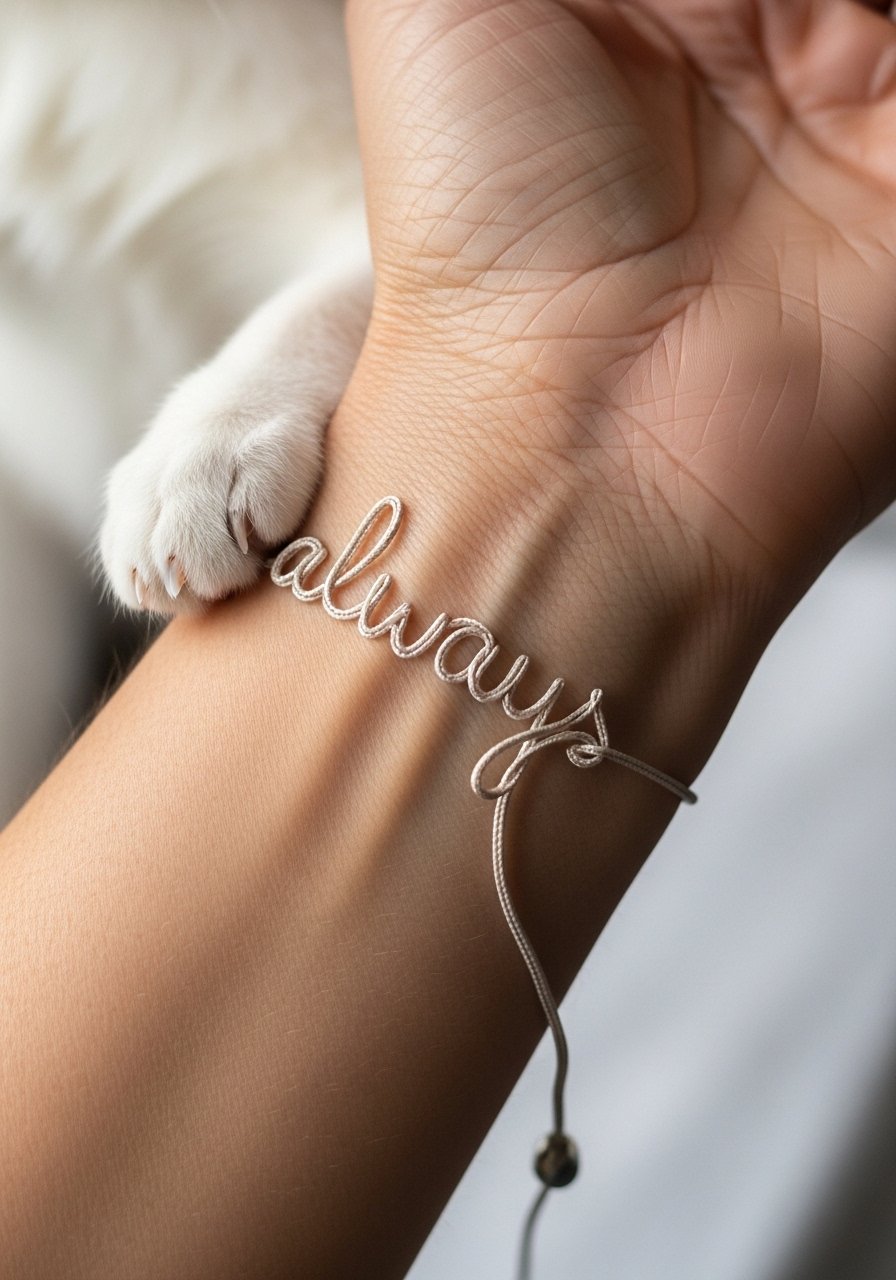
Using a leash as script turns an accessory into a word of memory. The wrist is visible and needs a slightly bolder leash line so the script remains readable. The main mistake is overly intricate curls that blur. Keep loops simple and ask for consistent spacing. A thin racing-inspired wristband can sit nearby without obscuring the leash.
24. Paw Snapshot Portrait on the Lower Back
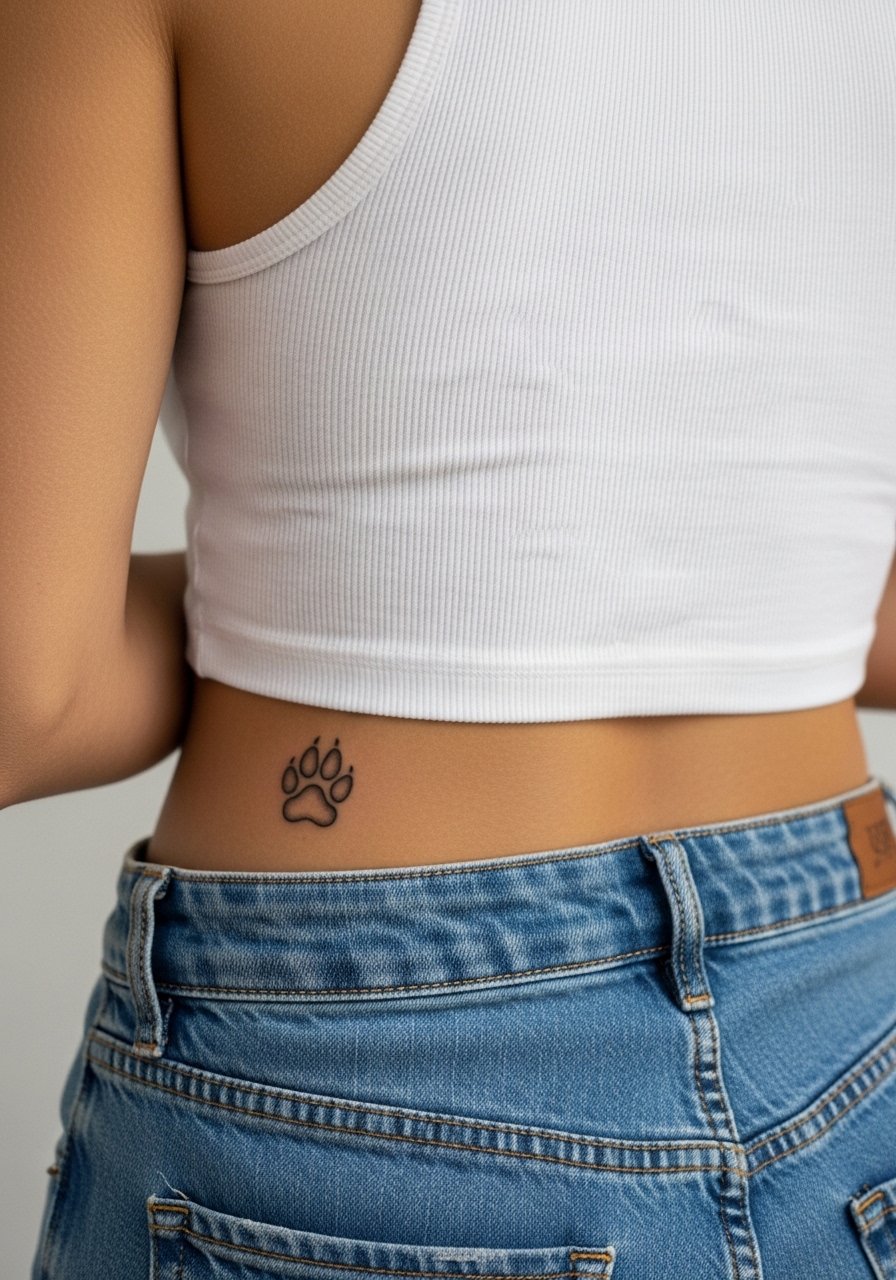
Lower back pieces are private and sit well under clothing. The trick is avoiding too-small detail, because the area moves with sitting and bending. Ask for a compact, bold silhouette inside the snapshot frame. Sessions are medium length. For wardrobe, high-waisted jeans keep the tattoo private unless you choose to reveal it.
25. Paw and Starfield on the Calf
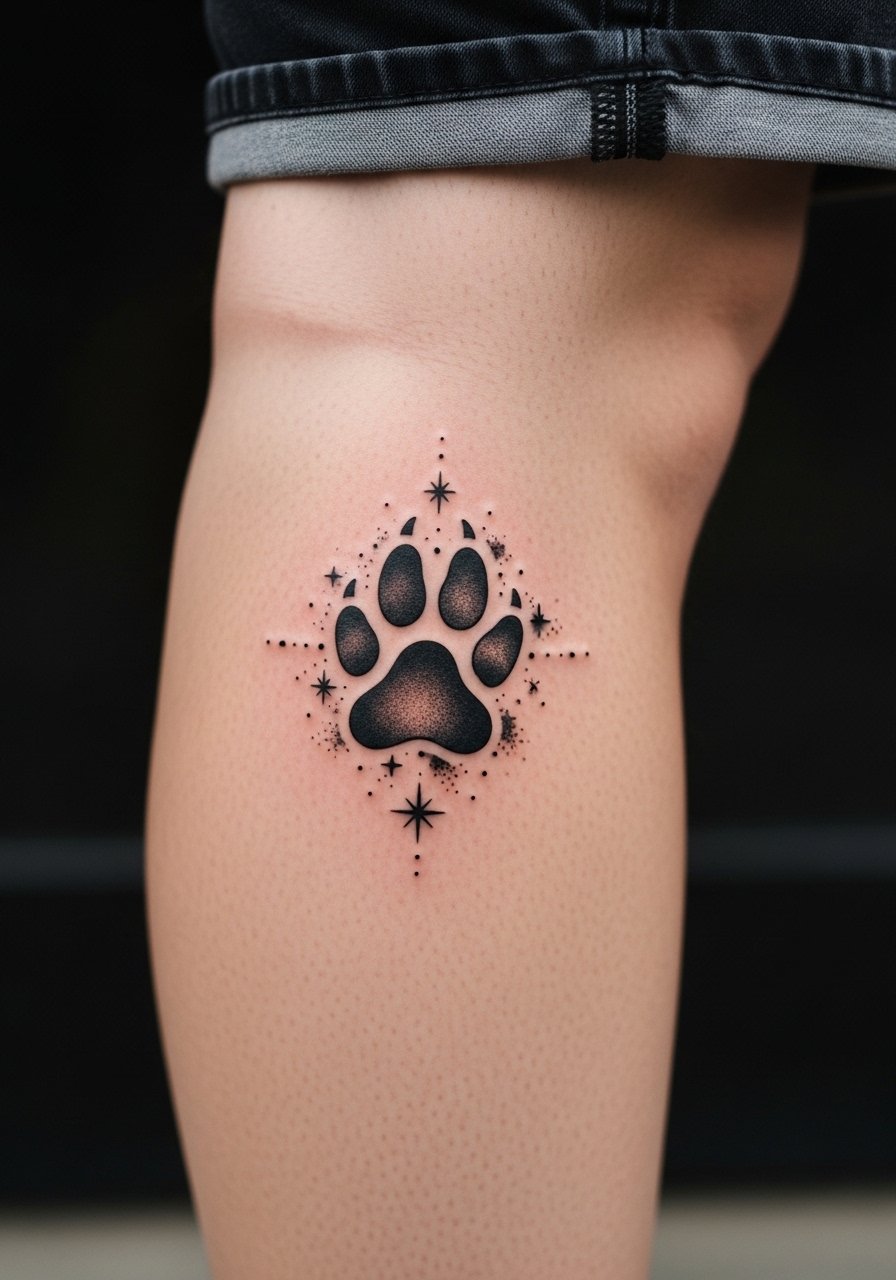
A paw with tiny stars gives a cosmic sense of presence. Calf placements are durable and photograph cleanly. Avoid placing the smallest stars too close to the paw edge because they can blur into the silhouette. A pair of casual shorts reveals the design well without overexposure.
26. Halftone Portrait with a Paw Overlay on the Chest
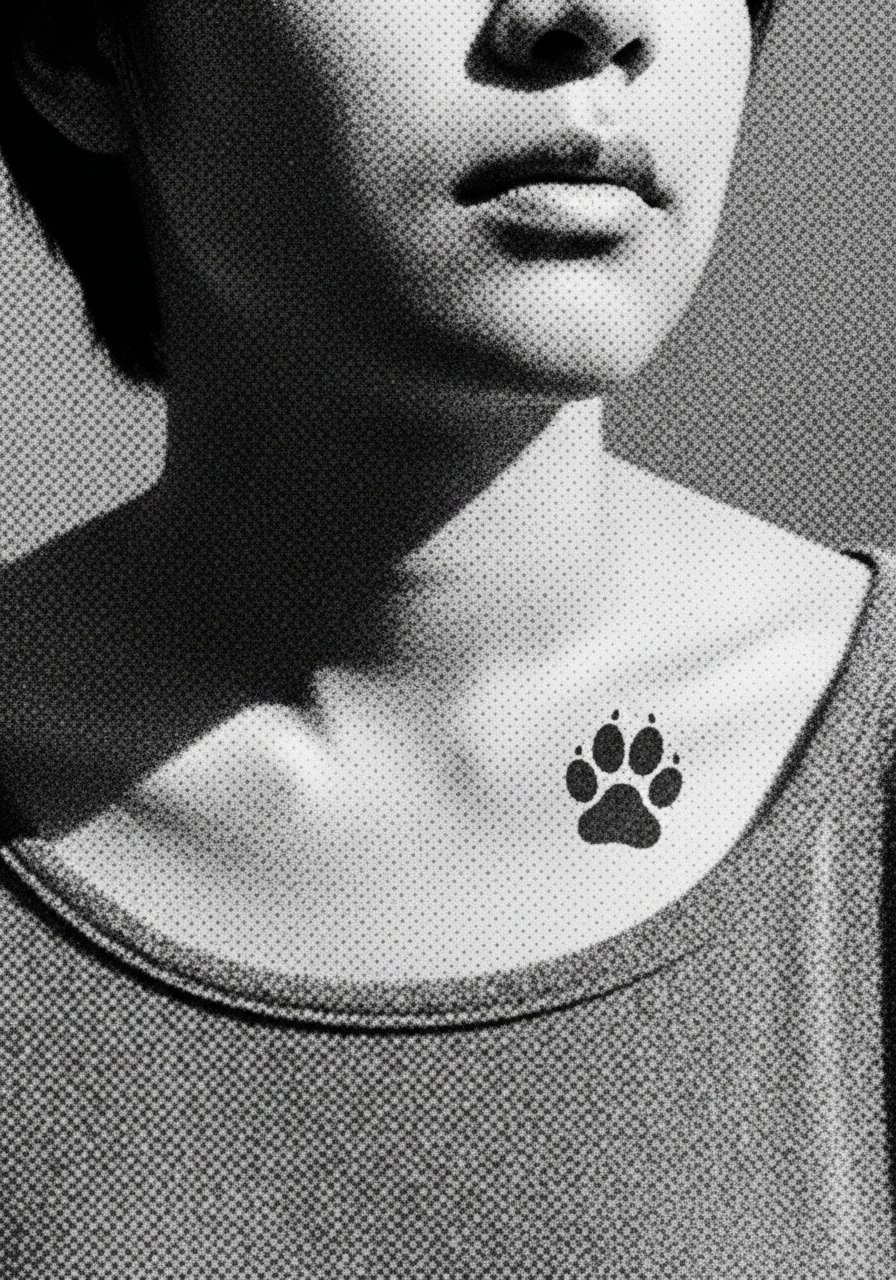
Halftone textures give portraits a graphic feel and can age more gracefully than ultra-fine shading. Chest work needs slightly bolder dot sizes so the halftone holds. A frequent mistake is asking for micro-dot halftone that collapses in healing. Ask the artist to test a patch at consult size so you see how the dots read on your skin. A wide-neck shirt displays the piece without shouting.
27. Paw with Heartbeat Across the Ribcage
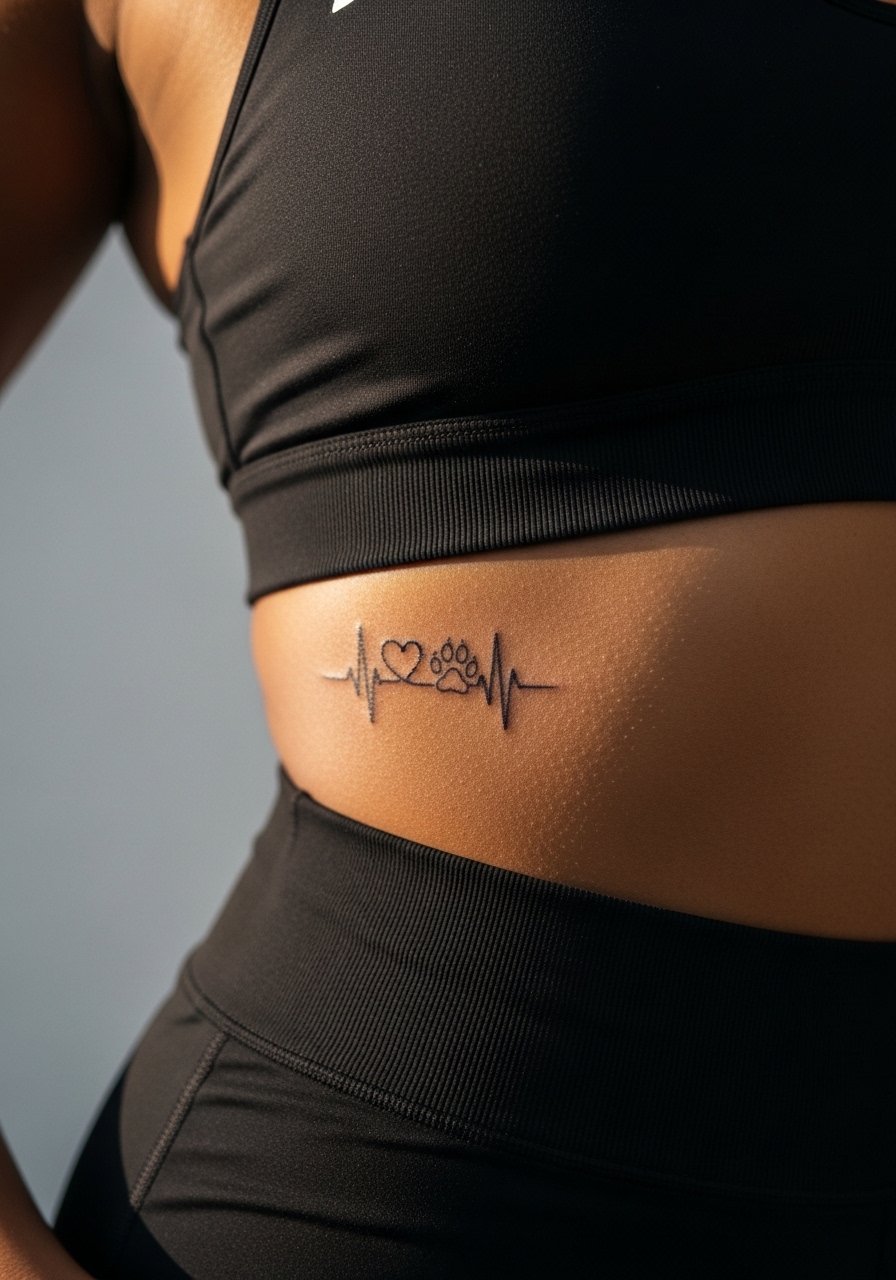
Placing a heartbeat and paw on the lower ribs is a powerful visual, but ribs demand careful spacing. Expect higher pain and the possibility of a touch-up. The controversy around fine line on ribs matters here. One group warns the skin motion heals lines into softer strokes quickly. The other group finds that with correct placement and slightly increased lineweight the design keeps definition. Ask your artist how their rib linework holds at one and three years. For the session, a fitted sports bra provides clean access and comfort.
Frequently Asked Questions
Q: Will a micro-realism dog portrait on the forearm need touch-ups sooner than a bold black paw?
A: Micro-realism relies on subtle gray gradients and fine linework, so it often needs a touch-up sooner than bold black shapes. How soon depends on your sun exposure, the exact lineweight chosen, and whether the artist planned for slightly denser core tones. Expect a realistic touch-up conversation at year two, not necessarily earlier.
Q: Are finger or knuckle paw tattoos worth it if I want permanence?
A: Fingers and knuckles fade faster because of skin turnover and washing. They are worth it if you accept periodic touch-ups and the aesthetic trade-off. If you want longer-lasting definition, consider a slightly larger paw on the outer hand or inner wrist.
Q: How should I discuss Roman numerals or small dates with my artist for a rib tattoo?
A: Ask your artist to space characters wider than you think necessary and to use slightly thicker strokes than a pure hairline. Request a mock stencil at actual size on your skin before committing so you can judge legibility when you move.
Q: Do watercolor memorials need different aftercare than blackwork?
A: Watercolor pieces often benefit from slightly longer initial hydration and careful sun protection because the color sits more subtly. Follow your artist's instructions and plan for a color refresh if the washes soften after a year. Post-session hydration and sunscreen matter for all styles.
Q: Can a behind-the-ear paw be hidden for work and still look intentional when revealed?
A: Yes, behind-the-ear placements are easy to conceal with hair and reveal when you want. Because the area is small, keep the design simple and ask about how the artist handles placements near the hairline so the edges remain crisp.
