
Fine line rose tattoos are everywhere online right now, and the look people save most is often the one that needs a quiet second thought. Trends favor tiny, delicate petals that sit close to the skin, but longevity depends on placement, spacing, and needle depth more than on how pretty it looks fresh. Read these vintage small rose ideas and you will get specific notes to bring into your consultation.
1. Fine Line Single Rose on Inner Forearm
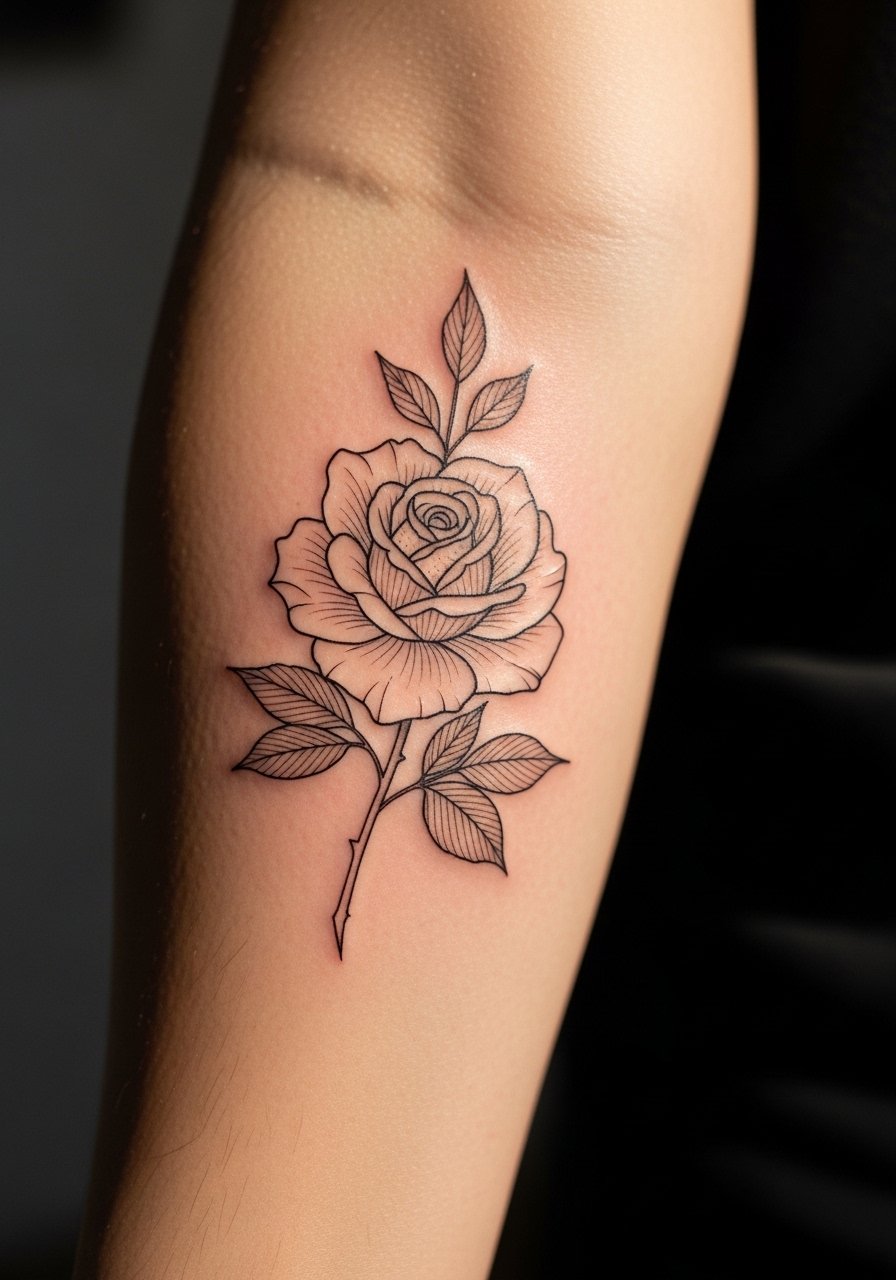
I bring this one up first because the inner forearm flatness makes it a reliable small canvas. Tell your artist you want a slightly heavier outline where petals meet to avoid feathering later. A common mistake is asking for hair-thin lines everywhere, which can soften into a gray blur in two to three years. Pain is low and the session is short, often under an hour for a single small rose. Pair it with a rolled sleeve on cooler days and a loose button-down shirt to show the linework without covering the piece.
2. Micro-Realism Rose on the Wrist
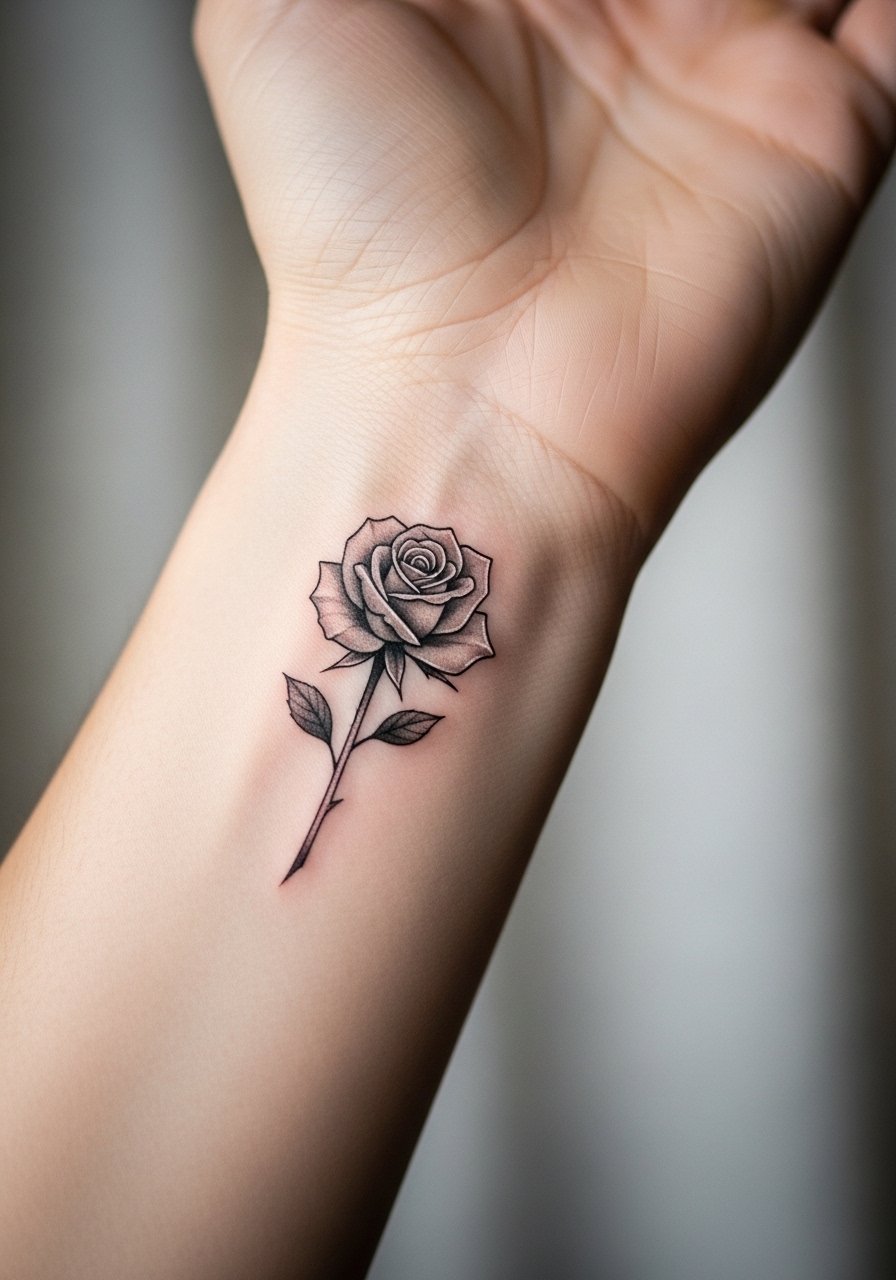
Wrist roses look delicate but face constant friction from watches and bracelets, which speeds fading. For the best results, ask for subtle stipple shading instead of heavy gray washes. The session feels like quick, focused passes and can sting more than the forearm because of thinner skin. Many people make the mistake of requesting the tiniest level of detail and then wonder why touch-ups arrive sooner than expected. Style it with a thin chain bracelet that sits below the tattoo rather than directly on top of it.
3. Traditional Tiny Rose on the Ankle
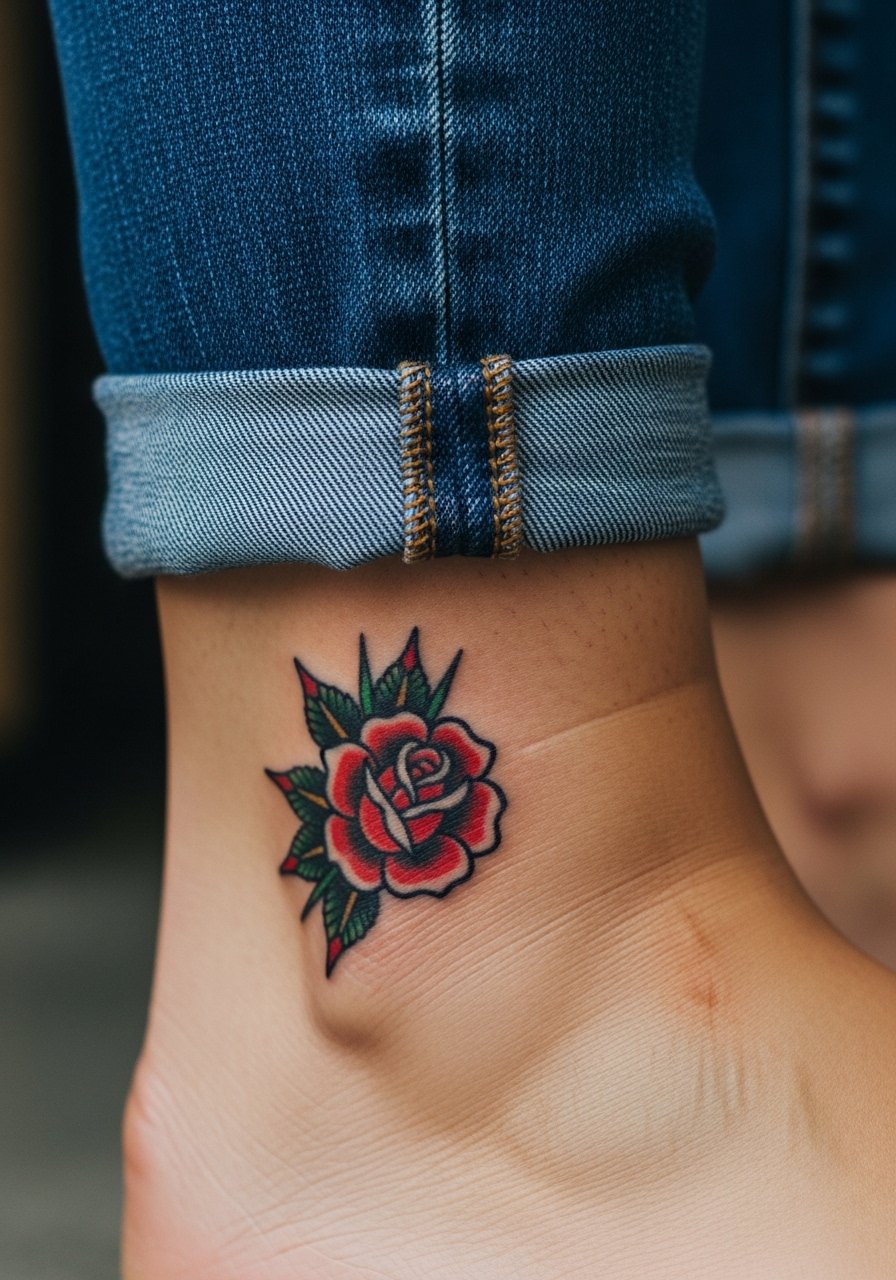
Ankle placements handle bold outlines well, and the traditional saturated approach ages into clear shapes. Fair warning, ankles take more touch-ups because of rubbing from shoes and socks. The session is brief but the area vibrates more with each needle pass. A frequent error is scaling the rose too small with thick black outlines, which crowds the petals. For footwear pairing wear low-cut sneakers or sandals so the tattoo is framed, and consider a sandals search for summer styling.
4. Tiny Rose Behind the Ear, Below the Hairline
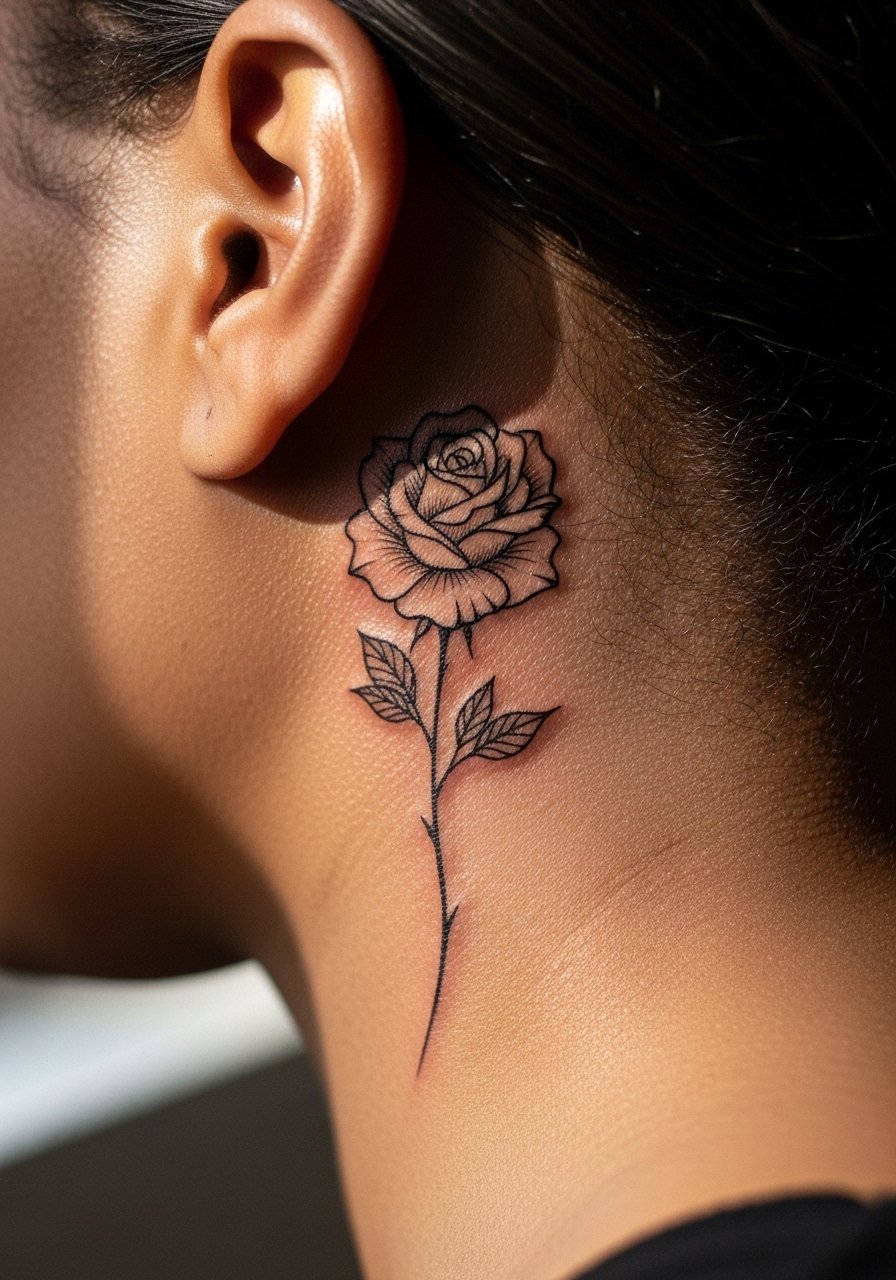
This placement reads as a quiet vintage accent. The sensitive location calls for a single line weight that avoids dense shading because the skin there moves a lot. Session time is short but expect a tender few days. A common mistake is pushing for color saturation similar to the forearm. Because hair can partially cover it, plan outfits that let the piece peek out, like a wide-neck sweater or a low bun for evenings.
5. Mini Blackwork Rose on the Side Ribcage
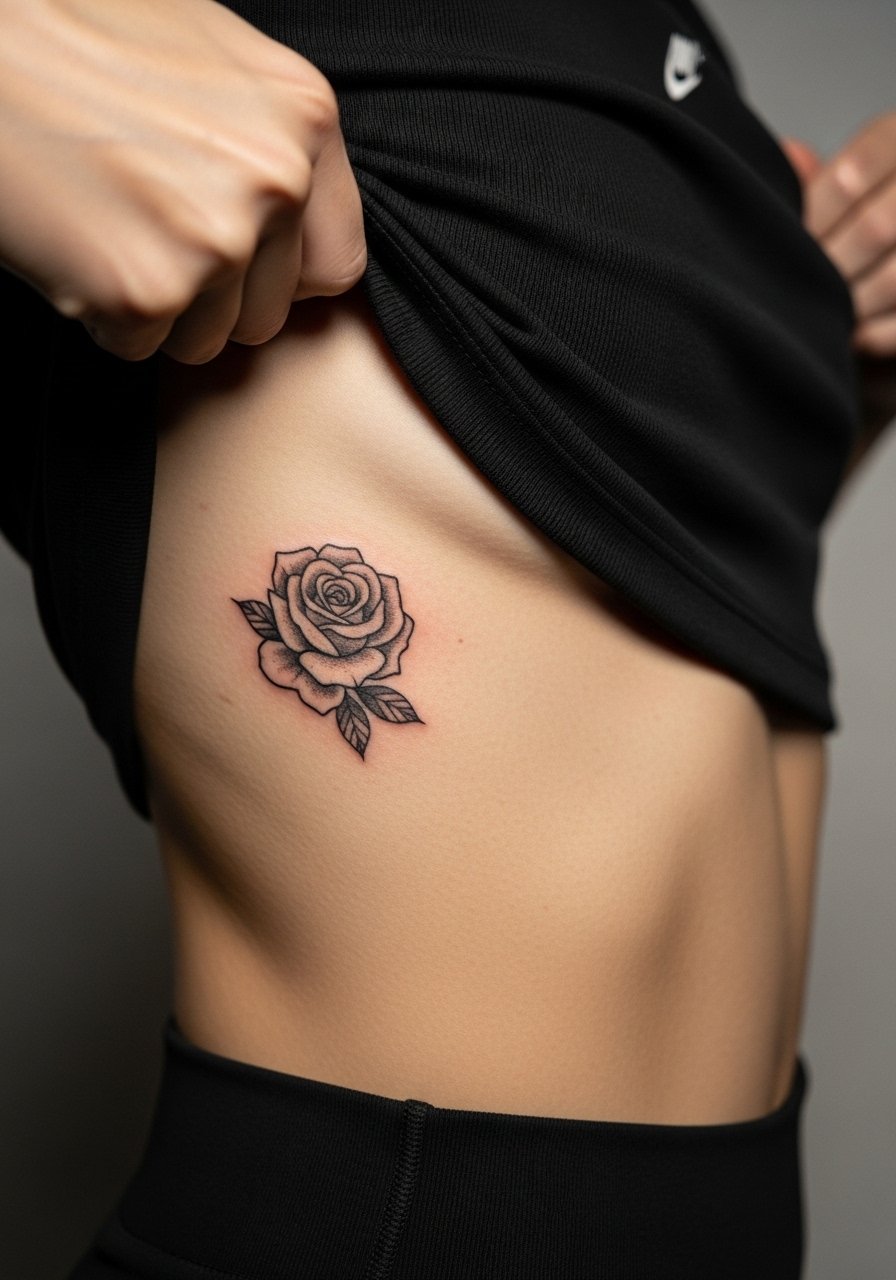
Rib work is notorious for session discomfort and for how skin stretch affects linework. Expect higher pain during the tattooing and plan for short bursts with breaks. The mistake I see most is getting overly dense detail in a small ribpiece, which blurs as the skin shifts. If you want vintage blackwork here, ask for open negative space between petals to keep the rose readable at year five. For the appointment wear a cropped athletic top so the artist has tidy access.
6. Dot-Work Vintage Rose on the Inner Bicep
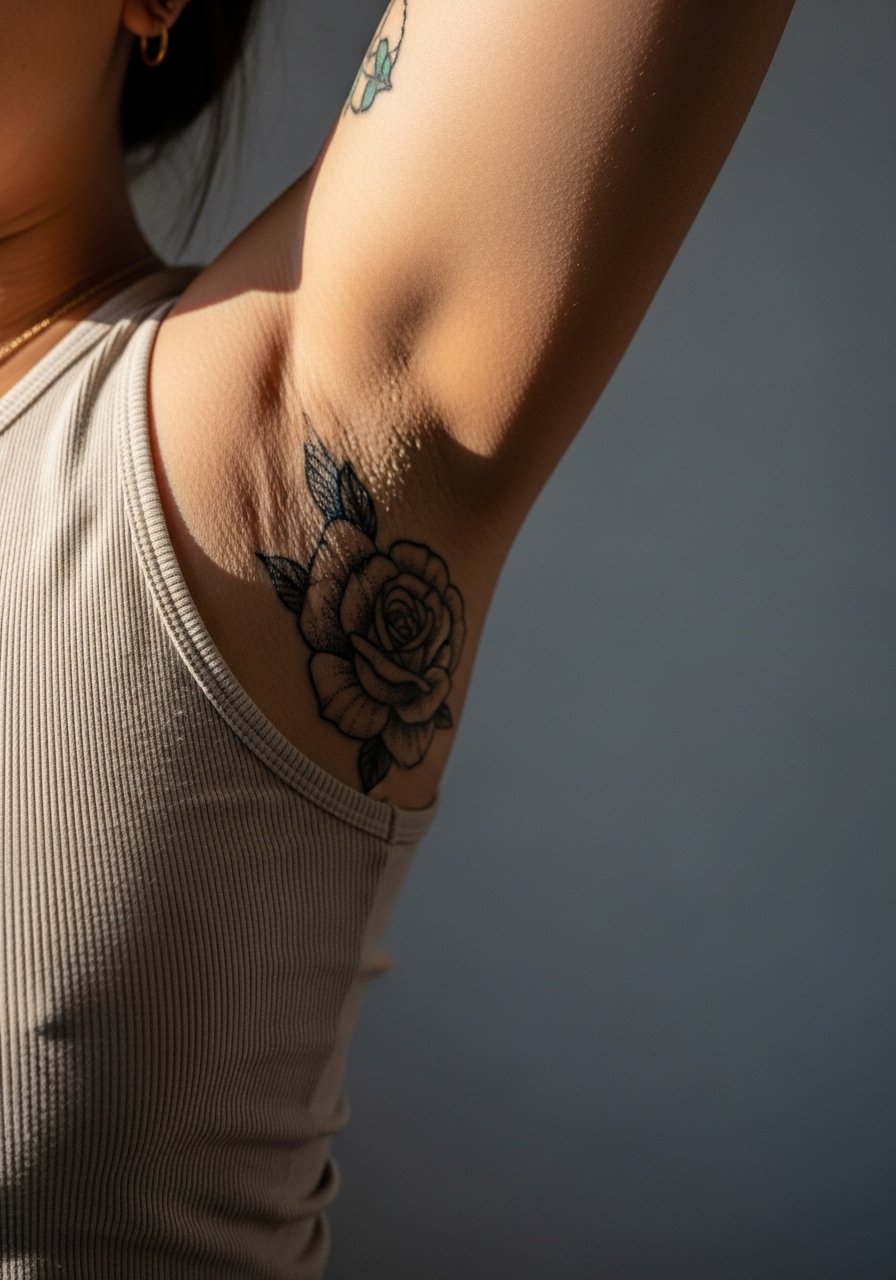
Inner bicep skin is soft and takes dot work beautifully, creating an old-school engraved look. Pain varies but many report surprise at tenderness during long shading passes. Artists split on this placement in a way that matters. One camp says the inner bicep swells and the stipple will compact into patchy spots over time. The other camp argues that careful spacing and conservative depth make dot work stable here. Ask your artist where they stand and whether they will space dots to anticipate settling. For showing it off, roll a sleeve or wear a tank top that frames the inner arm.
Studio Day Picks
The small forearm, ribcage, and inner bicep pieces above each ask for slightly different prep and a few specific items smooth the session and the first week.
- Stencil transfer paper kit. Lets you preview the linework on skin before committing, which helps for placements like the wrist and inner bicep where scale reads differently in person.
- Indie healing balm tin. A lightweight balm for the initial days keeps delicate fine line work moisturized without heavy occlusion.
- Thin protective film roll. Useful for ankle and wrist tattoos that face friction from shoes or watches during the first 48 hours.
- Fragrance free gentle wash. Cleans the healing area without stripping inks, which matters for small shaded roses.
- Aquaphor healing ointment. Thin layers in the first two days keep fine line pieces from crusting excessively while the skin seals.
7. Tiny Traditional Rose on the Back of the Hand
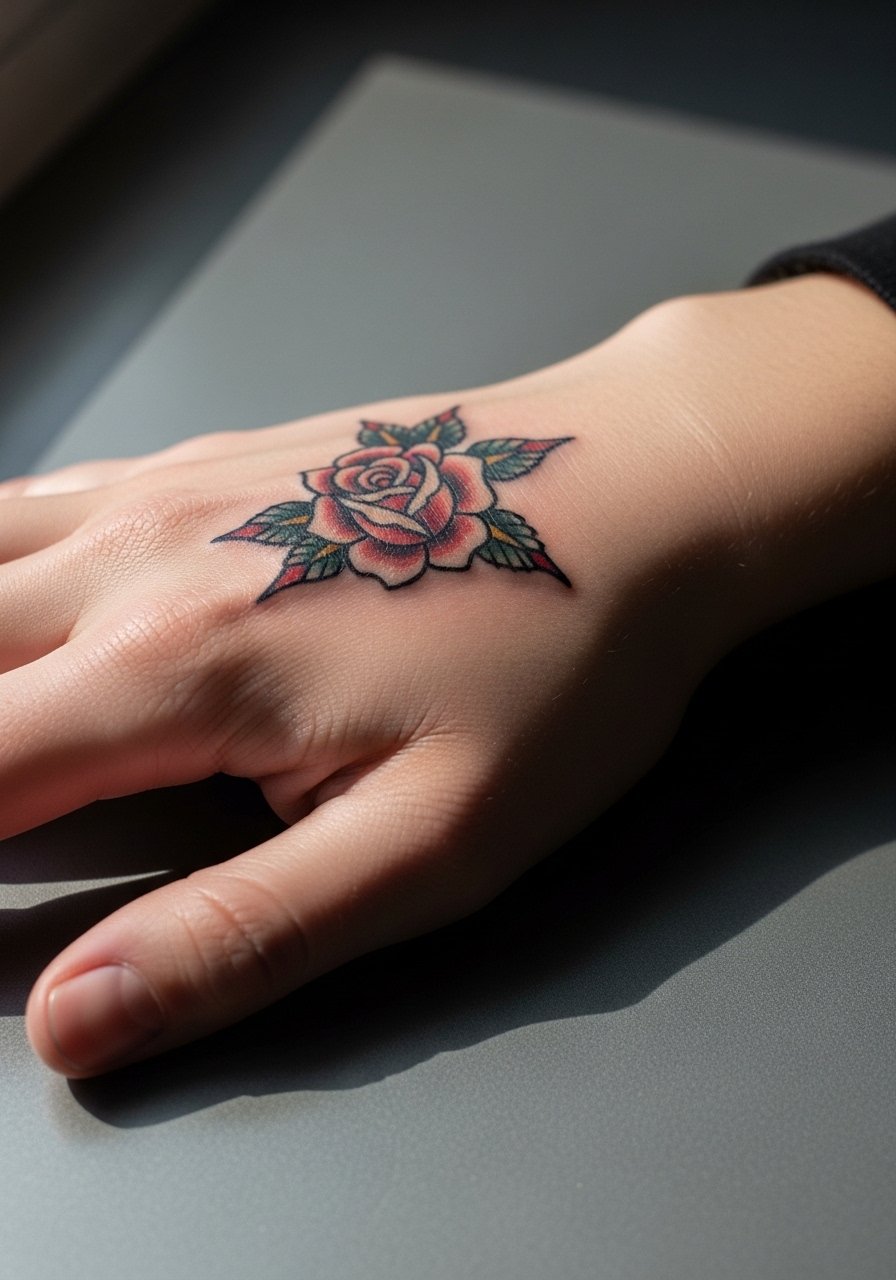
Hands age tattoos differently. The skin and constant washing make saturation fade and edges soften faster than on the arm. The controversy here is clear. One camp argues that hand tattoos should be bolder and accept faster touch-ups as part of the plan. The other camp avoids hands altogether for clients seeking longevity. If you choose this, plan for touch-ups and ask for slightly stronger outlines initially. Styling is simple, keep rings light so they do not constantly rub the piece.
8. Vintage Single Rose on the Collarbone
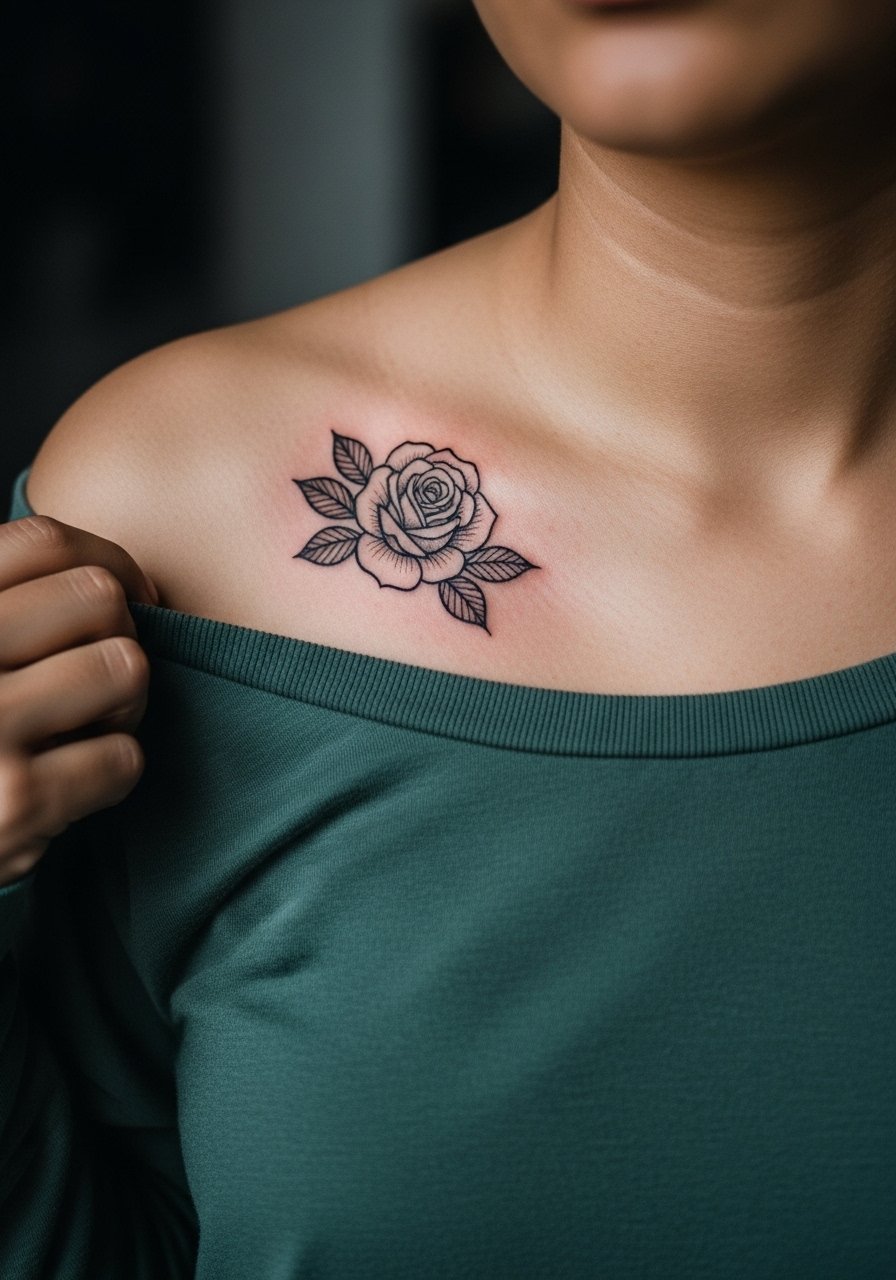
Collarbone roses read elegant with negative space that mimics vintage illustrations. Skin in that area can thin with age so avoid overloading with small dot shading. The session is moderate for sensitivity and usually quick for a small piece. Wear a wide-neck blouse for showing the work later and a button-down on the day so you can keep the area covered between passes.
9. Micro-Realism Bud on the Side of the Finger
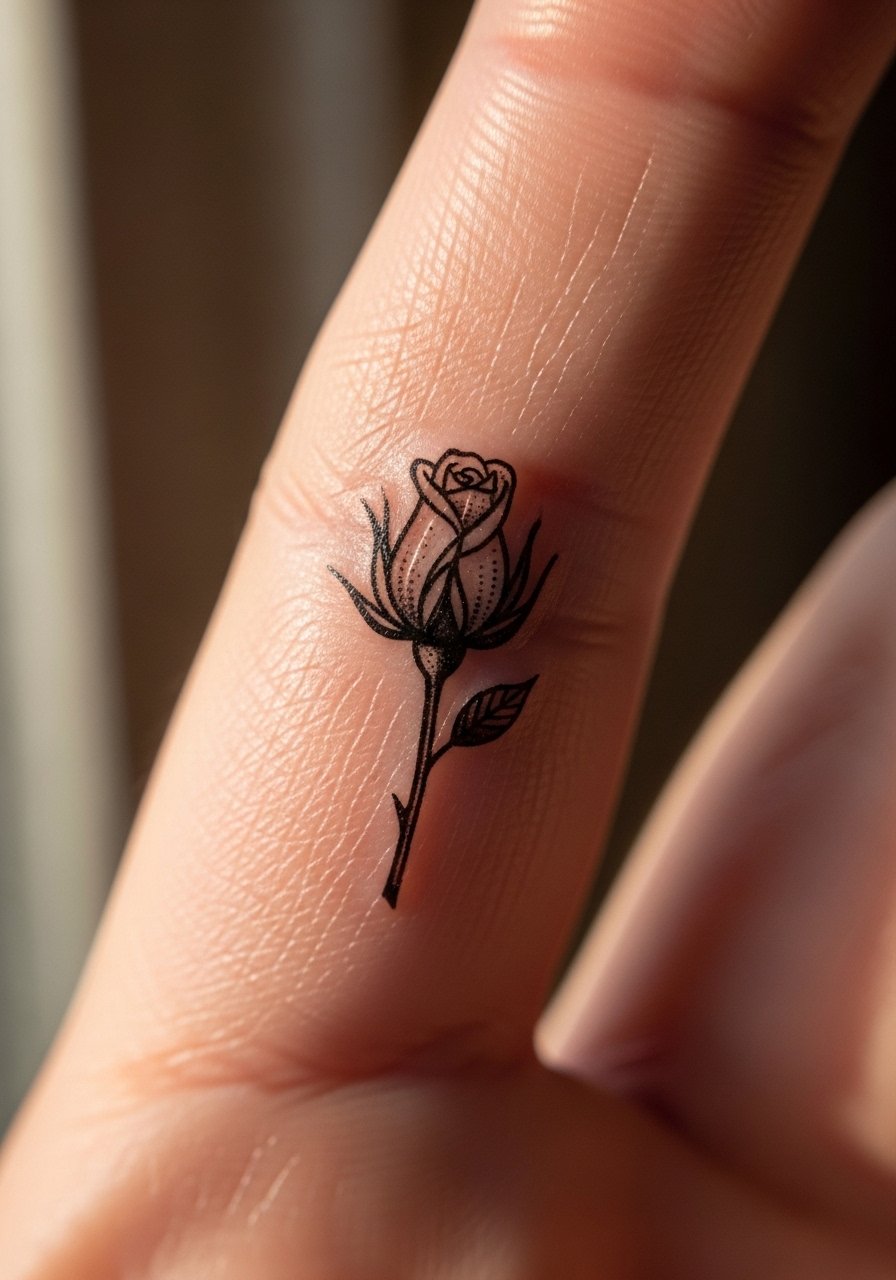
Finger placements are unforgiving. Lines spread and pigment can migrate into creases. A common mistake is requesting ultra-fine leaf veins that lose definition quickly. If you want a finger rose, keep the design slightly bolder and accept yearly touch-ups. For accessories, choose rings that sit away from the tattoo and consider adjusting before the piece heals. A protective habit during the first week helps preserve linework.
10. Vintage Roselet on the Nape of the Neck
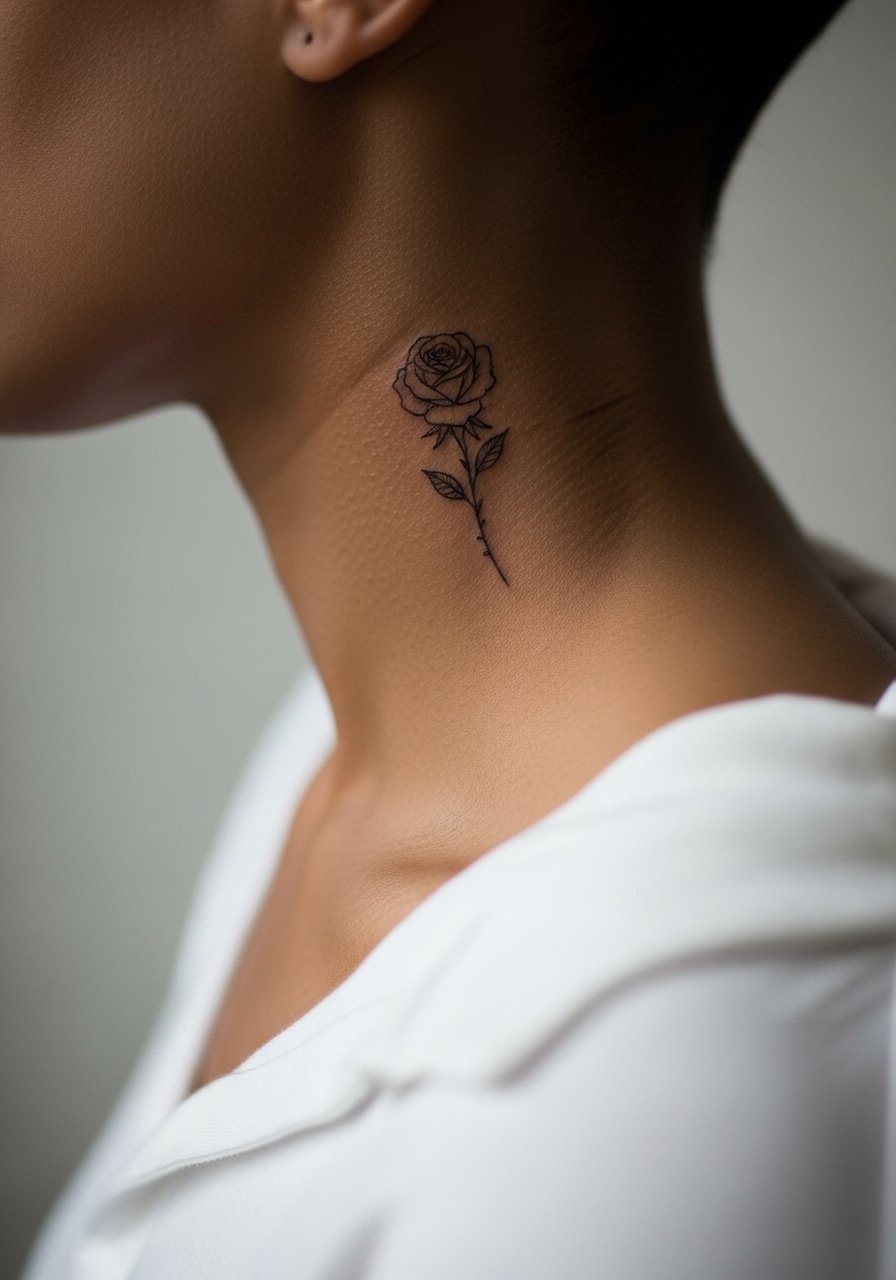
Neck roses peek out from collars and hair. The skin there moves and sweats more, so keep shading light to preserve clarity as it heals. Ask for spaced linework and avoid dense gray fills. The session can sting and requires breaks. For evening looks let the tattoo show under a wide-neck top. For the appointment wear a shirt you can pull aside easily.
11. Tiny Single Rose on the Back of the Calf
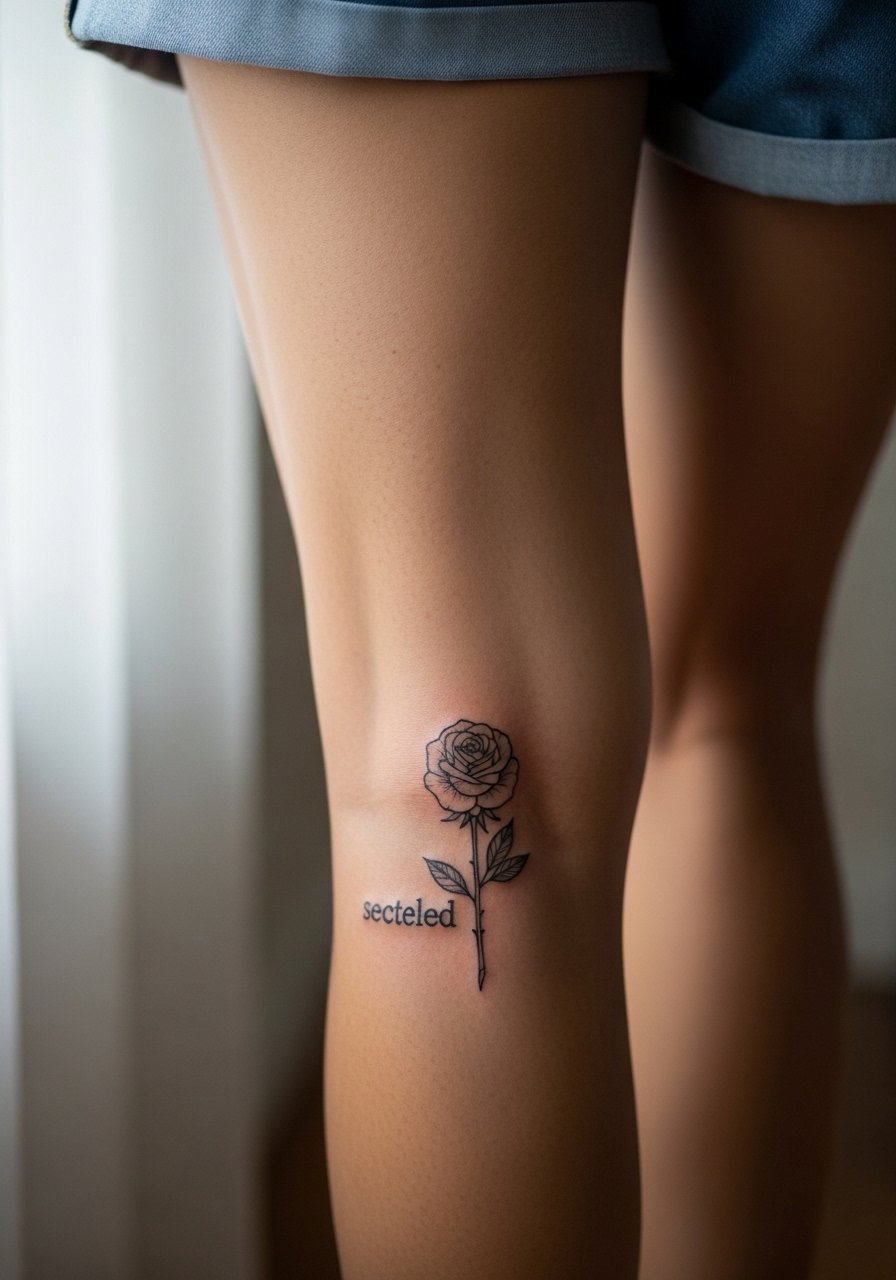
Calf placements are forgiving and handle vertical compositions well. The skin has good thickness so small details settle neatly. Sessions are comfortable and usually short. A mistake I see is crowding the rose with other small pieces that fight for attention. For summer styling choose outfits that let the piece show, like cropped trousers or a casual skirt search if you want it to peek while walking.
12. Small Stipple Rose Beside a Tiny Script on the Sternum
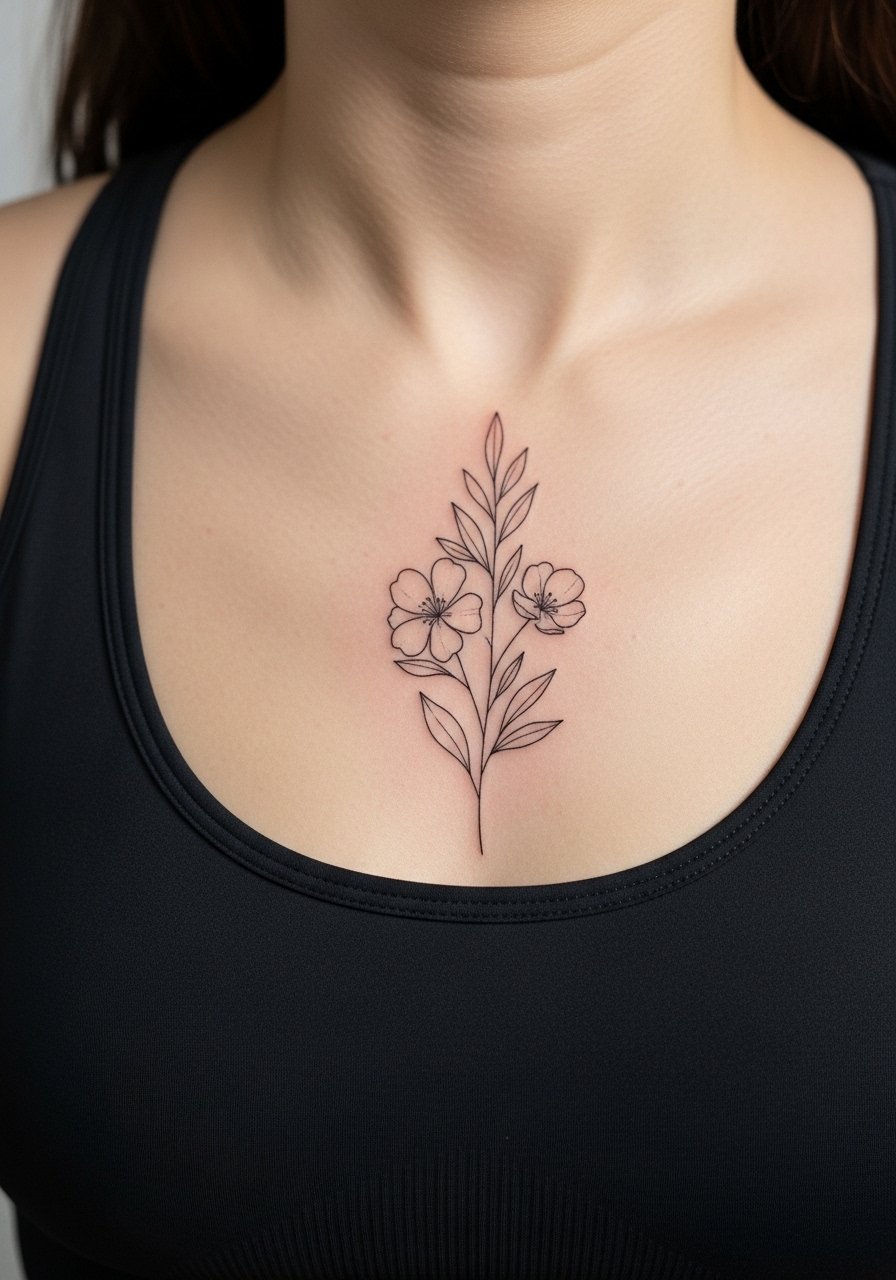
Sternum work reads intimate and vintage in tone. Because of the motion from breathing, stipple shading with open spacing holds up better than heavy fills. The session is more sensitive and takes patience. A common error is asking for dense shading across the central chest, which can look muddy over time. For both session comfort and showing off, a fitted sports bra makes the artist's access clean and frames the finished piece.
13. Tiny Rose with Whip Shading on the Outer Thigh
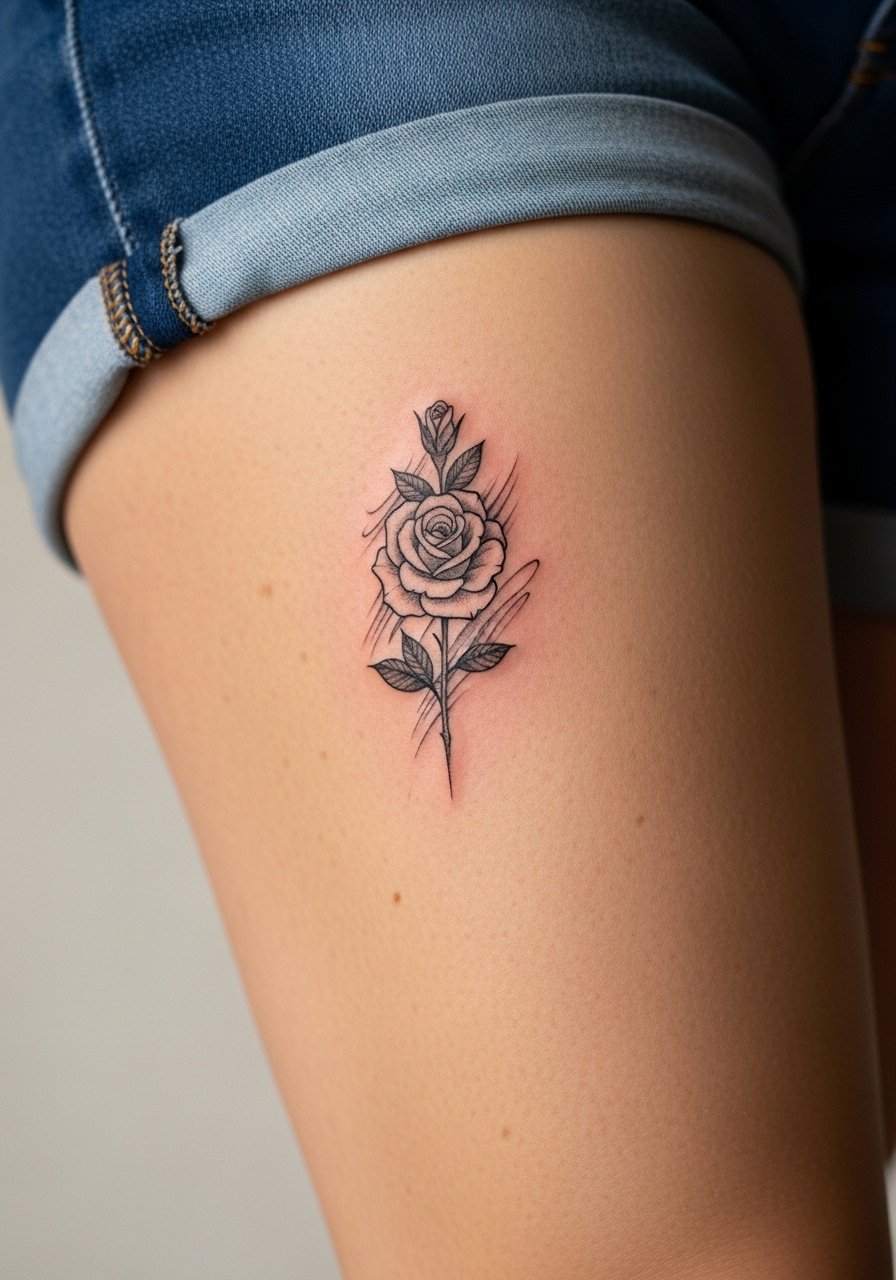
Outer thigh tattoos sit under fabric a lot so choose a design with breathing space around petals. Whip shading gives a softer vintage look and holds up because it avoids dense saturation. Session discomfort is low and appointments are relaxed. The mistake people make is picking heavy saturation that smudges under tight clothing. For the appointment pick loose bottoms like loose linen drawstring pants so you can roll the leg up comfortably.
14. Tiny Black Outline Rose on the Side Hip
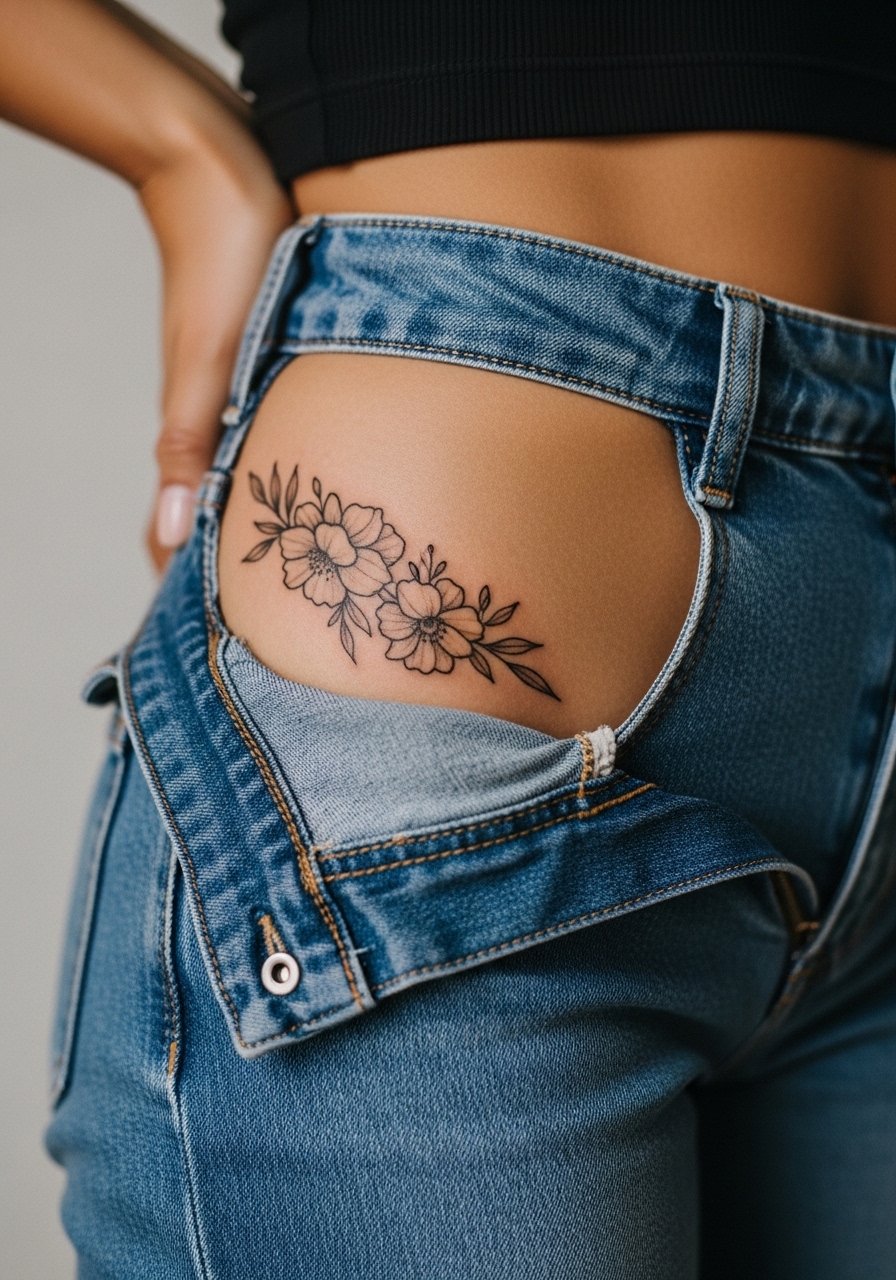
Hip tattoos are a classic vintage spot but they sit under waistbands a lot which causes extra friction while healing. Artists are split on color here. One camp prefers keeping hips to blackwork only to avoid early fading and pigment migration. The other camp is comfortable packing color if the client accepts likely touch-ups. If you want color, pick a palette the artist can saturate responsibly. For the session wear high-waisted bottoms you can lower slightly without discomfort, and consider a high-waisted jeans search to plan outfits.
15. Miniature Rose over the Collar of the Wrist
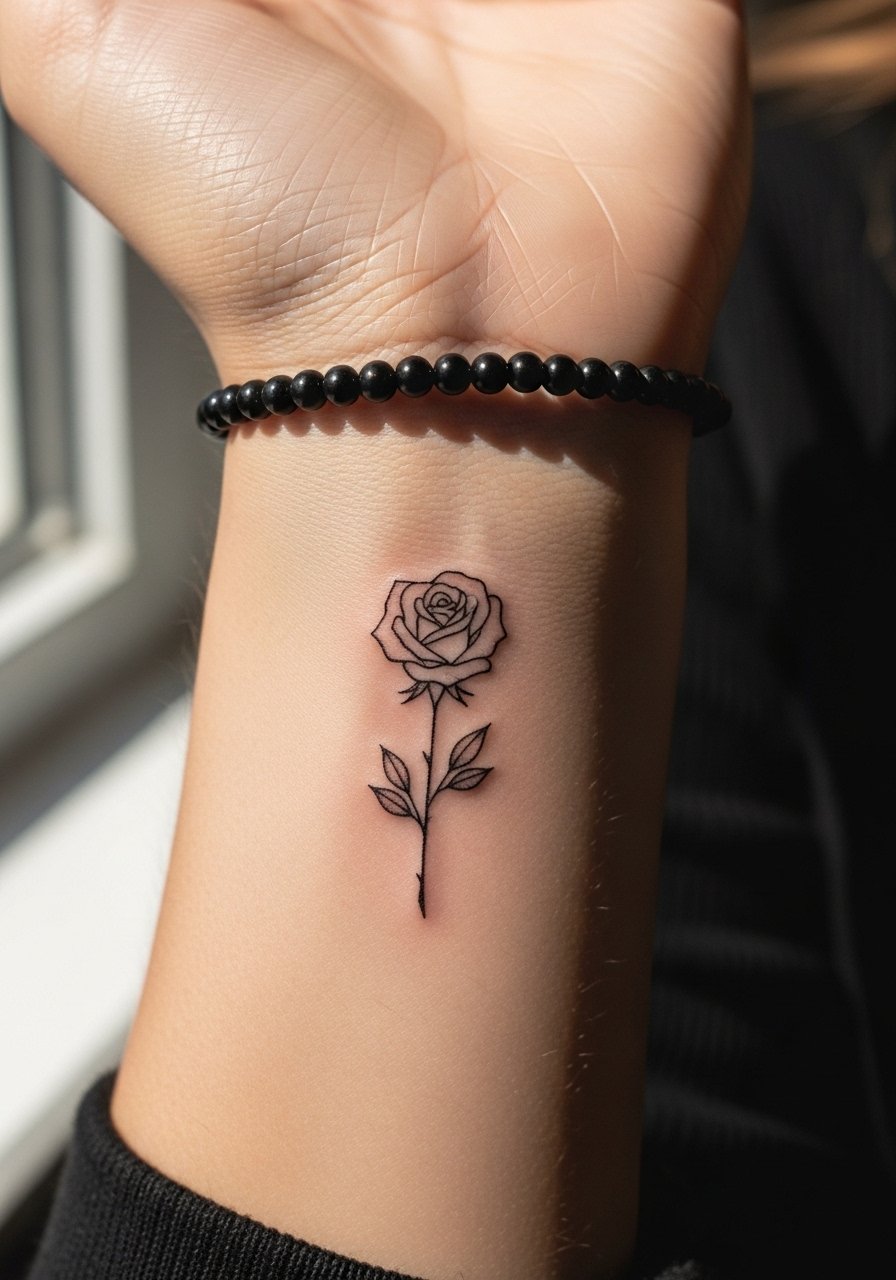
This is a compact placement that sits where a watch might rest. Keep the rose low in detail and ask for slightly bolder stems to avoid early loss of definition. The session is usually quick. A common mistake is placing it too close to the palm side where skin texture changes fast. Wear the watch on the opposite wrist during the first few weeks to reduce friction and let the piece settle.
16. Tiny Vintage Rose on the Outer Shoulder
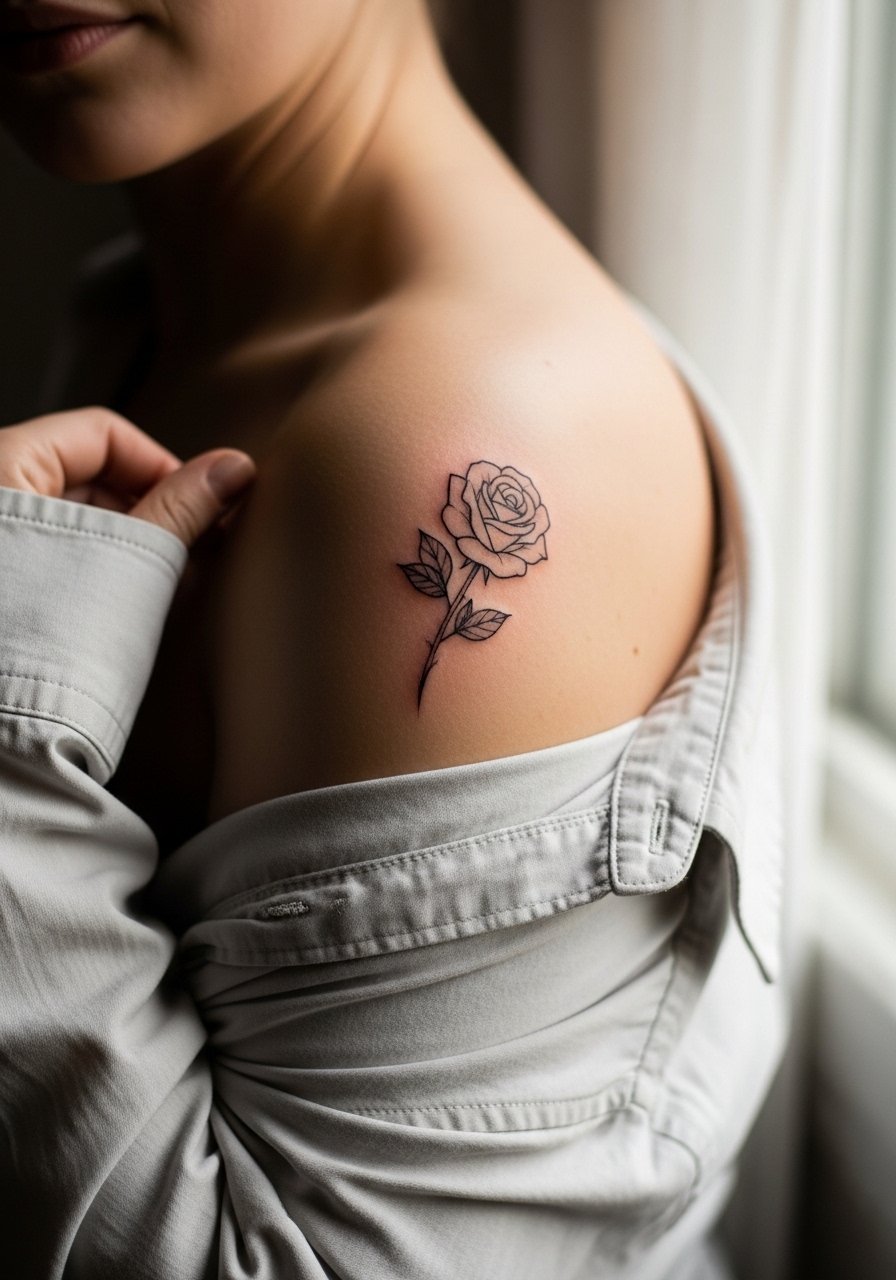
Shoulder placements are forgiving and make small designs readable at a glance. Ask your artist for slightly thicker outer lines so the piece keeps its form as it softens. Sessions are comfortable and quick, making it a good first small tattoo. For showing off let the rose peek from a loose button-down shirt or a simple tank. Also bring a top that provides easy access for the artist.
17. Tiny Red-Toned Rose on the Back of the Neck
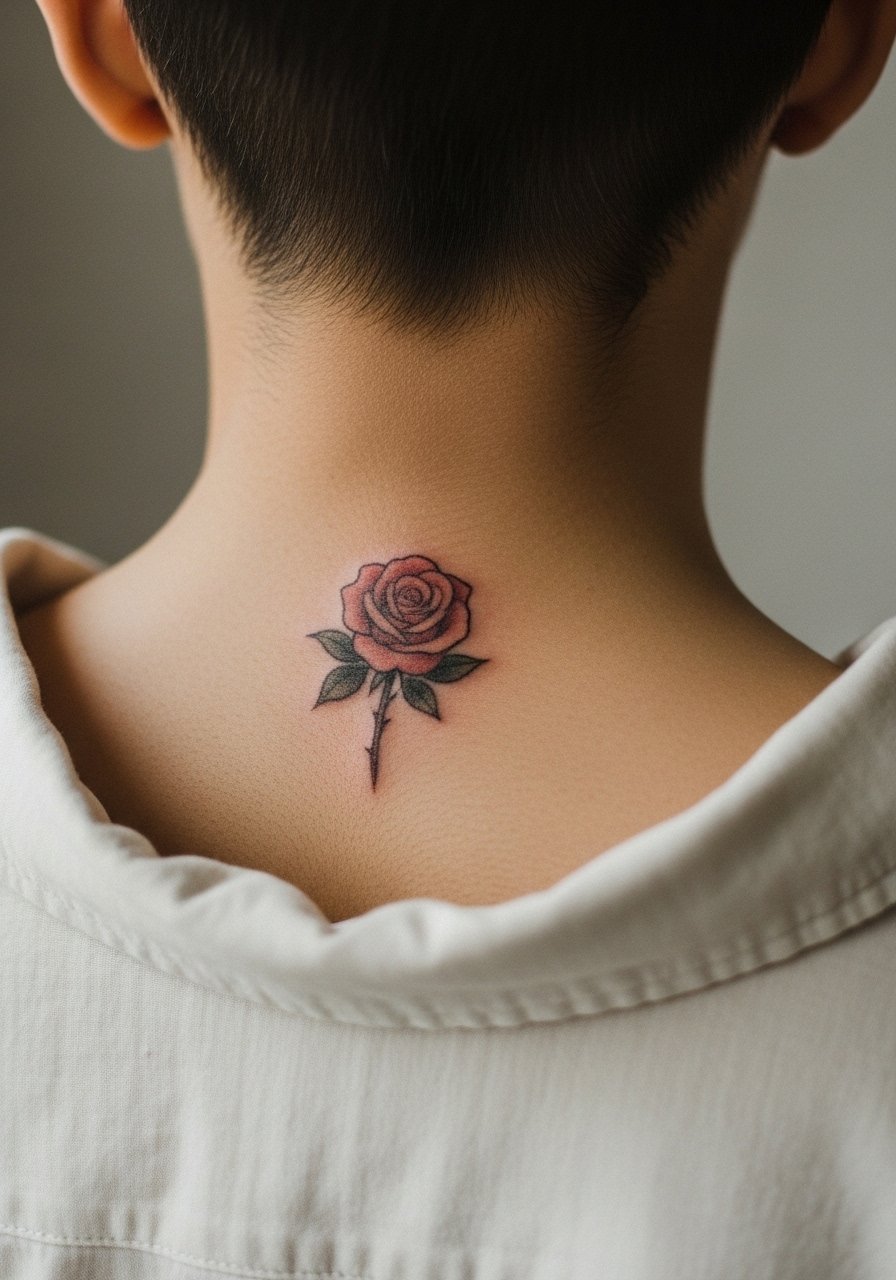
Back neck roses are discreet and vintage in spirit. Red pigments can heal differently depending on skin tone, so ask your artist about their experience with subtle red work on neck skin. The session can be quick but sensitive. People often underestimate how visible a neck tattoo is when hair is up. A low bun or a wide-neck top are good styling choices for evening looks.
18. Tiny Rose Cluster at the Inner Ankle
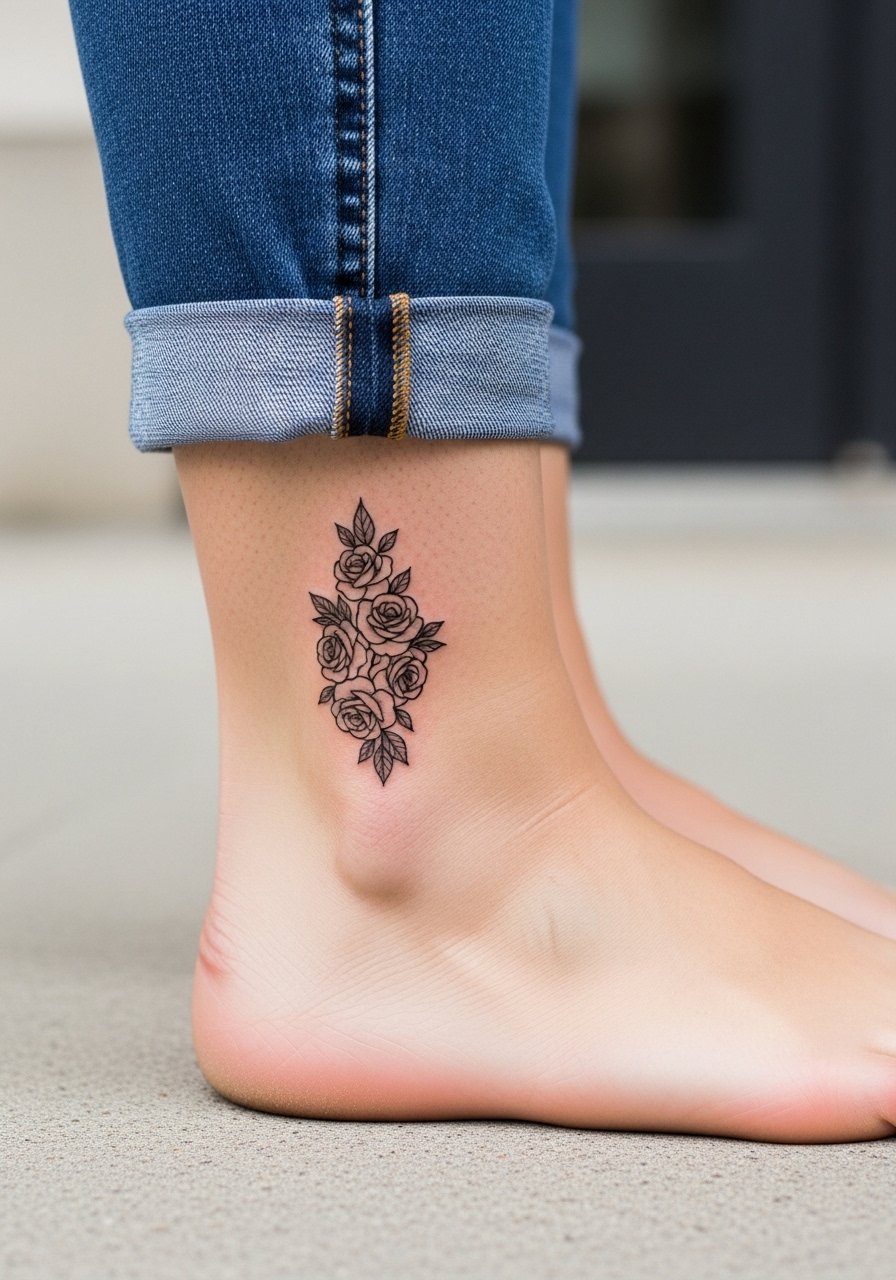
Inner ankle roses look delicate but face footwear friction and constant movement. A small cluster in a vertical layout helps distribute detail so nothing fights for space. The session is mildly painful and requires care with sock choice in the first week. For showing off pair with cropped pants or a loose slip skirt so the tattoo is visible in summer.
19. Tiny Rose with Script Stem on the Side Rib
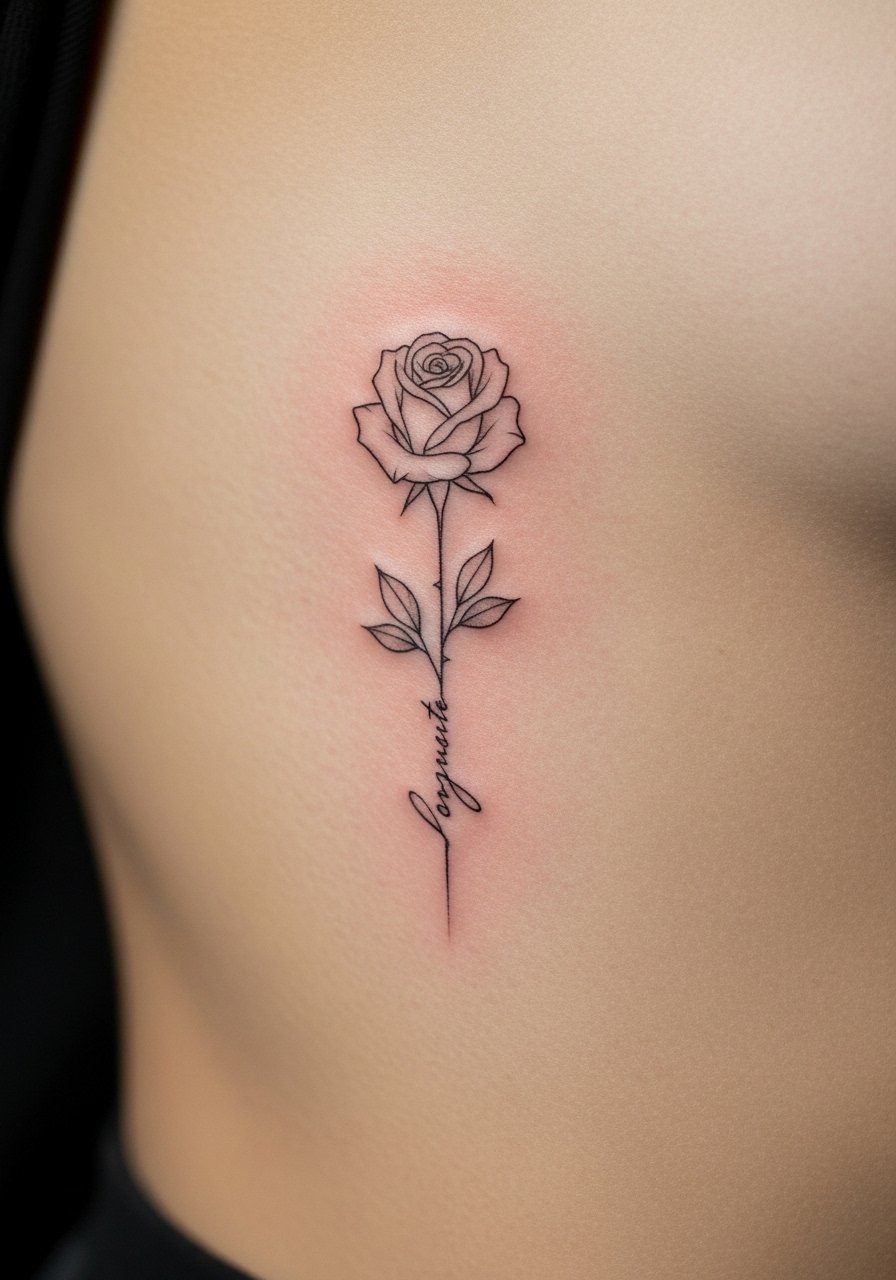
Combining script with a small rose can be effective but risky on the rib where breathing stretches letters. The aging risk is that thin script narrows and loses legibility. If you want words, ask for slightly wider letterforms and test the stencil while standing and breathing. Sessions can be more painful and require patience. Wear a cropped top for easy access on the day.
20. Tiny Rose on the Side of the Thumb
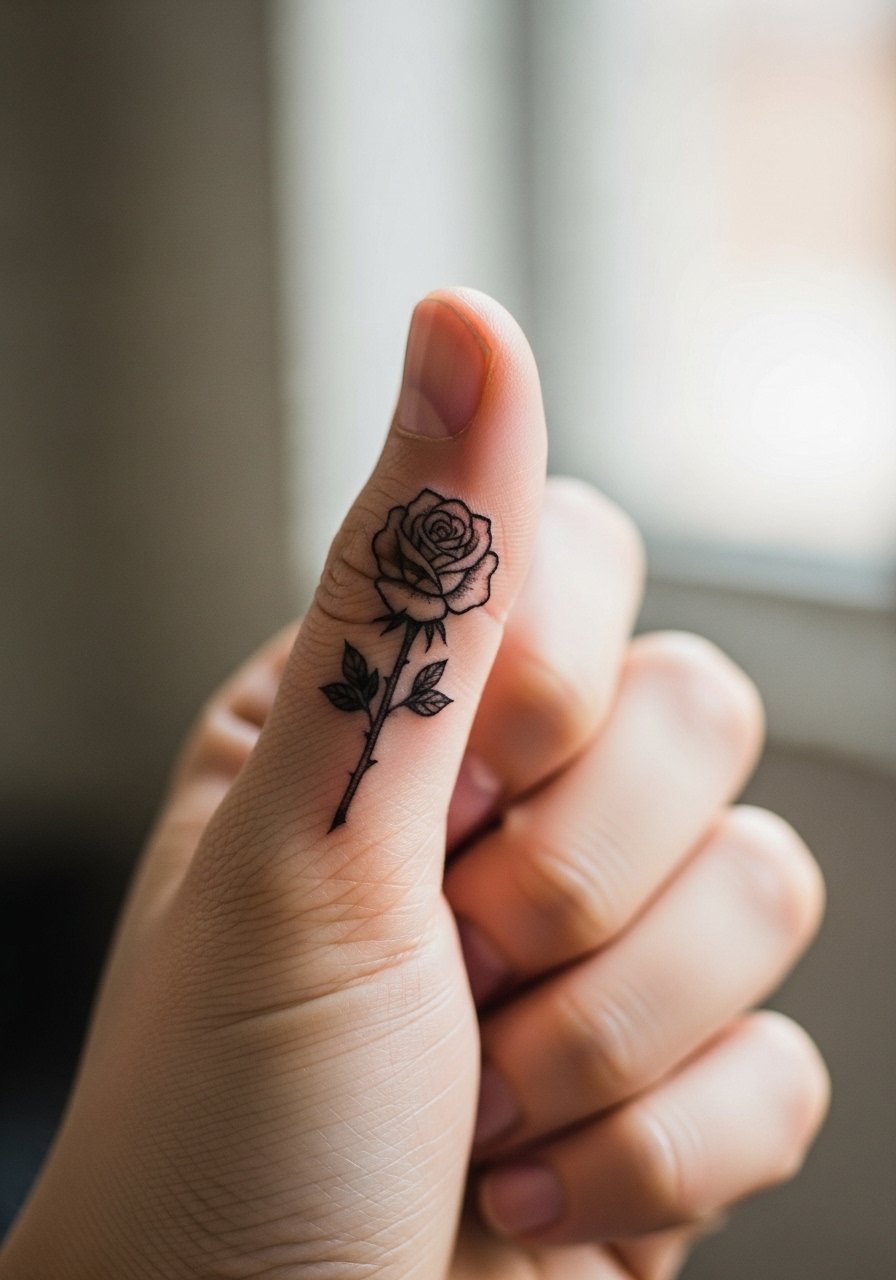
Thumb work falls into a high-wear category and often needs more frequent touch-ups. The common mistake is expecting a tiny, delicate thumbnail design to behave like one on the forearm. If you accept yearly adjustments, this placement can look charming and vintage. For early healing avoid ring or glove friction and keep the area dry while washing. Consider minimalist accessories that do not touch the tattoo.
21. Petite Rose with Dot Surround on the Upper Back
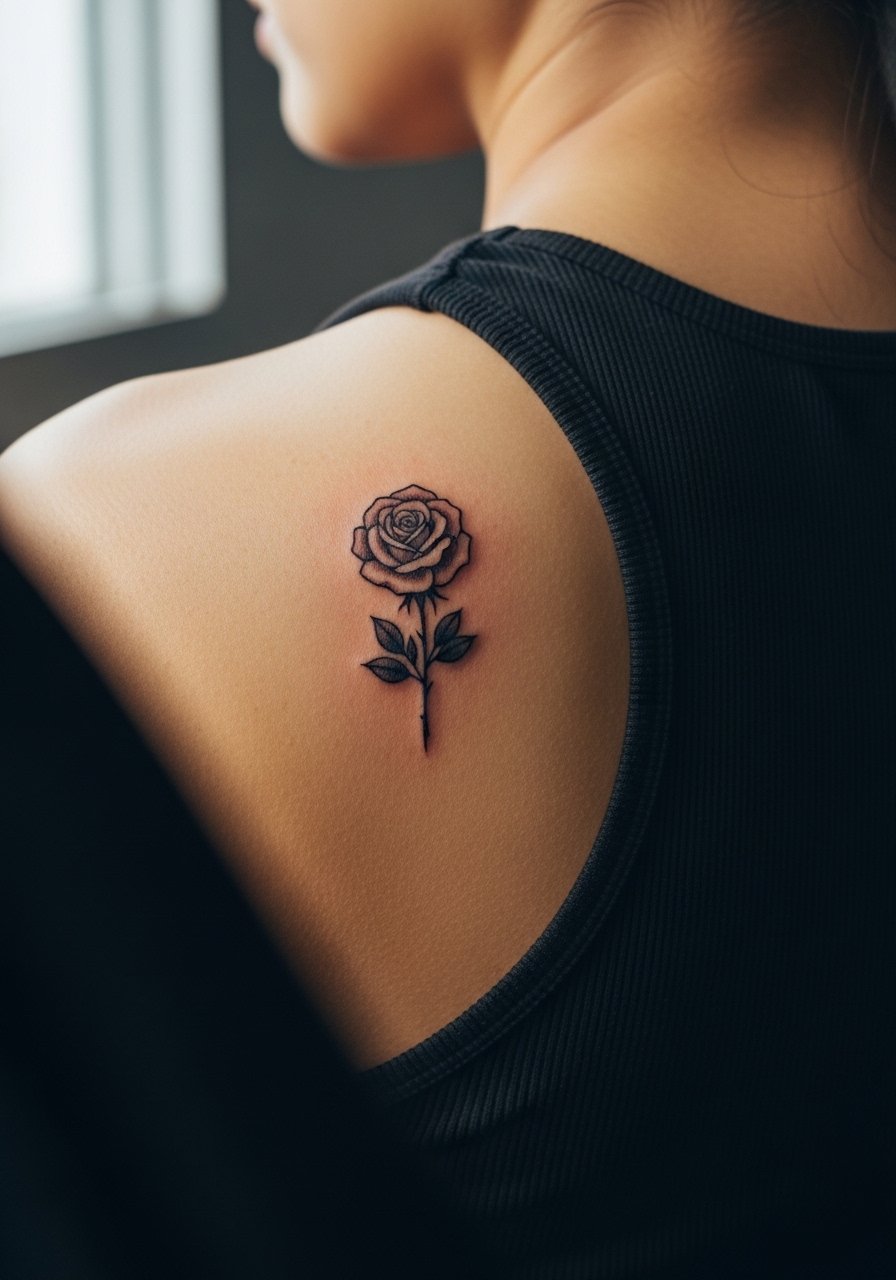
Upper back pieces sit flat and are low-friction, making them excellent for detailed small work. Sessions are relaxed and the skin type here preserves linework well. A mistake is overcomplicating the surrounding dots, which can crowd the rose. For showing it off choose tops with open backs or racerback styles that reveal the piece without sacrificing comfort.
22. Tiny Vintage Rose on the Inner Wrist Stack
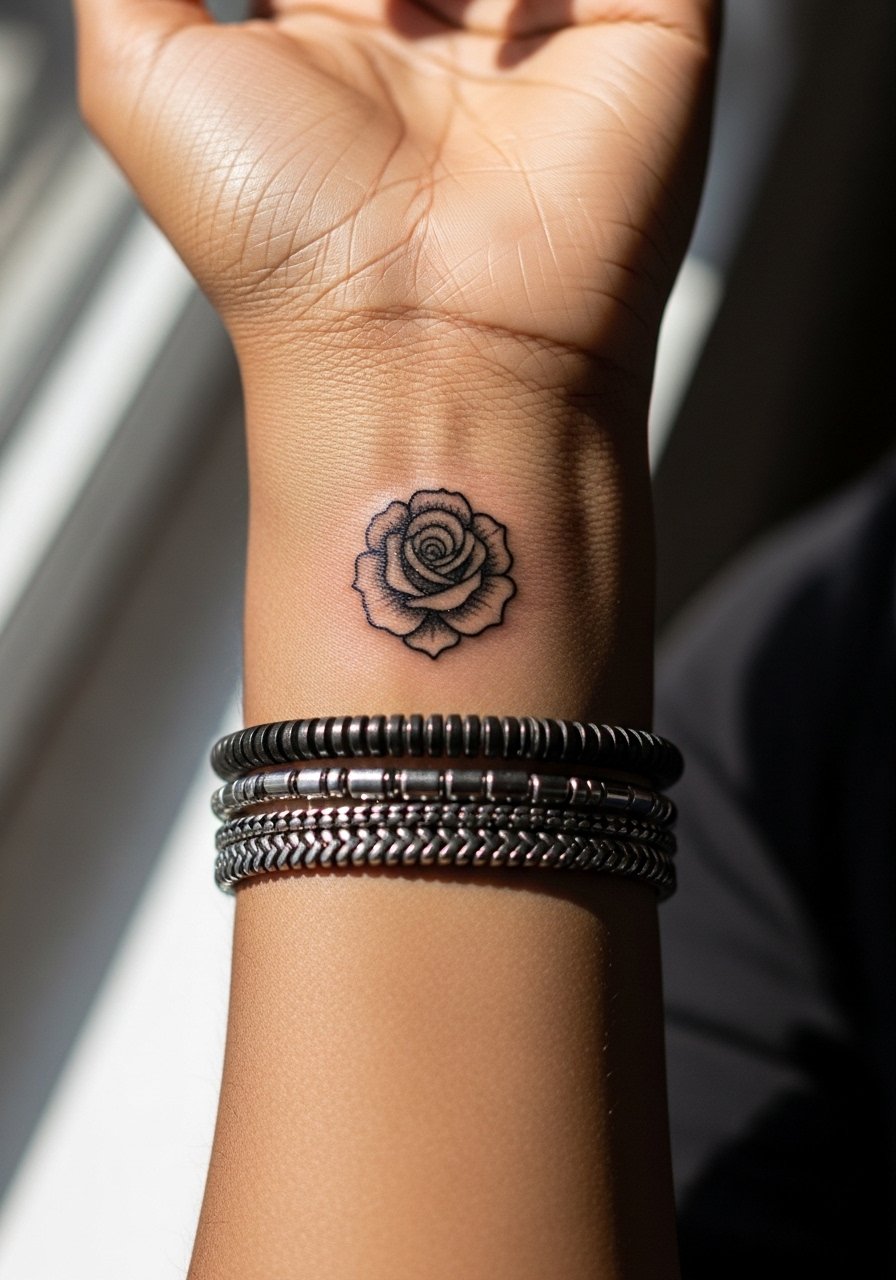
This classic spot sits well with stacked bracelet styling. To protect the rose, ask for slightly more space between petals and stems so the piece reads under daily movement. Sessions are short but the wrist heals under constant use. For showing the tattoo, choose a thin chain pendant or dainty bracelets that sit below the artwork rather than across it.
23. Small Rose Above the Elbow Crease
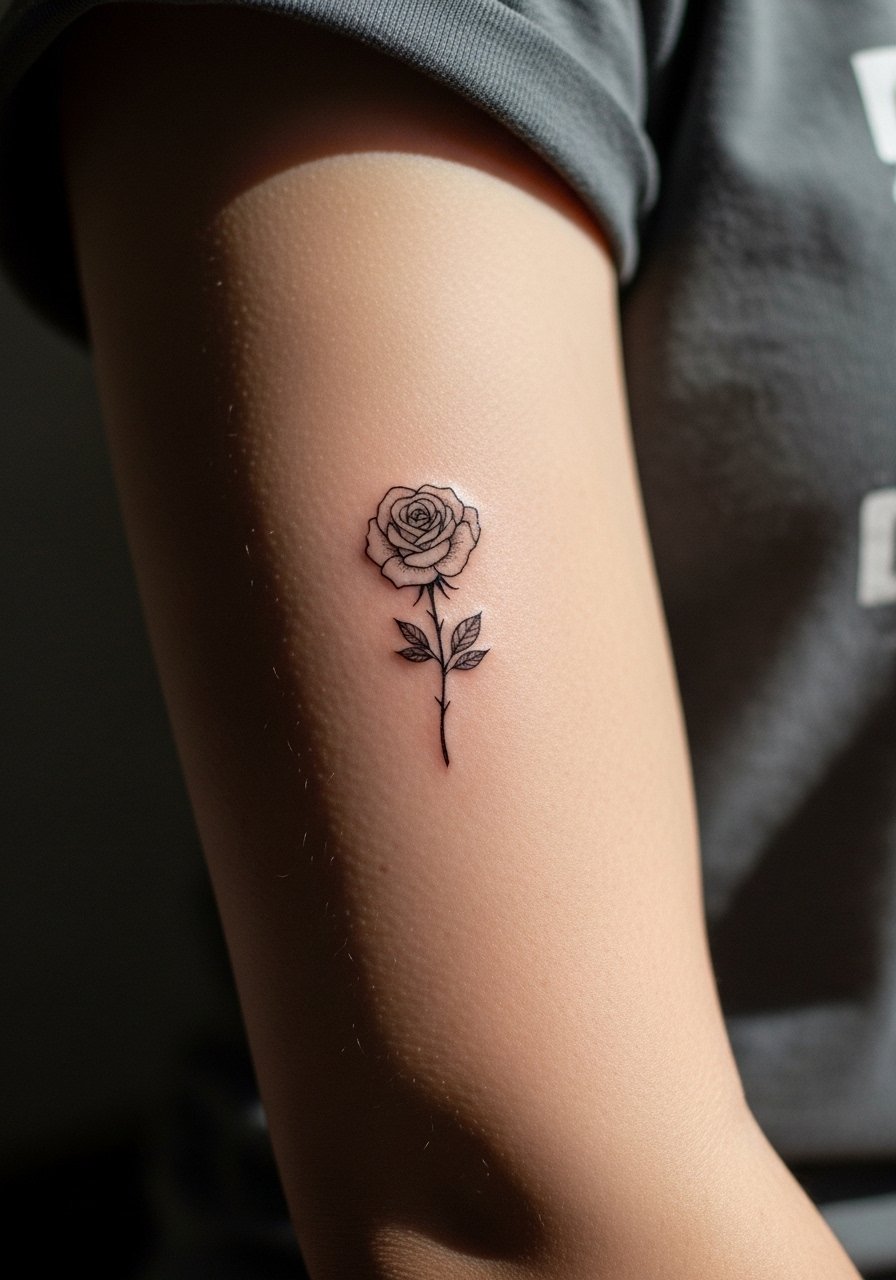
Placement above the elbow handles small designs well because the skin is less wrinkle-prone than the inner joint. Expect moderate session comfort. The typical error is asking for too much fine detail close to the crease, which can blur as the arm flexes. Wear a short sleeve that can be pushed up comfortably for both the appointment and the healing window.
24. Tiny Rose on the Side of the Calf with Vintage Leaves
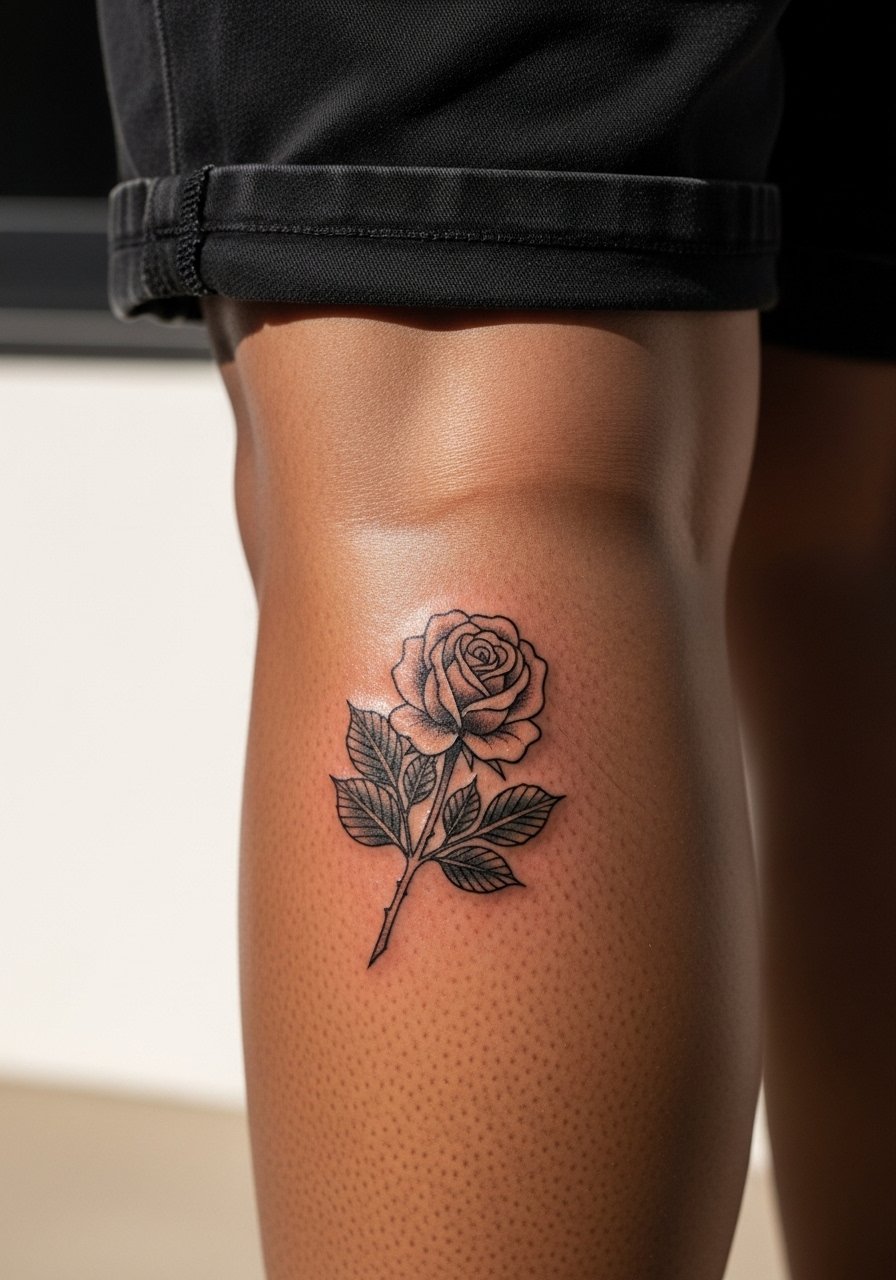
Side calf roses look graphic and vintage in profile. This area tolerates modest detail and keeps lines crisp. People sometimes crowd the negative space with extra dots or stars that distract from the rose. For summertime styling try cropped trousers or casual shorts so the piece is visible when you want it to be.
25. Tiny Rose on the Hip Bone Edge
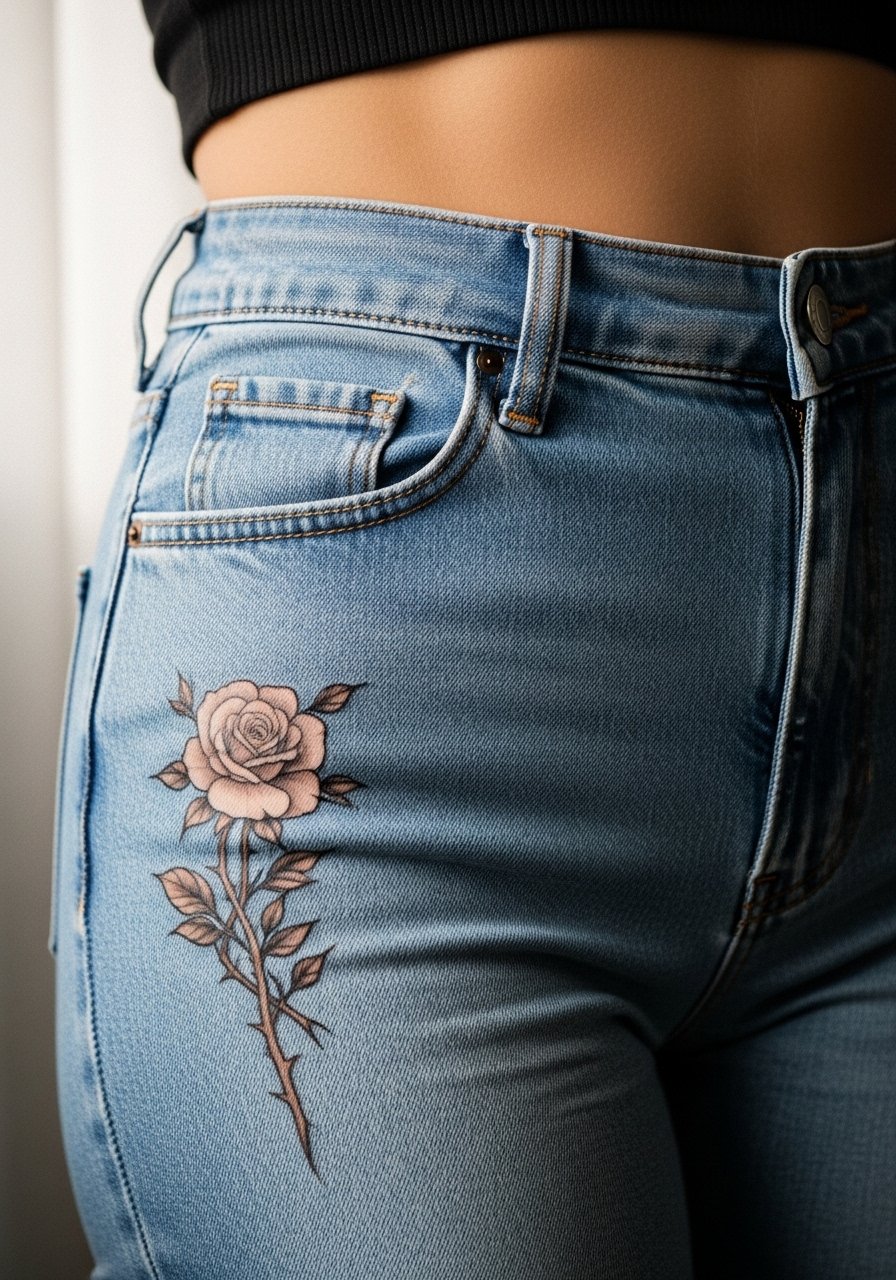
A rose that sits right on the hip bone edge has a vintage pinup feel. Friction from clothing is the main concern here, especially during the first week. Choose placement slightly away from the waistband seam and avoid tight belts while it heals. For showing off pick high-waisted pieces or swimsuits that frame rather than press on the area, like a high waisted bikini bottom.
26. Small Rose on the Side of the Eye Socket Area

Facial or temple work is highly visible and can affect job prospects in some fields. If you consider this placement, choose a minimal piece and plan for social and professional visibility. Sessions are short but sensitivity is high. Ask the artist about experience with facial skin and how they approach shallow versus deeper passes.
27. Petite Rose Cluster over the Collarbone and Shoulder Cap
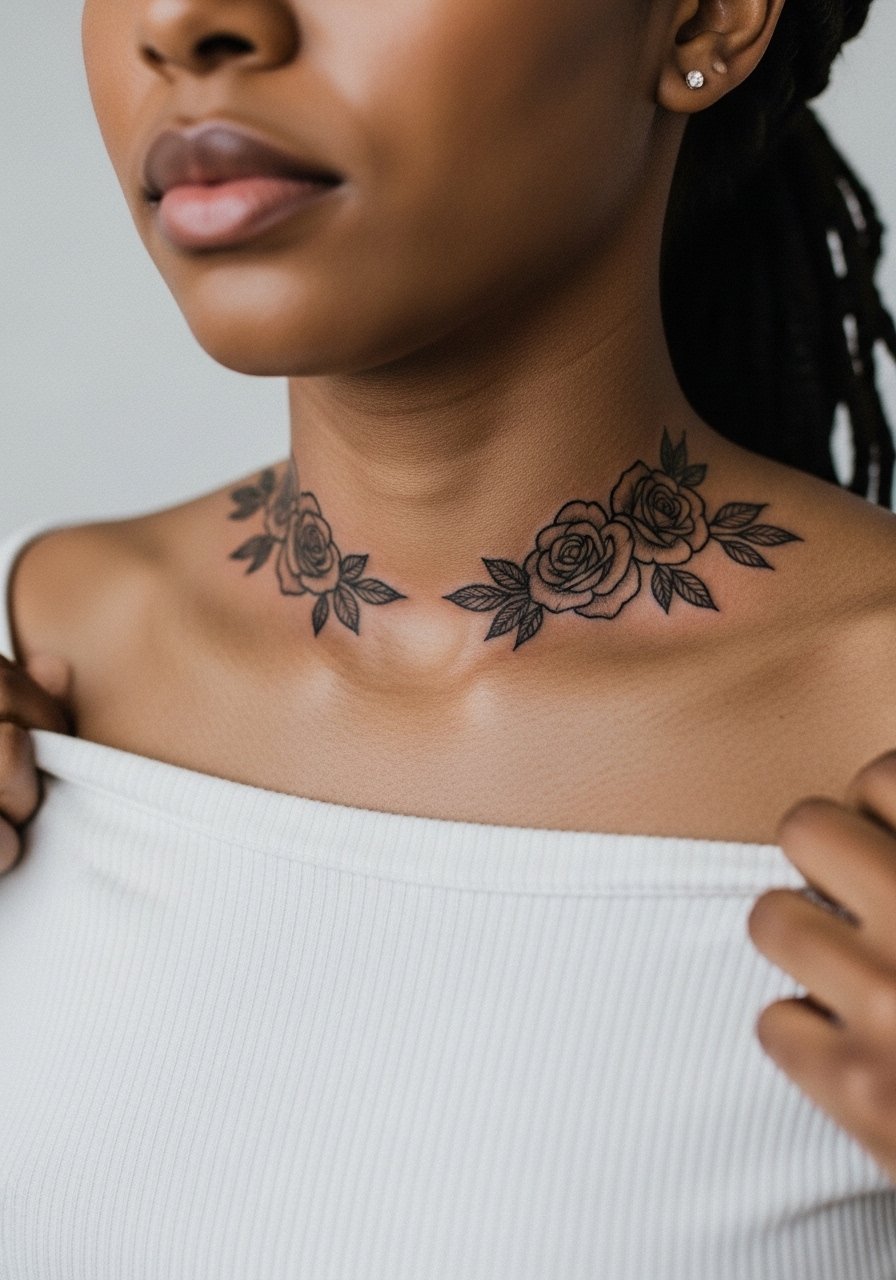
This little composition reads like a vintage etching when scaled correctly. The shoulder cap gives the piece motion and the collarbone pull adds an elegant line. A common mistake is packing too many blooms into a tiny area, which flattens the composition as it ages. For showing it off choose open-back dresses or wide-neck tops that let the spread read naturally.
Frequently Asked Questions
Q: Will fine line vintage roses blur faster than traditional styles on wrists or hands?
A: From what I have seen, fine line does blur sooner on high-wear spots like wrists and hands. Traditional thicker outlines and bolder saturation tend to age into clear shapes. If you love fine line, plan for touch-ups at year two to three and ask your artist about slightly heavier outer strokes to protect the petals.
Q: How should I dress for a sternum or ribcage session to make the appointment smoother?
A: Wear a fitted sports bra or a cropped top you can lift slightly so the artist has clean access without full exposure. A loose zip-up jacket to keep warm between passes is also handy. For showing the healed piece later consider tops with open backs or a wide-neck blouse that frames the area.
Q: Are there clear rules for where dot work or stipple shading holds up best?
A: Stipple shading holds up better on areas with less movement and thicker skin, such as the outer forearm, shoulder, and calf. It tends to compress on soft, constantly moving skin like the inner bicep or stomach unless the artist spaces dots with long-term settling in mind. Ask about spacing and depth so the stipple pattern has room to age.
Q: If I want a vintage look but low maintenance, which placements should I favor?
A: Favor low-friction areas like the outer shoulder, upper back, and calf. These spots preserve linework and shading with minimal touch-ups. Avoid hands, fingers, and high-friction waistlines if you want low maintenance long term.
Q: How do I find reliable reference images and artists for vintage small rose work without using social handles?
A: Search community tags and directories such as #vintagerosetattoo and browse tattoo directories for portfolios under vintage or small-floral categories. Also check local shop websites and visit a few studios to look at healed photo books and flash walls in person.
