
Fine line and wash trends look incredible on a saved mood board, but the reality in the chair and two years out is different. Watercolor pieces can fade faster on tanned skin, large back work drags healing into sweaty summer problems, and last-minute guest-spot cancellations wreck timelines. I’ve seen those issues across five shops in three cities, and this list favors watercolor angel ideas that balance the look you want with real-world longevity, session wear, and showing-off fits.
1. Watercolor Guardian Wings on Outer Forearm
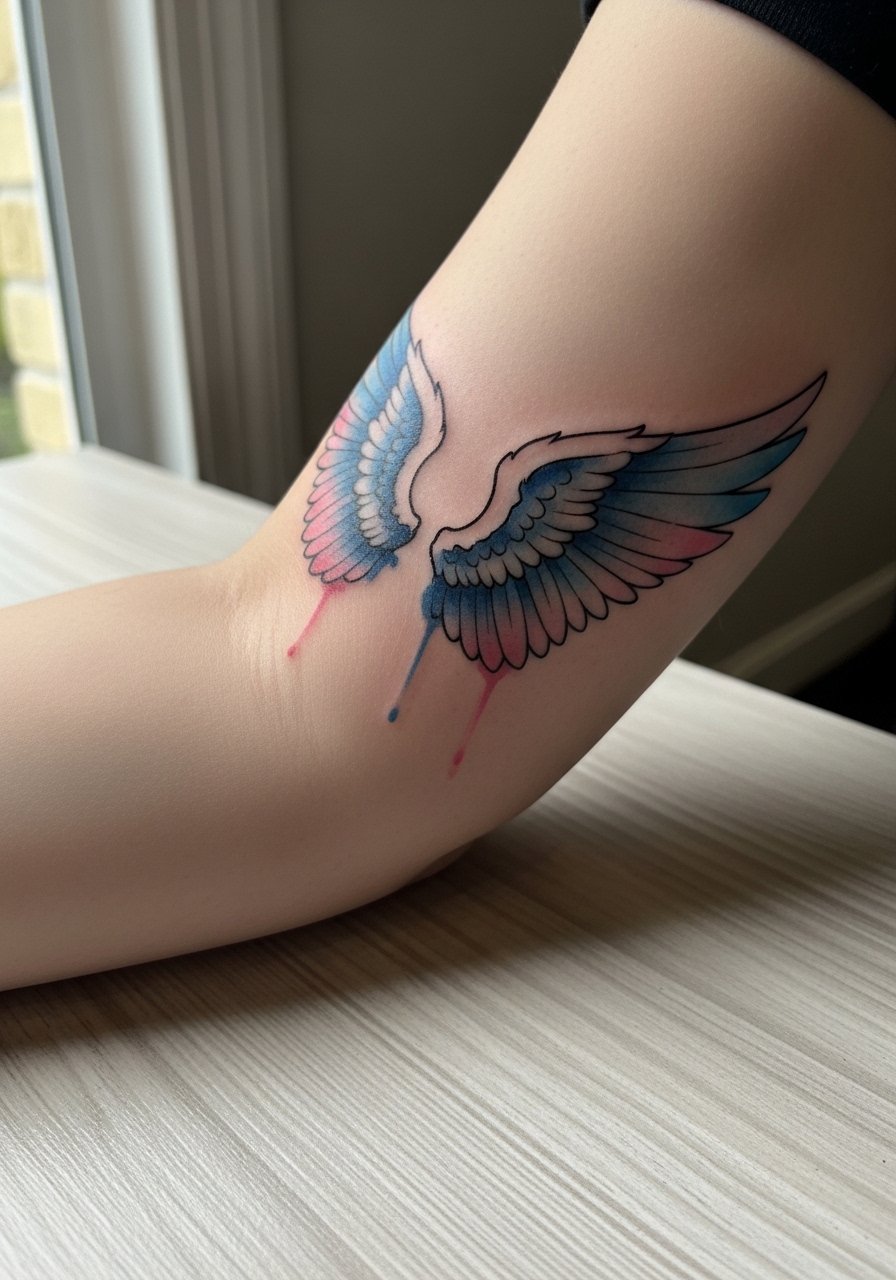
I’ve watched this forearm wing style age better when artists add a thin anchor outline that keeps the washes readable over time. Forearms are low on blowout risk if you avoid overly dense stipple next to thin linework. Tell your artist you want soft gradients with a faint structural outline and ask for a plan for touch-ups at year three. Pain is usually mild, session time is one to two hours for a 4 to 6 inch piece, and wear a loose fit tank top to the appointment so the sleeve does not rub the fresh ink.
2. Neo-Traditional Fallen Angel on Upper Chest

Chest pieces work well with bold outlines and watercolor splashes behind them so the main form stays readable as the washes soften. Expect moderate pain and a multi-session plan for a 6 to 8 inch upper chest piece. In consultation ask for saturated black outlines with color fills layered subtly to avoid early fading. For showing it off, pair with an open button-down shirt or a fitted white tee with the collar open. A common mistake is asking for pastel-only color with no outline, which tends to disappear first on warmer skin tones.
3. Halo-and-Wings Sleeve Start, Inner Bicep to Forearm
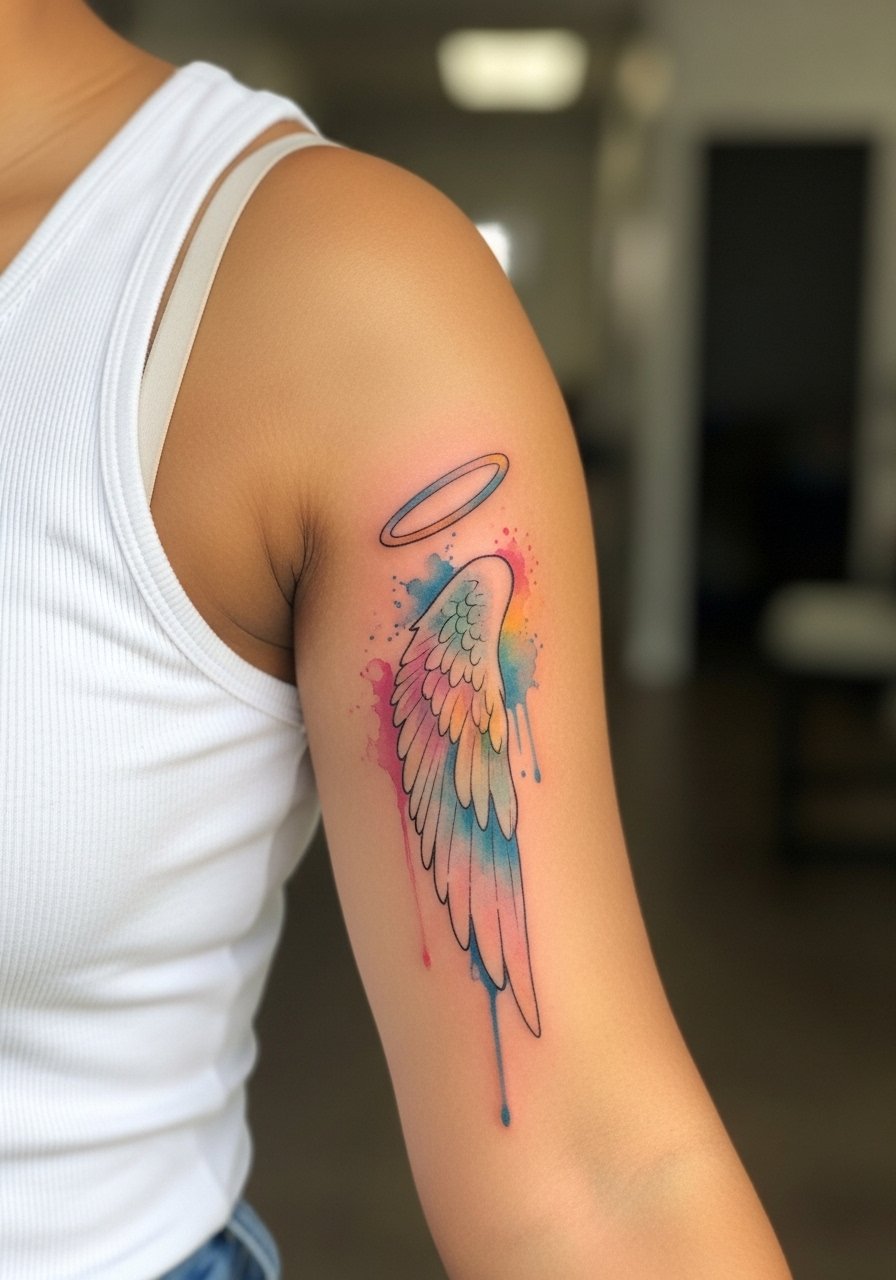
Sleeve starts are worth doing as a buildable commitment. I recommend a watercolor-neo hybrid that uses gentle outlines where the arm curves, so future pieces can stitch together without muddying. Sessions are longer and many artists will plan four or more sittings for a half-sleeve. Controversy exists about long-term fade versus structural longevity. One camp favors pure watercolor washes for the look. The other camp says adding outlines preserves clarity. Ask your artist which approach they lean toward and plan touch-ups two to three years out. For the session wear a loose tank or button-down so the artist can work the inner arm without fabric friction.
4. Minimalist Watercolor Angel Outline on Shoulder
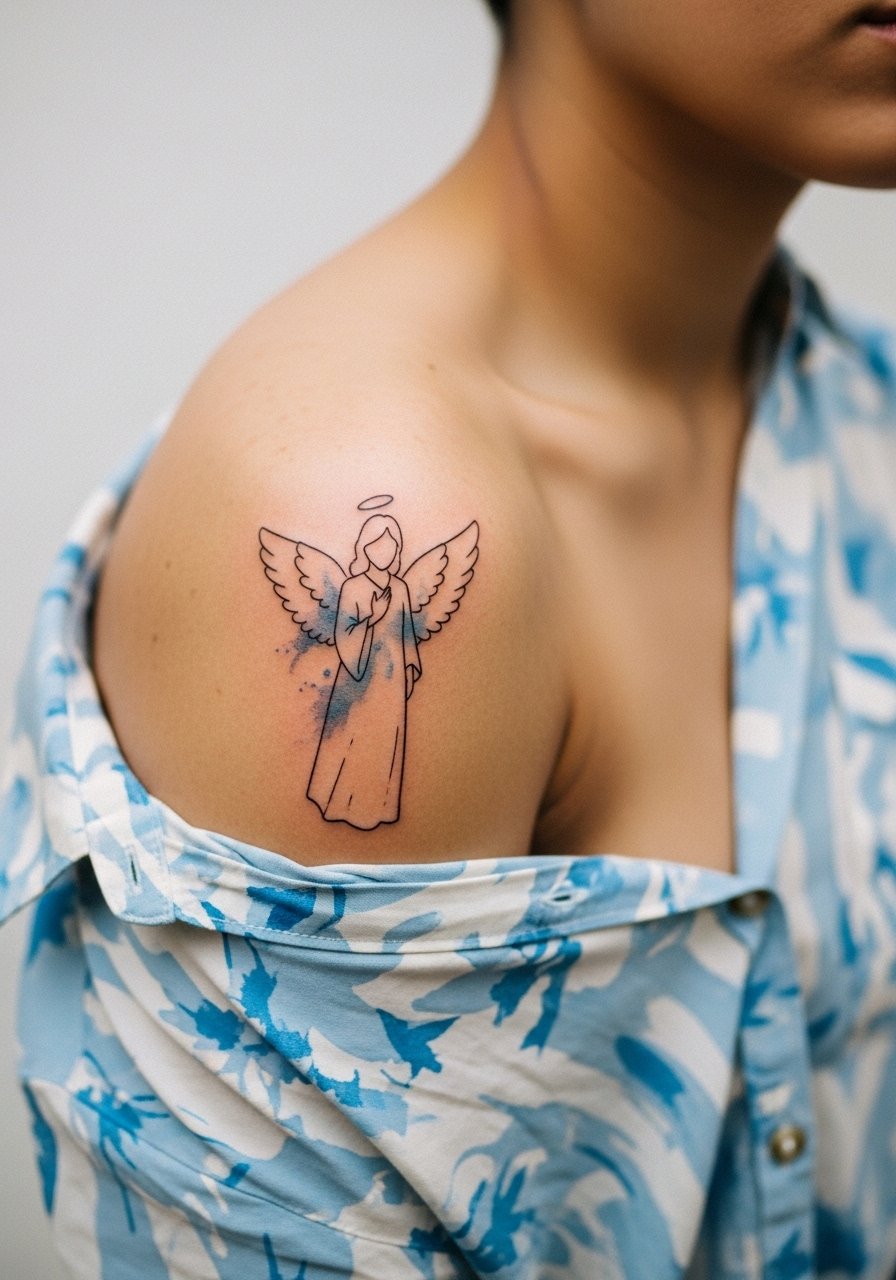
Shoulder pieces are a classic first-timer choice because they hide well and age predictably when kept simple. The biggest mistake is making the wash too soft and the outline too thin. Ask for a slightly stronger lineweight and a faint blue wash that stops short of the edge. Expect one session, low to moderate pain, and a touch-up maybe at year four for faint areas. Show it with a men's sleeveless muscle tee for evenings when you want the shoulder visible. For the appointment bring a loose short-sleeve button-up you can pull aside.
5. Realistic Watercolor Angel Face on Upper Back
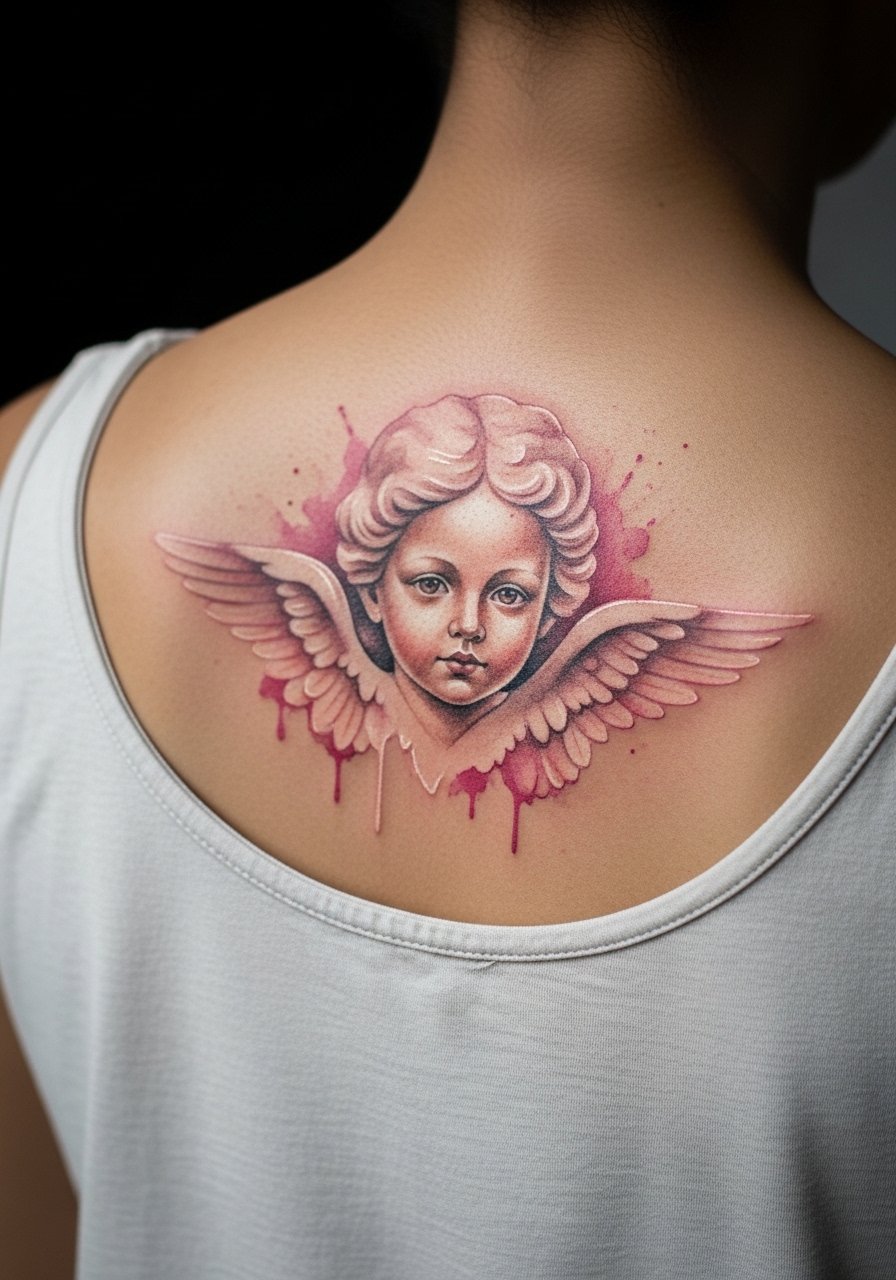
Large back portraits look remarkable when artists use skin-tone layering rather than only saturated color. Expect more sessions and longer healing windows. One common error is choosing too small a scale for a face, which loses expression as it heals. Ask for a 8 to 10 inch layout and plan for three to five sessions. For session comfort wear a loose tank top and bring a soft pillow for the chair. If you are booking for summer, account for sweat during healing by avoiding tight backpacks and switching to breathable wraps during the first week.
6. Traditional Angel with Watercolor Background on Outer Thigh
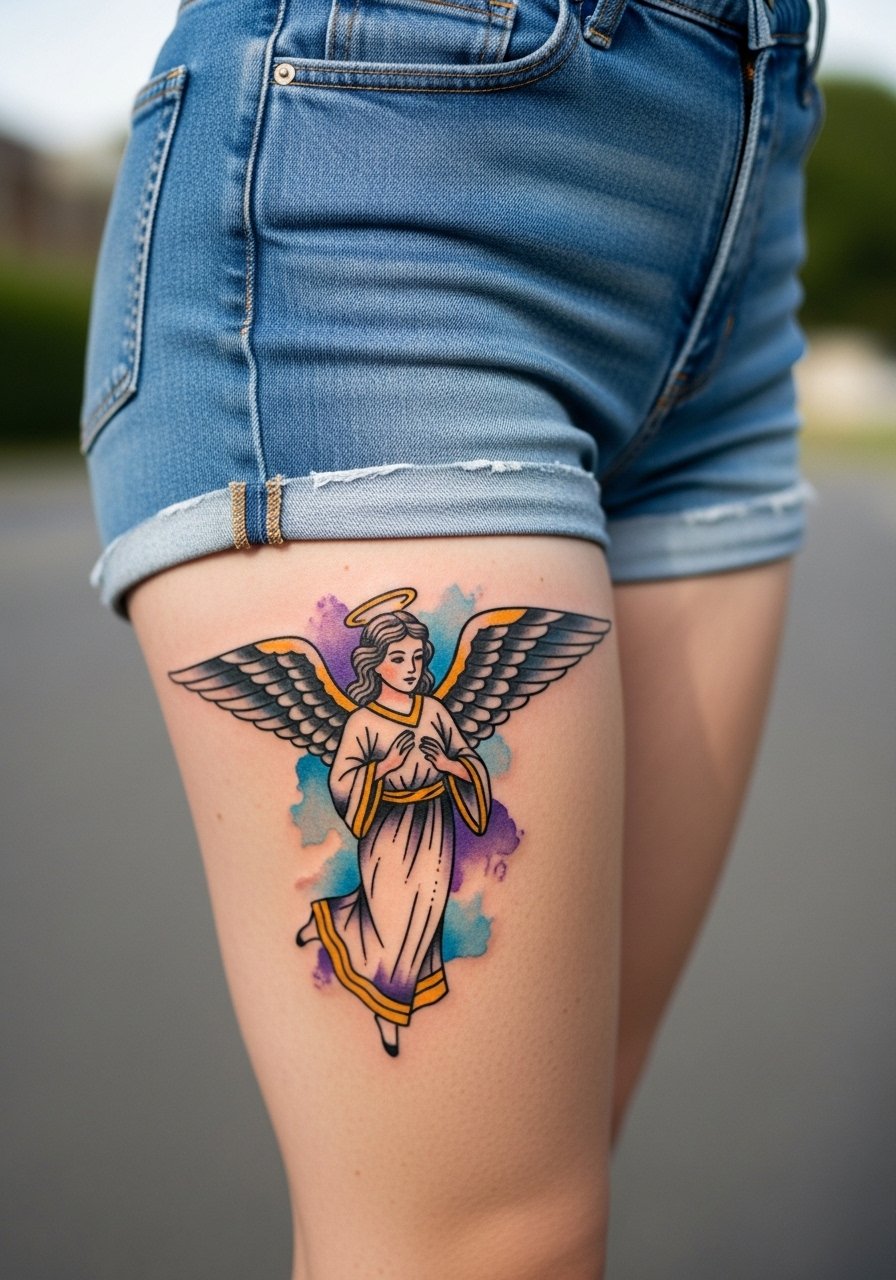
Thigh placements are forgiving during healing because you can control coverage and avoid friction. For active men who train a lot, ask for placement away from seams and for the artist to keep the bold outline clear so the wash reads after movement. Expect two sessions for a 5 to 7 inch piece and moderate pain. Wear loose gym shorts to the appointment so there is no tight elastic against the fresh ink. A frequent mistake is picking a spot too close to the groin where chafing becomes an issue.
Pre-Session Essentials
The forearm, chest, sleeve, shoulder, back, and thigh pieces above all ask for slightly different prep and a couple of smart products smooth the chair day and the first week.
-
Stencil transfer paper kit. Lets you preview the exact placement on skin before the needle goes down, which is helpful for forearm and chest pieces.
-
Topical numbing cream. Applied per instructions takes the edge off high-sensitivity areas like ribs and inner bicep during longer sessions.
-
Thin protective film roll. Keeps thigh and back work clean during the first days when clothing friction is most likely.
-
Fragrance free gentle body wash. Cleanses healing areas without stripping color on large watercolor backgrounds.
-
Aquaphor healing ointment. Thin layers in the earliest days lock in moisture for delicate washes without suffocating the skin.
7. Geometric Watercolor Wings on Calf
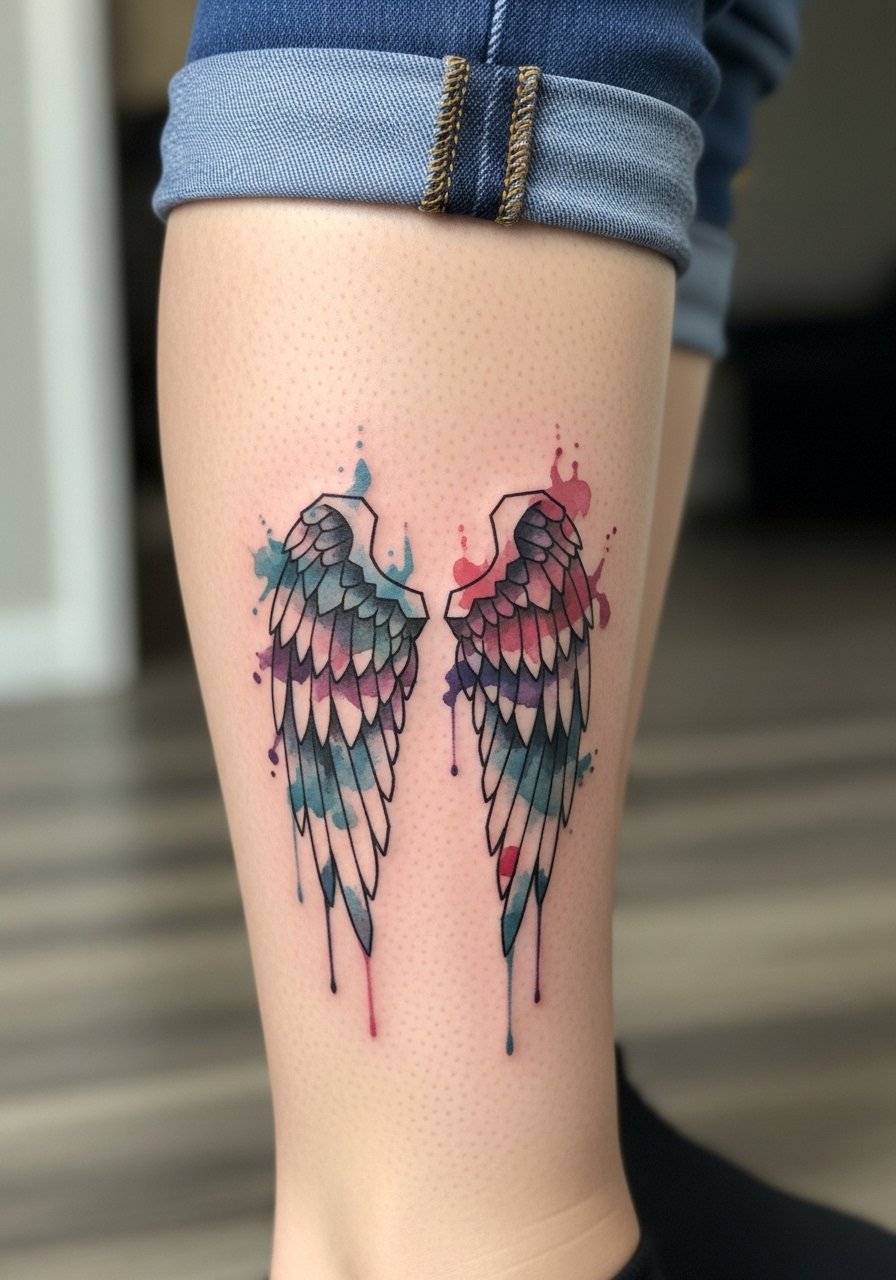
Calf placements suit geometric wings because the muscle gives a vertical canvas and reduced blowout risk. The main mistake is scaling the geometry too small. Ask for enough negative space between lines so the shapes do not merge as the ink settles. Sessions typically run one to two hours, pain is moderate, and touch-ups may be needed at year three if you want the colors refreshed. Roll your joggers up and wear canvas boat shoes or sandals to the session for easy access.
8. Blackwork Angel Silhouette with Watercolor Halo on Ribcage
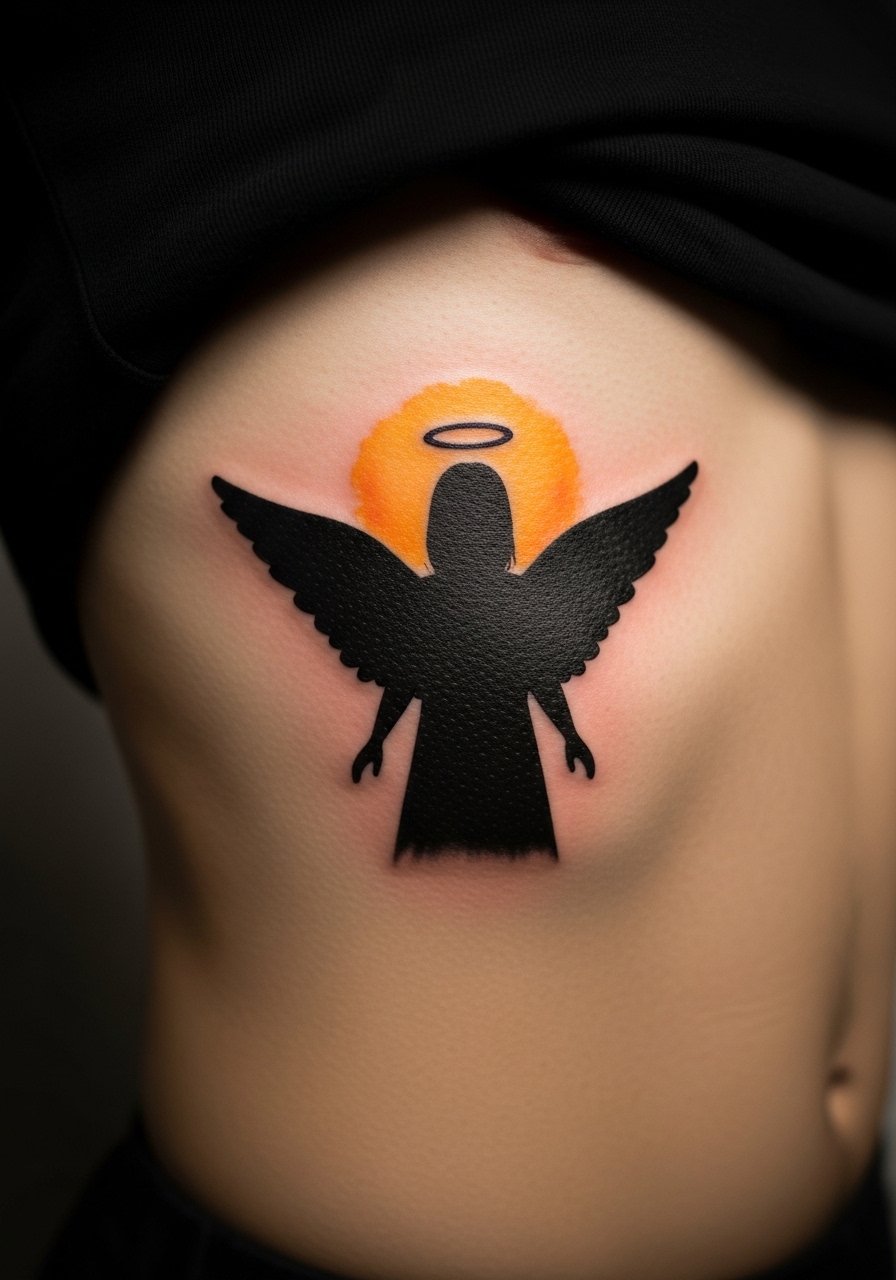
Fair warning, ribs are one of the higher pain spots. This silhouette approach pairs dense black form with a colored halo so the silhouette remains legible as the wash softens. There is a clear split in artist opinions about fine line work on ribs. One camp says the skin there stretches and fine lines blur fast. The other camp argues that with correct depth and spacing fine line settles fine on ribs. Ask the artist which method they prefer and plan for a touch-up timeline at year two or three. For the session wear a loose side seam shirt that you can pull aside easily.
9. Ornamental Watercolor Cherub on Side Neck
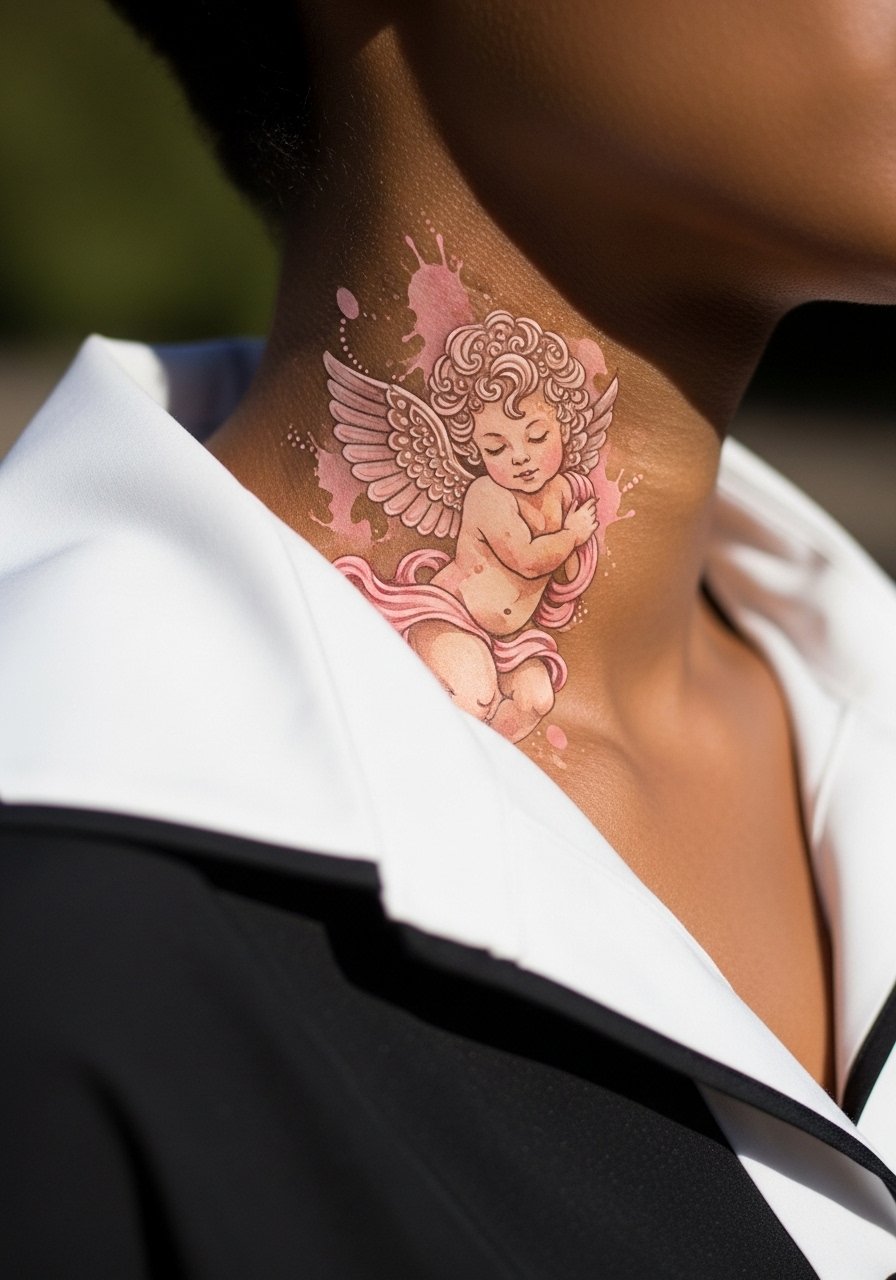
Neck pieces attract collectors but they are intimate and often visible to employers. This ornamental cherub works best in a small 3 inch scale with crisp linework and soft color fills. Pain is moderate to high depending on placement. During consultation ask for slight patterning around the cherub so it reads from a distance. For show-offs pair with a wide-neck shirt that frames the side neck. Consider career visibility before booking.
10. Ignorant Style Angel Skull Fusion on Inner Forearm
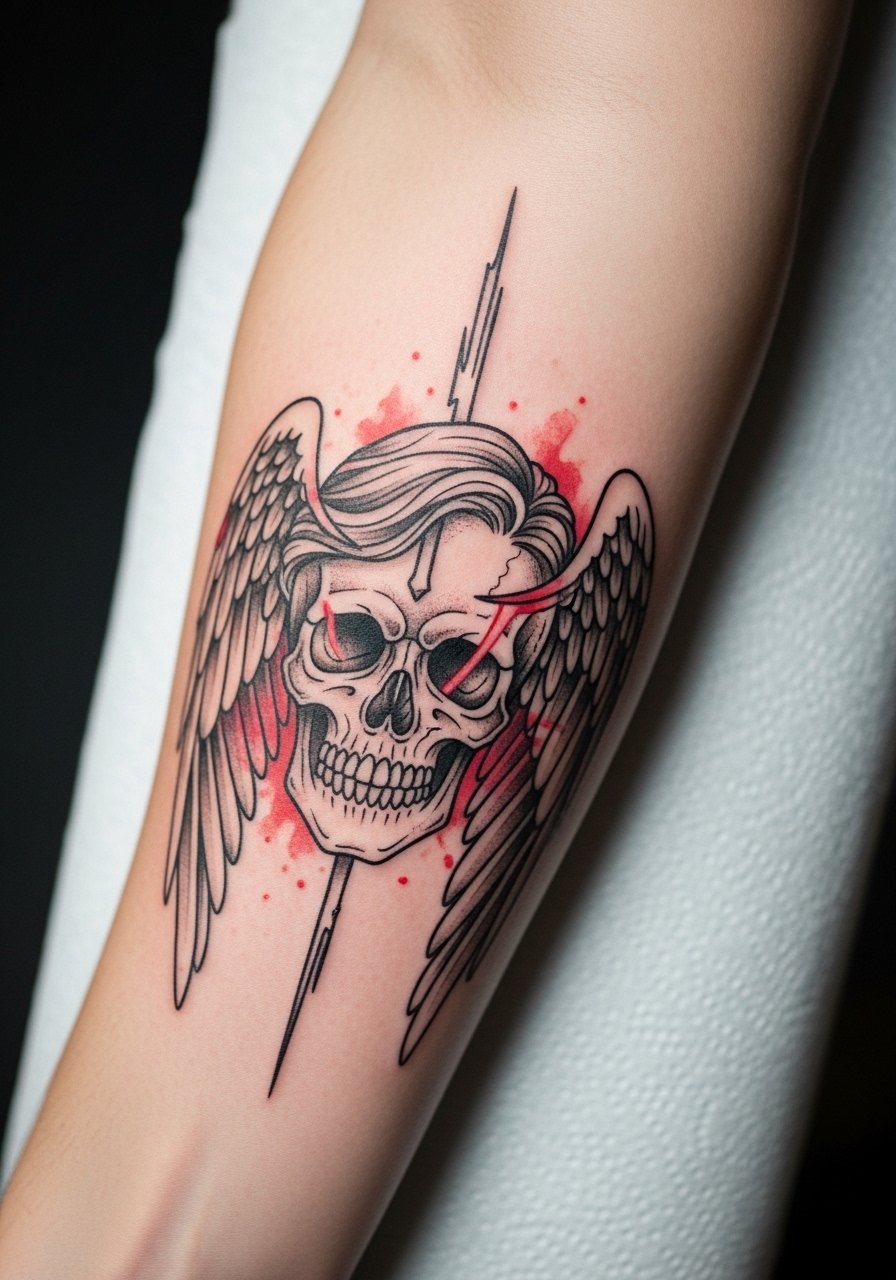
This rough, high-contrast fusion favors bold brushy strokes mixed with washes. The inner forearm offers easy display and moderate pain. A common mistake is over-detailing the skull portion which clashes with the ignorant style mark-making. Tell your artist you want the skull suggestion to read from a foot away and that the watercolor splashes remain loose. Sessions are two to three hours depending on size, and wear a loose fit tank so sleeves do not rub during the first week.
11. Tiny Halo Outline on Ankle

Ankle tattoos take light impact but face heavy friction from socks and shoes. The mistake people make is choosing ultra-thin single lines without allowance for touch-up. Choose a slightly bolder outline and plan for a touch-up at year two for a tiny 1 to 2 inch halo. Pain is low to moderate, and session time is short. For the appointment wear pants you can roll up and shoes you can slip off easily. Pair the look afterward with rolled joggers or sandals to show it off.
12. Micro-Realism Inner Bicep Angel
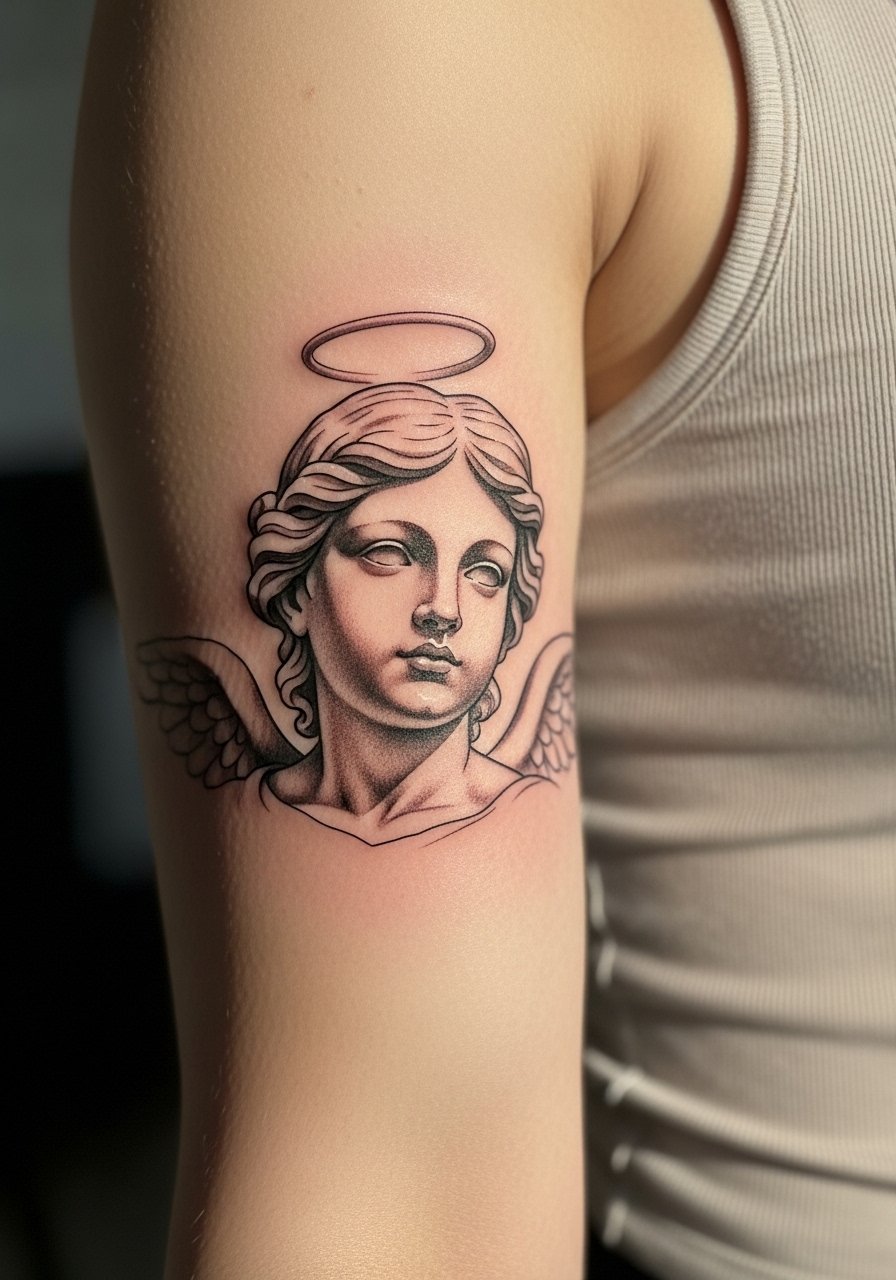
Inner bicep work is a hiding spot that looks striking and personal. The caveat is more sensitivity in that pocket and a bit more time to stay still. A common error is picking overly nuanced facial detail for a small size. Ask for the main planes of the face to be prioritized and expect a one to two hour session. Bring a loose tank top so the artist can position the arm comfortably. Healing looks different at six months versus two years because subtle shading can soften.
13. Small Ornamental Back-of-Neck Guardian
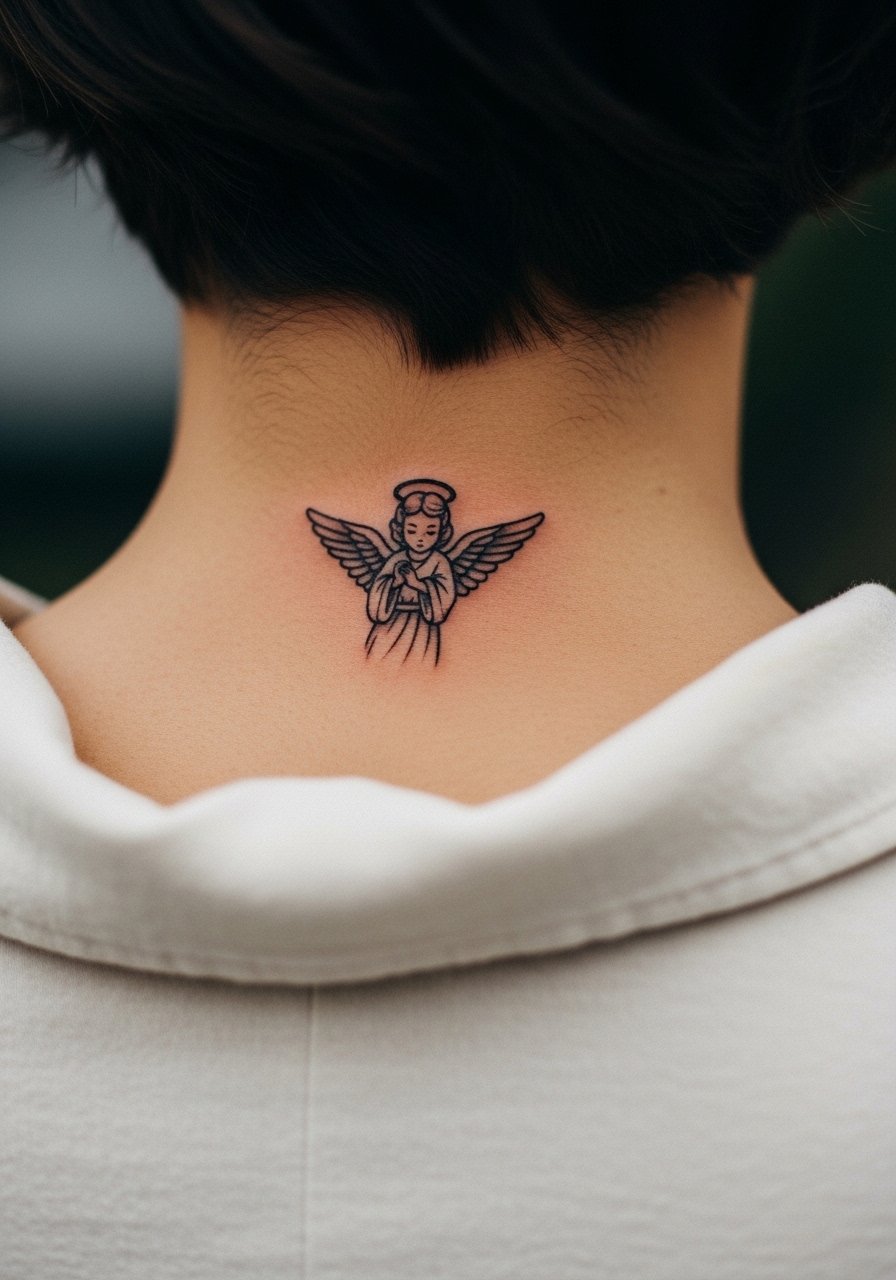
Back-of-neck pieces are discreet and easy to hide under collars. Keep this small and graphic so the wash does not bleed into surrounding hairline areas. Pain is low to moderate and session time is short. A mistake is requesting dense stipple that looks muddy as hair grows. Ask for clear spacing and a color accent rather than full washes. For show-offs keep a couple of shirts with wider collars when you want to reveal the spot.
14. Patchwork Sleeve Start with Angel Motifs
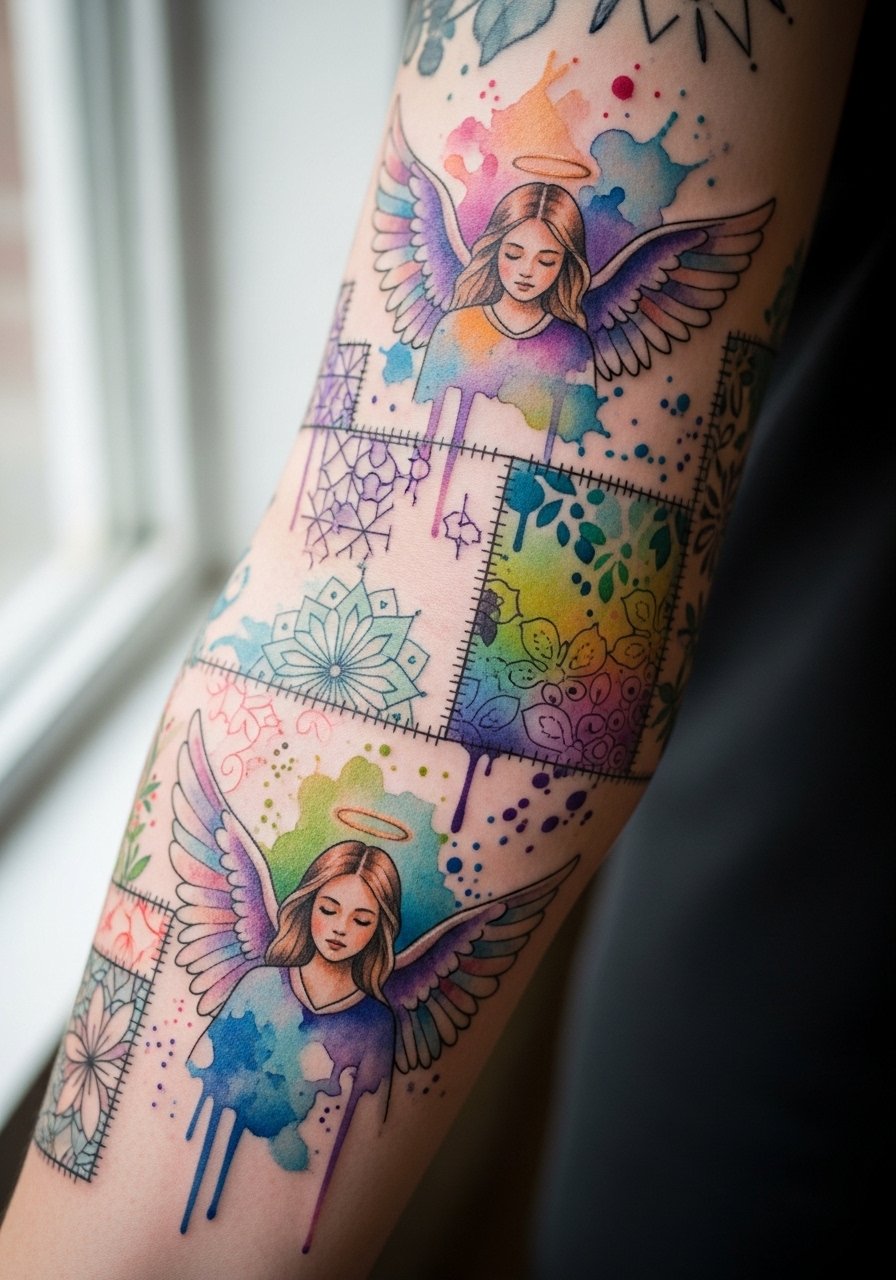
Patchwork sleeves let collectors build slowly and avoid the regret of a single full-piece commitment. The key is requesting consistent color language so future pieces do not read disjointed. Sessions are modular and typically planned over many visits. A common error is mixing unrelated palettes that clash as they age. During consultation ask the artist to sketch a palette guide. For the session wear a loose button-down shirt you can roll easily and a thin leather cuff pairs well for showing off the forearm.
15. UV-Reactive Watercolor Angel for Darker Skin Tones

This is an under-covered option that adapts watercolor for darker skin with UV-reactive highlights for nightlife visibility. Ask an artist experienced with pigments on darker complexions and request test patches if possible. Expect similar pain to other arm placements. The main mistake is expecting neon brightness in daylight. Instead plan subtle reflective accents that glow under blacklight. For the session wear a loose tank so the area is fully accessible.
16. Sternum Micro Halo Above the Fitted Sports Bra Line
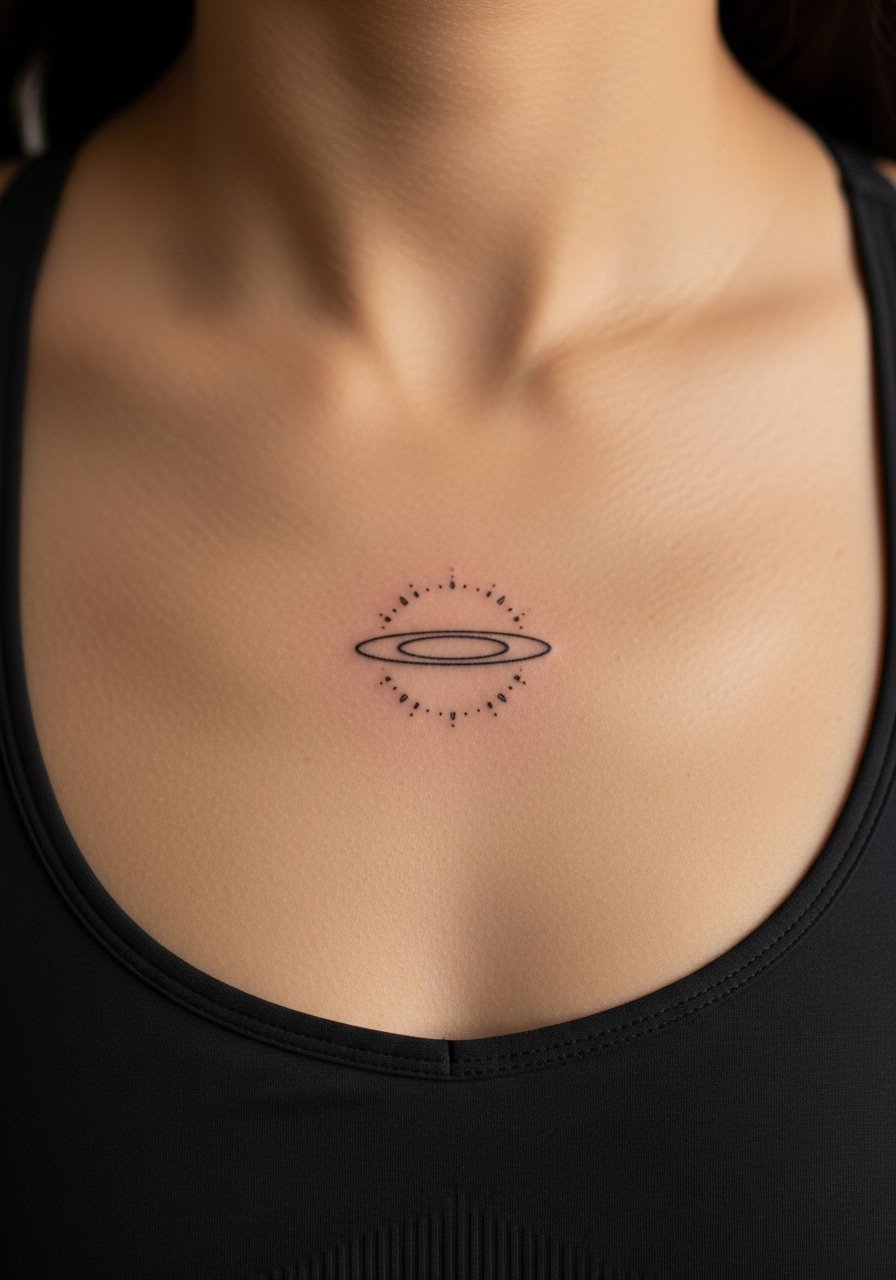
Sternum pieces need a specialized approach because of curvature and sensitivity. Always present the piece with fabric boundary so artists can judge placement. This spot is higher on the pain scale for many. A frequent mistake is choosing dense color on this flat plane which distorts with body movement. Keep the halo small, favor single-session work, and wear a fitted sports bra to the appointment. Career or public visibility is a consideration here.
17. Lower Back Angel Tailpiece

Lower back work reads well with flowing watercolor backgrounds and bold anchors so the form remains clear. Avoid full exposure in images and in the session wear a tank so only the area is revealed. The main mistake is placing the focal point too low where clothing rub can cause irritation during healing. Plan session timing to avoid heavy activity for a week. For showing it off wear a tank and high-waisted jeans with a low belt if you want the piece visible.
18. Calf Band of Angel Feathers

A calf band reads well on athletic builds and is low on blowout risk. Problems arise when feather details are too fine and placed too close. Ask for slightly broader barbs and clear spacing. Sessions are one to two hours and pain is moderate. Roll your pants up and wear no show socks or sandals to the appointment. For daily wear joggers rolled up frame the band best.
19. Concealed Thigh Memorial Angel with Family Crest
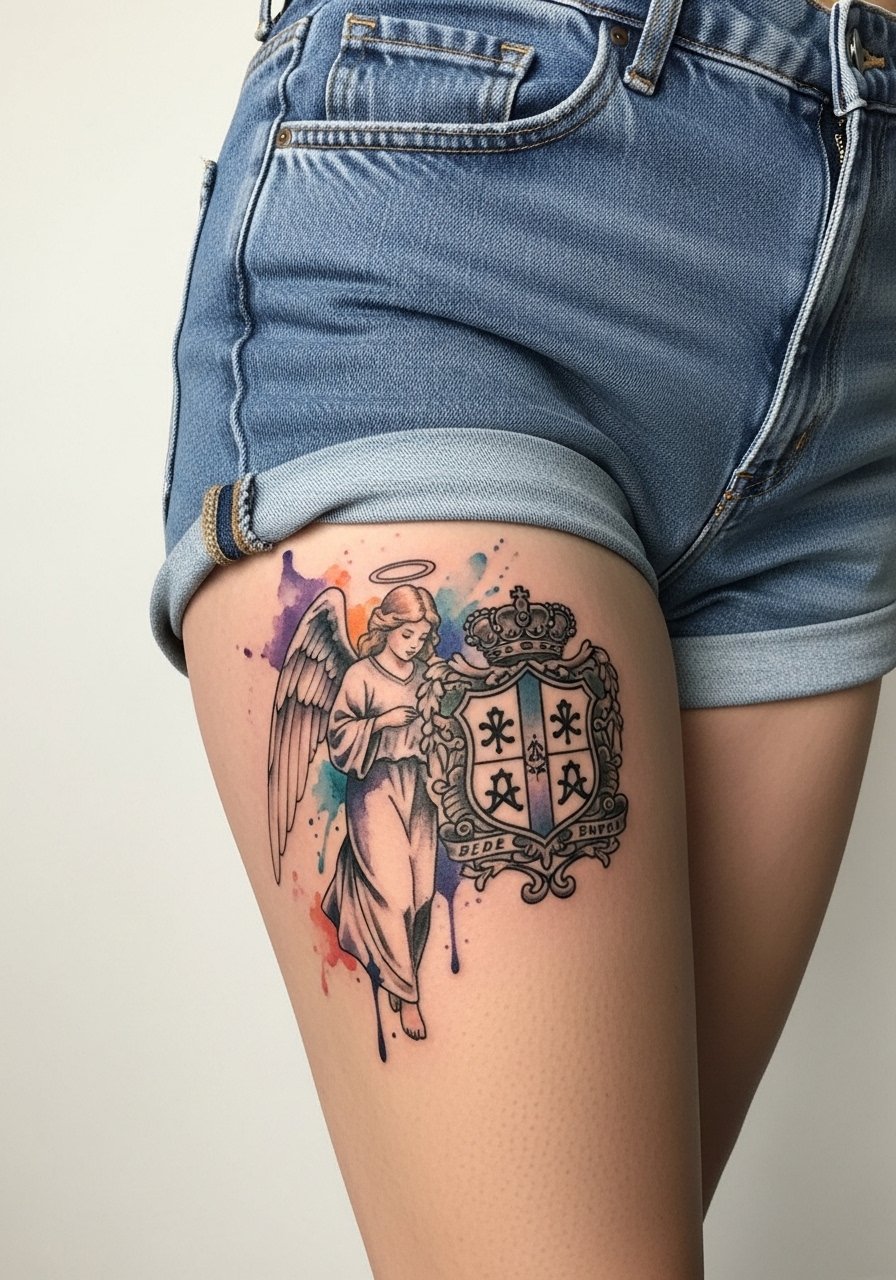
This builds on a less-covered idea: combining personal heraldry with an angel motif so the piece remains bespoke without being a direct portrait. Thigh placement hides healing and reduces accidental sun exposure. The common error is over-detailing the crest too small for the thigh canvas. Ask for a simplified crest that reads from a foot away and expect two sessions. Wear loose gym shorts to the appointment and plan for occasional touch-ups if weight or muscle changes.
20. Collarbone Faint Angel Outline

Collarbone pieces are subtle and photograph well. The downside is the area moves with breathing and can make fine linework blur if too delicate. Ask for slightly stronger linework with a soft wash above or below the bone. Sessions are short and pain is moderate. For showing it off choose wide-neck shirts and a thin chain. For the appointment wear a wide-neck shirt you can pull aside gently.
21. Patchwork Full-Sleeve Finale with Angel Motifs and Script

A full sleeve built as patchwork lets you curate motifs over time and avoid the single-style fade problem. Expect many sessions and a clear palette plan so script, angel figures, and washes do not clash. The main mistakes are mixing too many palettes and choosing tiny script that blurs. Ask for a palette guide and readable letterforms. For long sessions bring a breathable button-down you can wear loosely and plan touch-ups in a couple of years. A thin chain or leather cuff helps frame the sleeve when you want the work visible.
Frequently Asked Questions
Q: Will watercolor angel tattoos fade faster on tan or darker skin tones, and what can I do about it?
A: From what I have seen, washes can read differently on warmer or darker skin tones. Ask your artist to adapt the palette and include slightly stronger outlines or saturation where needed. UV protection and avoiding heavy sun exposure during the first year make a big difference. Consider an artist who shows healed examples on similar skin tones.
Q: How should I prep for a large back or thigh watercolor session to avoid sweaty, delayed healing?
A: Time the session outside of heavy training weeks and avoid intense cardio for at least three days after a large back or thigh session. Bring breathable clothing and a soft pillow for the chair. If you plan a summer session, schedule extra rest days and switch to breathable wraps if needed.
Q: Artists disagree about using Saniderm versus dry healing. Which approach should I pick for watercolor?
A: Artists split into two camps on this. One camp favors Saniderm and other breathable films for large pieces to reduce mess and friction. The other camp worries about trapped moisture on humid skin. The right call depends on your skin type and climate. Ask the artist for their preferred protocol and follow their instructions closely.
Q: How painful are ribcage watercolor pieces, and is numbing recommended?
A: Ribs rank higher on most pain scales. Numbing creams are an option and can make longer sessions manageable. Some traditionalists feel numbing changes the experience, but many artists use it neutrally for comfort. Discuss numbing timing and type with the studio before booking.
Q: If an artist cancels a guest spot last minute, what practical steps keep my plans intact?
A: Book with clear cancellation policies through appointment platforms when possible. Have a short list of local artists who can do consults on short notice and keep your reference board organized so you can rebook without starting from scratch. Expect rescheduling delays and allow buffer time before events.
Q: Do small watercolor ankle or wrist halos need different aftercare than larger pieces?
A: Small exposed spots face more friction and washing. For ankles and wrists, protect them from tight socks and jewelry during healing and be cautious with frequent hand washing. Follow your artist's cleansing routine and avoid submerging in baths until healed.
Q: What should I ask my artist in consultation to avoid a faded watercolor look two years in?
A: Ask about planned lineweight, saturation zones, and a touch-up timeline. Request to see healed examples on similar placements and skin tones. Ask whether they prefer a neo-traditional anchor outline or pure watercolor and why they recommend that approach for your skin and lifestyle.
