
Fine line shoulder pieces are trending on feeds, yet the designs that still look sharp after five years are often the ones that started with bolder spacing and thoughtful placement. I have watched Saturday consultations across five shops in Brooklyn where artists steer clients away from tiny, dense mandalas that blur fast. This list focuses on shoulder work that reads strong now and keeps shape later, with what to ask for in that first sit-down.
1. Bold Traditional Shoulder Cap
I've seen this one last decade on guys who wanted something that still reads across a crowded room. Open with a personal observation about durability. Ask your artist for slightly thicker linework than flash art to resist early softening. Pain on the shoulder is manageable, usually a 3 to 4, and a single session can take 2 to 4 hours depending on color. The common mistake is shrinking the piece too small to tuck under a shirt sleeve. For session day wear bring a loose button-down shirt you can pull aside easily so the artist has clear access.
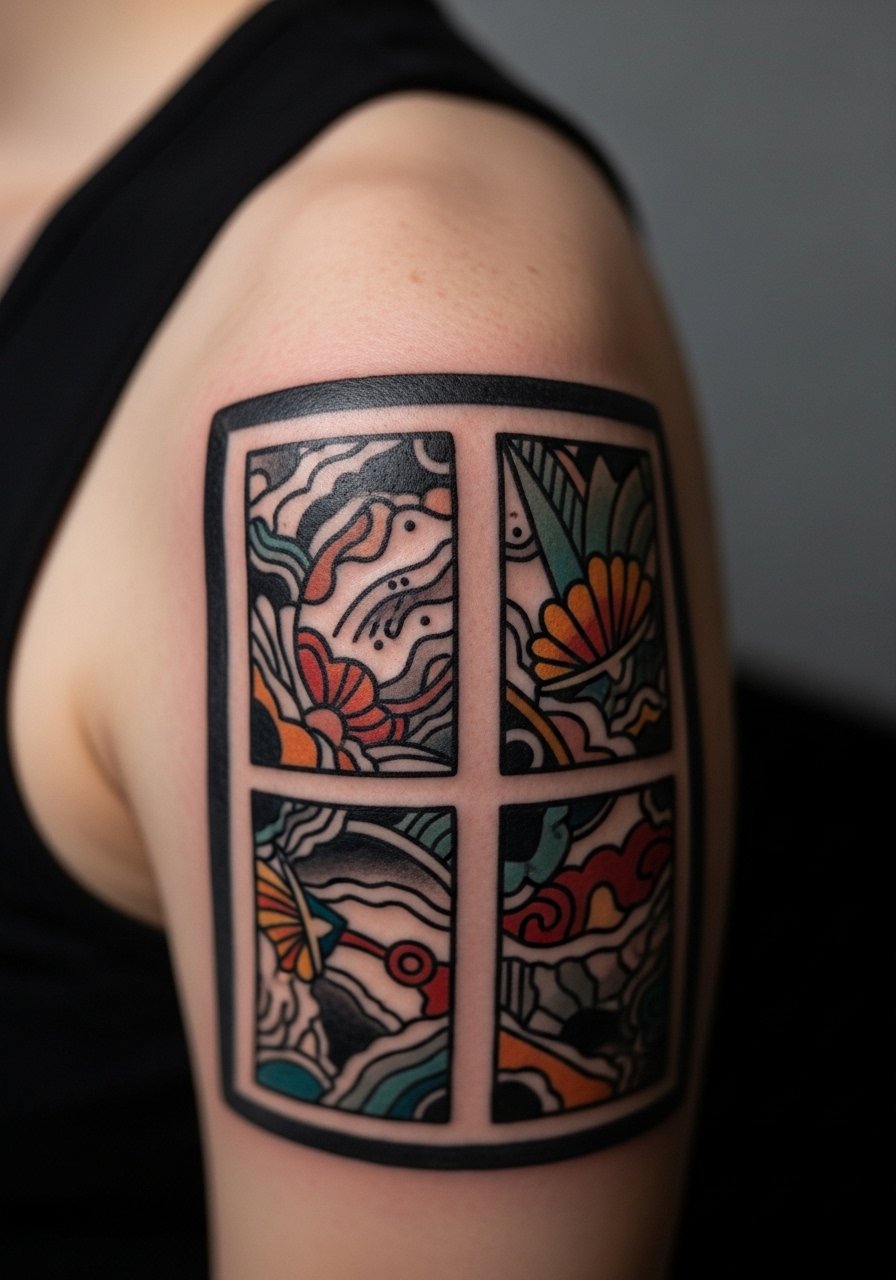
2. Blackwork Geometric Cap

Fair warning, dense blackwork on the shoulder can feel buzzy during long fills, and sessions often run 3 to 5 hours. This design favors men who want high contrast that reads at distance. Tell your artist you want alternating negative space so the piece breathes and avoids the "blob" effect that happens when fills meet around the joint. At six months the saturation looks even, at two years the blacks hold well if the ink was laid evenly, and touch-ups at 3 to 5 years are common. Pair show-off outfits like a muscle tank for summer evenings.
3. Micro-Realism Portrait on Outer Shoulder
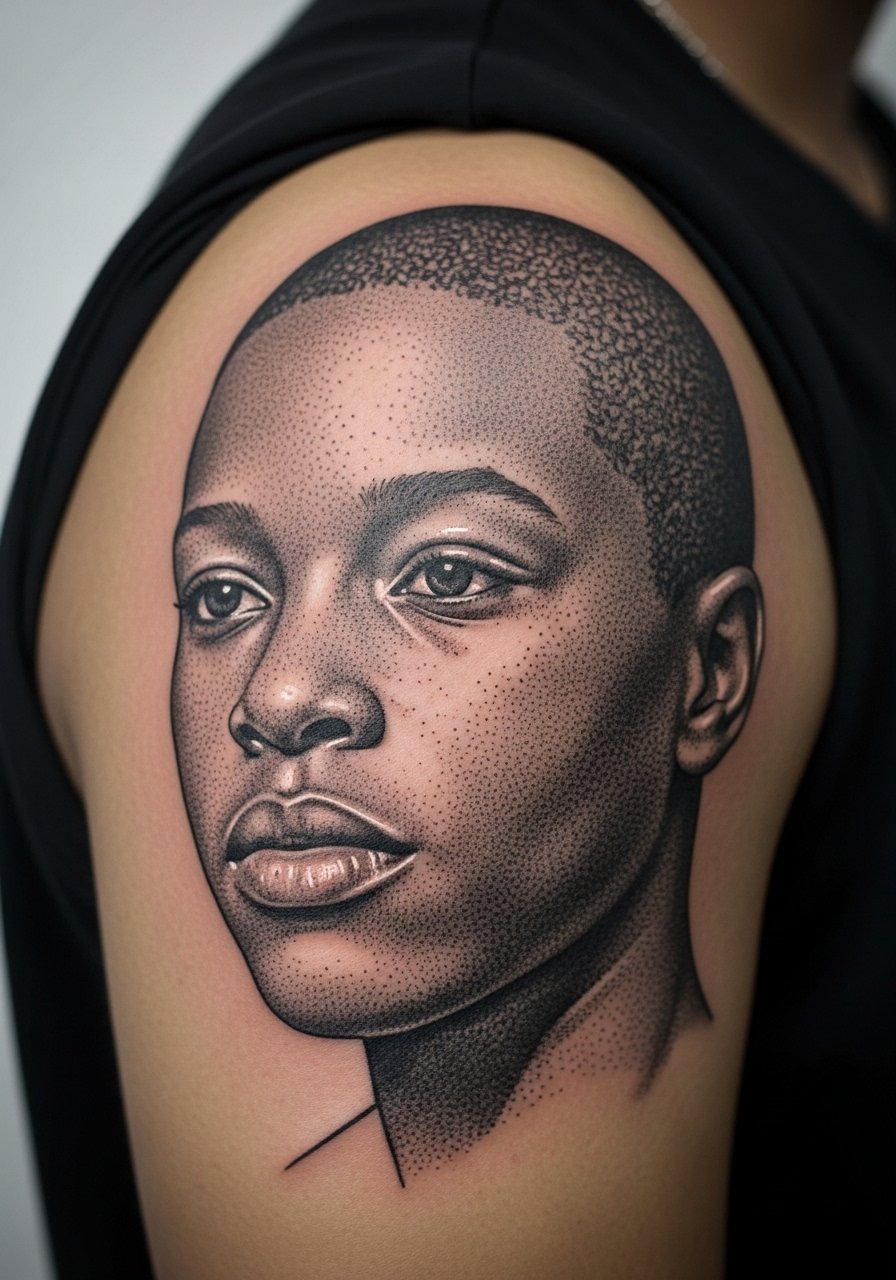
When you sit with your artist for a micro-realism shoulder portrait, bring reference photos that match the angle you want. This style reads best slightly larger than most people expect, so avoid tiny versions. Pain is low to moderate on the outer shoulder and a single session of 2 to 4 hours often does the work. The biggest mistake is using low-contrast photos for reference, which leaves the portrait flat after healing. Over time very fine details can soften, so expect a touch-up in the first two years for clarity. For the appointment wear a loose tank top you can pull aside.
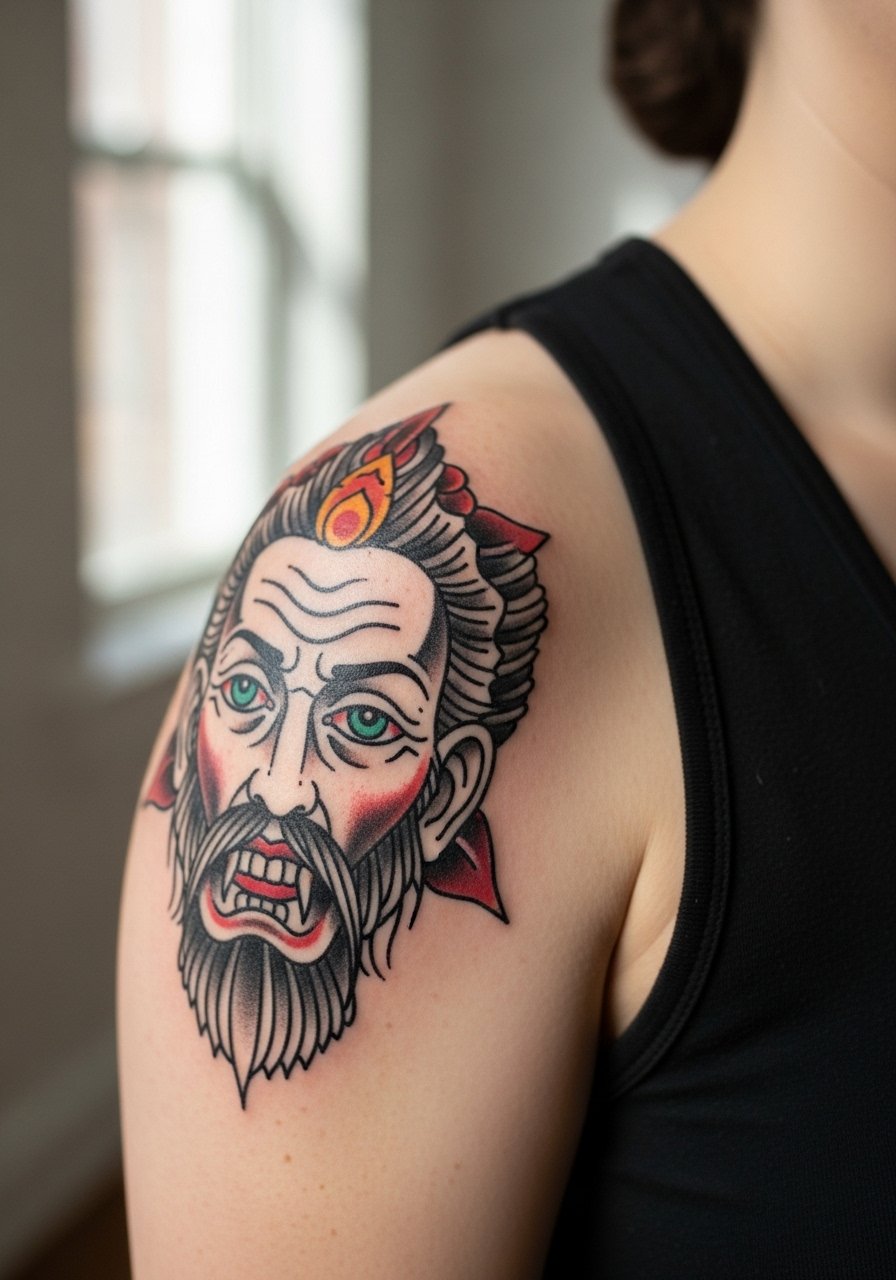
4. Neo-Traditional Shoulder Panel
There is a visual impact to neo-traditional work on the shoulder that reads like a framed piece when the sleeve sits up. Most people choose this style because the balance of linework and color holds up better than micro-detail in the same spot. For the consult, specify the color saturation you want and ask for slightly larger color fields to age better. A typical session is 3 to 6 hours and the shoulder cap resists distortion since the skin there does not stretch like the chest. Avoid asking for tiny ornamental details that will merge after a few years. Wear a short-sleeve button shirt so the artist can work unobstructed.
5. Japanese-Inspired Koi and Wave Shoulder
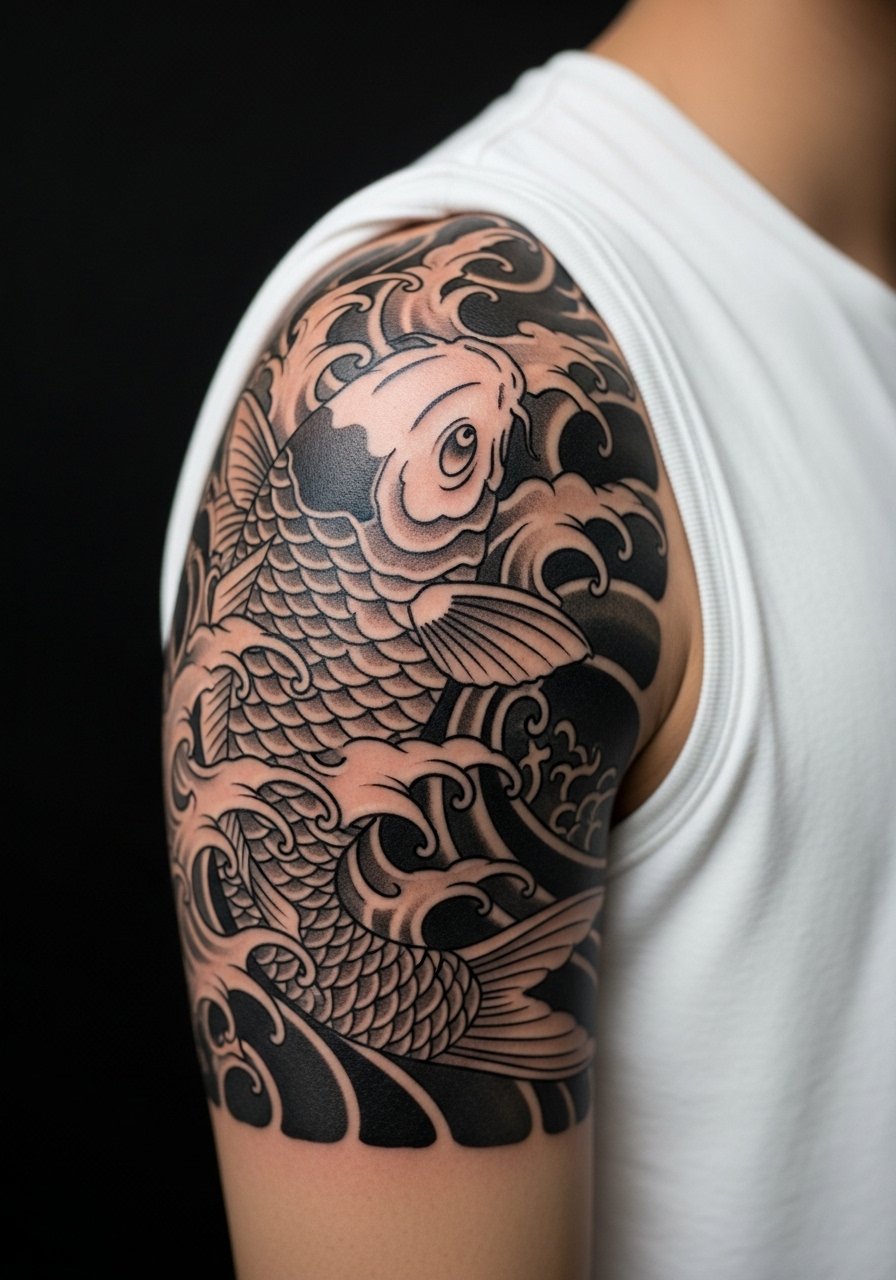
Consultation lead here. When booking this, tell the artist whether you want the koi to read toward movement or rest. The shoulder is great for Japanese motifs because the curve of the deltoid complements flow lines. Sessions often span multiple sittings due to color layering, each about 2 to 4 hours. A common mistake is crowding the design with too many small waves near the edge, which can age into visual noise. For showing it off, pair with a short sleeve Henley that frames the top of the cap.
6. Minimalist Linework Shoulder Blade
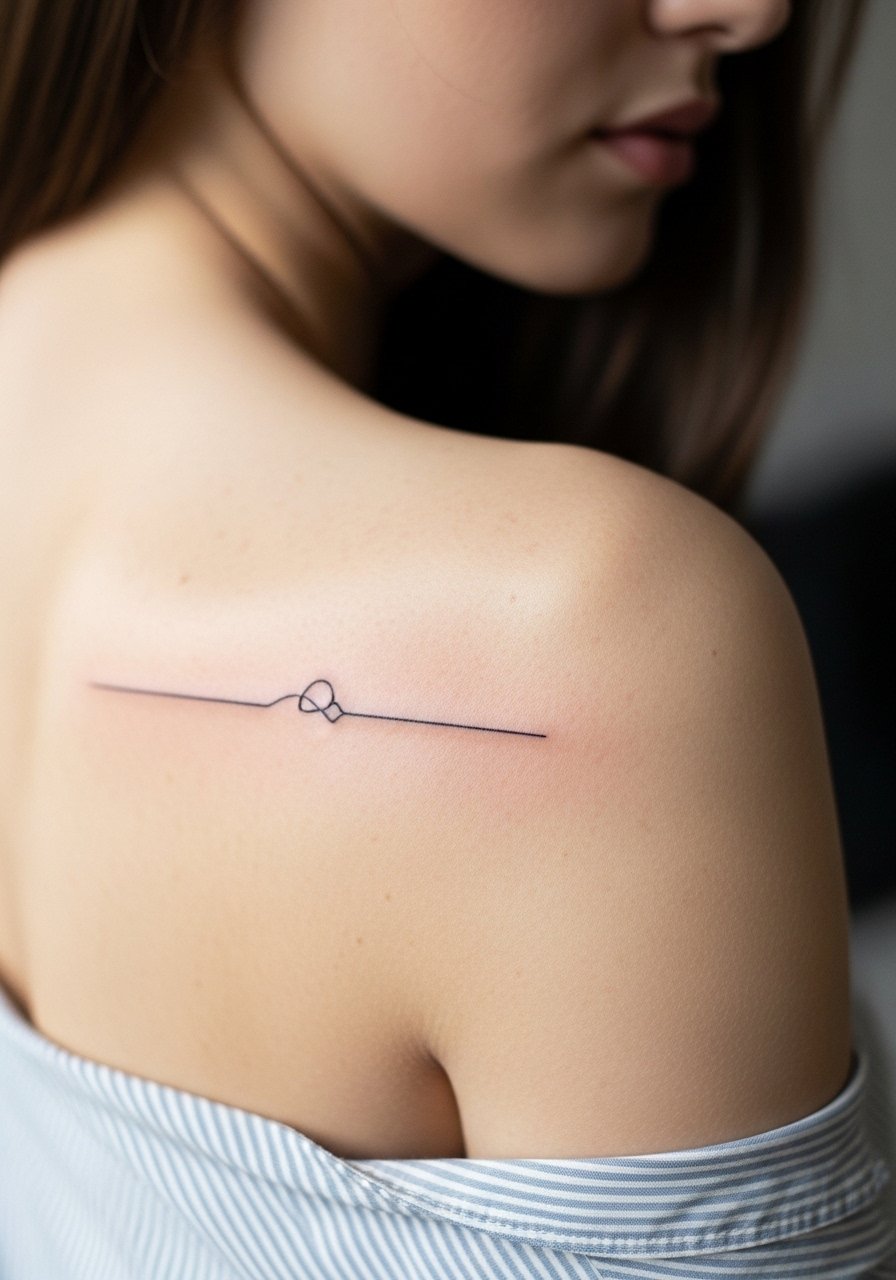
Controversy: artists are split on whether minimal fine line work should be used on mobile areas like the shoulder blade. One camp says fine line is fine there with correct depth and spacing. The other camp argues the motion and fabric friction blur lines within two to three years. Be explicit in your consult about desired longevity. Pain is moderate on the shoulder blade and sessions are short, often under two hours. The biggest mistake is asking for packed tiny detail in one session without planning for a touch-up. For the session wear a loose cotton tee you can lift to expose the area without rubbing stitches afterward.
7. Surfer-Style Wave Band on Shoulder
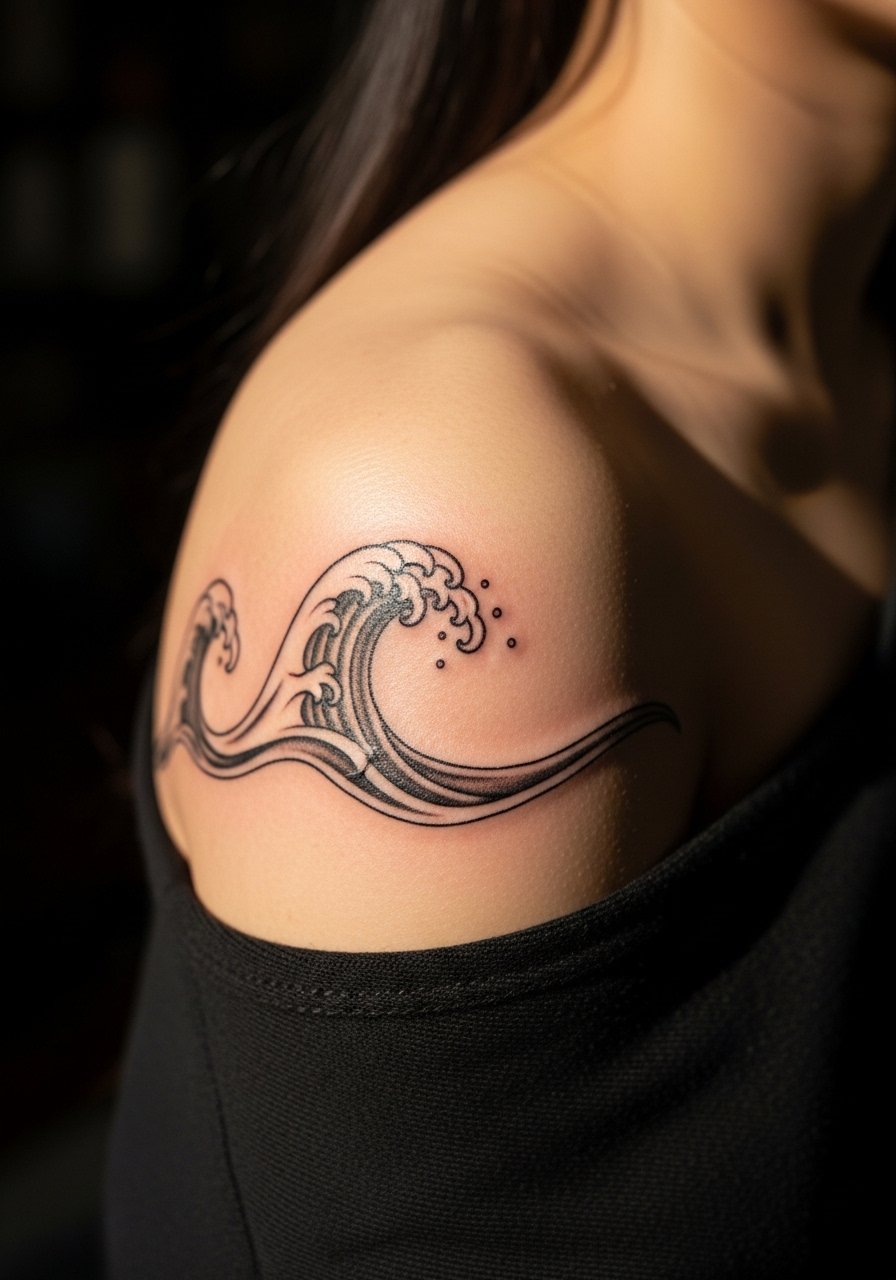
Visual impact lead. There is something about a clean continuous wave band that reads modern and masculine on the shoulder. This piece suits someone who wants a wearable motif without a full cap. Expect mild discomfort and a session time around 1 to 2 hours. The common mistake is making the band too thin which causes early breakage in line continuity. For show-off pairing, a short sleeve rash guard or rolled-up sleeves keeps attention on the shoulder shape.
8. Celtic Knot Shoulder Panel
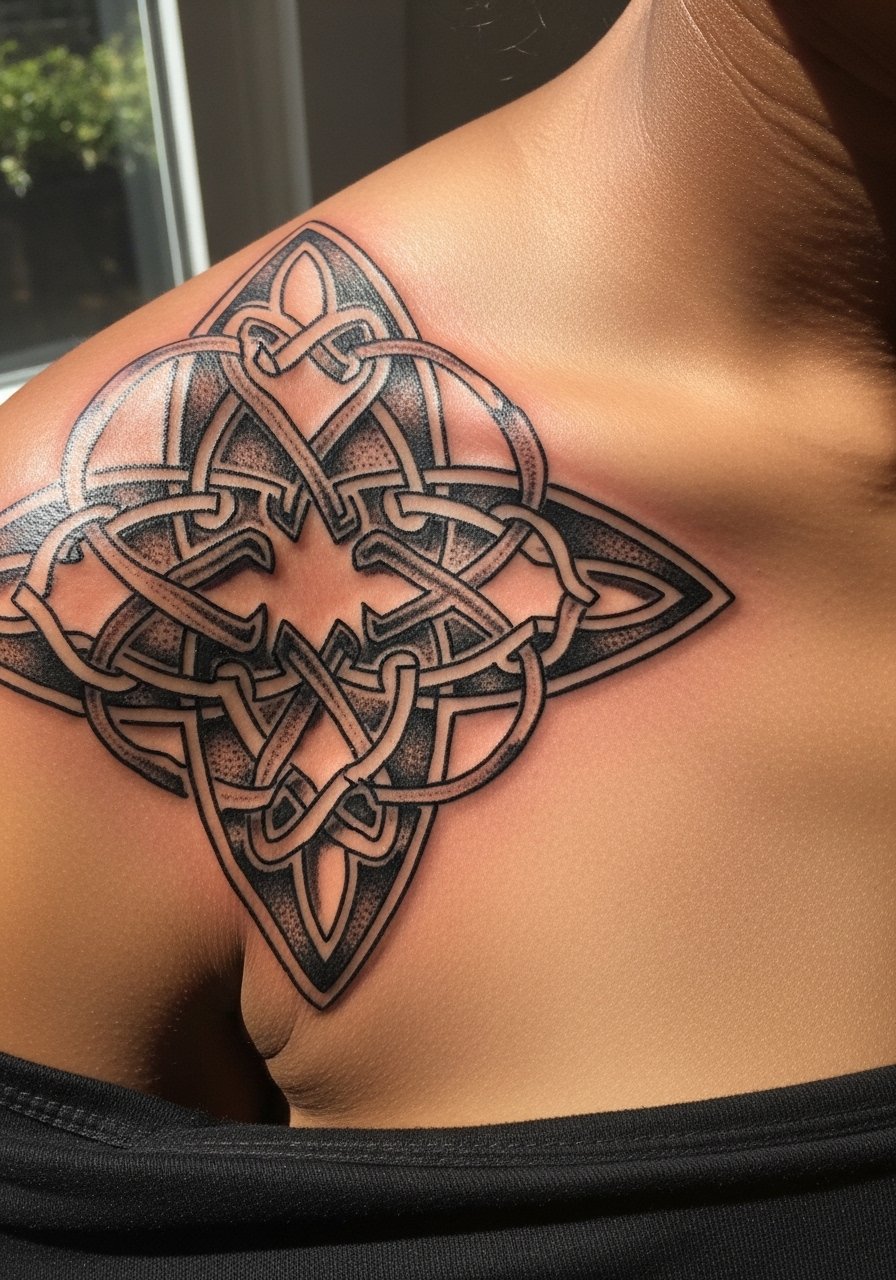
Mistake lead here. The biggest error with knotwork is losing knot separation by scaling the design too small. Tell your artist you want generous spacing and modest line weight so the pattern reads after healing. Pain is moderate near the shoulder seam and session times run 2 to 3 hours. Over time, well-spaced knotwork keeps its geometry, while cramped knots start to blend. Pair this with layered casual shirts where the collar sits just above the piece for an understated look. Add a lightweight overshirt when you want to frame the knot visually.
9. Armor Plate Blackwork Shoulder
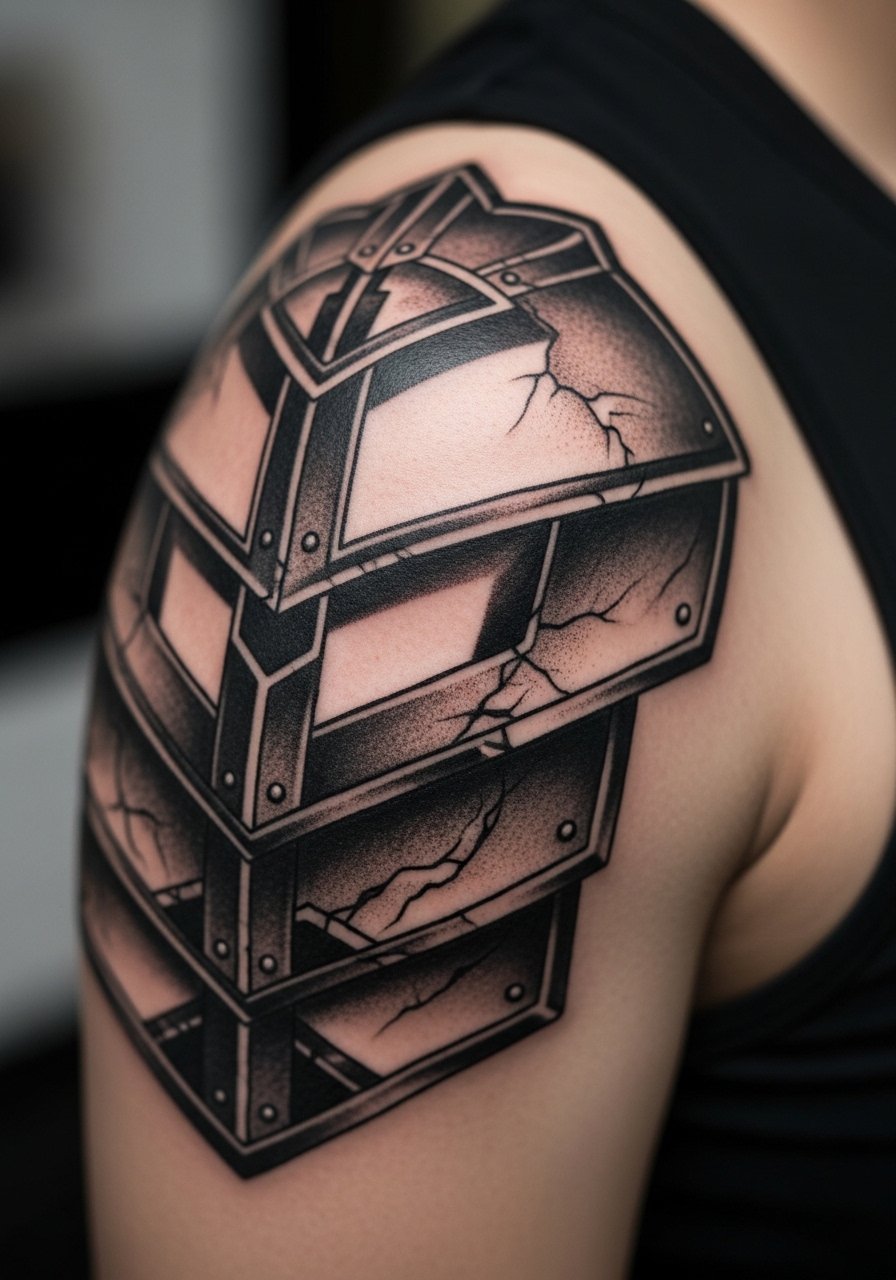
Personal observation lead. I have seen armor-inspired plates age well because the larger shapes withstand minor fading. This is best for someone who wants a strong silhouette rather than fine detail. Sessions can be long, often split across multiple sittings to build saturation, each 2 to 4 hours. The common mistake is asking for tiny rivet details that will soften. For the session wear a zip-up hoodie you can remove easily without pulling fabric over the area.
10. Compass and Nautical Star Shoulder
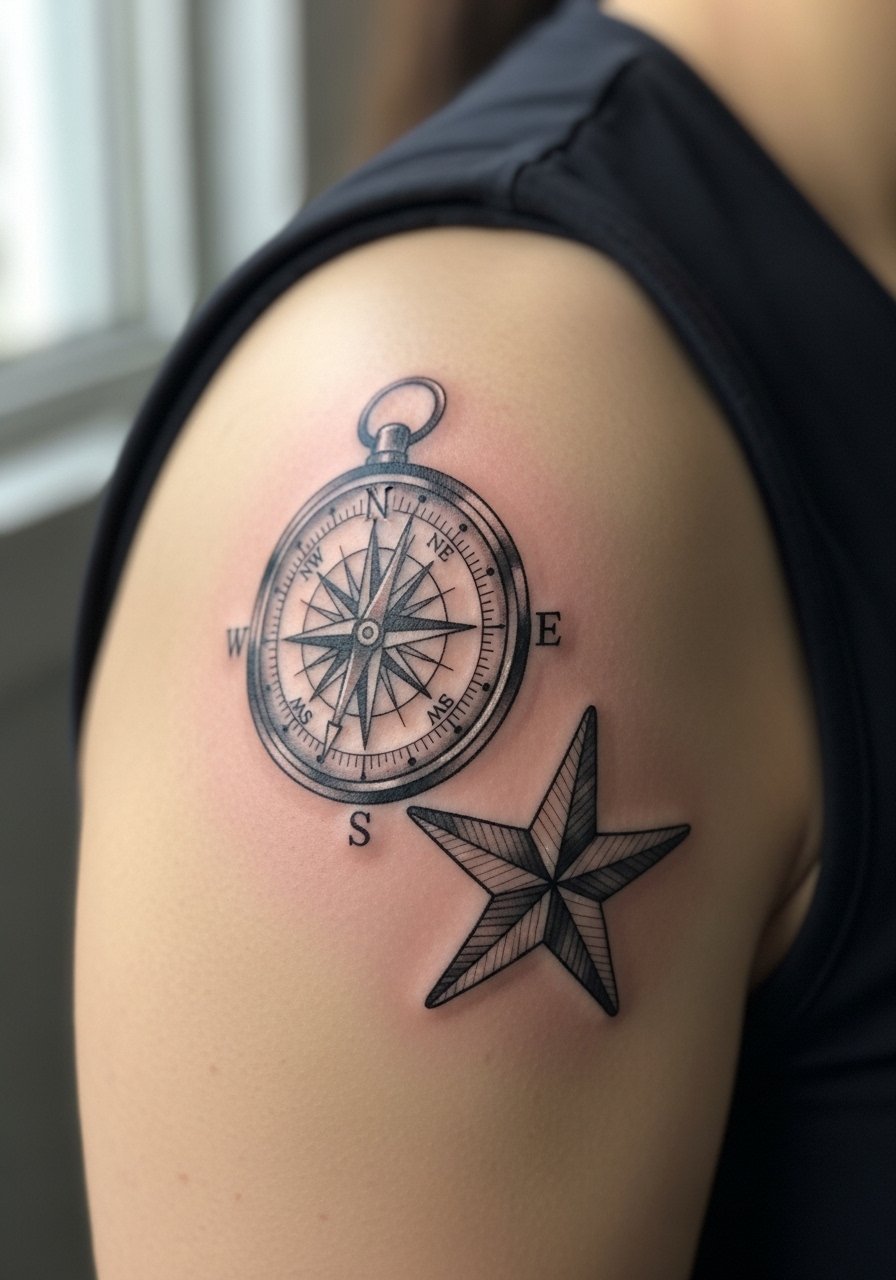
Aging and healing lead. Nautical motifs often look sharp at six months and age predictably if lines are not too tight. This piece suits travelers or people who want directional symbolism. Pain is low and the session is typically one to two hours. Avoid adding too many micro-details around the compass face, which can blend. For showing it off pair with a casual crewneck tee that sits around the base of the neck to keep focus on the shoulder.
11. Wolf Head in Profile on Shoulder
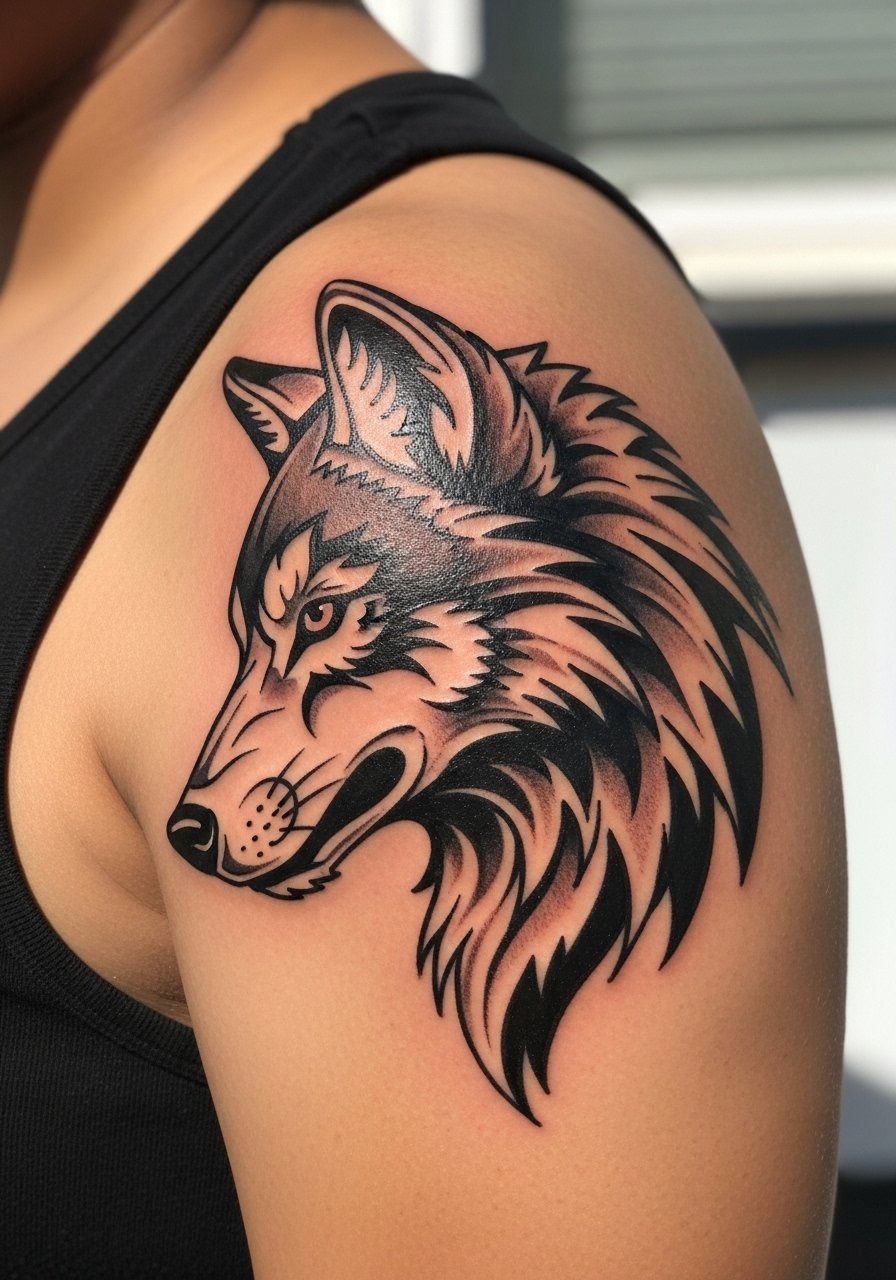
Consultation lead. For animal heads, ask for reference angles that match your shoulder curve so the snout does not distort when you move. Expect a session of 2 to 3 hours with moderate pain. A frequent mistake is pushing too much tiny fur detail near the jawline, which becomes muddied. Over years, bold contrast and clear separation keep the expression readable. This design pairs well with a heavy flannel shirt left unbuttoned to frame the shoulder.
12. Sleeve-Ready Shoulder Anchor Motif

Styling lead. This motif is often chosen as the first piece in a sleeve plan because the shoulder anchors other elements visually. Pain is moderate and session time is usually 1 to 3 hours. A common mistake is trying to compress a full sleeve concept into a single shoulder piece. Tell your artist you want clear margins for future additions. For session wear pick a button-down shirt you can roll up or remove without disturbing the area.
13. Script Banner Over the Shoulder
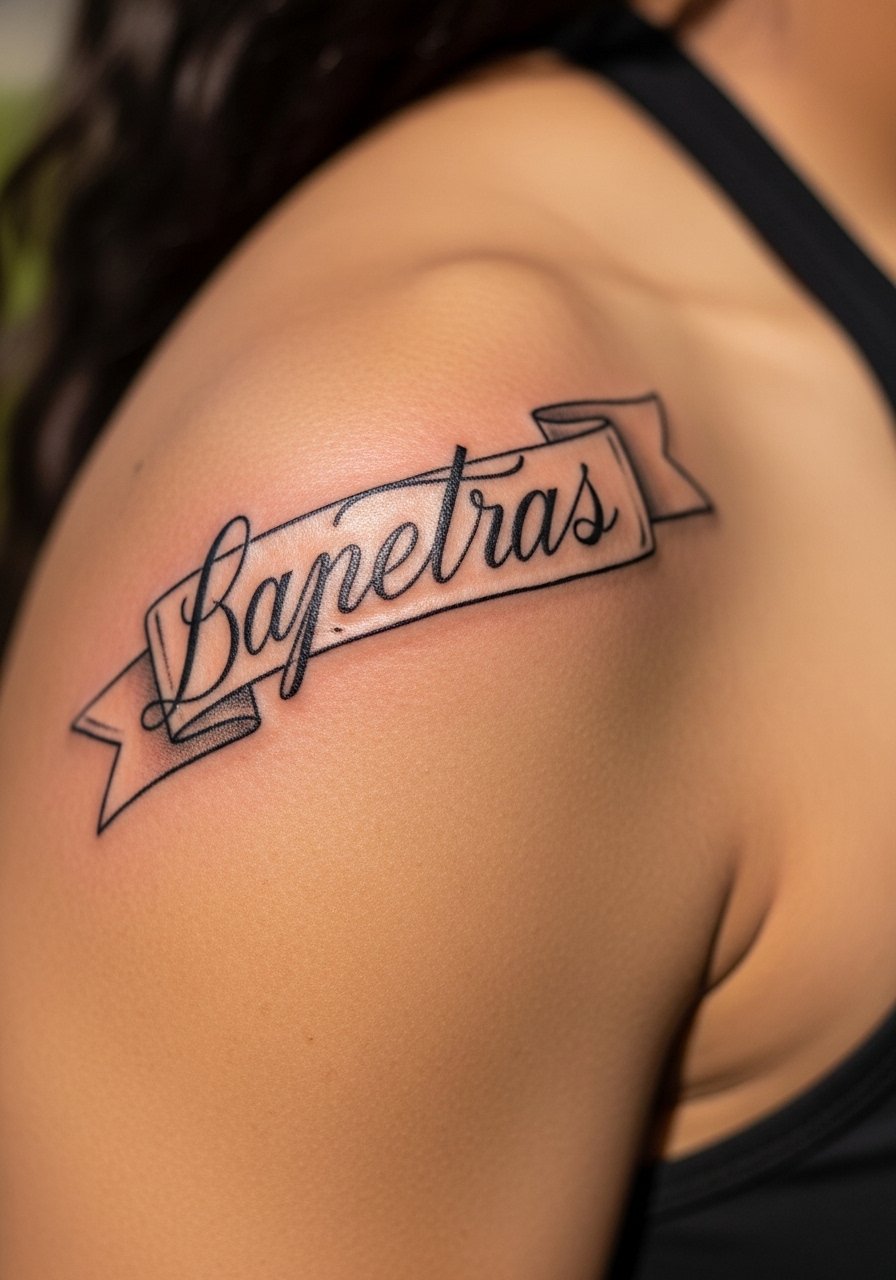
Mistake lead. The biggest error with script is choosing a font that looks great printed but loses legibility when inked small. Bring exact text and font samples with the precise capitalization you want. Pain is mild and a session is usually under two hours. Aging depends on line weight. Thin script needs touch-ups sooner than weightier lettering. For showing it off, a crewneck tee with the neckline sitting low frames the banner without crowding it.
14. Mandala Shoulder Bloom
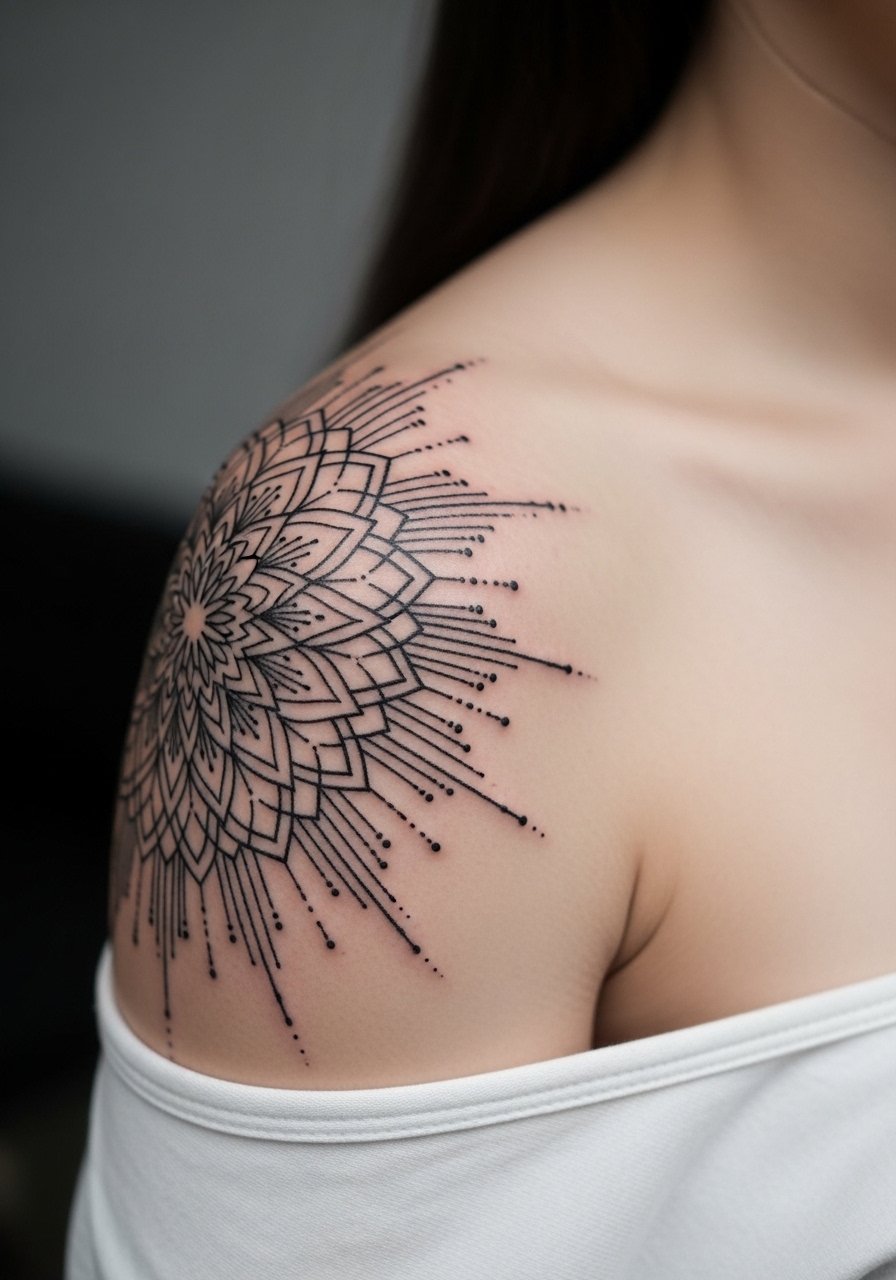
Controversy lead. Mandalas on mobile areas split artists into two camps. One group says dense mandalas done too small will blur, losing radial clarity within a couple of years. The other group believes careful spacing and slightly heavier line weight preserve the pattern. If you want a mandala on the shoulder, ask which approach the artist prefers and why. Sessions vary from 2 to 5 hours. The common mistake is compressing concentric rows without breath room. For a show-off outfit pick a linen short-sleeve shirt that exposes the cap.
15. Compass Rose with Map Fragments
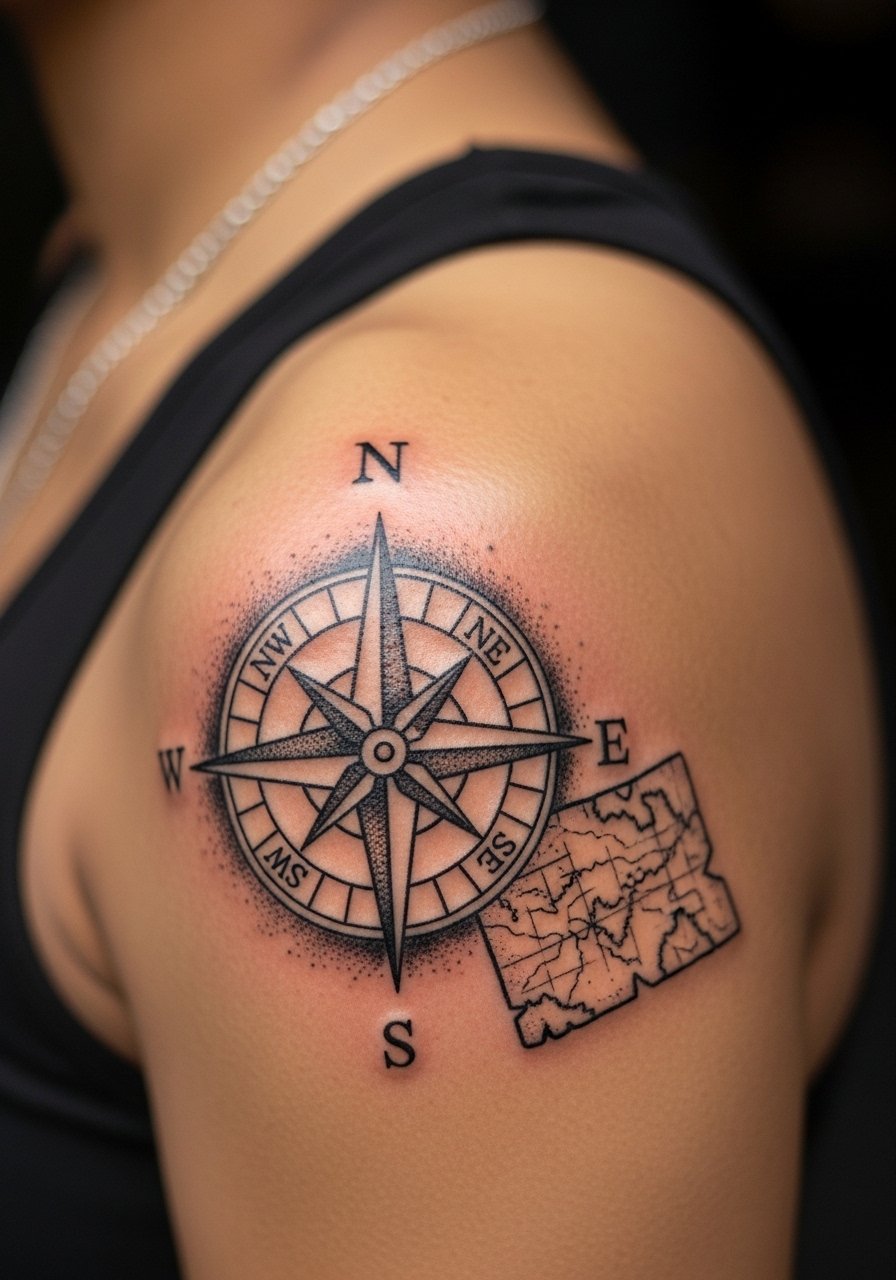
Visual impact lead. Small map fragments paired with a compass look intentional and age well because the map elements are kept minimal. Sessions are often split into a shading and a line session, totaling 2 to 4 hours. A common mistake is overloading the map with tiny place names, which fades into an illegible texture. This suits someone who wants a travel narrative without committing to a full chest piece. Wear a short sleeve technical tee for the session so the artist can work comfortably.
16. Mechanical Gearwork Shoulder Panel
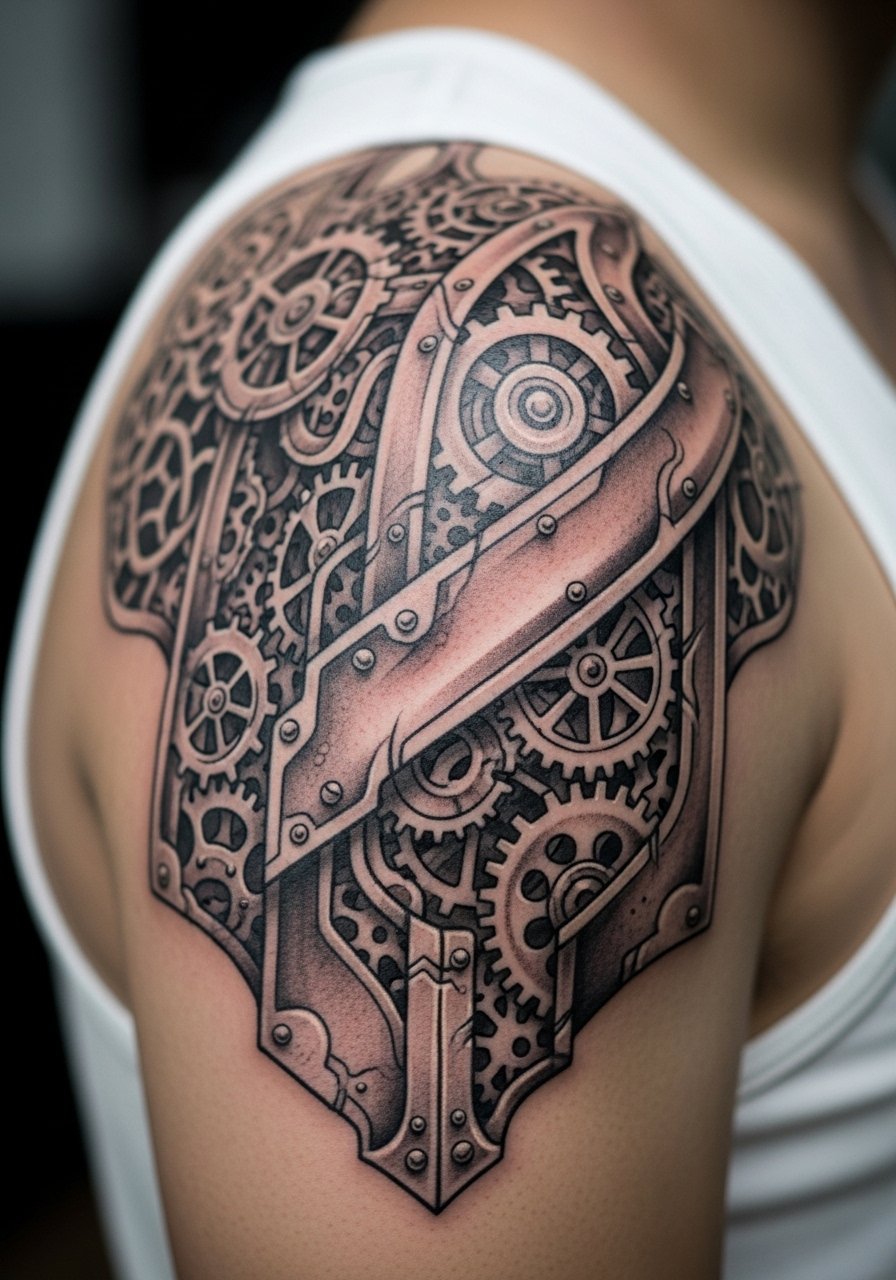
Pain warning lead. Large gearwork requires concentrated shading and can feel gritty during fill sections. Sessions usually run 3 to 6 hours across appointments. This design is best for someone who likes structured, modular aesthetics rather than soft organic shapes. The mistake I see most often is adding tiny filigree between gears that later flattens. For the session wear a zip-front jacket you can remove without pulling fabric across the area.
17. Stylized Eagle Wing on Deltoid
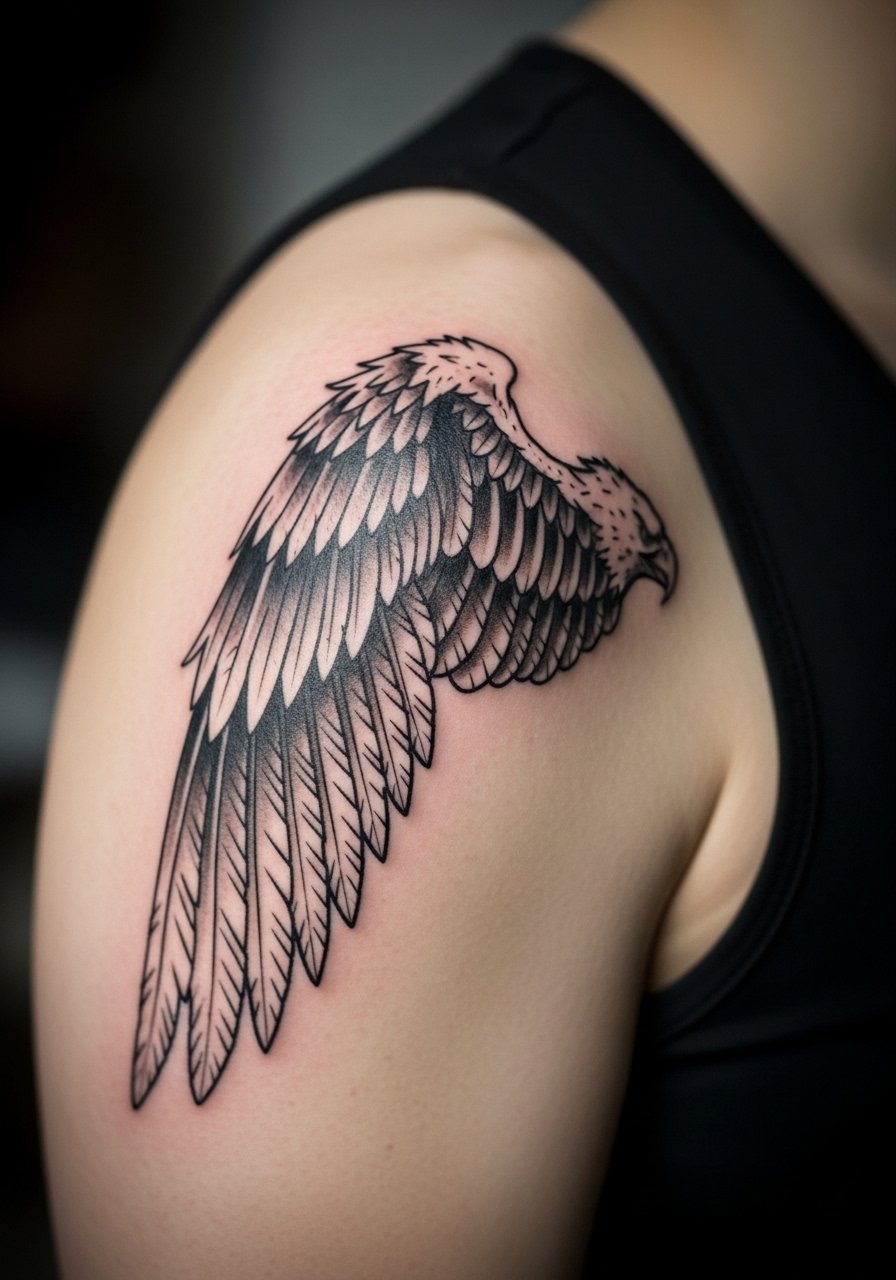
Personal observation lead. Eagle wing motifs use the shoulder's natural sweep to suggest motion. They suit men who want a visually aggressive silhouette without a full back piece. Expect moderate pain and a session around 2 to 3 hours. A common mistake is compressing too many feathers into the tip which merges with wear. Over time, a well-spaced wing keeps its graphic read. Pair with a baseball tee when you want the shoulder line to pop.
18. Polynesian-Inspired Shoulder Band
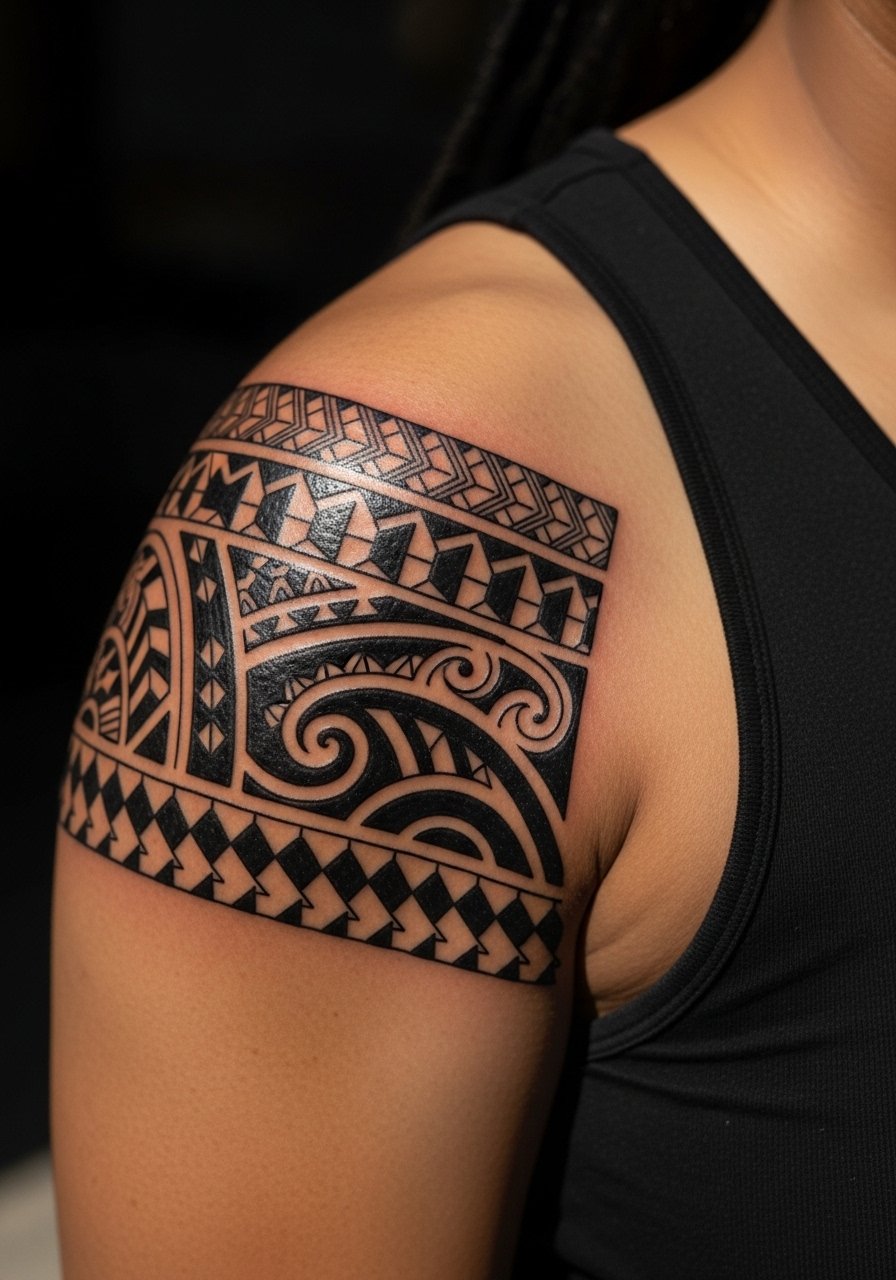
Cultural origin note. This pattern draws from Pacific traditions, so many clients opt for personalized motifs rather than direct copies. Consultation lead. Be clear that you want respectful adaptation and ask the artist about cultural references they understand. Sessions are medium length, often 2 to 4 hours. The mistake is lifting a generic online stencil without adaptation to the shoulder curve. For session wear try a loose sleeveless top you can remove without rubbing the area.
19. Flames and Smoke Shoulder Flame
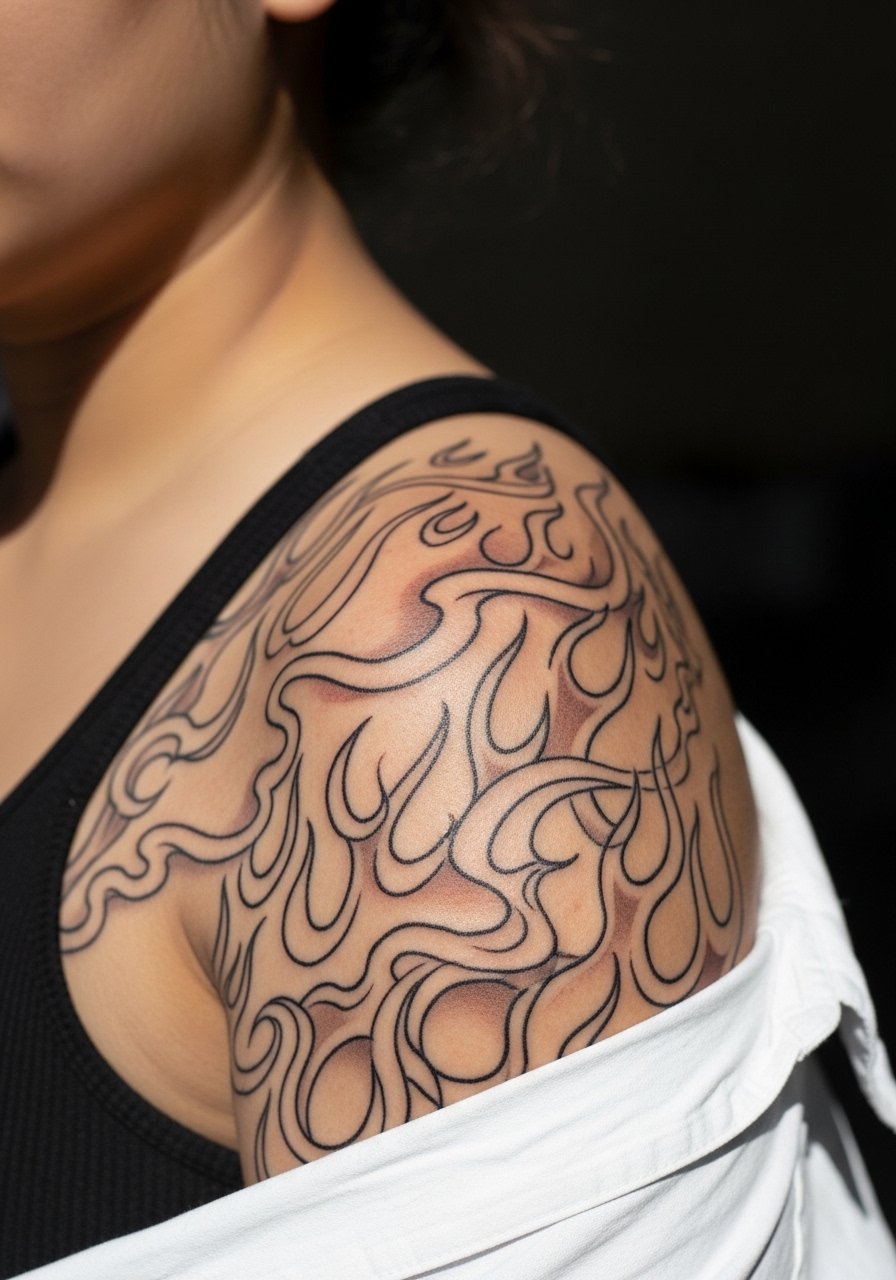
Visual impact lead. Flame motifs read as motion and look especially strong on the outer shoulder where they can trail down the arm. Expect a session of 1 to 3 hours with mild to moderate pain. A common mistake is overdrawing tiny embers that look cluttered once healed. For showing it off pick a sleeveless hoodie or rolled sleeves that keep the flow visible.
20. Fine Line Constellation Cluster
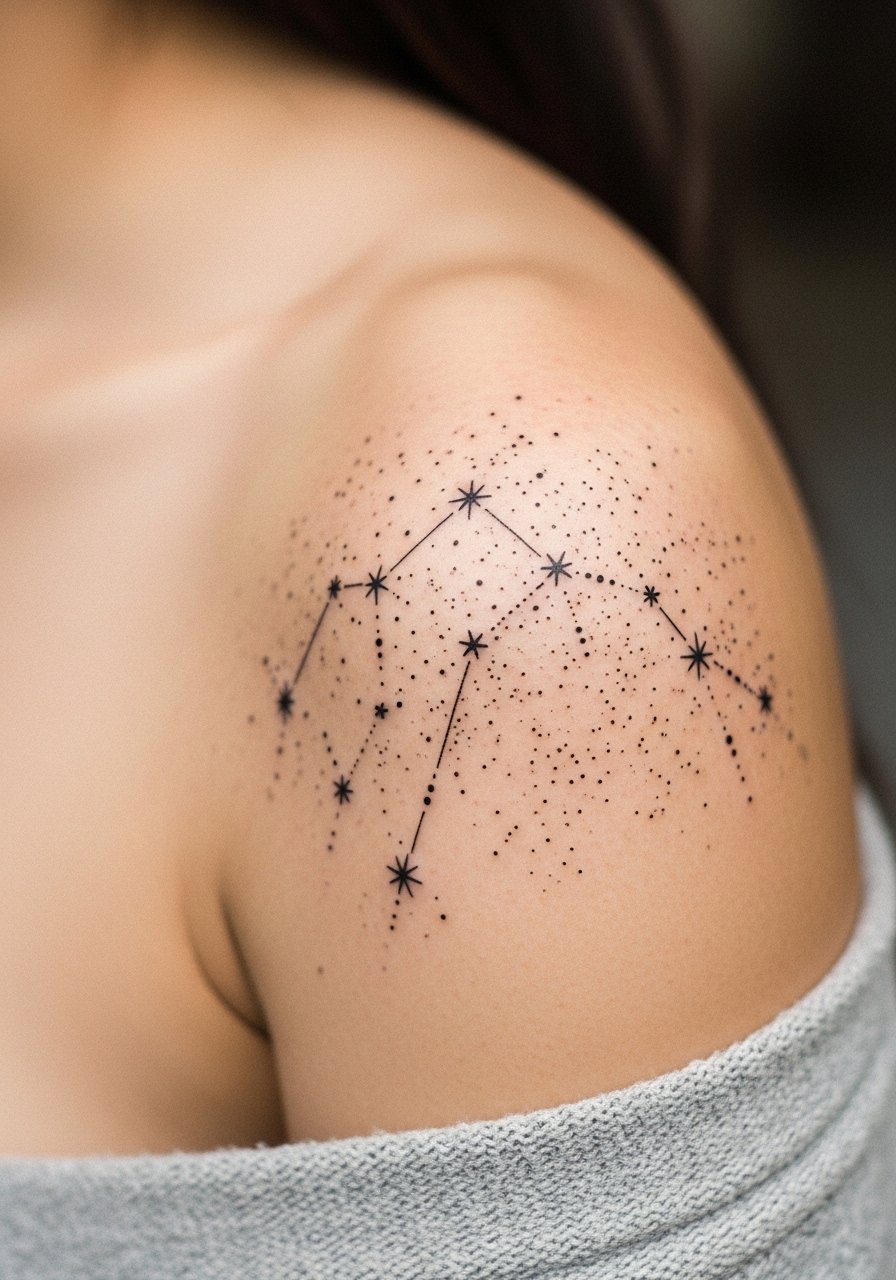
Styling lead. Fine line star clusters look delicate and pair well with casual summer wear, but they require spacing to avoid fusion. Pain is low and sessions are short, often under an hour for a small cluster. The mistake is packing too many stars close together. For showing the piece, a scoop neck tee keeps the shoulder visible without competing for attention.
21. Anchor-to-Compass Hybrid Shoulder Tattoo
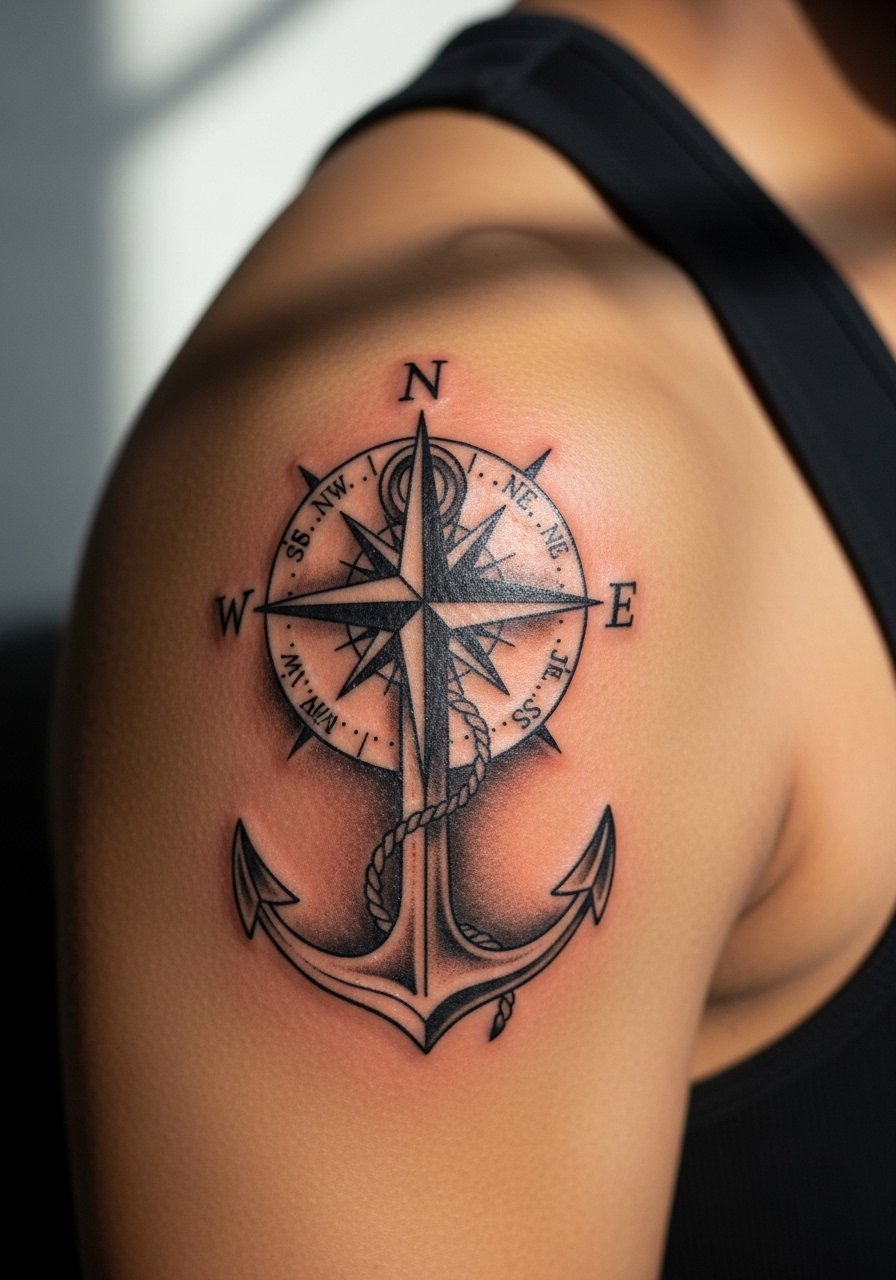
Mistake lead. Hybrids need clear hierarchy so the eye reads the primary symbol first. Tell the artist which element should dominate and where you want negative space. Sessions vary from 1 to 3 hours. A frequent error is insisting on equal detail across both elements, which flattens the composition. For the session wear a soft button shirt that you can unbutton to expose the top of the shoulder without tugging.
Studio Day Picks
The shoulder pieces above can demand different prep than chest or rib work, and these small items smooth out the session and the first few days of healing.
-
Stencil transfer paper kit. Useful for artists and clients who like to preview placement and lineweight on the shoulder before needles touch skin.
-
Topical numbing cream. Applied per directions 30 to 45 minutes before can lessen edge pain during concentrated shading on the shoulder.
-
Thin protective film roll. Keeps shoulder caps protected from shirt friction in the first 48 hours, especially if your work sits near sleeve seams.
-
Fragrance-free body wash. Gentle cleansers reduce irritation while you follow your artist's healing routine for delicate linework.
-
Aquaphor healing ointment. A thin application in the early days locks in moisture and helps fine lines settle without excessive crusting.
Frequently Asked Questions
Q: Will fine line shoulder tattoos blur faster than bold work?
A: It depends on spacing and placement. Fine line on a stable shoulder cap can hold up if the artist uses modest line weight and leaves breathing room. Denser micro-detail tends to soften faster, so ask about planned spacing and expect a possible touch-up at year two or three.
Q: How long should I expect a blackwork shoulder panel session to last?
A: Most blackwork panels need multiple passes. Expect 3 to 6 hours split into sessions. Artists often spread fills to maintain consistent saturation and to let skin recover between sessions.
Q: Are shoulder tattoos visible in professional settings and how should I plan wardrobe?
A: Shoulders can be concealed with regular dress shirts and jackets, but sleeveless or short-sleeve clothing reveals caps. If visibility matters, think about sleeve lengths. For showing off, a short sleeve Henley frames the area without looking deliberate.
Q: Do Japanese-style designs need more sessions than a single motif?
A: Yes. Traditional-style compositions that wrap slightly require layering for color and clarity. Budget time for two to three sessions depending on saturation and size.
Q: If I want a mandala on the shoulder, what should I ask during consultation?
A: Ask the artist how they handle spacing and line weight for mobile areas. Request a mock placement to confirm radial balance along your deltoid curve. Discuss whether they prefer heavier lines to preserve the pattern long term.
Q: How soon can I return to gym work that uses shoulder straps after getting a cap?
A: Give at least a few days for initial healing before heavy strap use. Light movement is fine, but avoid tight straps that rub the fresh area for the first week. Follow your artist's timeline for full activity.
